


Useful links
Useful links
- Manage contacts: Change contact opt-in/opt-out state
- Manage contacts: Delete/undelete contact
- Manage contacts: Sales stages
- Manage contacts: Add/remove contact
Mass contact management is necessary for seamless coordination of actions on contact groups. SALESmanago provides a complex tool for performing actions on selected groups of contacts.
To start contact management go to
CDP => CONTACTS LIST => MANAGE CONTACTS
Contents
[A] Selection of the group of contacts that you will run actions for
[B] Defining the type and details of the action.
[A] Selection of the group of contacts that you will run actions for
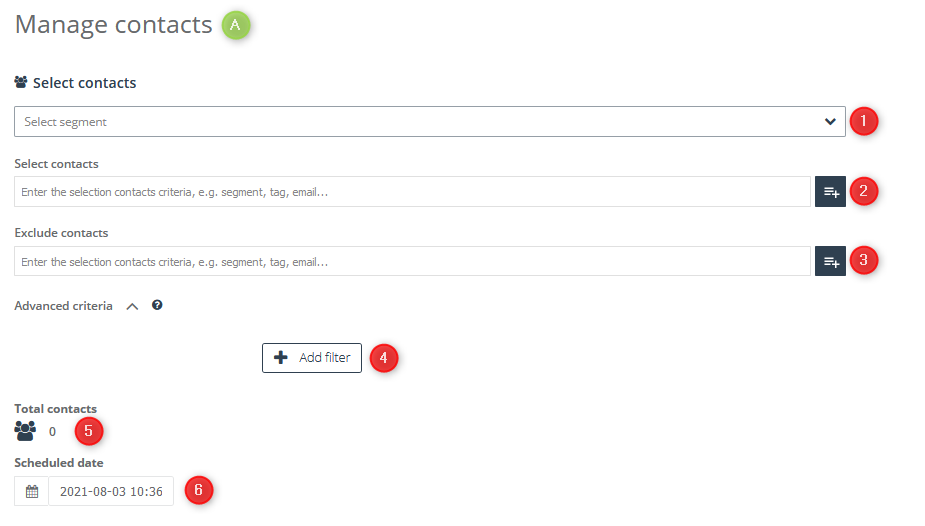
[1] Select segment – from the drop-down list of ready-made segments you can choose the one you are interested in by typing the name in the search box or by browsing the list. To select the right group of recipients click its name on the list. Choosing a particular segment will cause selectors defining this segment to appear in the Select Contacts and Exclude Contacts windows. Below you will also see a list of filters applied to the group. All items will be displayed in editable form.
[2] Select contacts – in this field you can specify the group of message recipients. Apart from the option of sending mass mailings after entering the name, email address or telephone number, you can also add contacts to the list of recipients using predefined segments.
For more information and a complete list of predefined segments, click here >>
If there are exceptions among the marked contacts to whom you do not want to send messages, you can use the option:
[3] Exclude contacts – you can do it the same way you select contacts for mailing, including additional selectors.
[4] Advanced criteria – use the advanced filtering option, which allows you to filter contacts by:
- age –indicate the age range;
- birth date – tick the has or has not option;
- date – specify the time period in which the contact was included in the system, when it was modified and performed its most recent activity;
- details –enter the name of the detail and its value using mathematical operators;
- number of emails – enter the numeric value of emails sent, opened and clicked;
- email address domain – enter the domain; you can enter several domains, separating them with commas;
- external events – enter the name of the external event details;
- name –select has or has not option;
- phone number – select has or has not option;
- scoring – specify from which (or to which) numerical value contacts will be filtered;
- tags – you can specify the time period in which the tag was created, specify all the names of tags by which the contact will be searched and specify any tag name from the previously entered;
- tag scoring – enter a tag name and specify its scoring using mathematical operators;
- dictionary detail – select a detail name from the dictionary and define its value using mathematical operators;
You can find more information on advanced filtering options here >>
[5] Total contacts – this indicator shows the total number of recipients to whom the message was addressed. The number of recipients is updated in real time if changes are made to the segment or filter selection.
[6] Scheduled date – specify the date and time when the selected changes will be implemented.
[B] Defining the type and details of the action
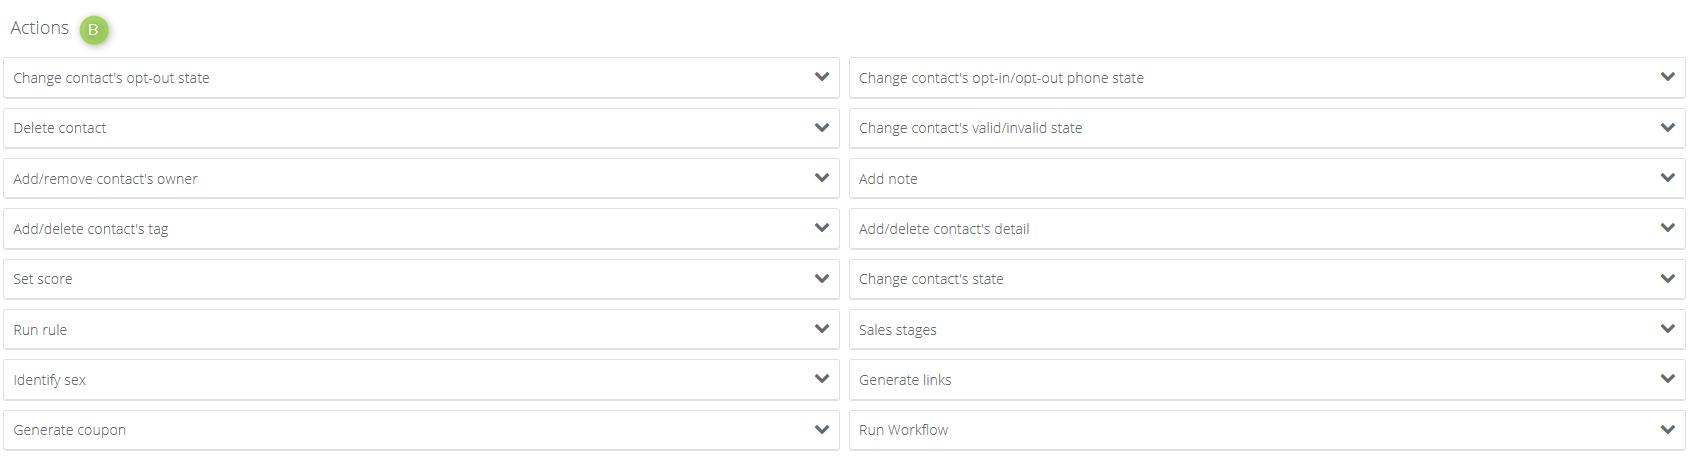
Above you can find the list of the actions you can run. You can choose from the following:
Change contact’s opt-out state – allows you to change the contact’s mailing status from opt-in to opt-out More information
Delete/undelete contact – allows you to delete contacts More information
Add/remove contact owner – allows you to assign contacts to different user accounts More information
Add/Delete contact’s tag – allows you to add or remove a tag from a contact More Info
Set score – allows to manually assign the desired number of points to selected contacts in the system More info
Run rule – allows you to manually launch an automation rule for selected contacts More info
Identify sex – allows you to assign appropriate tags with gender distinction More Info
Generate coupon – allows you to generate coupons for your contacts that can be used in an email or text message More info
Change contact opt-in/opt-out phone state – allows you to change the status of a contact from opt-in to opt-out or vice versa within a mobile marketing channel More information
Change contact valid/invalid state – allows you to change the status of a contact, e.g. to mark it as invalid More info
Add note – allows you to assign one note to multiple contacts at once More Info
Add/delete contact detail – allows you to assign new, or delete existing, details on a contact card More Info
Change contact state – allows to change contact’s status of selected group (by default every new contact, which enters system has a PROSPECT status) More info
Sales stages – allows you to assign or remove selected contacts to a specific sales stage More info
Generate links – allows to generate links with monitoring parameter for selected group of contacts, which e.g. is not yet monitored More info
Run Workflow – allows to launch chosen Workflow process for selected group of contacts More info
IMPORTANT:
- After you have selected the required action click ‘Perform actions’.
- The time required for completing the action is basically determined by the size of the group it is run for. The larger number of excluded contacts or cases of advanced filtering, the longer the process will take.
- You can run several actions simultaneously.
Submit your review | |