


Web Push notifications are short browser-based messages that you can send straight to the subscriber’s device. It’s a fast way to communicate with your audience. A notification consists of a small icon, a title, and a short message (and in the case of Rich Web Push notifications, a larger graphic), and the entire notification is linked to a page of your choice. Web Push notifications display within the browser, even outside your website. The person who wishes to receive them does not have to leave any personal information; they only need to agree to the notifications.
In order for the subscriber to receive the notification, they must agree via a form. Once consent is given, another message will be displayed – one thanking them for subscribing. However, you can turn them off to improve the user experience (UX) on the website.

To disable the thank you window, go to
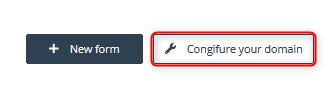
Web Push → Consent forms→ Configure your domain
Contents
- Basic information
- Domain Configuration
- Additional information about configuration
- How do you upload files?
- How do you check if files have been uploaded correctly?
1. Basic information
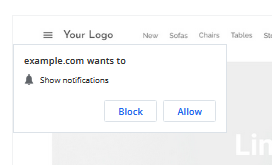
Web Push notification subscribers can see two types of consent forms: graphical and native.
Here is an example of a graphical consent form displayed by the system:

Here is an example of a native consent form displayed by a browser:
A configuration of your domain will make sending Web Push notifications in a more convenient way:
Before configuration: the browser displays the agreement form sent from the SALESmanago system. Once the user confirms it, the thank you page with the confirmation of subscription will display in a separate browser window, in this window the user will receive a browser prompt with the request for showing notifications as well.
After configuration: if the user confirms the agreement form sent from the SALESmanago system, the browser prompt with the request will display in the same browser window. The thank you page with a confirmation of subscription will not be displayed.
2. Domain Configuration
If you don’t want to display an extra window after a person subscribes to notifications in the consent form, add the right files to your site. To do so:
- Go to Web Push → Consent Forms→ Configure your domain.
2. Follow the commands listed one by one on the pop-up banner:
- Click Download files button.
- Extract the two files: manifest.json and sw.js.
- Upload files to the root directory and share it.
- Add the following code to a section on each page of your website where users can subscribe:
<link rel=”manifest” href=”/manifest.json”>
3. Additional information about configuration
When configuring your own domain, keep in mind that:
- Your site must fully support HTTPS to use this feature. Consent forms will not display on HTTP pages.
- The native form will not display on a page without the sw.js file. Such a page will only display a graphical form (containing a Thank You Page) through which the signup occurs.
- The sw.js file does not need to be in the root directory. Just add a variable to the tracking code and provide the directory path where the sw.js file is placed.
EXAMPLE: Here is a sample configuration:
<script>
var _smid = “epqdxascl3j176j1”;
var _smswdir = “/dir/to/sw.js”;
(function(w, r, a, sm, s ) {
w[‘SalesmanagoObject’] = r;
w[r] = w[r] || function () {( w[r].q = w[r].q || [] ).push(arguments)};
sm = document.createElement(‘script’); sm.type = ‘text/javascript’; sm.async = true; sm.src = a;
s = document.getElementsByTagName(‘script’)[0];
s.parentNode.insertBefore(sm, s);
})(window, ‘sm’, (‘https:’ == document.location.protocol ? ‘https://’ : ‘http://’) + ‘salesmanagotest.ap.ngrok.io/static/sm.js’);
</script>
4. How do you upload files?
You can upload files in three ways:
1. FTP (File Transfer Protocol)
It is a connection method that serves to transmit the files from the remote server to the local computer and the other way round.
If you happen to have the access to the FTP server (e.g. Filezilla), you need to upload the files to the folder on the server.
Learn more about FTP and uploading files >>
2. Control panel – WordPress
If you have the admin account in WordPress, you need to add the files in the control panel. However, the first thing to do is to install a plugin (e.g. WP File Manager) that will allow you to manage the files in WordPress.
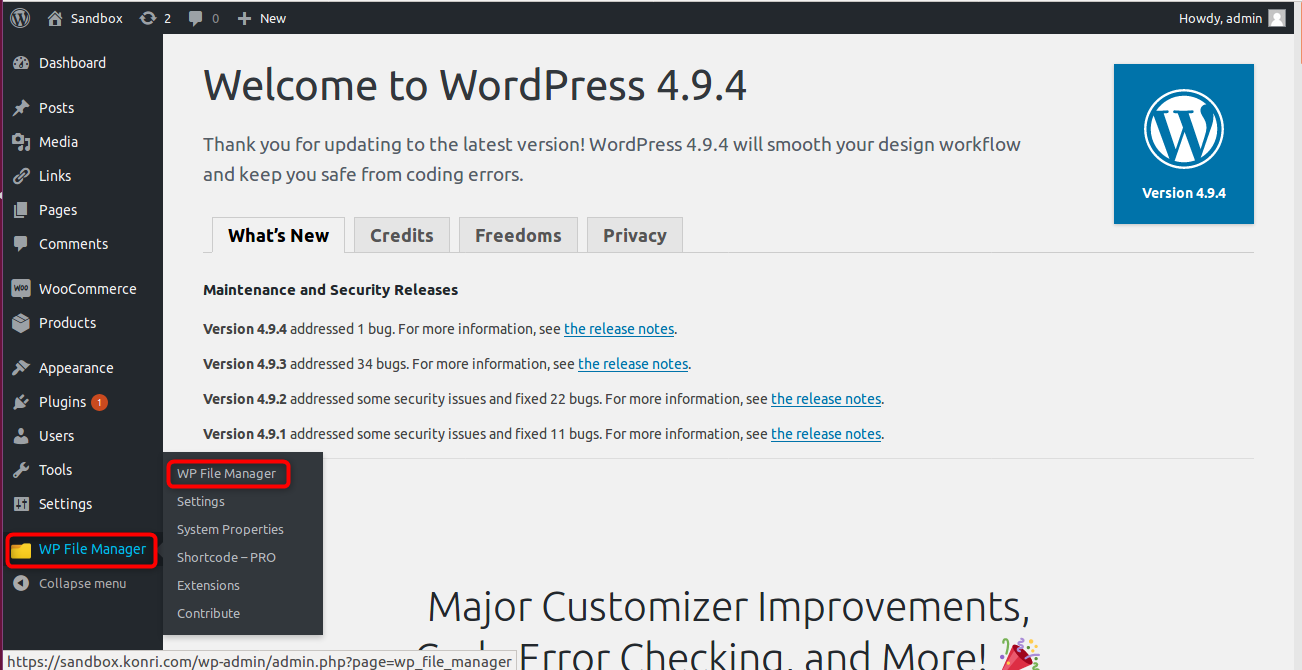
After you install the plugin, it will appear on the menu on the left side in the marked area. Once you click it, you will see the list from which you need to select the top position – WP File Manager.
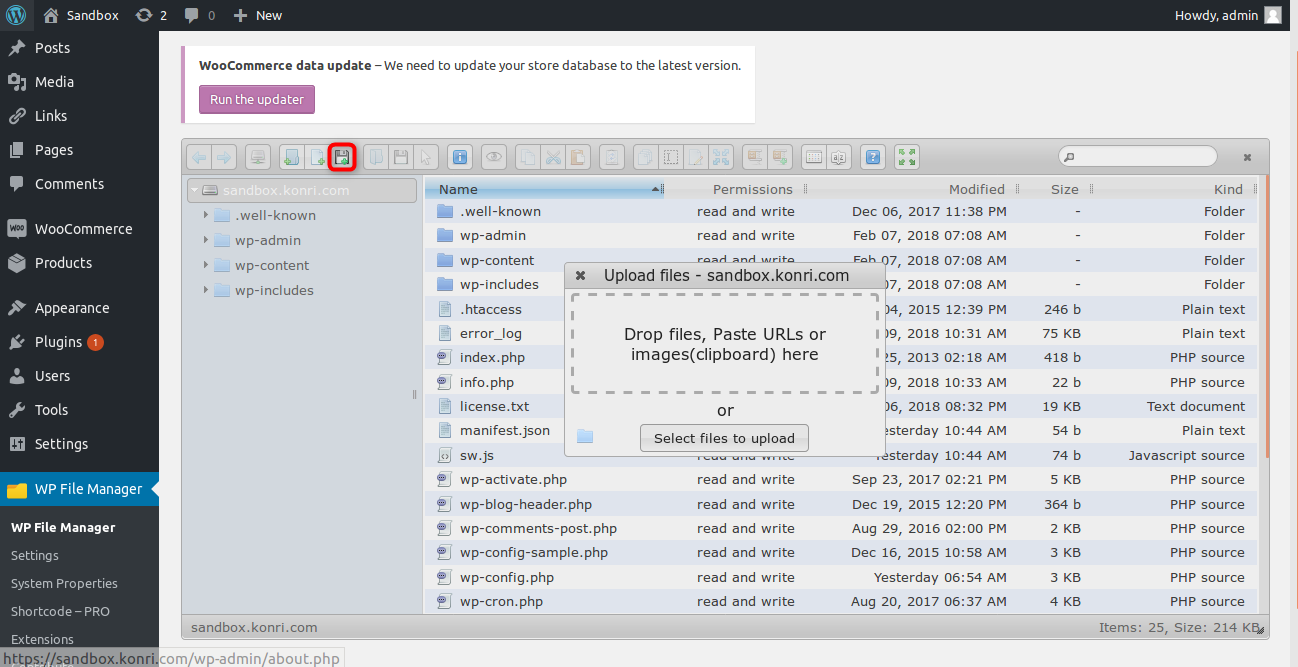
You will be redirected to the folder to which you need to upload files: manifest.json and sw.js. Click the marked icon and drop or upload the files.
3. Contact your webmaster
Contact the administrator of your website and send a request together with the files to upload them to the directory on your website.
5. How do you check if files have been uploaded correctly?
After you upload the files, the URL addresses below should be accessible publicly (replace yoursite.com with your domain):
- https://yoursite.com/manifest.json
- https://yoursite.com/sw.js