SALESmanago has a simple way for users to “opt-in” for receiving emails if they choose to do so. In other words, it means that the user subscribes to receiving emails and is assigned with an opt-in status.
SETTING AN OPT-IN LINK IS NECESSARY WHILE CREATING AN EMAIL CONFIRMING SUBSCRIPTION
Contents
1. Adding an opt-in link to an email in Drag&Drop Email Designer
2. Adding an opt-in link in HTML wizard
3. Adding an opt-in link using HTML
1. Adding an opt-in link to an email in Drag&Drop Email Designer
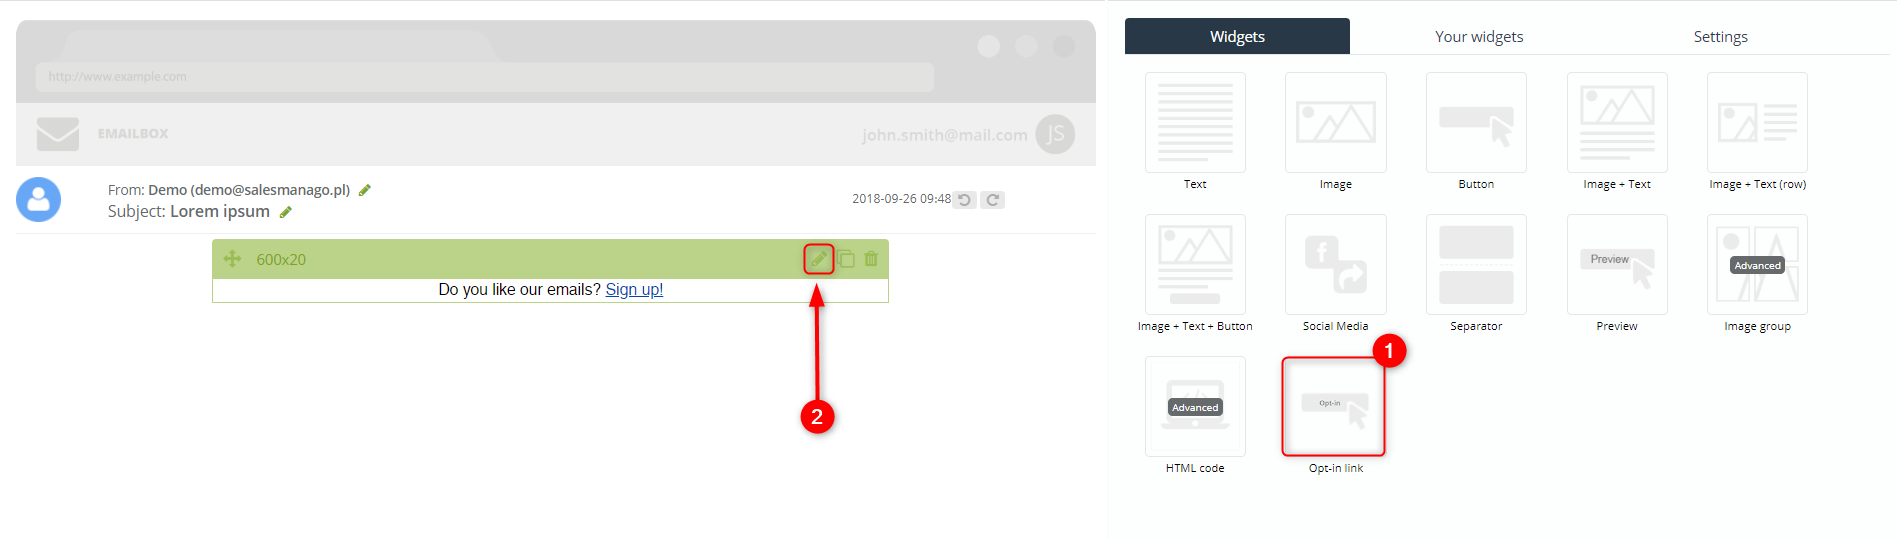
In Drag&Drop Email Designer after you choose option Create an email confirming subscription, go to the Widgets tab and choose [1] Opt-in link and drag it to the email preview on the left side on the screen. Hover the cursor over the widget and you will see the green contextual menu. [2] The pencil icon enables editing mode of the widget.
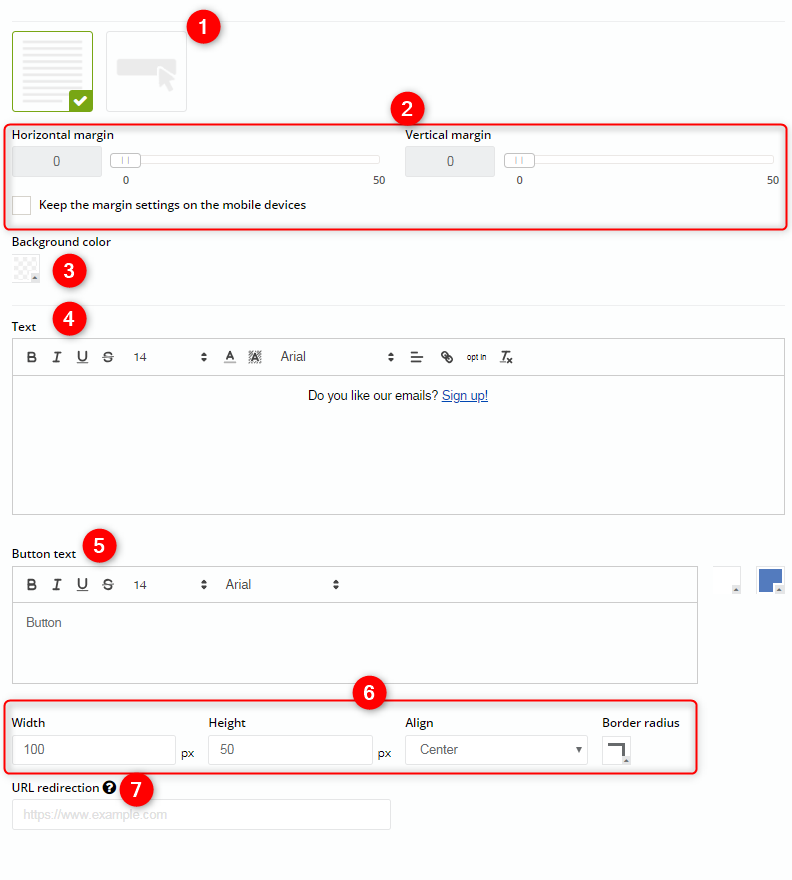
[1] – you can choose the form of display the opt-in link. It can be either a text form (e.g. Do you like our emails? Subscribe!) or a button.
[2] – To add padding to content, use this slider. This lets you set a margin of 0 to 50 px on each side of the element (horizontal padding and vertical padding). Tick the checkbox if you want to keep the margin settings for mobile devices.
[3] Background color – to change the background color click the color picker to change the background of the element.
[4] Text – enter any amount of the text in the text field. You can make it bold, change its alignment, colors, size, and type of the font; you can highlight the text and add links. The marked element is linked with an opt-in link which means that the user after clicking the link sign in for the subscription.
[5] Button text – enter the text that will be displayed on the opt-in button (do it if you chose to display opt-in link as a button). You can make the text bold, change its colors, the type of the font and the size. Next to the text field you can find the color pickers with which you can change the background color of the button and the font color.
[6] – set the parameters concerning the size, the alignment and the border radius of the button.
[7] URL redirection – by clicking the link/button the contact will be assigned with the opt-in status in the system and will be redirected to the website of your choice More information
2. Adding an opt-in link in HTML wizard
You can easily add an opt-in link with the templates creator. It can be added while creating a template or put directly into a message (provided that the template uses editable fields).
The first step is to make a part of the template hyperlinked, usually at the bottom. To do it, select some text with the left mouse button – in this case, the word “Here”. Then, make the selected part of the text hyperlinked using the “Insert placeholder” option.
![]()
Then, provide a link redirecting to the opt-in page. Click the “Insert placeholder” icon.

The following screen will appear:
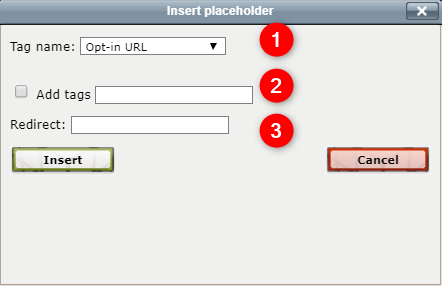
[1] Tag name – select ‘opt-in URL’.
[2] Add tags – tick the checkbox and enter the name of the tags that will be added to the contact once he or she clicks the opt-in link.
[3] Redirect – paste a URL address the user will be redirected to upon clicking the link.
3. Adding an opt-in link using HTML
There is also a straightforward way of creating an opt-in link with just HTML. Type $opt-in$ into the code, it should look like this:
<a href="$opt-in$">Subscribe </a>
While sending the message this link is replaced with a real one, redirecting to an opt-in page generated for each recipient individually.