The SALESmanago plugin for Shopify attempts to automatically add the SALESmanago Monitoring Code to all pages of your e-store (except for Thank You and Order Status pages, where this option is blocked by Shopify). However, changes in Shopify’s policies may prevent this automatic mechanism from functioning correctly. If you discover that the Monitoring Code is missing from all pages of your e-store, follow the instructions below to add it manually.
Adding the Monitoring Code to a Shopify e-store
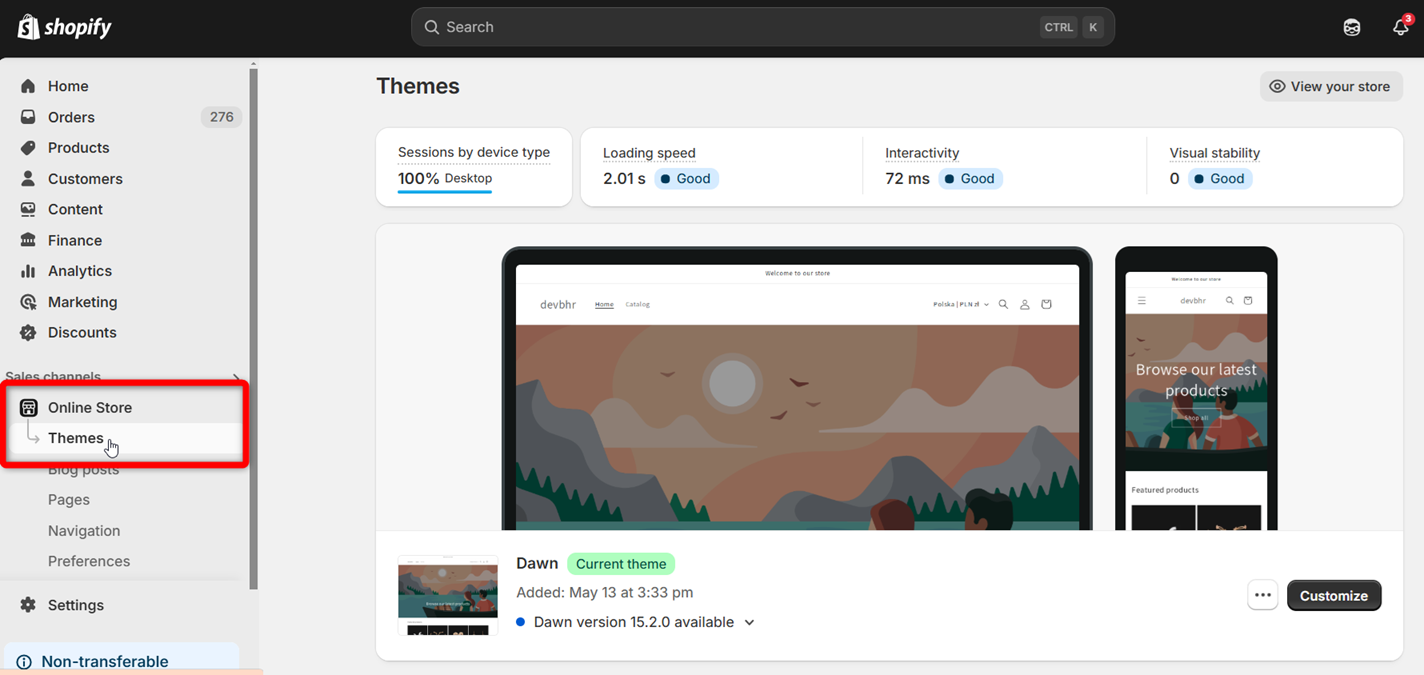
1. In the admin panel in Shopify, go to Online Store → Themes:
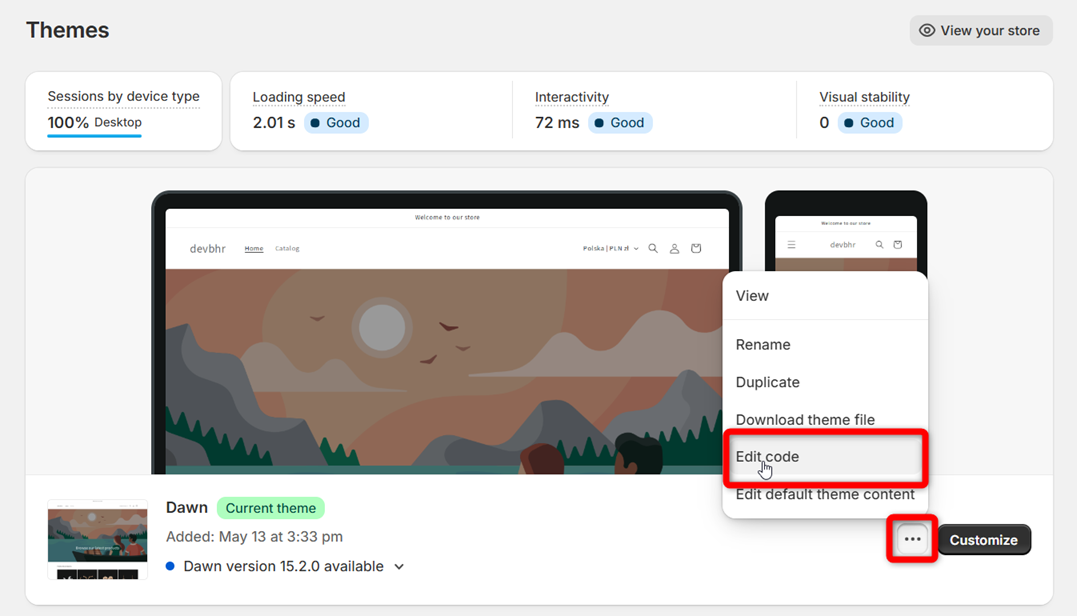
2. In the Current theme section, click the “…” icon and select Edit code:
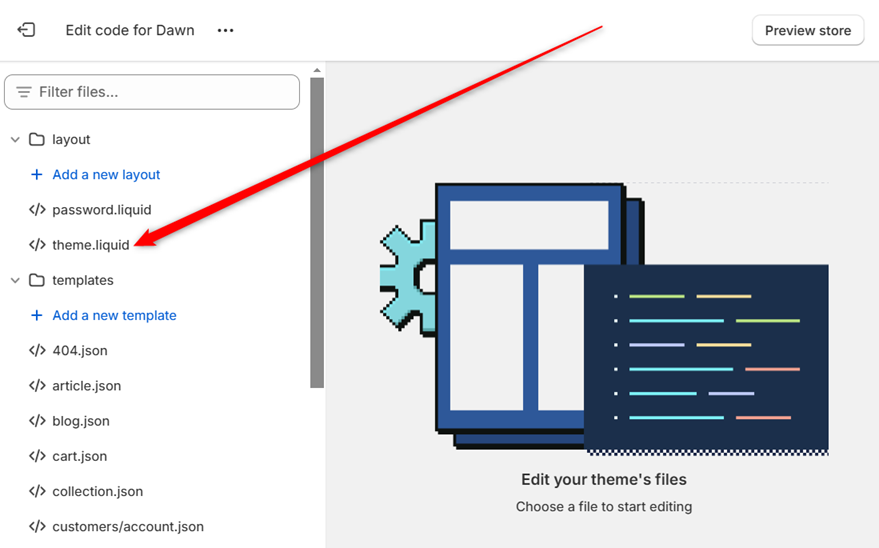
3. You will see a list of all files included in your theme. Select the file named “theme.liquid”—the main theme file that allows you to introduce changes across all pages of your e-store (except for Thank You and Order Status pages).
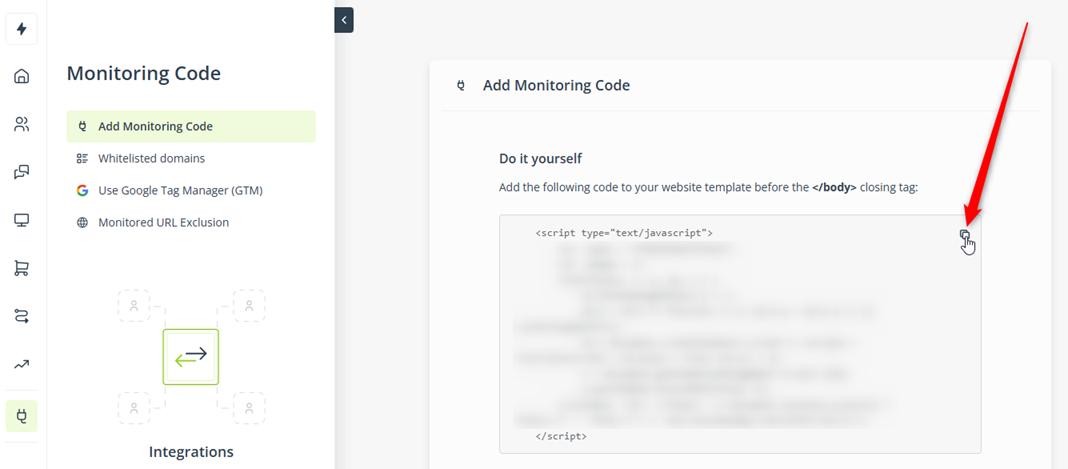
4. On the SALESmanago platform, go to Menu → Integrations → Monitoring Code → Add Monitoring Code. Copy your unique Monitoring Code:
5. Paste the copied Monitoring Code into the <head> section of the theme.liquid file, for example, directly before the </head> tag.
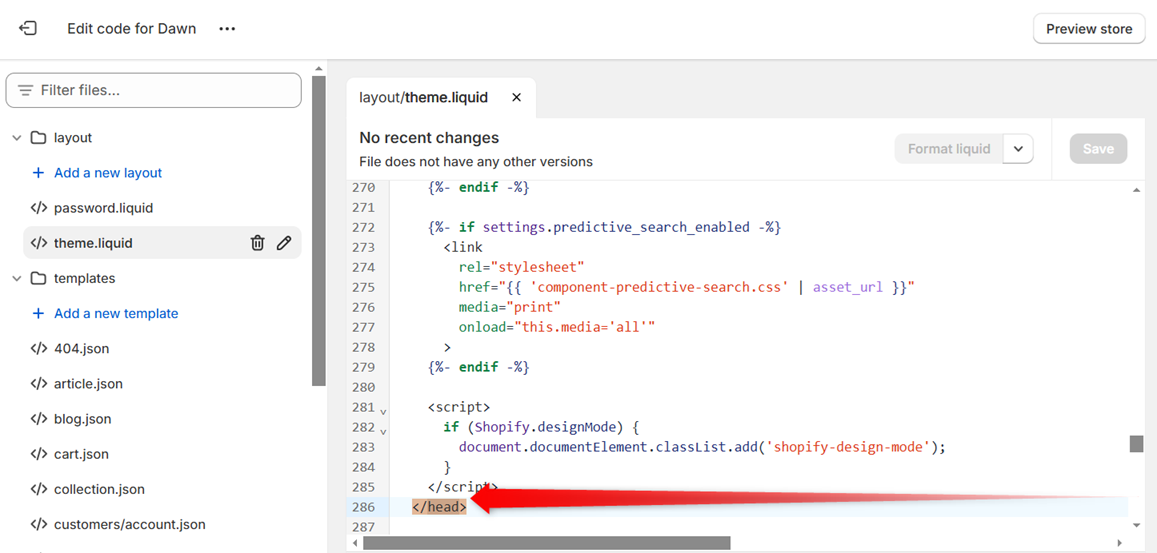
6. Save your changes by clicking the button in the top-right corner.

That’s it! The SALESmanago Monitoring Code will be added to all pages of your e-store (except for Thank You and Order Status pages, where this option is blocked by Shopify).
NOTE: If you see a warning in the developer tools about a duplicated Monitoring Code, this indicates that the Code is already implemented through the SALESmanago plugin. In this case, undo all the steps above (remove the Code from the theme.liquid file).