XML is a universal markup language, which is used for the presentation of data on a website in a structured manner. The proper configuration of an XML file and its implementation with SALESmanago is necessary to use certain features of the system.
It is crucial that you verify the data in the XML file before you send it for verification. After the XML is verified, the SALESmanago IT Department prepares an XML file transform (a special processing of the file that makes it possible to display its data). This means, that each time an XML file changes, a new transform has to be created.
In SALESmanago, every XML file can have only one transform assigned, however it is possible to edit each element. If there is an XML file uploaded to the system together with a transform, at any time you can edit elements, change links and mapping.
IMPORTANT: When you prepare an XML file, remember to use dots in product prices (both regular and discount prices), e.g. 79.99, 45.99, 100.00. The prices CANNOT contain commas.
Find out how to properly prepare an XML file and learn more about possibilities of using it >>
To add XML files to the system
Go to Integrations → Integration Center → Product Catalogs
List of the product feeds
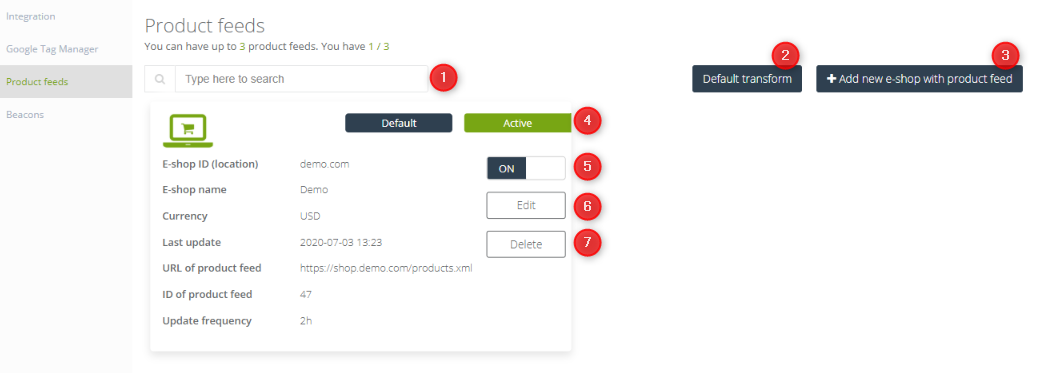
[1] – Search for the e-shop by typing here its name.
[2] Default transform – when you add a new e-shop, you can choose the XML format. When you choose a Default option from the dropdown list, you will need to paste the XML transform in this place. If the XML format of the added e-shops is marked as default, then it means that every added e-shop will be of this format.
[3] Add new e-shop with product feed – the option of adding a new e-shop. Within one e-shop you add one XML file.
[4] Status – your e-shop can be either active or inactive.
[5] Activation / deactivation – click this button to activate or deactivate the e-shop.
[6] Edit – the option of editing the e-shop.
[7] Delete – deletion of the e-shop.
IMPORTANT: You can choose to activate, deactivate, edit or delete the e-shop at any time.
Remember, that you can have up to 3 product feeds. It doesn’t matter if your feeds are active or not. If you need to add more product feeds contact with us via success@salesmanago.com
Adding an e-shop
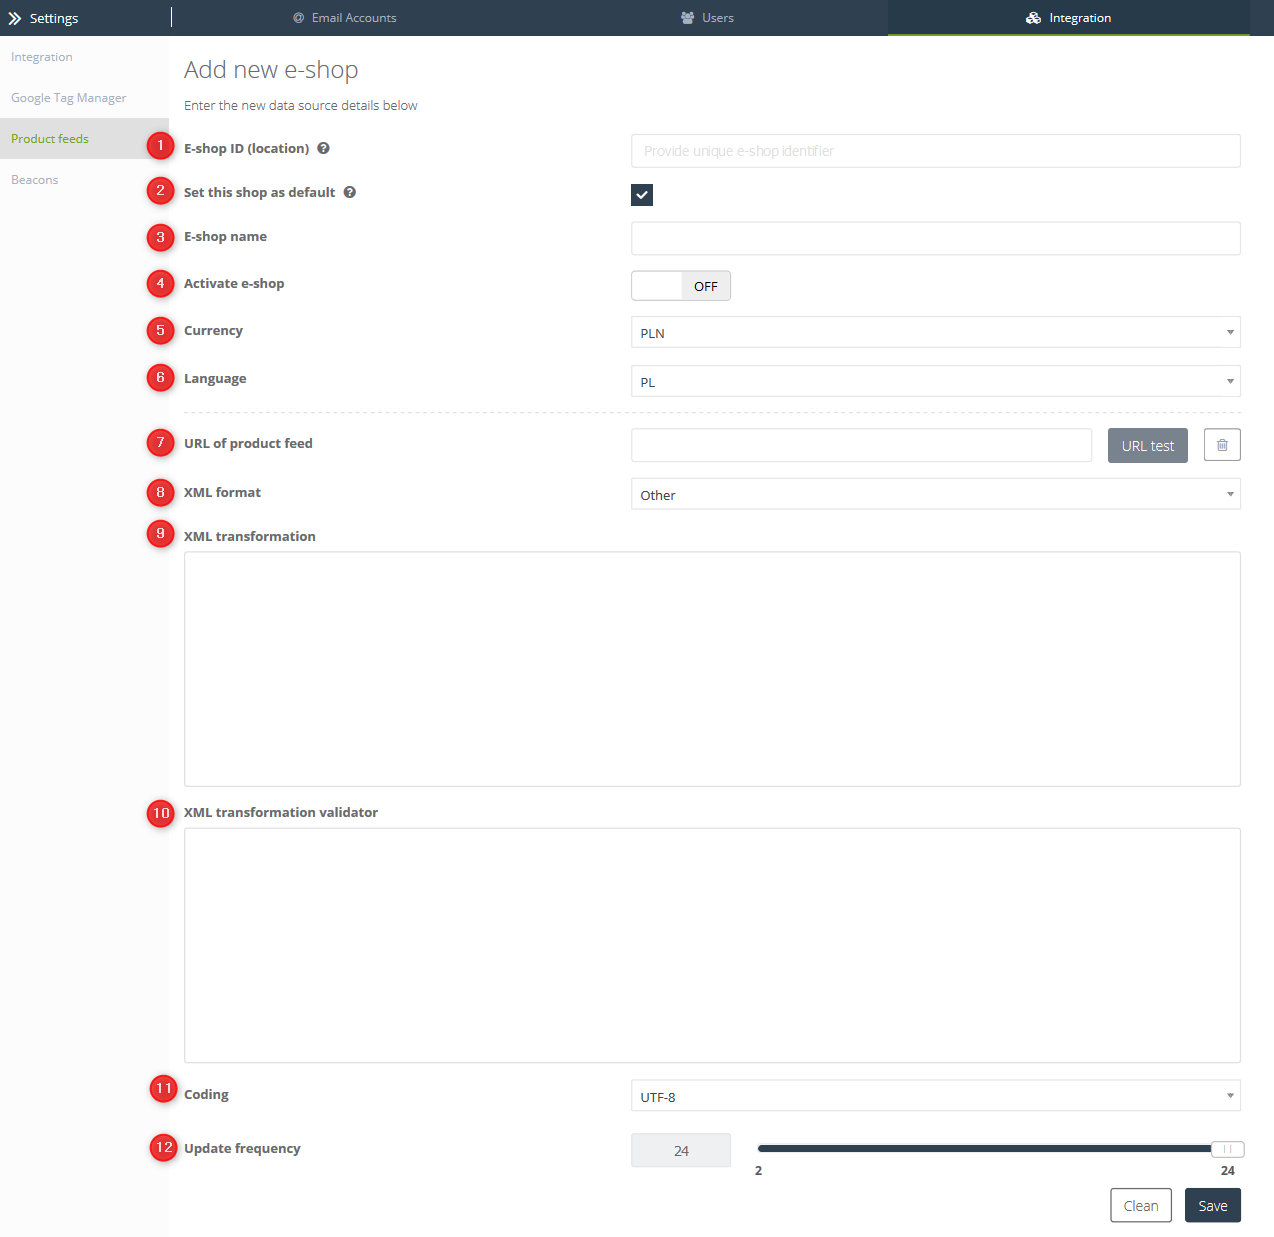
[1] E-shop ID (location) – Unique shop identifier – this identifier is used to connect information about the product sent in the external event with a particular product feed. Maximum number of characters without spaces is 36 (possible characters: letters a-z, numbers 1-9, /_-.). Unique shop identifier has to be exactly the same as the value in the LOCATION field in external events sent from a particular shop. IMPORTANT: If you have only one product feed, the system will connect an external event and the product feed that you have in the system automatically. When you use multistore option, remember about coherence in sending external events with a unique identifier.
[2] Set this shop as default – Default shop should contain XML file with information about all products in the shop. All this information will be used to identify the product e.g. the product which was viewed on the website.
[3] E-shop name – determine the shop domain from which XML files will be used in the transform (e.g. domain.com or www.domain.com).
[4] Activate shop – click ON/OFF
[5] Currency – select from the drop-down list.
[6] Language – select from the drop-down list.
[8] XML format
[9] XML transformation
[10] XML transformation validator
[11] Coding – select type of charset. Options to choose from: UTH-8 or Windows 1250 (accurately, as in XML file).
[12] Update frequency
Click Save to save information concerning the new e-shop.