The purpose of this solution is to automatically react to contact being tagged with a specific tag by sending them a previously prepared email.
INSTRUCTIONS:
To begin, from the home screen, go to Automation Processes → Automation Rules → Add New Rule.
An automation rule editor will open.
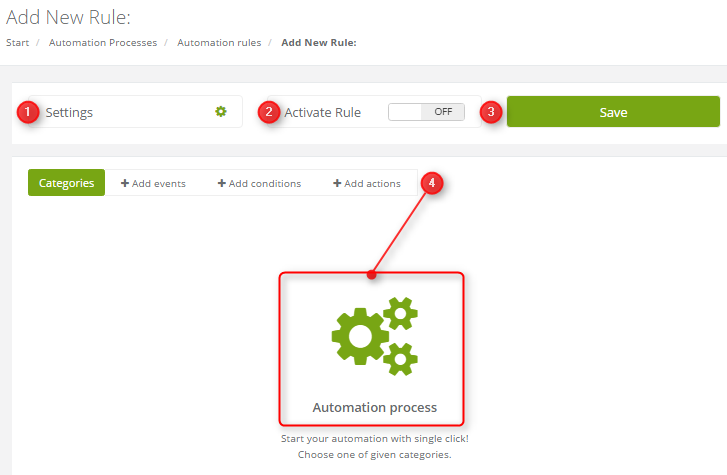
[1] Settings
[2] A switch for turning the rule on and off.
[3] Save – after you finish editing this rule, save it by clicking this button.
[4] Categories – choose an element you want to add in the Automation Process field – events, conditions, actions. In each category, there can be more than one element.
After you click Settings, a window will appear.
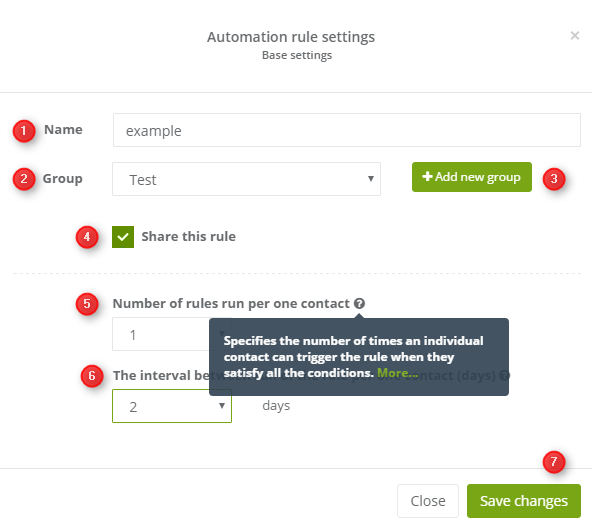
[1] Name the rule.
[2] Assign the rule to a group by choosing from a drop-down list, or [3] add a new group.
[4] Sharing the rule means, that it will be visible on all user accounts and activated for all contacts in the system. This option is selected by default.
[5] The number of times this rule can activate for one contact.
[6] The minimal interval between rule activations for one contact.
Click Save changes to apply settings to the rule. The next step is adding an event.

[1] Click Add events.
[2] Click the green Plus icon. A list will open to the right. Find Contact was tagged with.
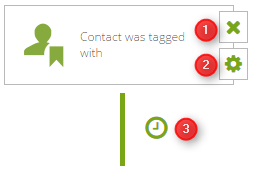
[1] Click this icon if you want to delete this element.
[2] Click this icon to open event details.
[3] This icon opens event-condition settings, but because in this example there are no conditions, there is no reason to use it now.
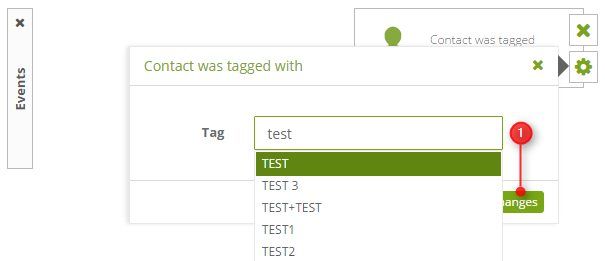
[1] From a drop-down list Tag, choose a tag that, upon being assigned to a contact, will trigger an automatic email to be sent to that contact.
Save changes. Then add an action.
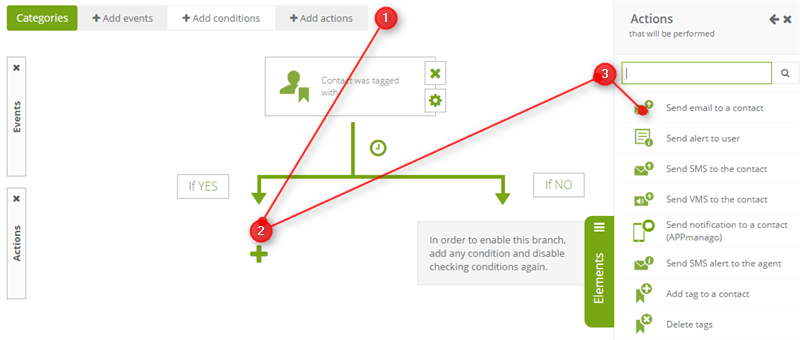
[1] Click Add actions. The arrow will branch into “If YES” and “If NO” giving you the option to specify actions for different outcomes.
[2] Click the green Plus icon. A list will open to the right. Find Send email to a contact and drag it onto the main field.
[3] Proceed to this action’s settings.
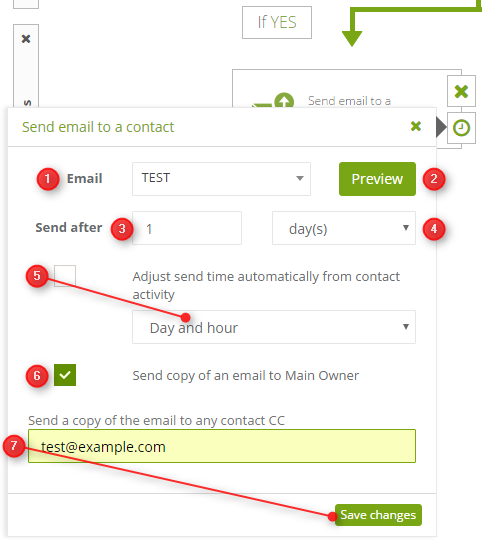
[1] Choose a message that you want to send with this action. You can see the message by clicking Preview [2].
[3] Choose the delay after which the message is to be sent (starting from when set conditions were met) and a unit of time [4].
[5] Select the checkbox to automatically choose an optimal sending time for active contacts, or choose from a drop-down list.
[6] Select the checkbox to automatically send a carbon copy of the message to the contact owner.
[7] In this field, you can put any email address you want to receive a carbon copy of the message.
Then Save changes.
Remember to save the rule and turn it on, otherwise, it will not work.