Useful links
Web Push consents are collected by individual browsers for individual domains. When you start using the Web Push channel in SALESmanago, first, you need to create or configure a consent prompt that will be displayed on your website. By default, all collected Web Push consents will be assigned to a SALESmanago domain: salesmanagopush.com. Consequently, the source displayed on both your consent prompts and notifications will be “salesmanagopush.com”. If you prefer to assign consents to your own domain, you need to perform additional configuration. Read this article to learn how.
Contents
1. Getting started
SALESmanago allows you to easily create and manage Web Push consent prompts and Web Push notifications. However, by default, the domain displayed on your consent prompts and notifications will be salesmanagopush.com.
This is because by default, all Web Push consents are assigned to this domain, and not your own domain. This may affect the credibility of your consent prompts, resulting in lower opt-in rates.
To assign Web Push consents to your own domain, you need to perform additional configuration. This can be achieved in three ways:
- By inserting a dedicated sw.js file in the root directory of your website.
- By inserting a dedicated sw.js file, accompanied by a Service-Worker-Allowed header, in a non-root directory of your website.
- By inserting a dedicated sw.js file through Cloudflare.
The detailed instructions for these three methods are provided below.
An additional advantage of this configuration is that it allows you to use the “Browser-based only” consent prompt wizard. Without this configuration, consent prompts created in this wizard will exist on your account, but will not be displayed on your website (due to the absence of the sw.js file). Regardless of this additional option, the recommended consent mode remains “Website-based + Browser-based”.
To understand precisely what changes result from this configuration and how you should proceed, read Section 3: Effects and next steps.
NOTE: The Web Push channel is only available for websites served over HTTPS.
2. Configure your domain
Below, you will find detailed instructions for configuring your domain so that Web Push consents are assigned to this domain and not the default salesmanagopush.com.
The basic method is adding a dedicated sw.js file to the root directory. If for some reason this is not feasible, you can add the service worker to a non-root directory, in which case it must be accompanied by a special header. The second option, however, is not available for some SaaS platforms, either. In this case, you can use a workaround offered by Cloudflare.
IMPORTANT: Shopify actively prevents all of the options described in this article. If your e-store is set up on this platform and you want to send Web Push notifications from SALESmanago, you can only gather consents for the salesmanagopush.com domain.
A. Adding the sw.js file to the root directory
To use the standard method for configuring your own domain, go to Menu → Channels → Web Push → Consent prompts and click Configure your domain.
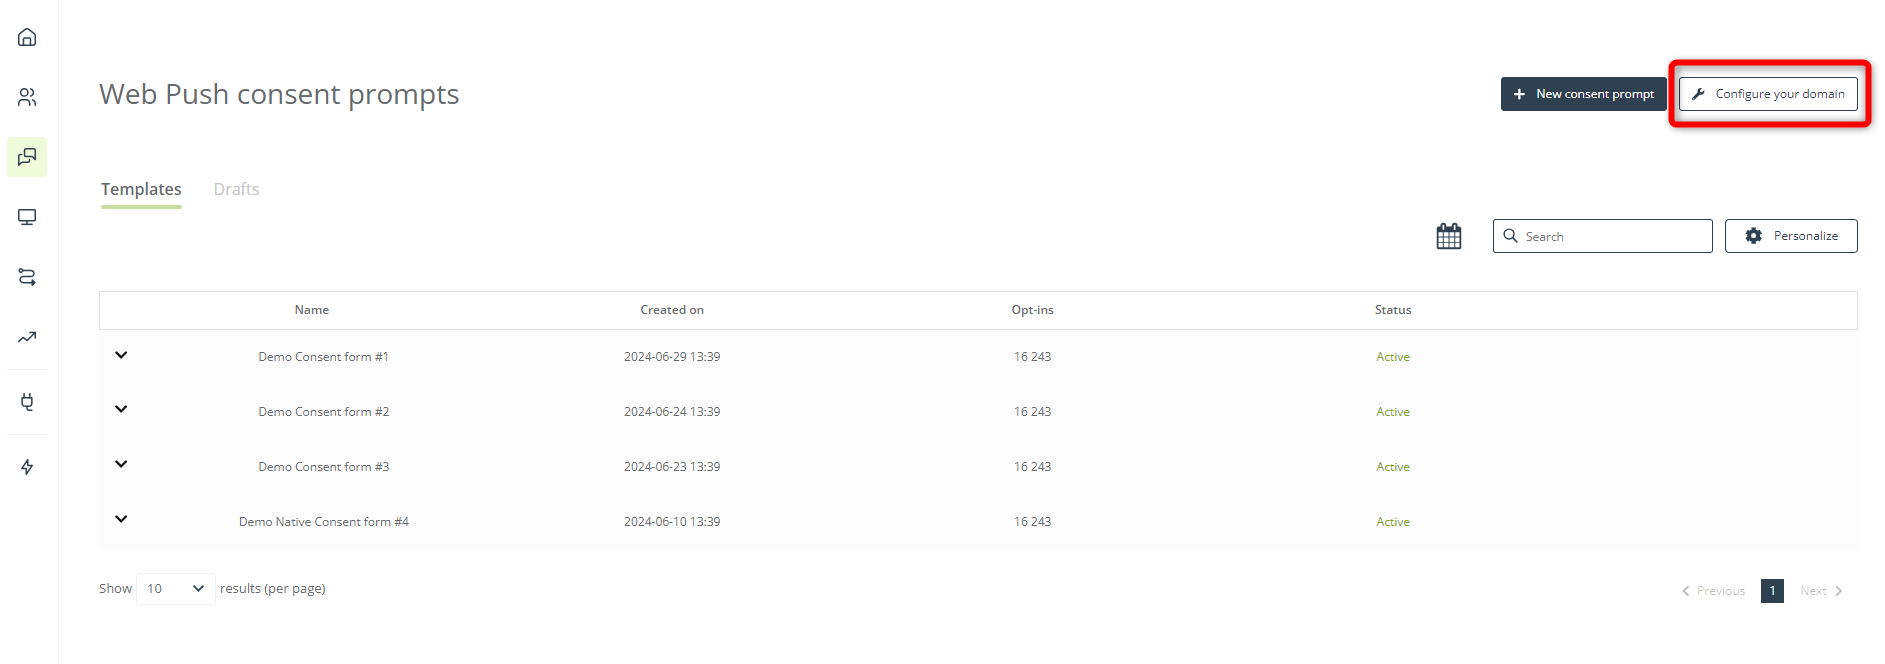
A pop-up will appear with all the necessary instructions.
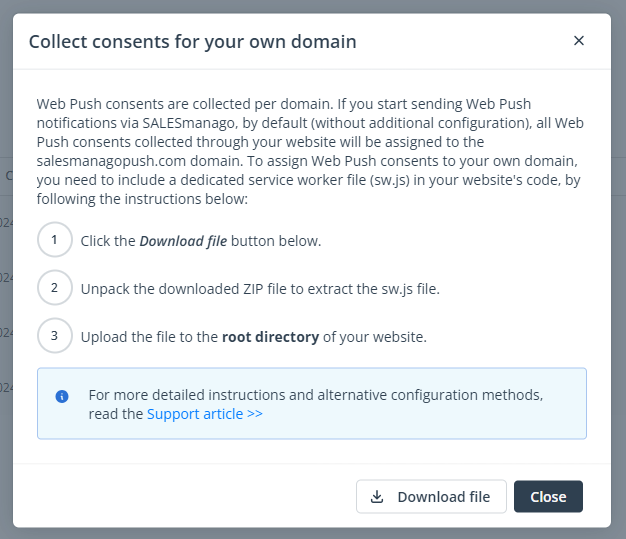
Just as instructed, download the sw.js (service worker) file required to authorize consents and handle notifications. Then, upload the file to the root directory of your website.
The typical steps required to upload a file to your server include logging into your hosting account, locating the “File Manager” section, navigating to the root directory, and uploading the sw.js file. Make sure to follow any specific instructions from your hosting provider regarding file permissions or server configuration.
TIP: The root directory, in which your website’s main files are stored, is often referred to as the “public_html” folder. If you are unsure of your root directory’s location, consult the documentation of your hosting provider or their support team.
B. Adding the sw.js file to a non-root directory
If you are unable to insert the sw.js file directly into the root directory of your website, you can define a custom path to this file.
Start by downloading the sw.js file as described in Section 2.A above. Next, upload the sw.js file to your server, for example, to the storage folder:
/uploads/storage/sw.js
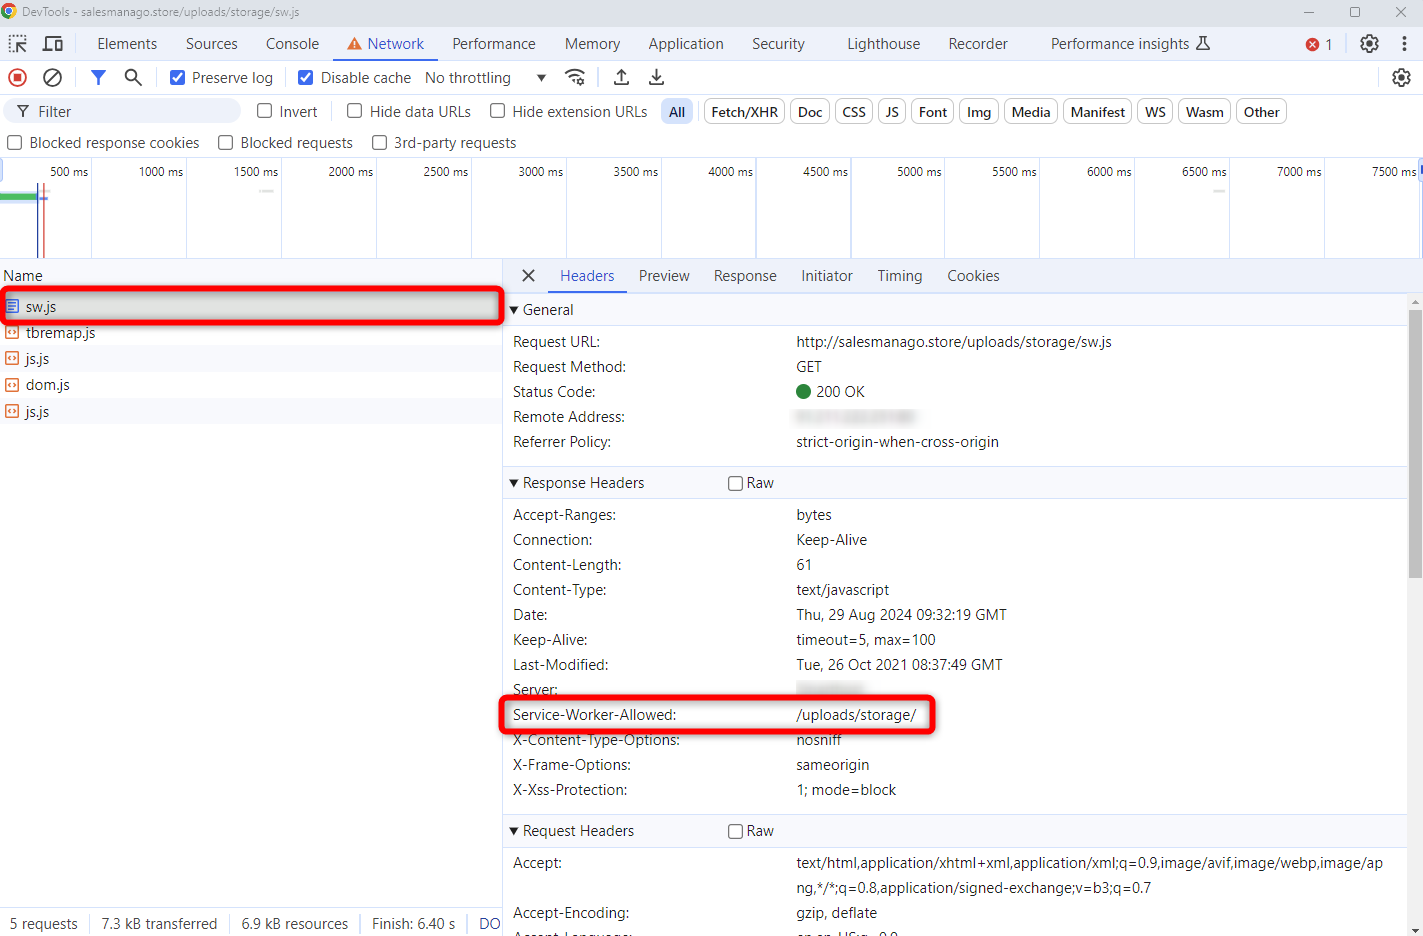
The important thing is that if you want to place the service worker in any other directory than root, your server must add the Service-Worker-Allowed header when returning the sw.js file. You can achieve it, for example, by creating an .htaccess file on an Apache server:
<IfModule mod_headers.c>
    <Files "sw.js">
        Header set Service-Worker-Allowed "/uploads/storage/"
    </Files>
</IfModule>
To verify if the header is successfully returned alongside the sw.js file, check the network tab in Developer Tools (F12):
Finally, to complete the configuration, add the _smswdir and _smswscope fields to the SALESmanago Monitoring Code, for example:
 var _smid = "xxxxxxxxxxxxx";
        var _smapp = 1;
	var _smswdir = "/uploads/storage/sw.js";
        var _smswscope = "/uploads/storage/";

        (function(w, r, a, sm, s ) {
            w['SalesmanagoObject'] = r;
            w[r] = w[r] || function () {( w[r].q = w[r].q || [] ).push(arguments)};
            sm = document.createElement('script'); sm.type = 'text/javascript'; sm.async = true; sm.src = a;
            s = document.getElementsByTagName('script')[0];
            s.parentNode.insertBefore(sm, s);
        })(window, 'sm', ('https:' == document.location.protocol ? 'https://' : 'http://') + 'www.salesmanago.com/static/sm.js');
C. Adding the sw.js file through Cloudflare
Adding the service worker file using Cloudflare is an easy-to-follow process, however, it still requires technical knowledge and should be performed by a developer. Click the link below for detailed instructions.
Learn how to add the service worker file via Cloudflare >>
3. Effects and next steps
The moment the configuration is complete, Web Push consents collected on your website will start being assigned to your own domain. If this configuration was performed before you started using the Web Push channel in SALESmanago, the next step is to create a Web Push consent prompt. You can create a number of consent prompts and display them on different pages of your website. When sending a Web Push notification, in its settings, you can always choose one or more consent prompts based on which the notification will be sent.
Learn how to create a Web Push consent prompt in SALESmanago >>
If the configuration described in this article was performed after you had been using the Web Push channel in SALESmanago for a certain period of time, the situation is slightly different. The consent prompts used before the configuration will remain fully functional, however, all consents collected through these prompts before the configuration will be assigned to salesmanagopush.com, while all consents collected after the configuration will be assigned to your own domain. This means that if you send a Web Push notification based on such a prompt, some recipients will see “salesmanagopush.com” as the sending domain, while some recipients will see your own domain in that place.
It is up to you how you proceed. You can continue to use the old consent prompts or create new consent prompts and start collecting consents anew.