Command Center is the new UI standard for managing KPI-oriented, multi-channel, multi-functional and multi-tasking marketing processes. It gives a centralized view of all marketing processes and solutions aimed at achieving specific goals. Start using advanced campaign planning today, to create a campaign template in the cockpit, and to manage all processes and sendnings available in the SALESmanago system.
To go to the Marketing Management Cockpit in SALESmanago, select the tab
Automations → Command Center → Campaigns
Campaigns are one of the functionalities offered by the extensive Command Center panel. It gives you the ability to plan and build advanced marketing processes from one desktop system. After expanding the Elements tab, you can use all of the created in the system email messages, text messages, Web Push notifications, Segments, elements created in the Lead Generation panel and those created in the Web Personalization panel.
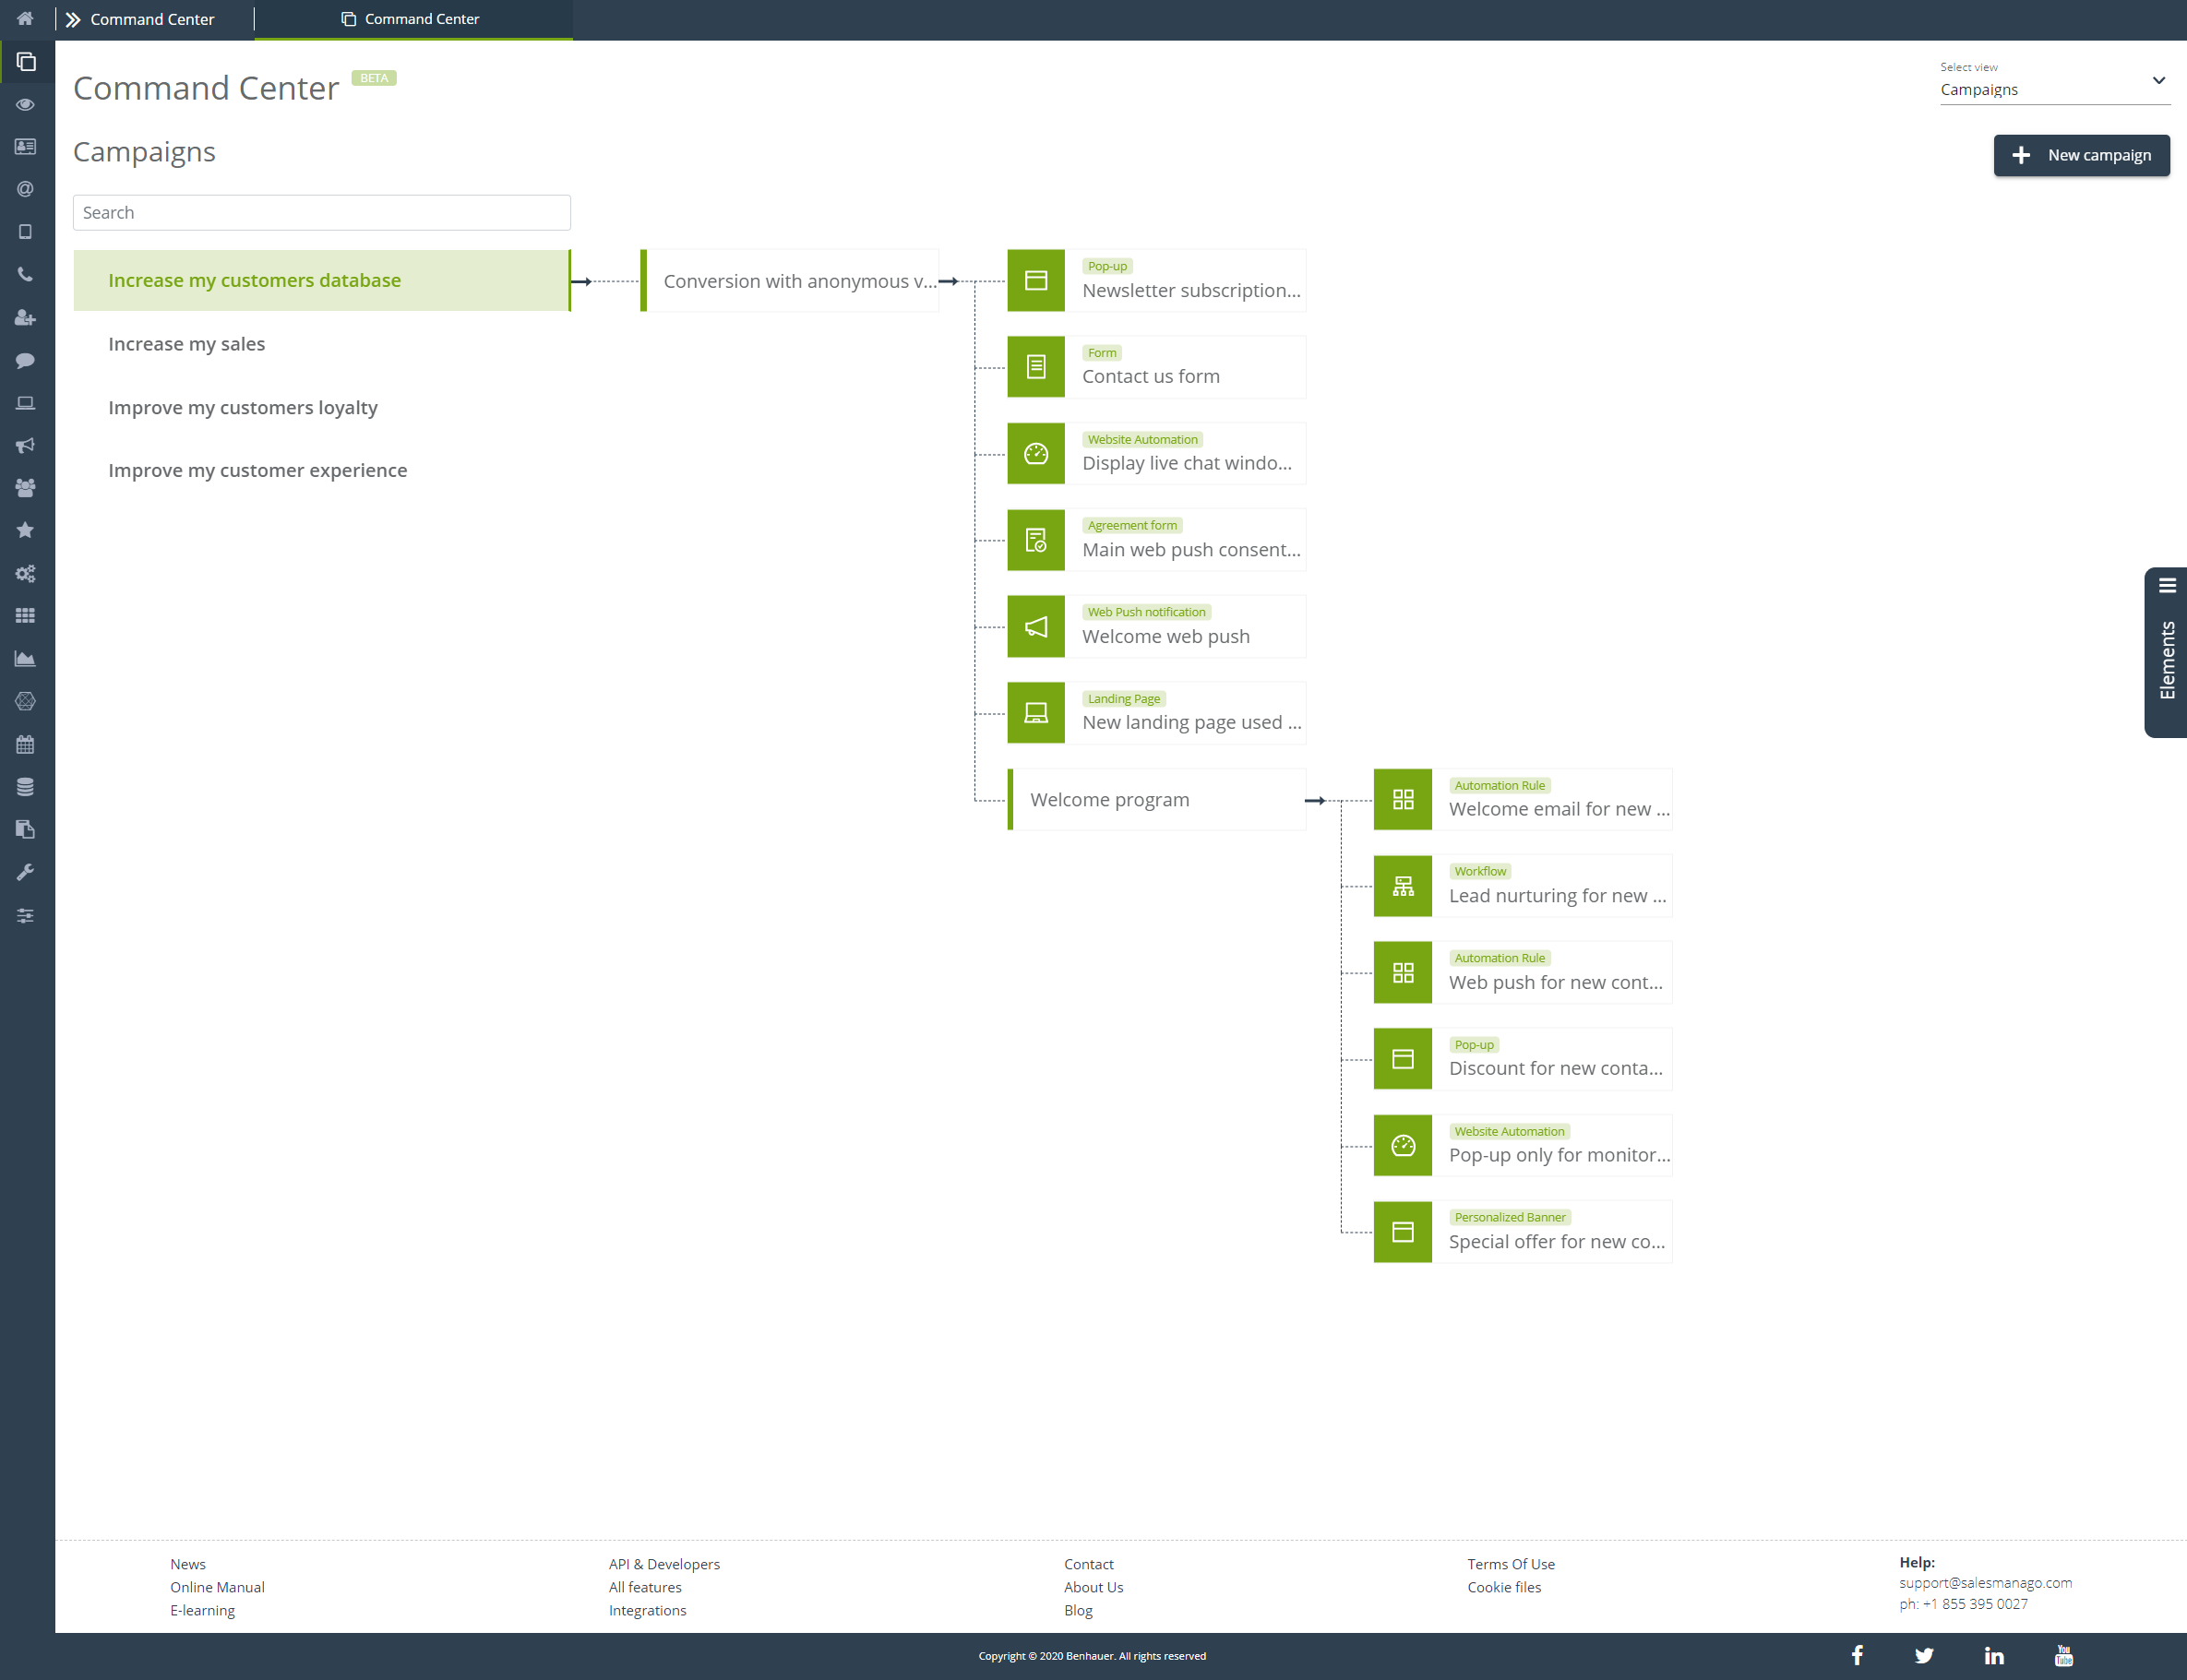
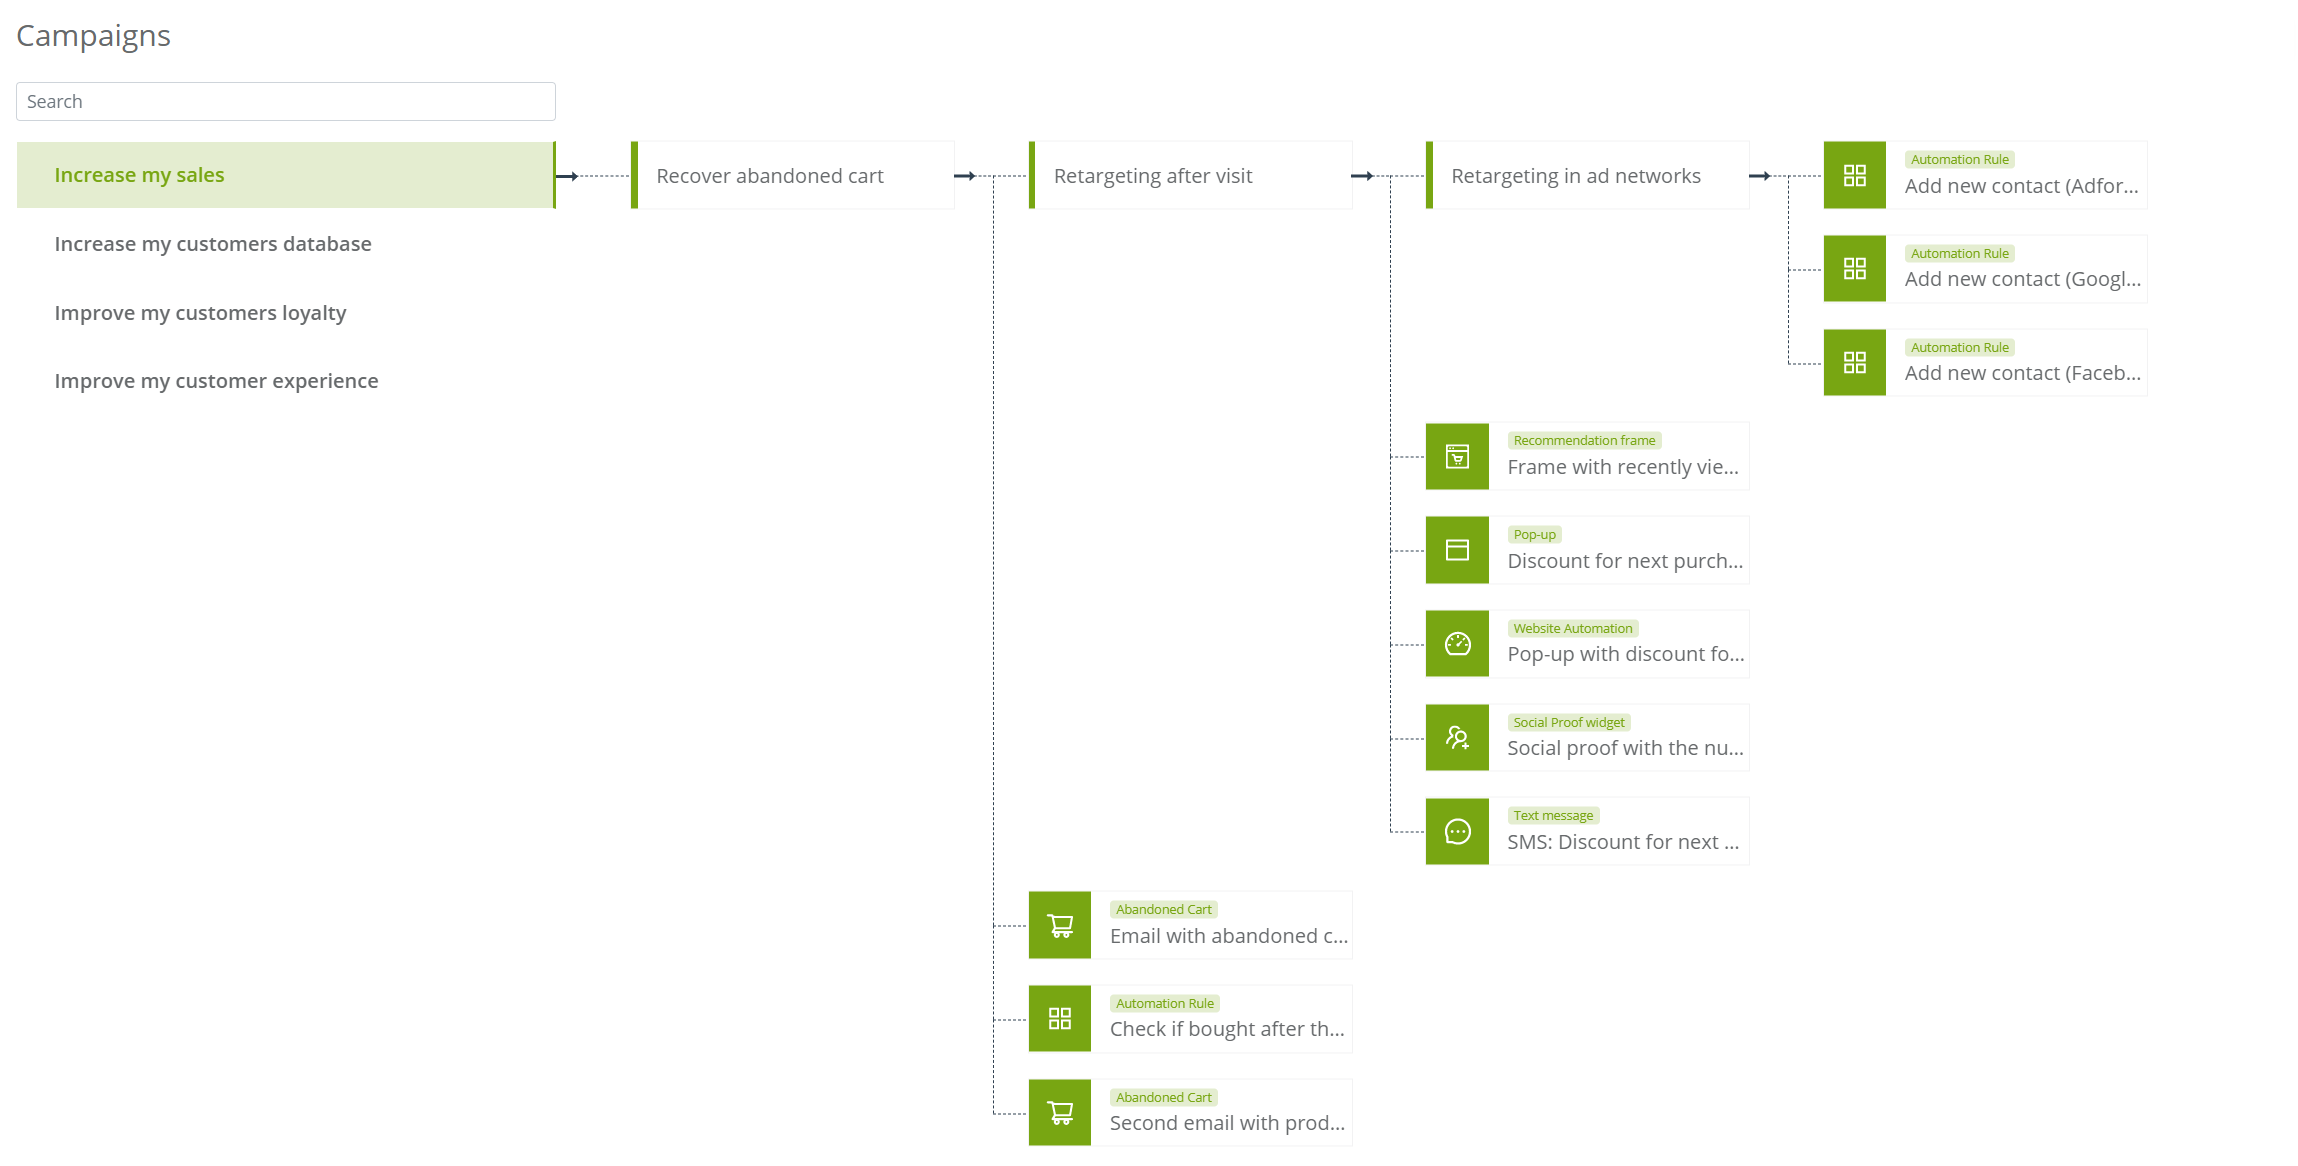
Build an advanced marketing campaign plan, based on increasing sales in your company, reducing the number of abandoned carts and increasing website conversion at the same time. An example diagram of a campaign that you can create:
After selecting the Campaign view in the Command Center panel, the following tile layout will appear on your screen:
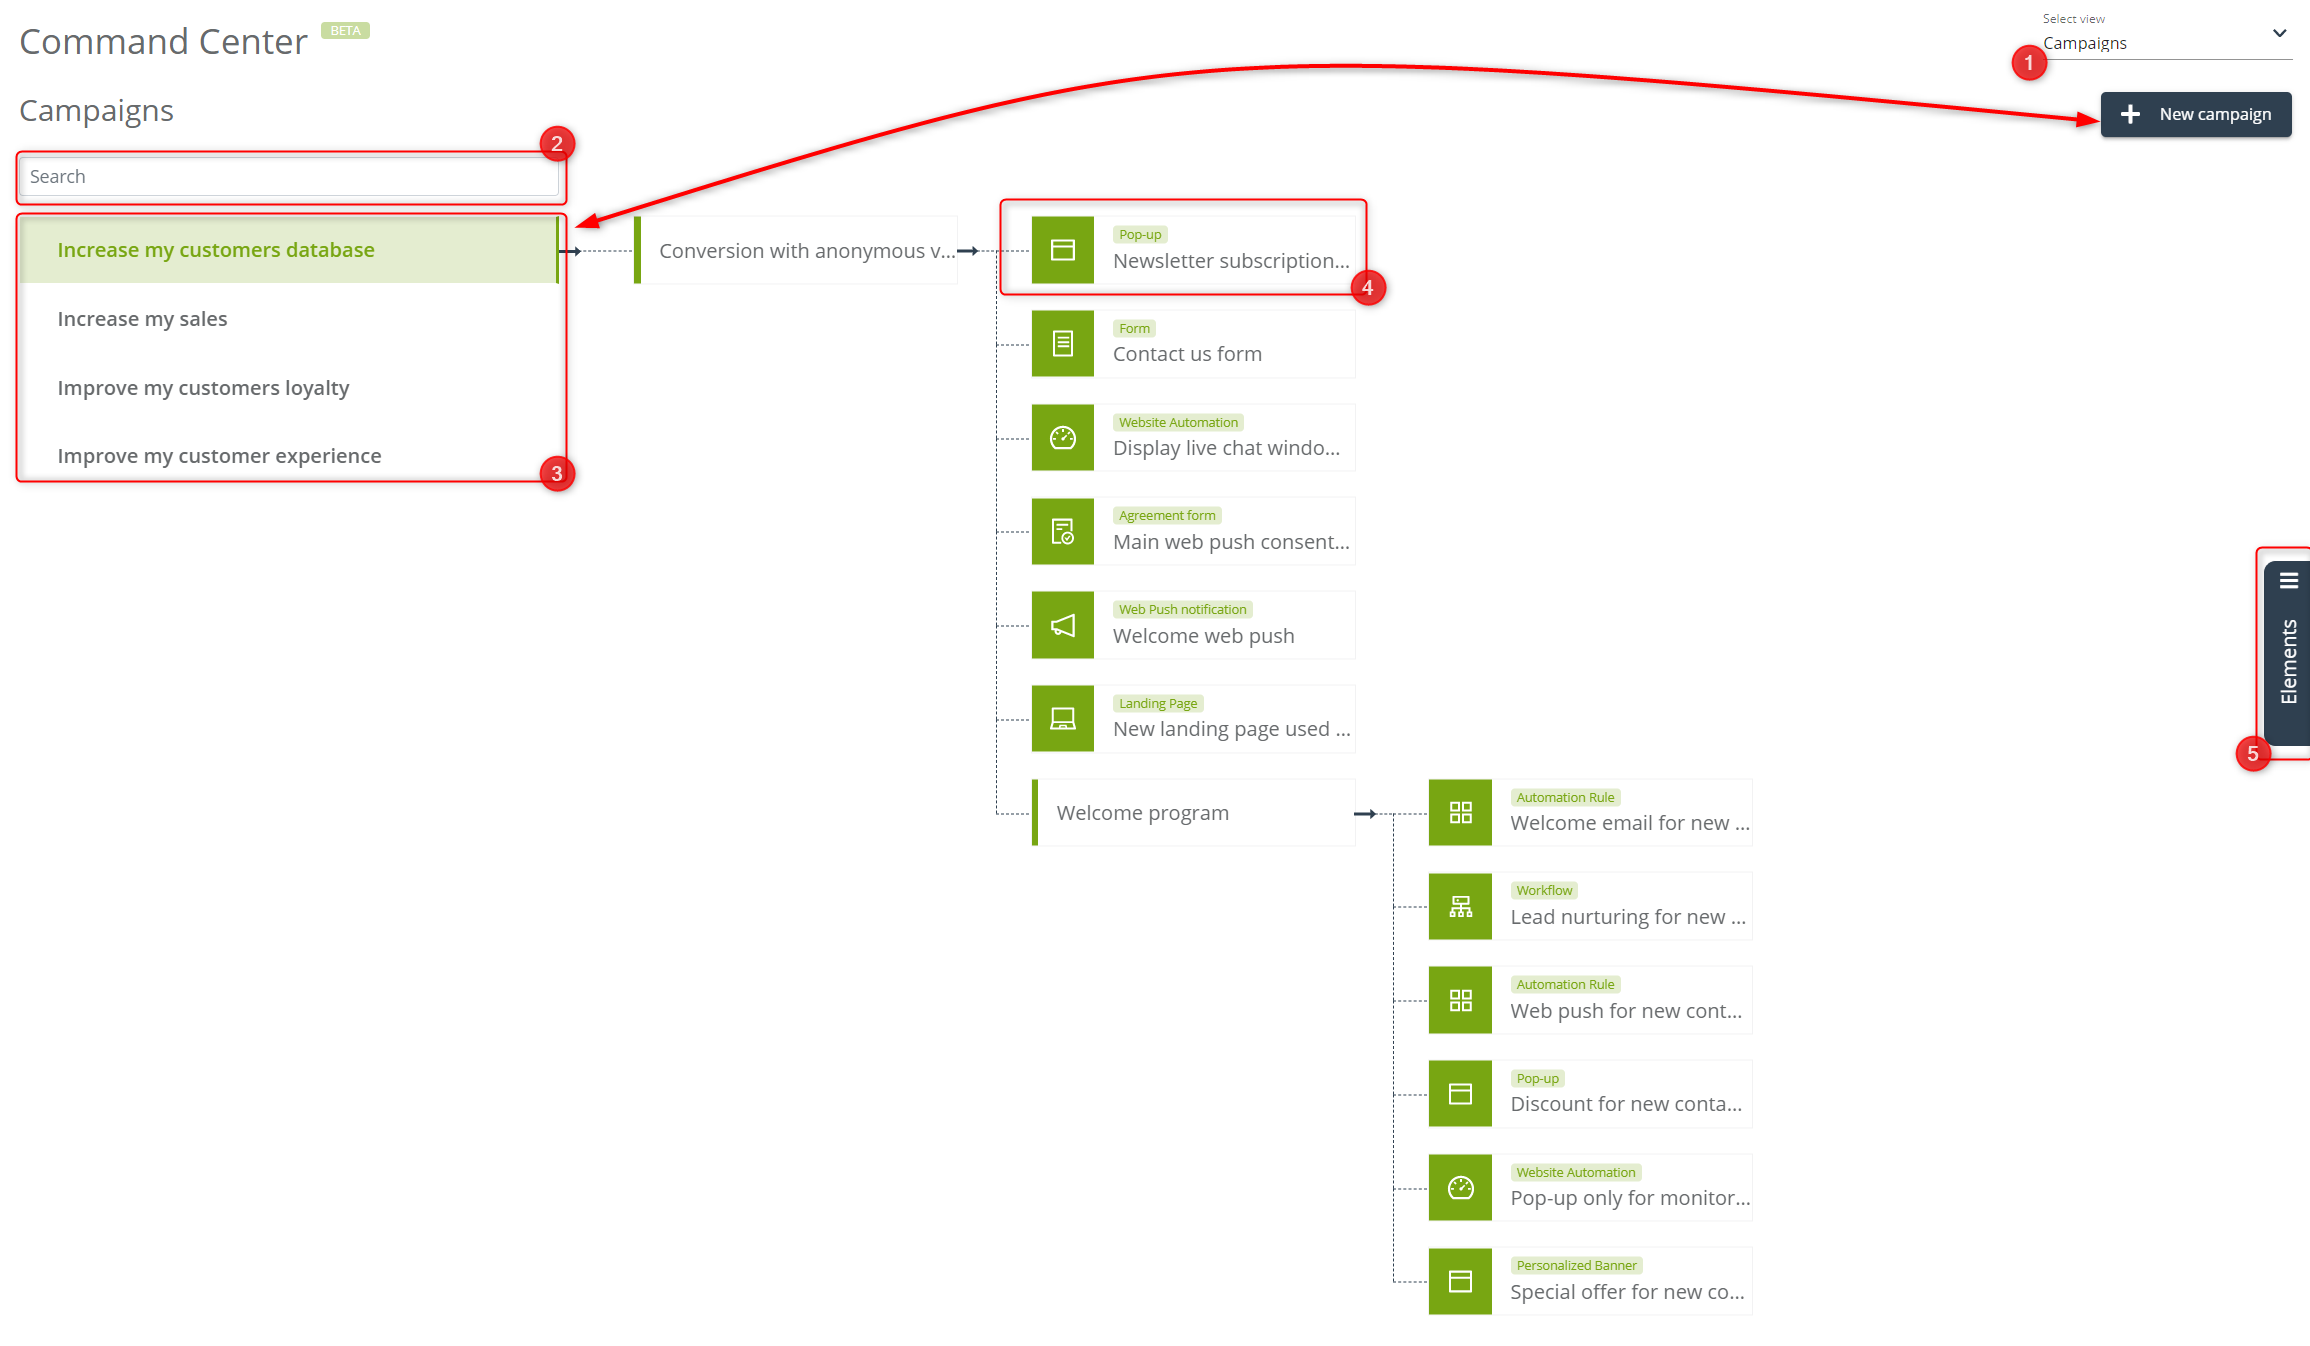
[1] Select view – you can change the way the panel is displayed at any time,by going to the Calendar management view or to the shared view called Campaigns + Calendar.
See how to manage campaigns in Command Center Calendar >>
[2] Search engine – use it to shorten the list of campaign names to the desired ones, if you have many of them on your list.
[3] +New campaign – click the button to create a new campaign, which you can then complete, building it from all the elements available and previously created by you in the system:
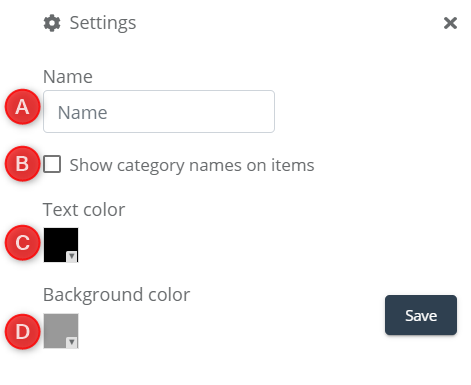
[A] Name – set the name of your campaign, under which you will find all established marketing processes
[B] Show category names on items – if you want, category names can appear above the names of specific elements, informing about which groups they belong to – whether they are emails, pop-ups, landing pages, etc.
To make it easier for you to differentiate and expand your campaigns, we’ve also added the ability to make visual changes to their preview. You can change [C] Text color and [D] Background color for each campaign.
You can edit any already created, planned campaign. Click the settings button and you will see the same window as above.
[4] Categories and elements – these are what all campaigns are made of. Each of the campaigns created by you can contain up to 50 elements, any number of folders, maximum 1 of the same item, and any number of folders and subfolders. At any time, you can go straight from the panel view to basic information about a specific element, or remove it from your tree of processes. All elements and their categories are available in the [5] Elements tab.
IMPORTANT: After clicking on any element, you can view the date of its creation and go directly to editing:
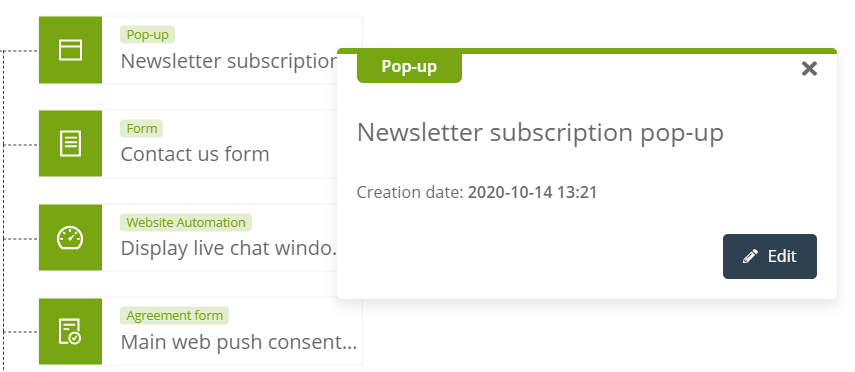
[5] Elements – these are all emails, text messages, Web Push notifications, Automation Processes, Segments, Lead Generation elements and elements of the WWW Personalization panel, created earlier in the system. Using the Drag & Drop tool, you can apply them to any place in the panel, linking to any folder of the selected campaign.
IMPORTANT: You don’t have to worry that your changes in the Command Center will not be saved. Autosave works in this panel.