The operation of Loyalty Program in SALESmanago is not limited to simple segmentation of contacts and awarding them with points. Enhance the traditional awarding of points with purchases made with additional rewards in the form of bonus points and use customer behavior data such as website activities and all CDP data. Create your own gamification and rewards programs to effectively support the customer’s buying cycle.
Contents
- Information
- Chart of the changes in the number of points
- History of changes in the number of points
- History of tier changes
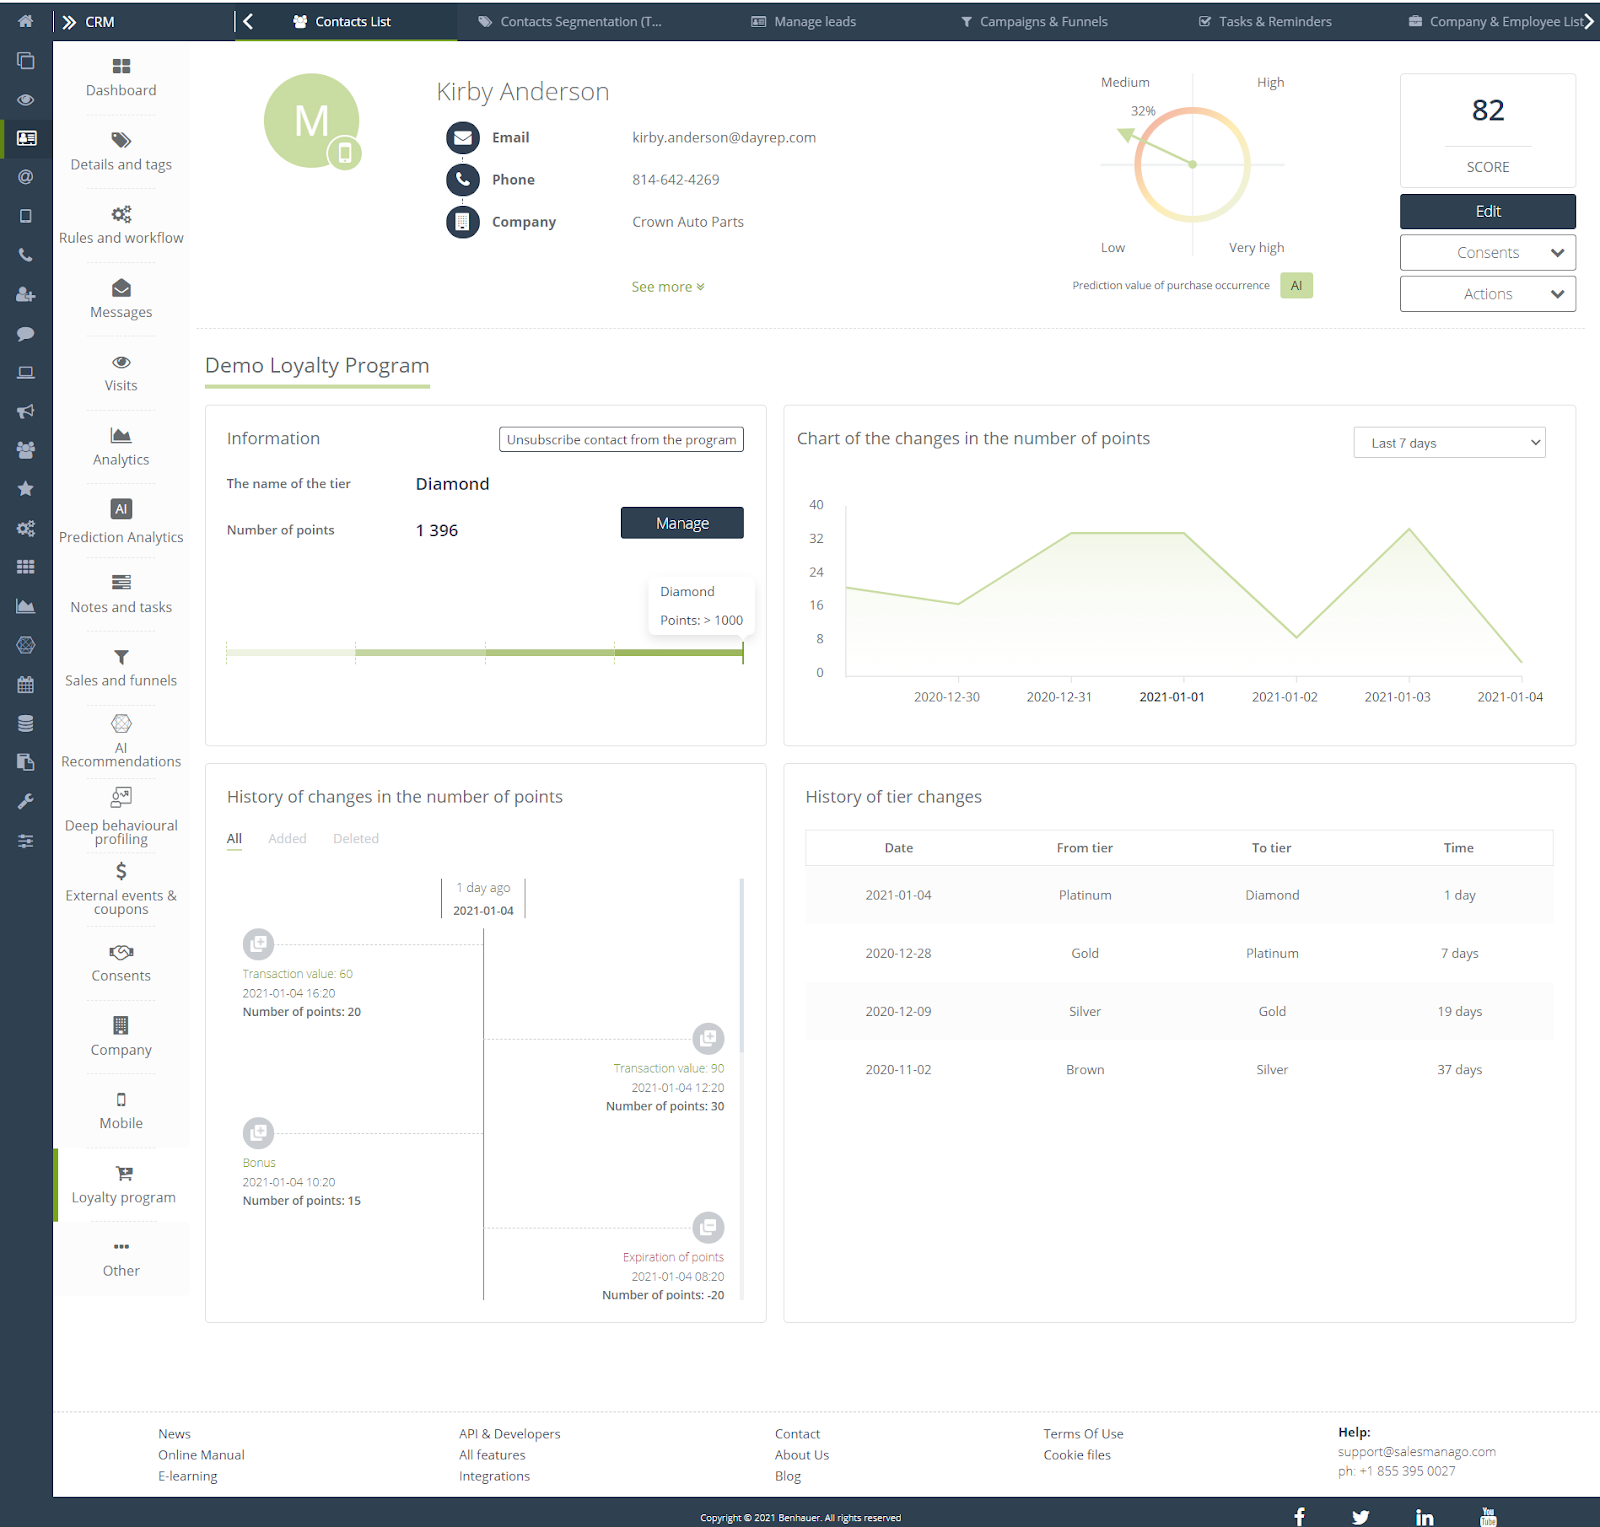
1. Information
The elements of Loyalty Program on the customer’s contact card provide us with several additional functions, thanks to which the use of the module is even simpler and more intuitive.
[1] Unsubscribe/Subscribe contact to the program – from the customer’s contact card, you can manually add them or remove them from the selected Loyalty Program.
IMPORTANT: A contact can only be in one eCommerce Loyalty Program at a time.
[2] The name of the tier – at this point, the tier of the contact is shown, on the lower section, it is graphically presented what path it has traveled to reach it and how many points it is missing to the next tier.
[3] Number of points – i.e. the total number of collected points by a given contact in a given Loyalty Program.
[4] Manage – this button will take you to the award and removal points window:

[A] Add/Remove points – you can manually add or remove additional loyalty points. Select which action on the contact you want to perform.
[B] Enter the number of points – specify the number of points for which you want to perform the selected action.
[C] Description – will be visible in the history of changes in the number of points on the contact card.
[D] Save – click to approve changes.
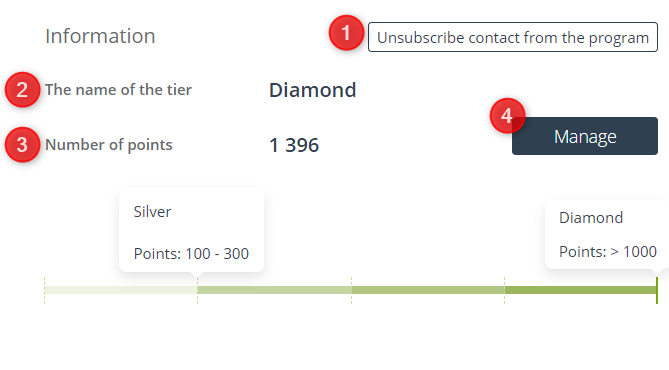
2. Chart of the changes in the number of points
The contact card also allows you to observe the changes of points over a selected period of time:
[1] Time period – select the time period for which the information in the tile will be displayed – the available options are: last 7 days, 30 days, current month, previous month, current quarter, previous quarter, current year, previous year, last 12 months.
[2] Points – at this point you can see the exact number of points that the contact had at a given time, on the time slot you can observe how his involvement and activation in the selected Loyalty Program decreased and increased.
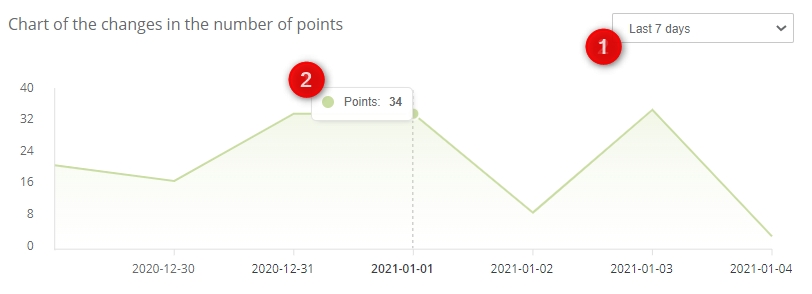
3. History of changes in the number of points
If you track changes in points, it is worth knowing their history, why the contact received bonus points, for which transaction they received points, or why they were removed from their point account.
[1] Event type – select the type of event for which you want to view the history of changes in the number of points:
- All – shows both the actions that made the contact gain new points and those that caused you a loss.
- Added – only concern getting additional points by contact.
- Deleted – only apply to points lost by contact.
[2] Date – the date on which the given data is displayed is shown on the chart here.
[3] Event – exact data for a given event, such as date, event name, number of points awarded, or deleted.
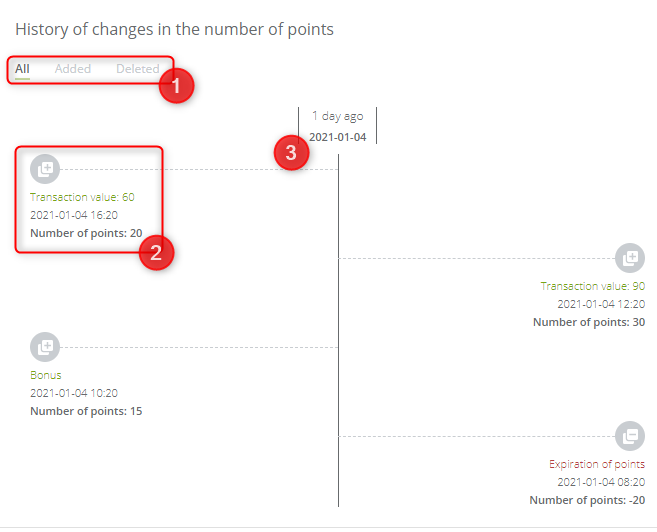
4. History of tier changes
It is also worth tracking changes in tiers by contacts to know how Loyalty Program activates a specific user.

[1] Date – the date on which the user changed tier is displayed here.
[2] From tier – from what tier the user has moved by losing or gaining new points.
[3] To tier – that is, to what tier the user has moved by losing or gaining new points.
[4] Time – specifies the number of days that the contact has been in tier from point [2] before reaching tier from point [3].