Both In-App and Mobile Push notifications are delivered through a mobile application. However, In-App notifications, displayed within your mobile app, offer much greater flexibility in terms of design and display options. SALESmanago provides a comprehensive, easy-to-use solution that allows you to create elaborate In-App notifications tailored to your needs. Read this article to learn how to use it.
Contents
1. Getting started
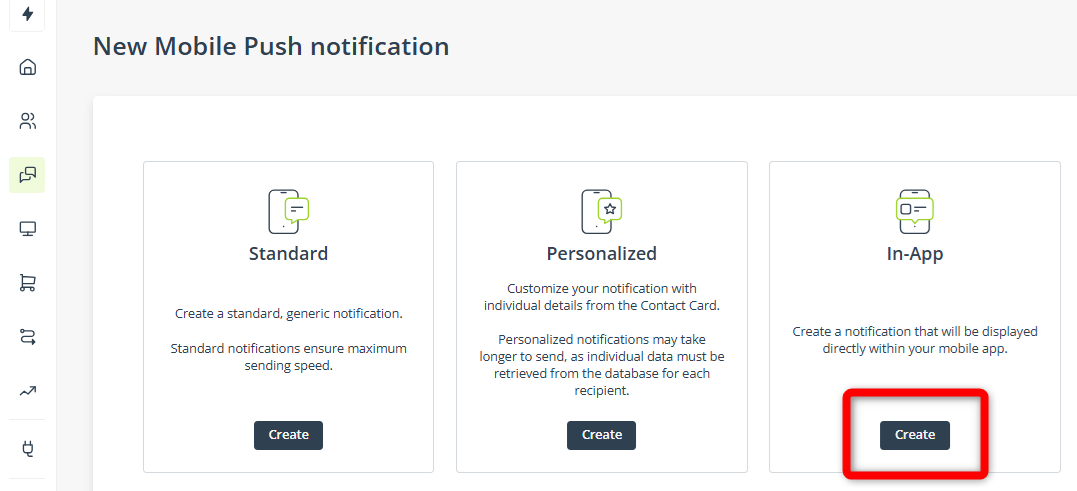
In-App notifications are a great way to engage users of your mobile application. To create a new In-App template in SALESmanago, go to Menu → Channels → Mobile Push → Templates. Click New notification and select the message type: In-App.
The In-App creator is a user-friendly drag & drop designer that enables you to easily create the layouts you need by customizing ready-made elements: sections and widgets. Read on to learn more about the creation process and the template’s settings.
NOTE:
- In-App notifications cannot be saved as drafts. To avoid losing your work, save it as a finished template and remember to complete it before sending.
- Remember that to create and send In-App notifications, you need to integrate your SALESmanago account with your Android and/or iOS account(s) and with your mobile application.
2. Sections and widgets
To create an In-App template, drag and drop sections and widgets into the design area.
A section can consist of one or more columns, allowing you to create elaborate layouts. After placing a section in the design area, click it to access its settings:
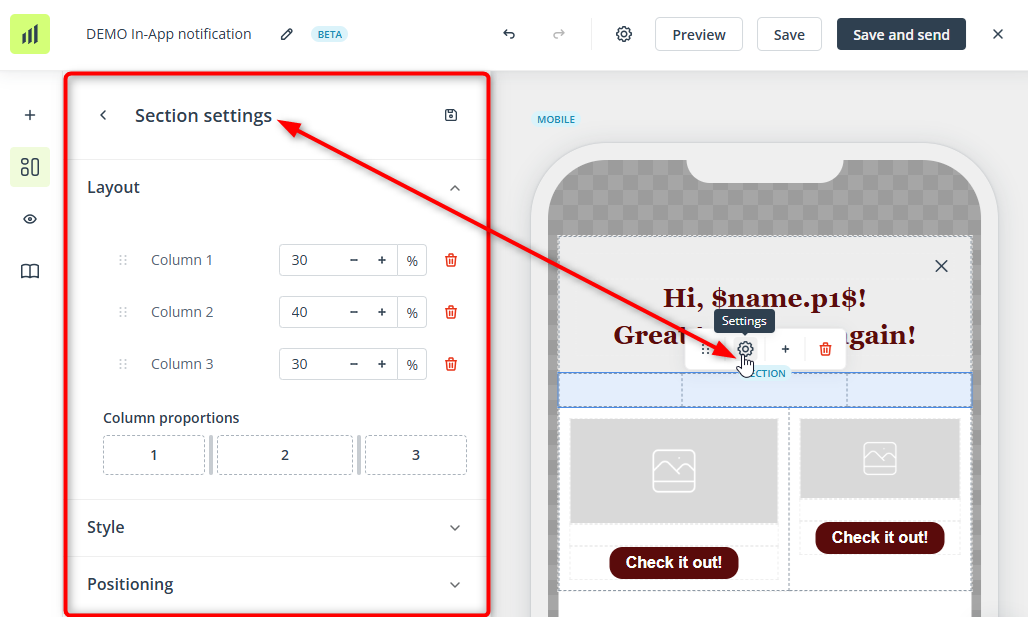
In the section settings, you can define the number of columns and their size, the background color, and the padding.
When you move your cursor over a section (or click it), a small menu appears above it. It includes the following options:
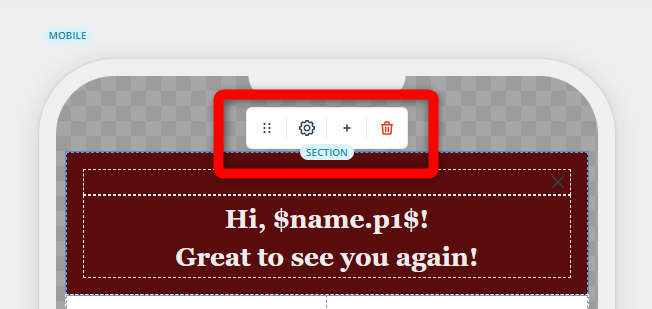
- Move—Change the arrangement of your sections within the template.
- Settings—Open the left-hand panel with section settings.
- Add column—Add another column. If you click this button, all columns in the section will be set to an equal size. To remove a column, access the section’s settings. Note that columns are numbered from left to right.
- Remove—Remove the section from the template.
Sections are containers for widgets. Widgets allow you to include specific types of content in your notification, such as text, images, or buttons. After placing a widget in a section (or, more precisely, in a section’s column), click it to open its settings in the left-hand panel.

In the widget settings, you can customize the widget’s content (for example, by selecting an image from the Gallery) and appearance, including colors, strokes (borders), corner rounding, and positioning.
When you move your cursor over a widget (or click it), a small menu appears below it. The menu includes the following options:
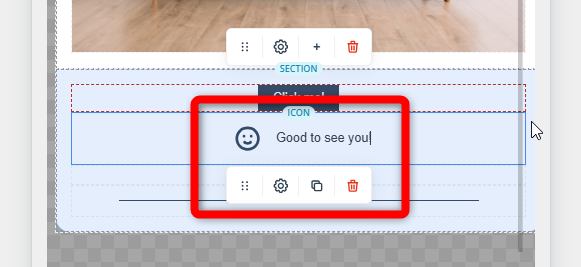
- Move—Change the arrangement of widgets within the template.
- Settings—Open the left-hand panel with the widget’s settings.
- Duplicate—Create an identical copy of the widget below the original.
- Remove—Remove the widget from the template.
3. Closing options
An In-App notification must include a close button. A close button is always present by default when you create a new template. However, you can also add it using the Button widget:
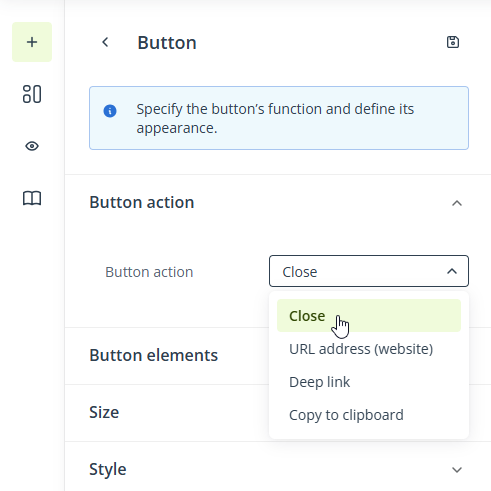
In the widget’s settings, select the button action: Close, just as shown in the screenshot above. Then, select an icon that will clearly indicate the button’s function to the user.
To enable additional closing options (tapping inside our outside the notification area), select Closing options from the main menu:
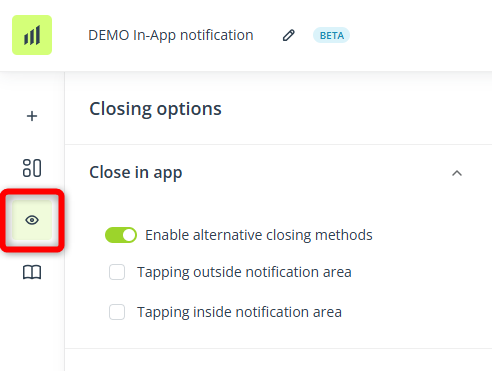
Turn the switch on and select the checkboxes next to the options you want to implement.
4. Library
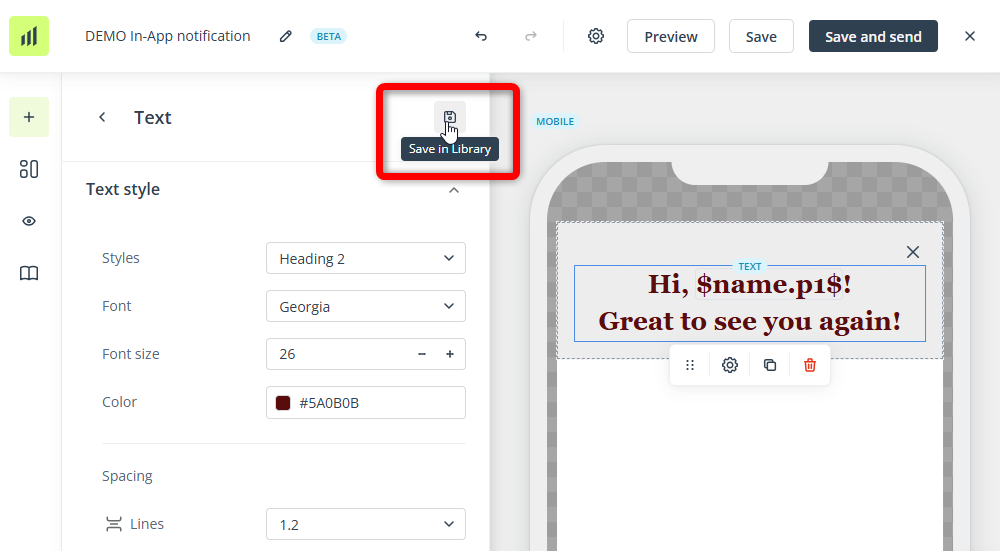
Just like in the Email Design Studio or the Web Engagement Studio, you can use the Library to store configured elements (sections and widgets) you expect to re-use in the future.
To save an element in the Library, click the element to open its settings in the left-hand panel. Then, click the dedicated icon:
To re-use a saved element, just drag and drop it into the design area.
IMPORTANT: If you modify a saved element after dragging it into the design area, these changes will not be reflected in the Library.
5. Settings
When the template content is ready, proceed to Settings (available under the gear icon in the top toolbar):
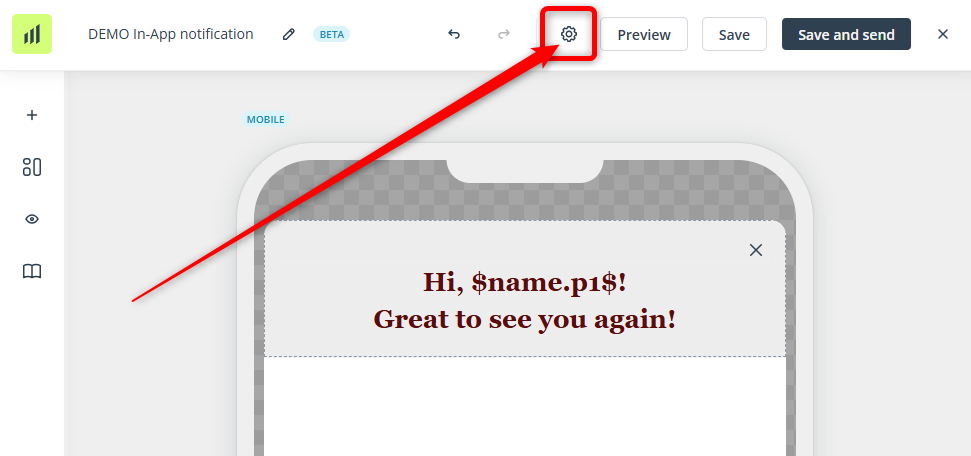
Here, you can edit the template’s name, select the FCM key and the APNs key you want to use to send this template, and define the tracking parameters that will be added to all links included in the In-App notification.