You can save Web Push notifications created in the SALESmanago Wizard for later use in two ways: as drafts and as templates. This is especially useful if you’re planning a campaign in advance and working to optimize your working time. Preparing ready-made notifications that you can easily edit and quickly send significantly speeds up the workflow, making it easier to plan marketing activities.
To open the drafts and templates list, go to
Web Push → Drafts and templates
Contents
- Basic information
- Template list
- Drafts
- Templates
1. Basic information
Notifications created in the Web Push Notification Wizard can be sent right away, scheduled, or saved as a draft or template.
A draft notification is a “rough” version that you won’t send yet; you can polish it at any time. You can’t use a draft in campaigns. For campaigns, you must complete and save them as a template.
Templates are ready-made messages that you can modify and send as you wish. You can also use them in automation rules and workflow processes.
2. Template list
The list of drafts and templates for Web Push notifications gives you quick access to premade creations. The list has many options for filtering and customizing the view. It also allows you to quickly jump to the available actions on a given notification.
The list has two tabs to separate drafts (which you need to complete before sending them) from templates (finished creations that you can send right away).
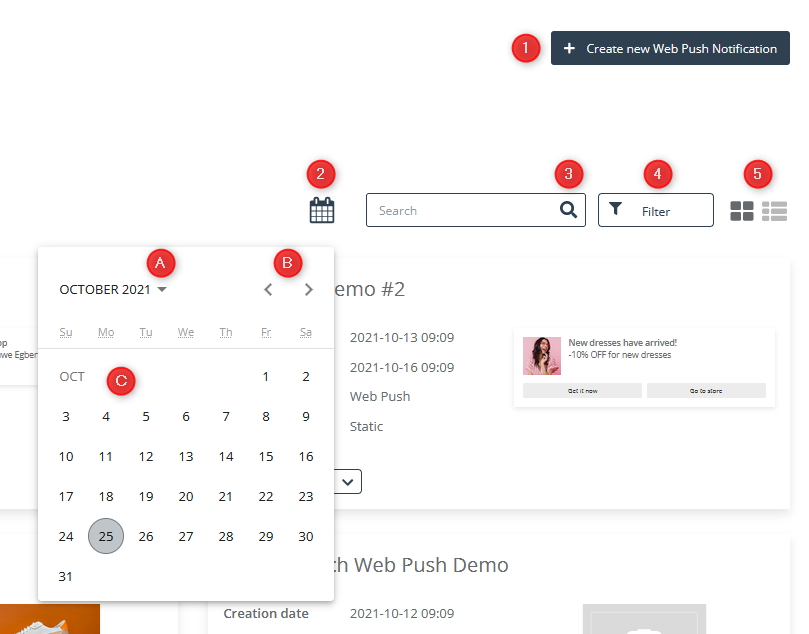
[1] Create a new Web Push notification – Smoothly navigate to the Web Push Notification Wizard.
Learn how to create a notification with the Web Push Notification Wizard >>
[1] Filter by date – Click the calendar icon to expand the calendar and select a date range.
[A] Year and month – Use the drop-down menu to quickly jump to the time you are interested in. Select the year first and then the month.
[B] Navigate between months – You can also use the arrows to find the date you want.
[C] Date range – Once you have found the starting date, click the appropriate date and then hover over the ending date and click this date. This will select the date range that will form the basis of this filter.
[3] Browsing – Makes it easy to quickly find a notification by typing in its name. To search for a notification, simply start by typing its name. After typing three characters, you will notice that the list starts to dynamically match the query.
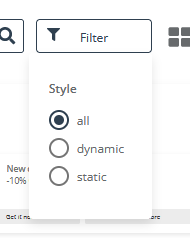
[4] Filtering – drop down menu offers you an option to filter the list to see either dynamic or static notifications. You can also mark the “all” box to see all of them.
[5] Changing the list view – Depending on your preference, you have the option to view the list of notifications as tiles or as a list. To change the view, select your preferred option.
Filtering can be modified at will.
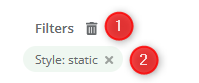
[1] Delete all filters – By clicking the trashcan icon, you can quickly delete all the filters you have entered.
[2] Delete filter – Filters can also be deleted individually. If you want to remove a single filter from the list, click the “x” in the box next to the filter name.
3. Drafts
On the drafts list, you can easily see basic information [1] about each notification draft. You can check the date of its creation and last modification, the notification type and its style, and see a preview [2]. You also can use an Action button [3] on the notification tile.
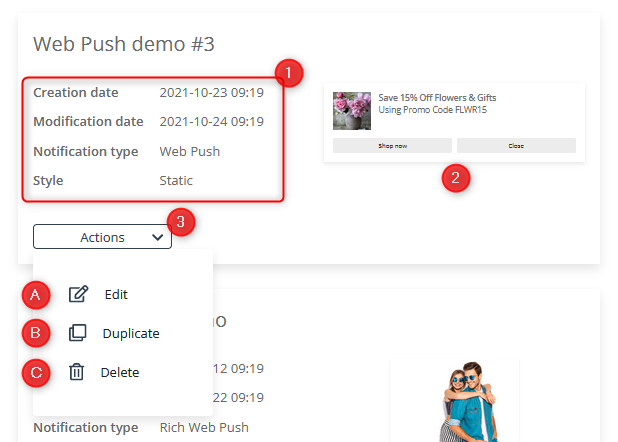
[A] Edit – Redirects you to the Web Push Notification Wizard, where you can start working on the notification.
[B] Duplicate – Creates an identical copy of the selected notification. You can find the copy on the drafts list.
[C] Delete – Permanently deletes the notification draft.
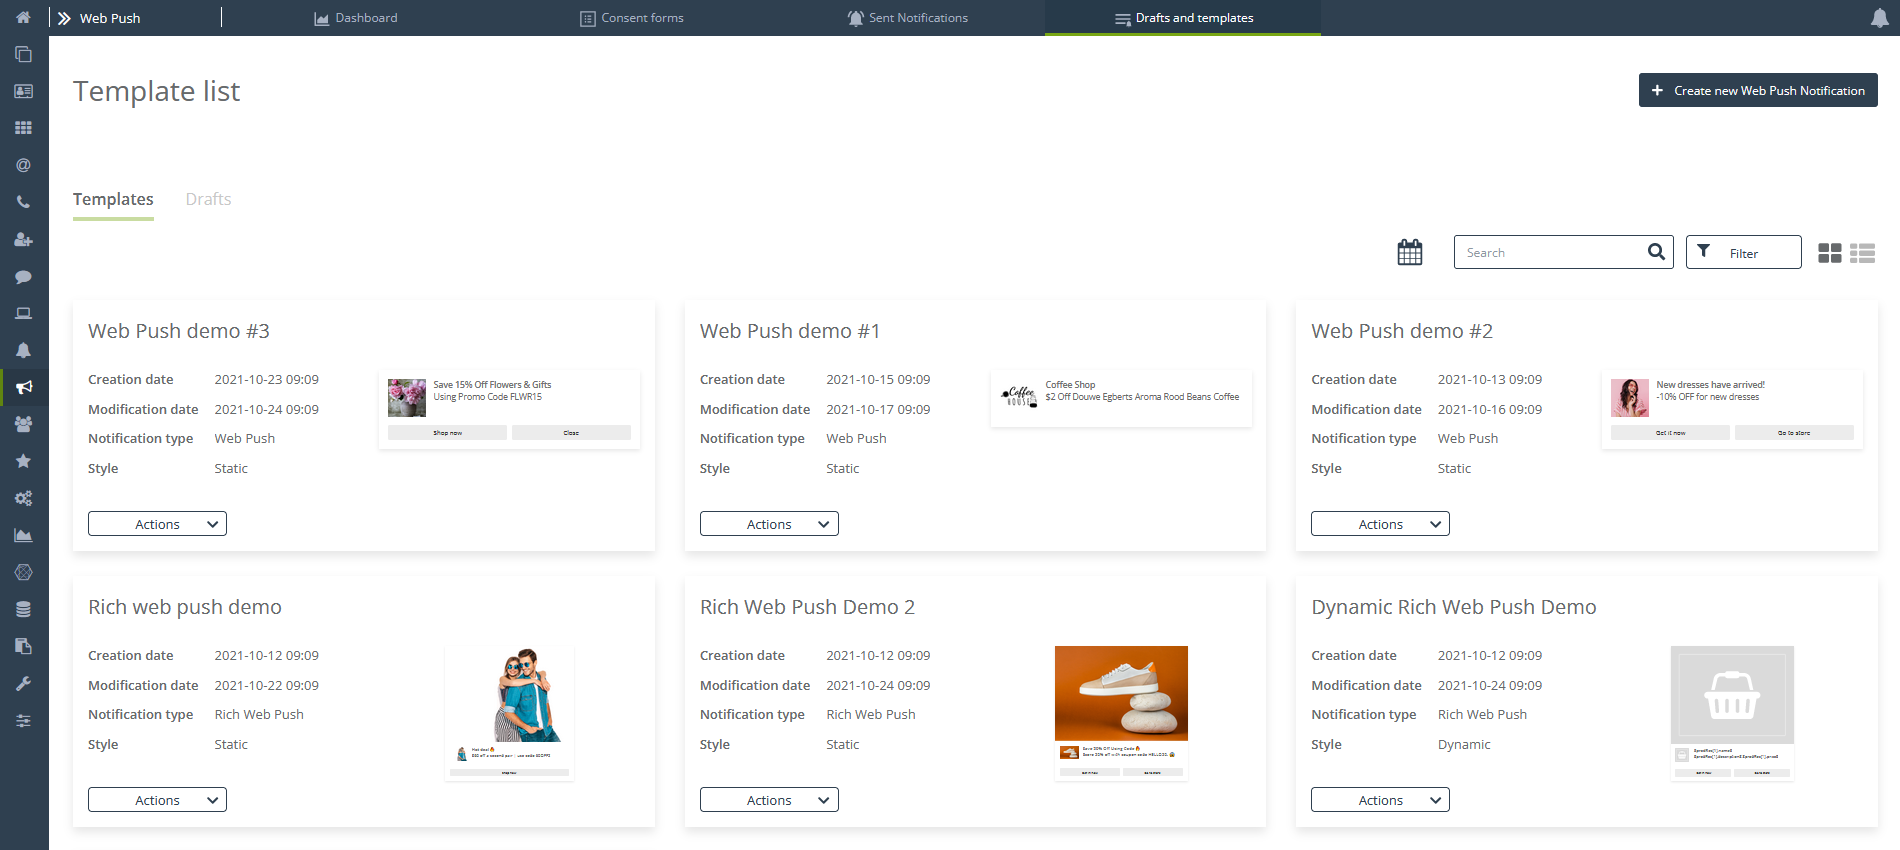
4. Templates
On the templates list, you can easily see basic information [1] about each notification draft. You can check the date of its creation and last modification, the notification type and its style, and see a preview [2]. You also can use an Action button [3] on the notification tile.
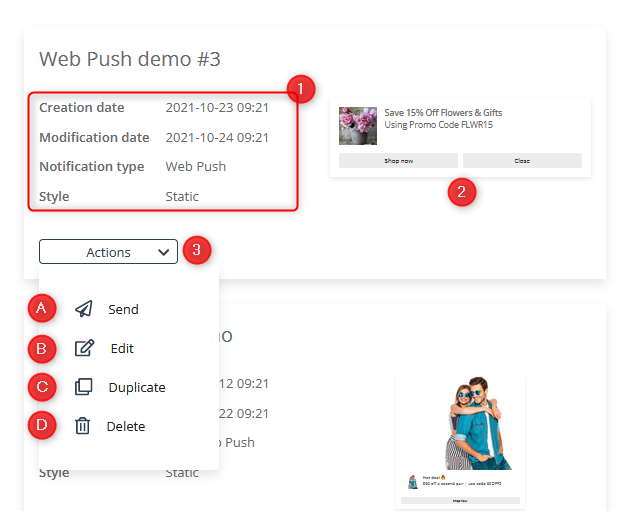
[A] Send – Redirects you to the Web Push Notification Wizard to the Send step, where you can specify the recipient group and send or schedule the notification.
[B] Edit – Redirects you to the Web Push Notification Wizard, where you can start working on the notification.
[C] Duplicate – Creates an identical copy of the selected notification. You can find the copy on the templates list.
[D] Delete – Permanently deletes the notification template.