


MS Dynamics 365 is one of the most popular CRM systems. Thanks to two-way integration, SALESmanago users can easily synchronize contact details of their existing customers and their marketing consents, between both of those systems.
To configure the plugin with the SALESmanago system, open the Dynamics 365 website and then go to Settings → Advanced Settings
Contents
- Scope of integration
- Starting system configuration
- Creating a web resource for saving access data to SALESmanago
- Creating an entity – Integration with SALESmanago
- Adding fields for the Integration with SALESmanago entity
- Form customization for entities. Integration with SALESmanago
- Adding consent fields for a contact
- Publishing of Dynamics changes
- Plugin registration
- Adding a single entity instance. SALESmanago integration
- Added button for downloading basic contact data with SALESmanago
- Adding a button for downloading information about consents with SALESmanago
- Adding a button for exporting contacts to SALESmanago
1. Scope of integration
Integration works in both ways – SALESmanago to MS Dynamics, as well as MS Dynamics to SALESmanago. If your data requires a specific transfer it’s described below, but most of the synchronization is done automatically.
IMPORTANT: The integration consists of sending contacts from MS Dynamics to SALESmanago. However, it does not send contacts that are in SALESmanago to MS Dynamics. All changes to the contact information that is in MS Dynamics and SALESmanago, are sent in two directions. This means that introducing changes to contacts in MS Dynamics will send these changes to SALESmanago and similarly, introducing changes to contacts in SALESmanago, which are also in MS Dynamics, will send these changes to MS Dynamics.
Scope of integration:
- Synchronizing MS Dynamics contacts to SALESmanago system
- name and surname
- email address
- phone number
- street
- city
- postal code
- country
- fax
- date of birth
- Synchronizing marketing consents
- newsletter subscription status
- subscription status for receiving SMS messages
To correctly configure the integration, go through all 12 steps without skipping any of them.
IMPORTANT: Integration will work with versions from MS Dynamics 365 CRM 2015 upwards.
2. Starting system configuration
The first step of correct integration with MS Dynamics is starting the system configuration. Log in to your account on the platform and follow the setup steps below:

[1] Expand the Settings panel, and then select [2] Customizations from the displayed list.

To create, modify, or delete components within your organization, select the [3] Customize the System panel. Components include entities, fields, relations, forms, reports, processes, and more.
3. Creation of a web resource for saving access data to SALESmanago
Step 2, creating a web resource for saving access data to SALESmanago requires going to Web Resources:
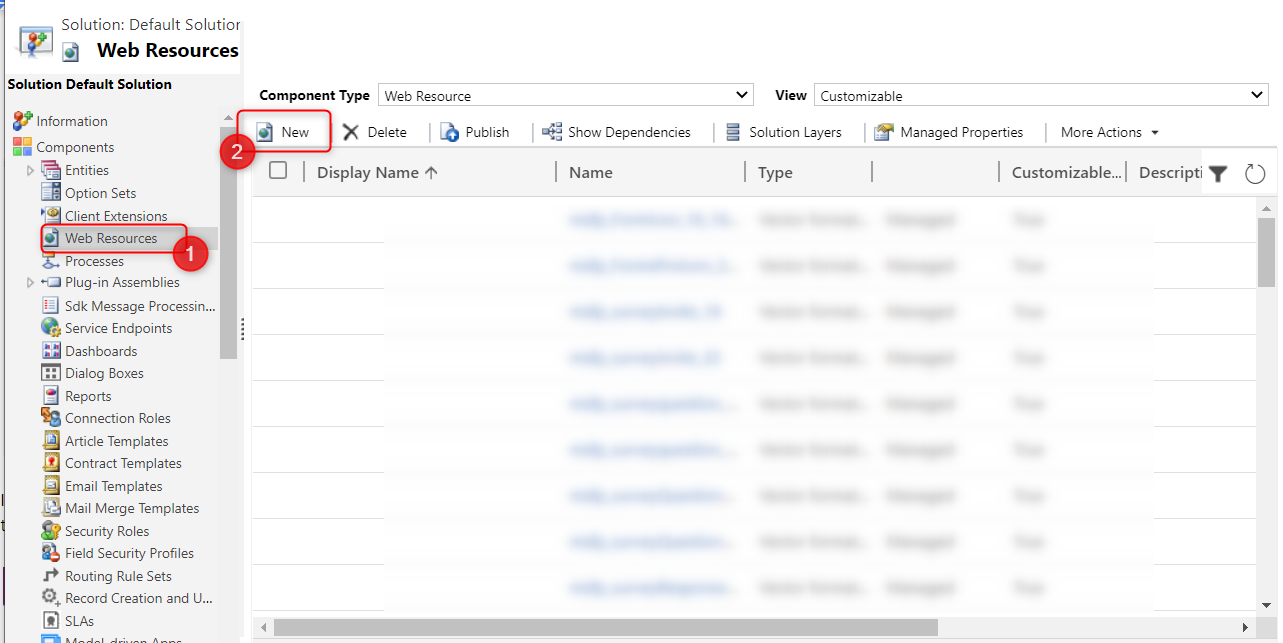
In the window that appears, select [1] Web Resources from the drop-down list and then click the [2] New.

In the new window, specify the Name and Type of the file – here, select the provided HTML file, ie Webpage (HTML).
It is not required to set the display name, description, language. If you want, you can enable support on mobile devices. Finally, click the “Save” button.
4. Creating an entity – Integration with SALESmanago
To create an entity, go back to the Customize system panel.
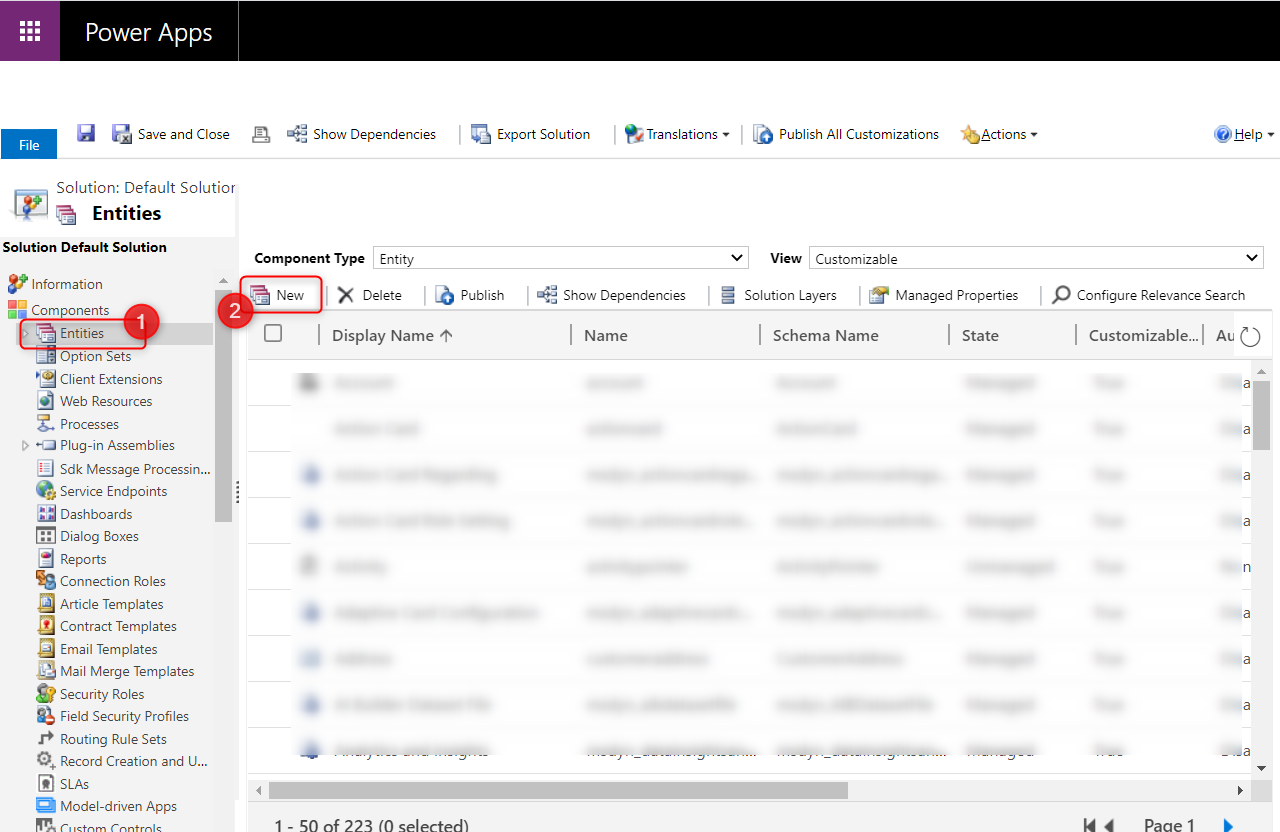
In the window that appears, select [1] Entities from the drop-down list and then click the [2] New icon.
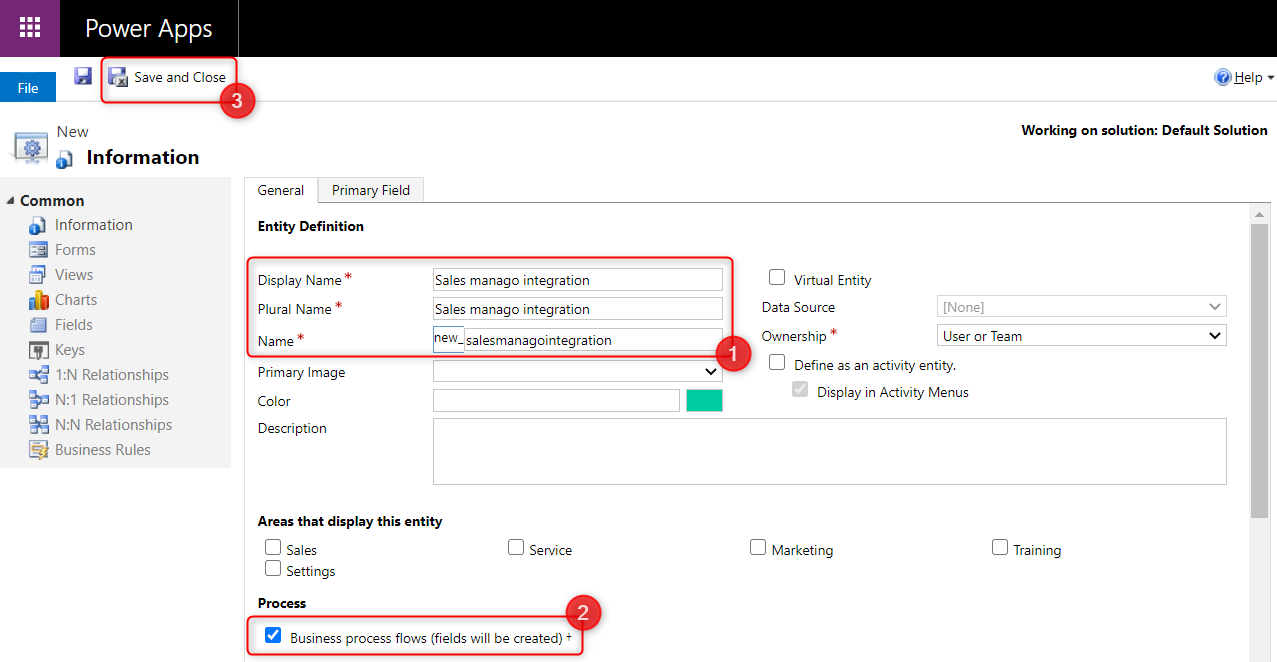
In the new window, specify [1] Display name, Plural Name and Name.
It is not required to fill in the other settings.
Then be sure to select [2] Business process flows (the fields will be created) – this is a required field.
Finally, click on the “Save & Close” button.
IMPORTANT: It is vital to enter the correct name: salesmanagointegration (the prefix new_ will be added in the front) and check the option to run for business processes. Setting of the areas where the entity is to appear can be done according to your needs.
5. Adding fields for the Integration with SALESmanago entity
Expand the Components => Entities panel, then find [1] SALESmanago Integration.
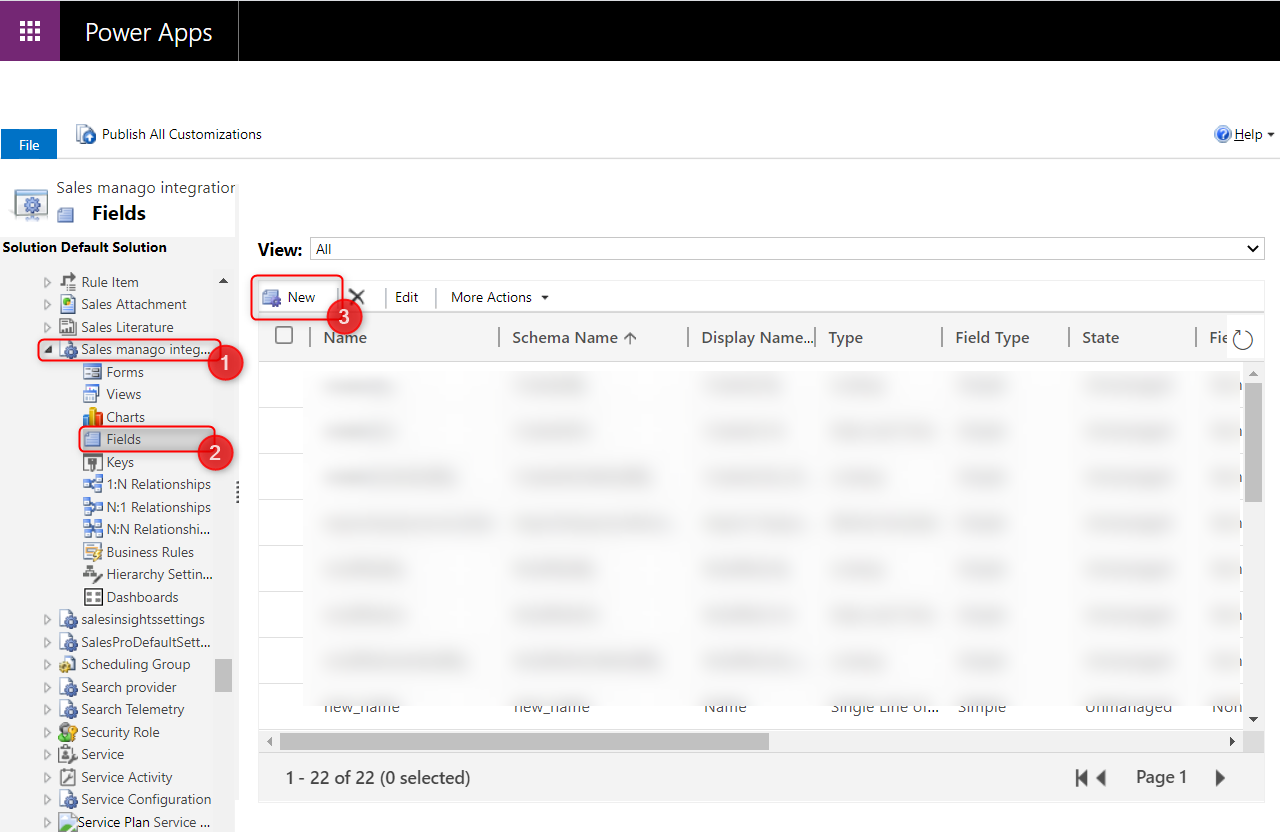
Select the [2] Fields tab and click the [3] New.
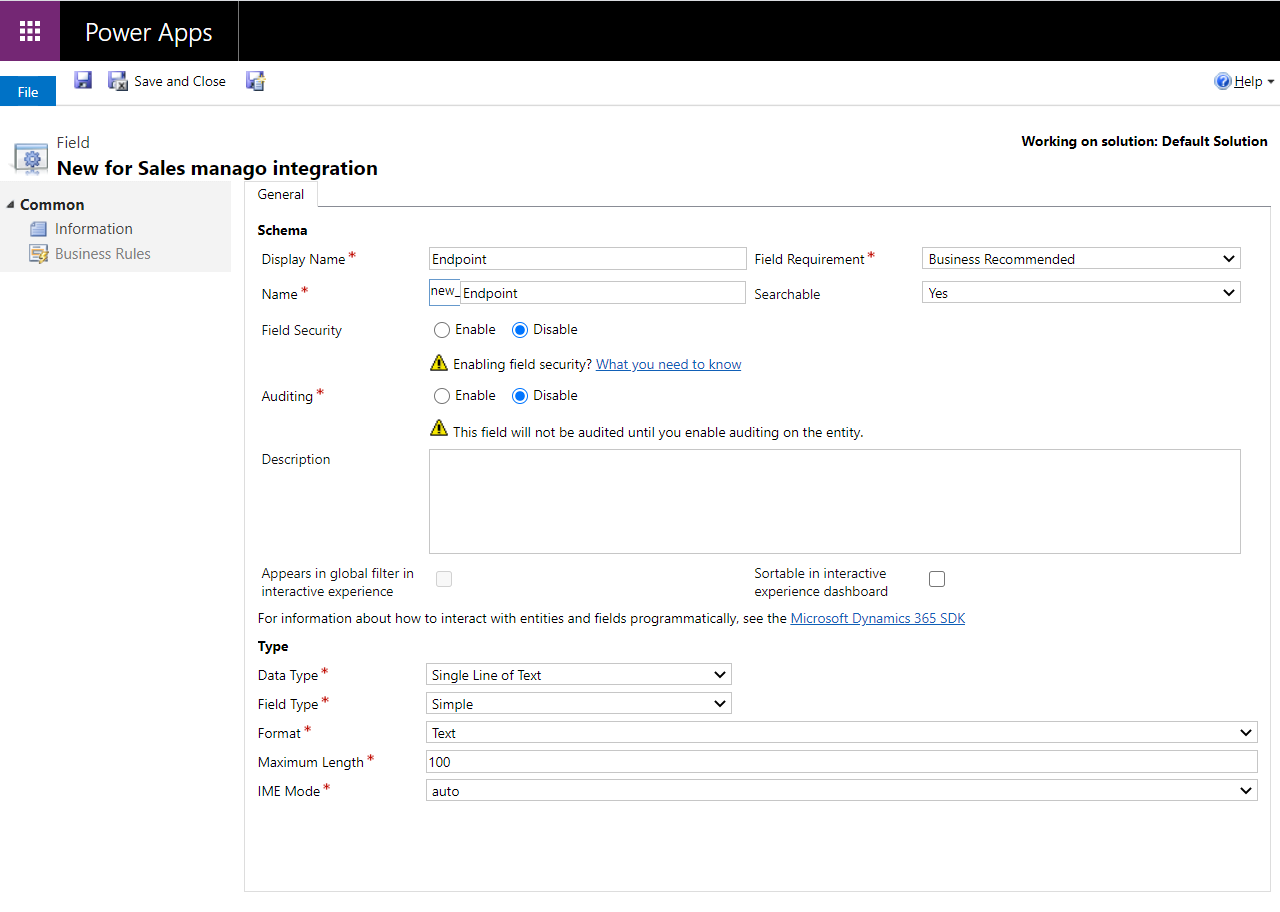
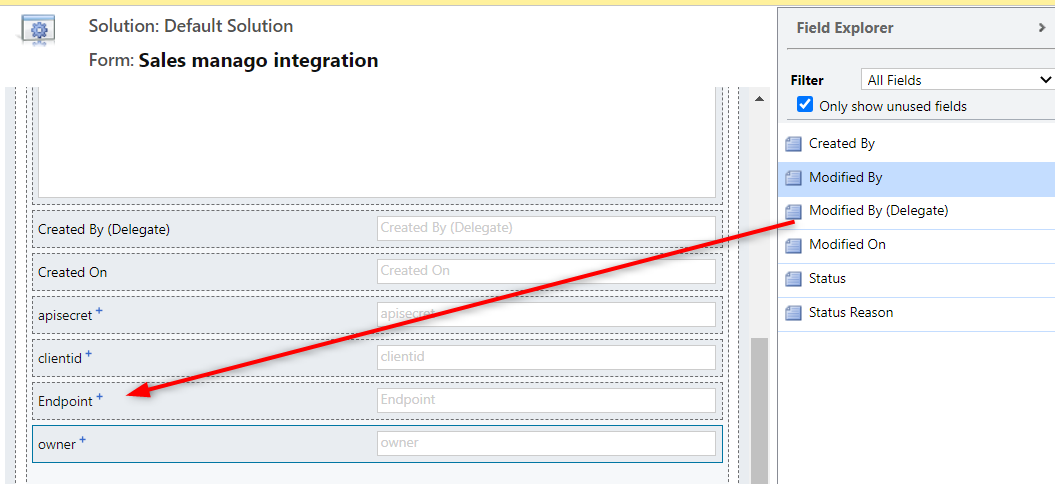
4 new fields should be added (new_ prefix is added automatically):
- new_apisecret
- new_clientid
- new_owner
- new_endpoint
It is important that the field names are correct. The screenshot shows only an example for the new_endpoint field, the rest should be done analogously:
When finished, the following fields should be available after entering the “Fields” window:

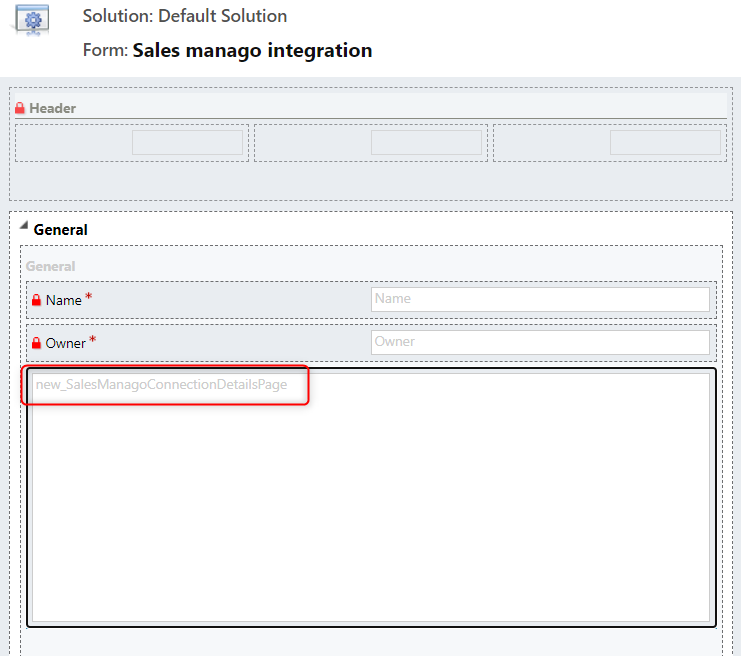
6. Form customization for entities. Integration with SALESmanago
Step 5 of the configuration consists of adjusting the created form for the previously created entity:
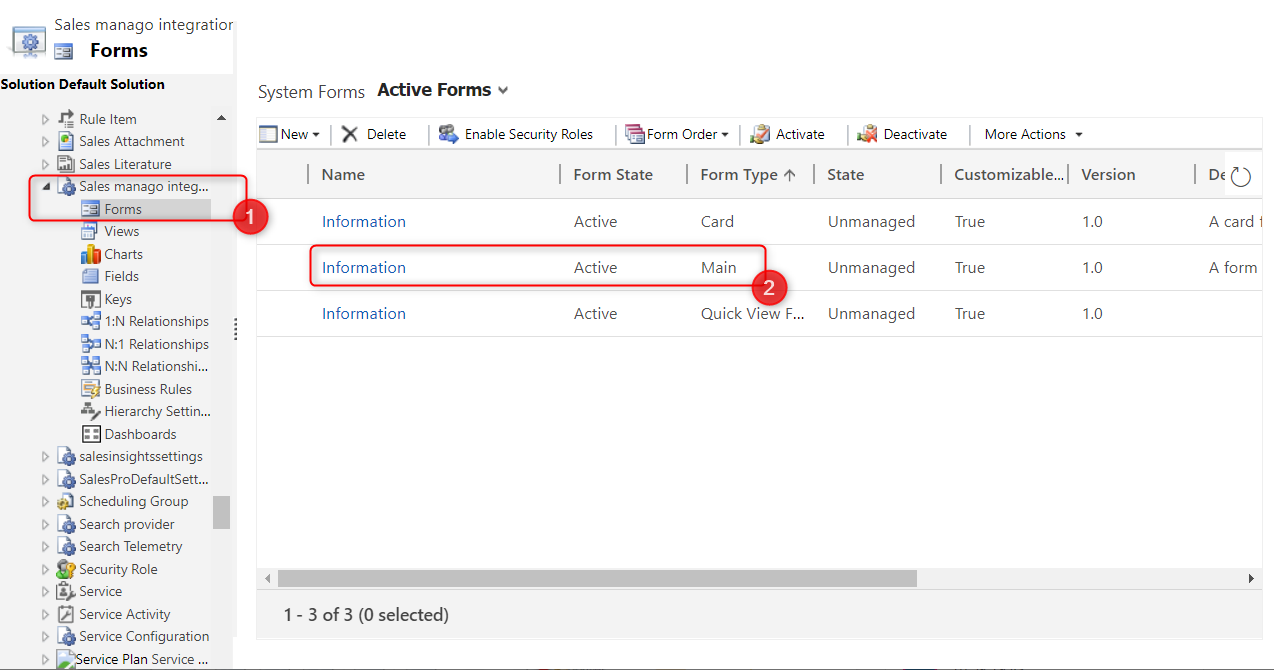
In the list of Entities, select Integration with SALESmanago, and then select [1] Forms. Click [2] the form that is marked as main in the type.
IMPORTANT: The following steps should not be performed if the Hidden Access database functionality is not required.

Go to the INSERT tab and then click Web Resource.
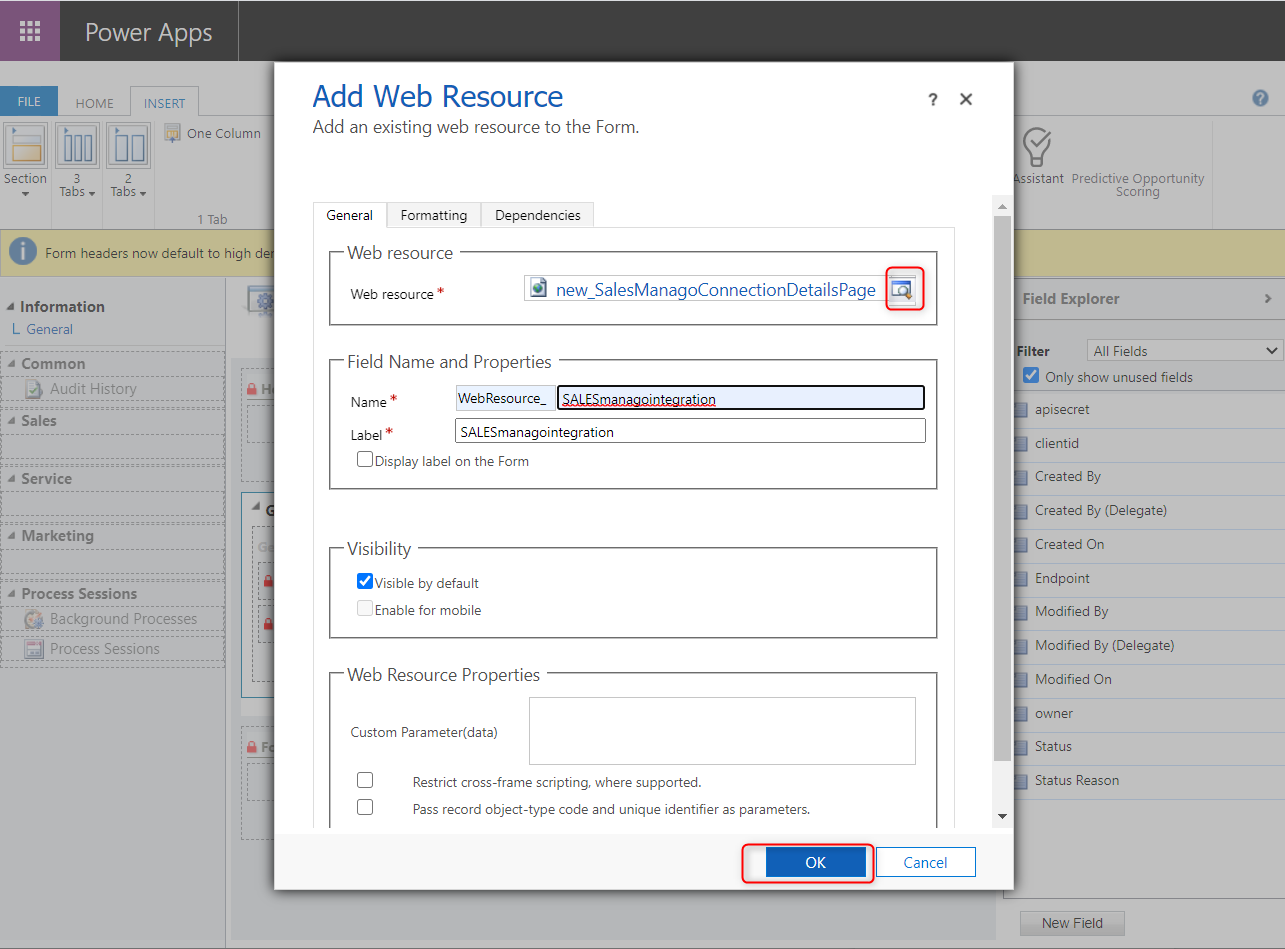
Find the previously added web resource. Click OK to save your changes.
It should appear on the form as follows:
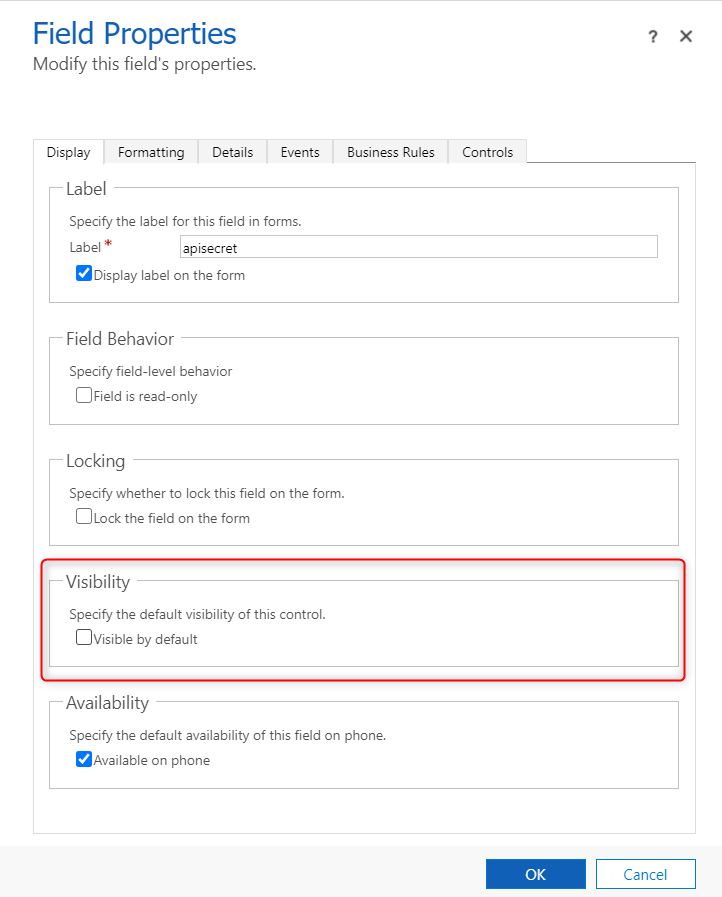
The fields should be added regardless of the configuration used (with and without Hidden Access database). Even when using web resource, the fields must be on the form so that data for these fields can be saved (in this case the fields will be hidden).
In order to use the web resource instead of the fields, simply hide them. If you don’t use web resource, skip this step. Double-click on an element to view its settings:
7. Adding consent fields for a contact
Step 6 is to set up new consent fields for contacts. The following suggestions are only examples, you can add any consent to the system:

For each consent defined in SALESmanago, a corresponding logical field must be created on the side of MS Dynamics. A naming convention is required: new_consent_name of the consent of SM. Below is an example for a test consent INTEGRATION.
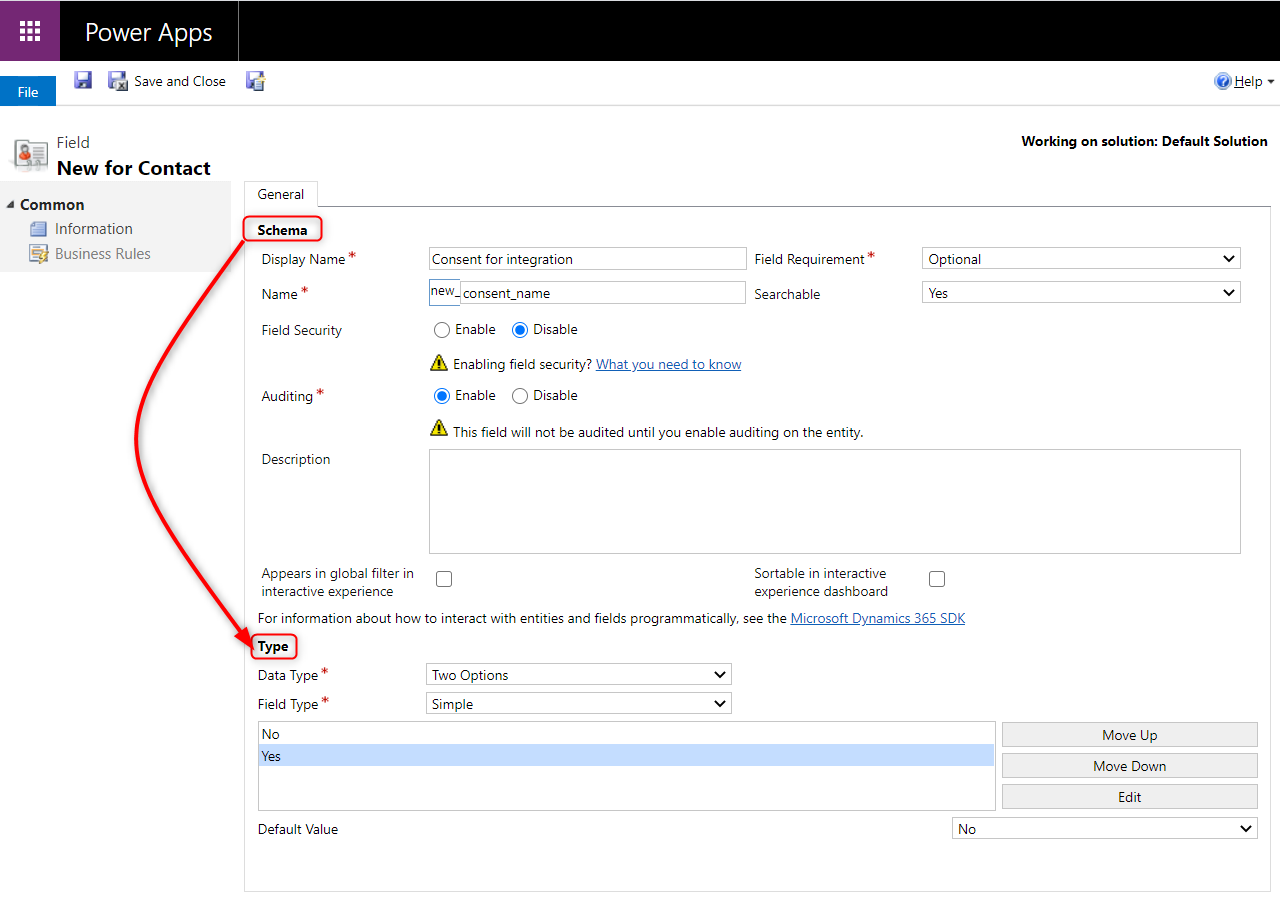
Fill in the fields according to the formula above and click Save and Close.
8. Publishing of Dynamics changes
To enlist changes from SALESmanago to an integrated account in MS Dynamics, go to the Entities:
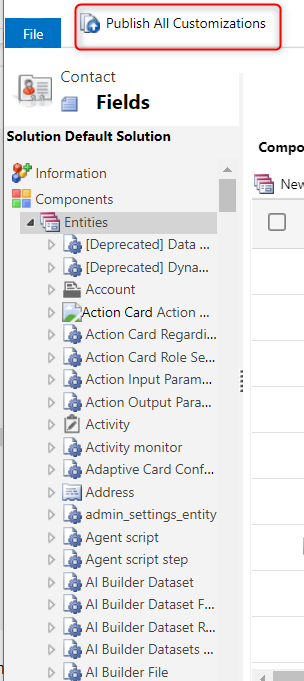
To save and publish all changes in MS Dynamics go to Entities => SALESmanago Integration => Forms, at the top of the page click the Publish All Customizations button.
9. Plugin registration
To register a plug-in, download the plug-in registration tool (https://xrm.tools/SDK). Then run PluginRegistration.exe (.. \ sdk \ PluginRegistration \ PluginRegistration.exe) and establish a new connection to CRM Dynamics.

Log in using your Microsoft Dynamics data, and then click + CREATE NEW CONNECTION.
The next step is to register the uploaded dll file:

Click on “Register New Assembly”.
The following window will appear:
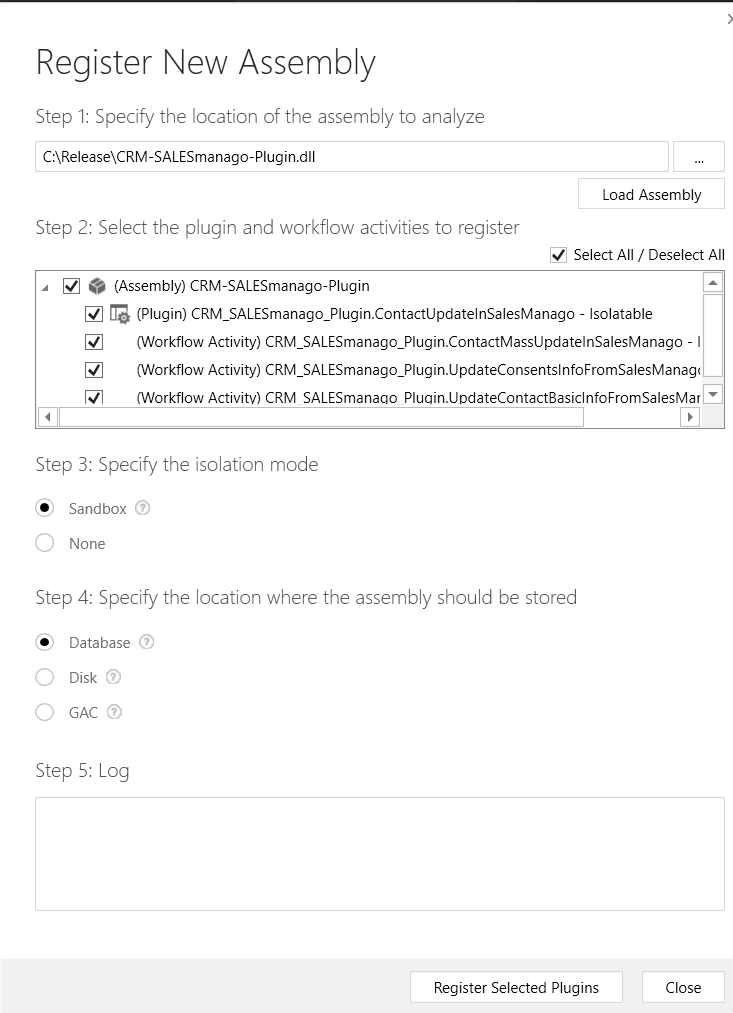
In the window, select the plug-in downloaded from the link below:
If the registration of the plugin was successful, the following window should appear:

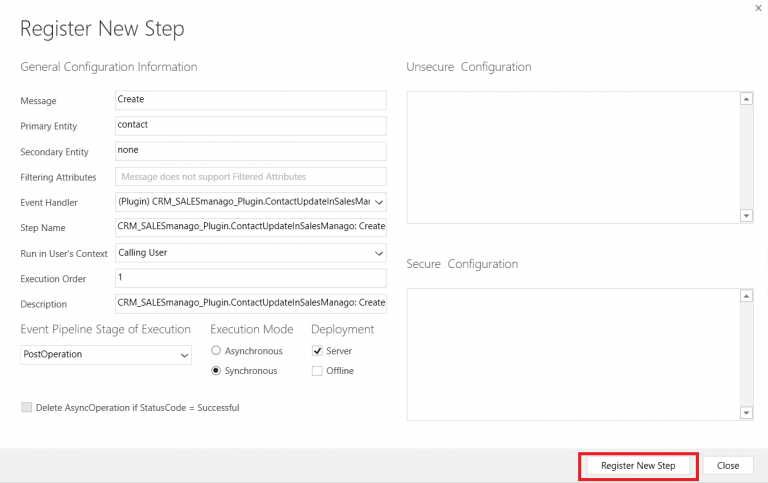
After approval, go to Register => Register New Step or select the ContactUpdateInSalesManago plugin, right-click and select “Register new step” to register three new steps one by one: create, update and delete, as shown in the pictures below:
[A] Create
[B] Update
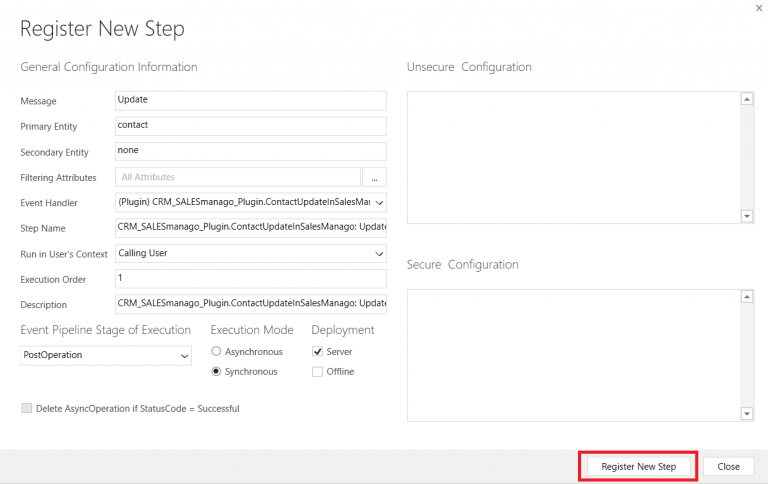
IMPORTANT: On the picture above the Filtering Attributes: All attributes option is selected. However, it is strongly recommended to limit the number of filters that trigger an action only to those that are actually synchronized to SALESmanago. Otherwise, unnecessary API calls may occur.
[C] Delete

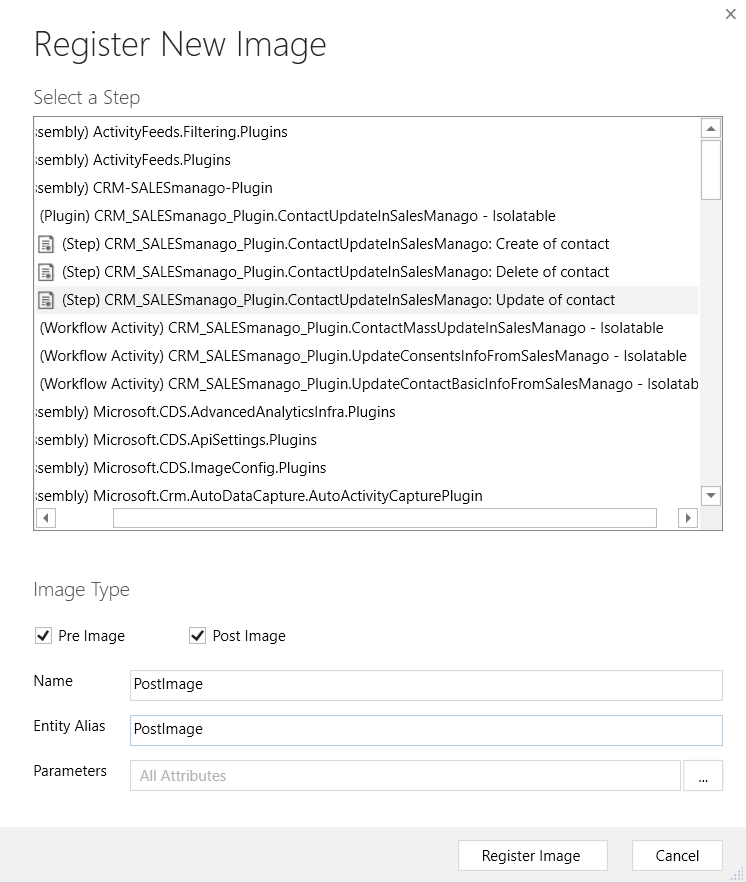
Right click on the added “Update of contact” step and select “Register New Image”. It is important that the names and selected options are the same, as in the photo below:
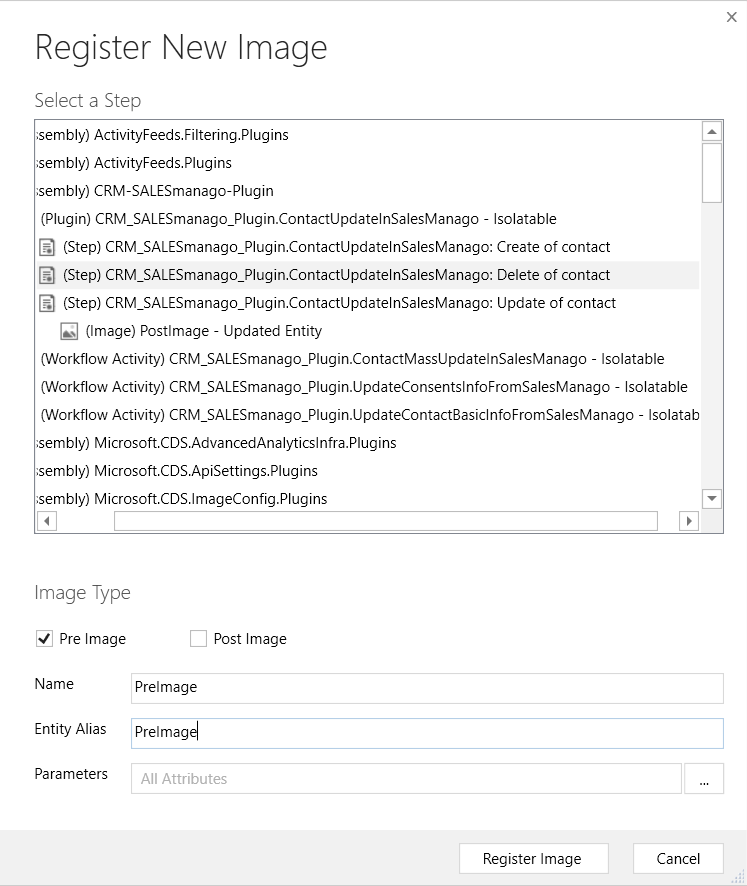
Right click on the added step “Delete of contact” and select “Register New Image”. It is important that the names and selected options are the same, as in the photo below:
10. Adding a single entity instance. SALESmanago integration
One of the last steps is to add a single instance to the entity you created earlier:
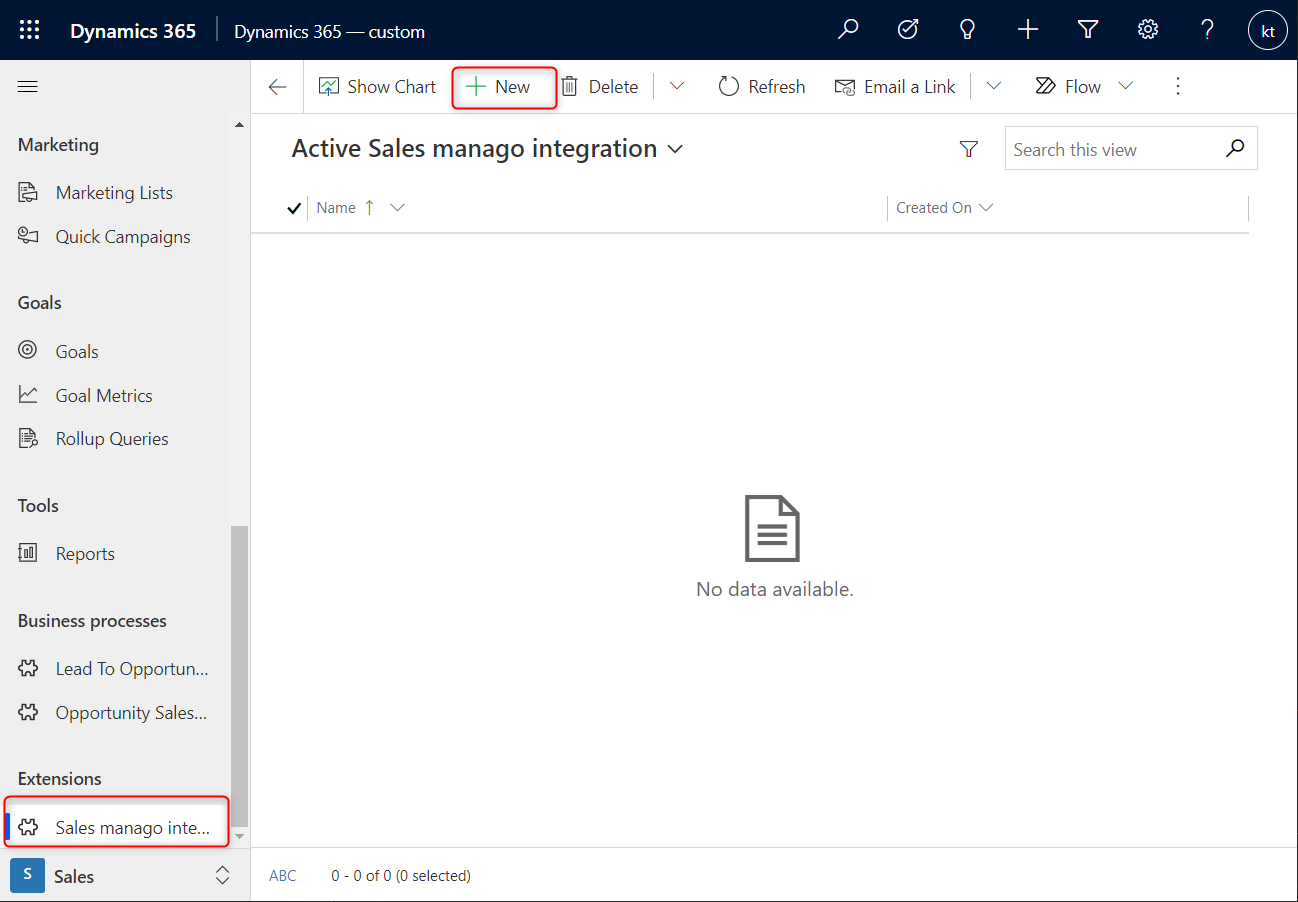
Go to the previously added SALESmanago Integration extension, and then click “+ New”. The following window will appear:
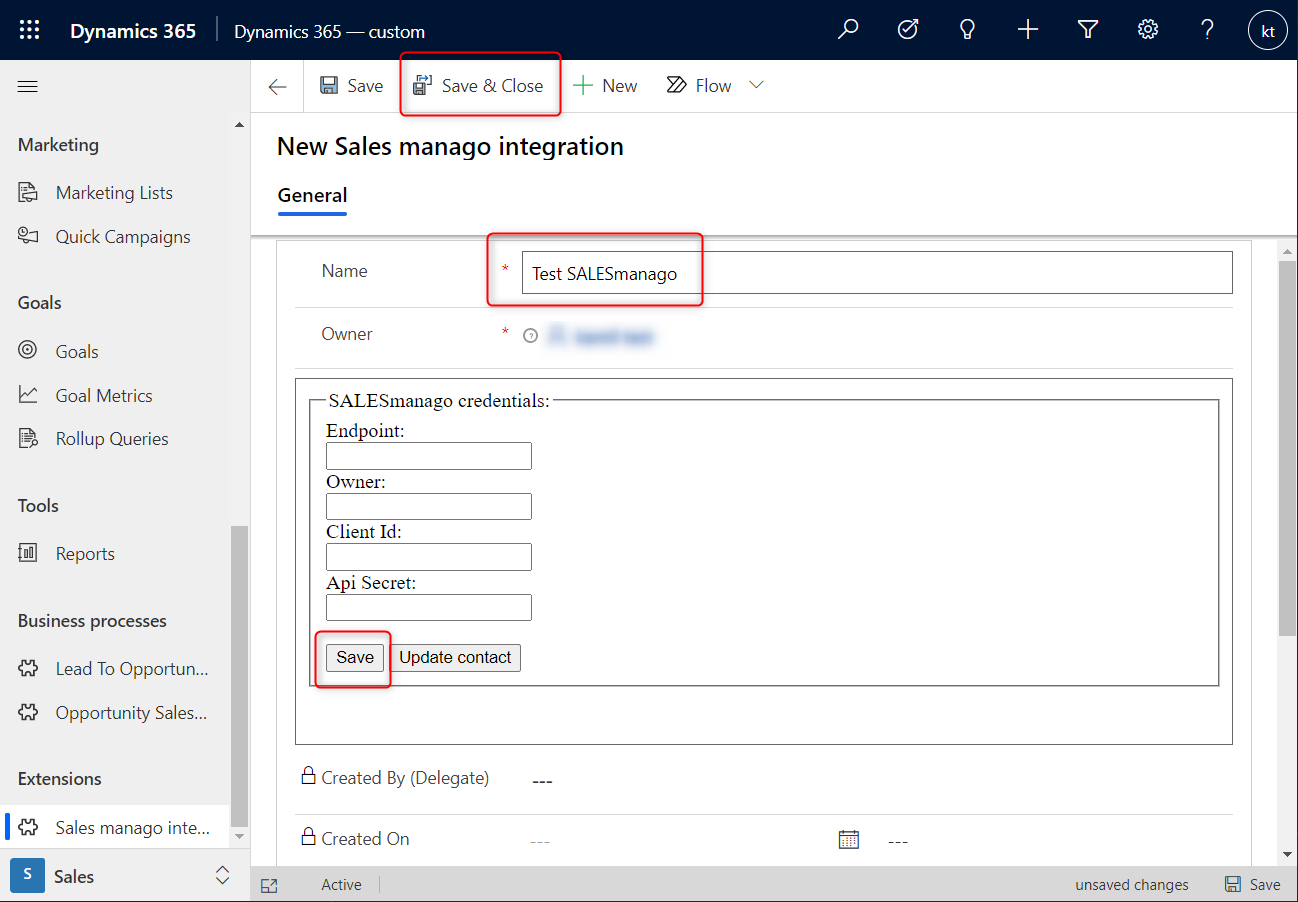
Fill in the required fields and click the “Save” button.
IMPORTANT: If a web resource is used, the data will not be visible after re-entering entity details. However, they are saved there.
11. Adding a button for downloading basic contact data with SALESmanago
Go to Advanced Settings, pull down the Settings panel, and then select “Processes” in the Process Center list.
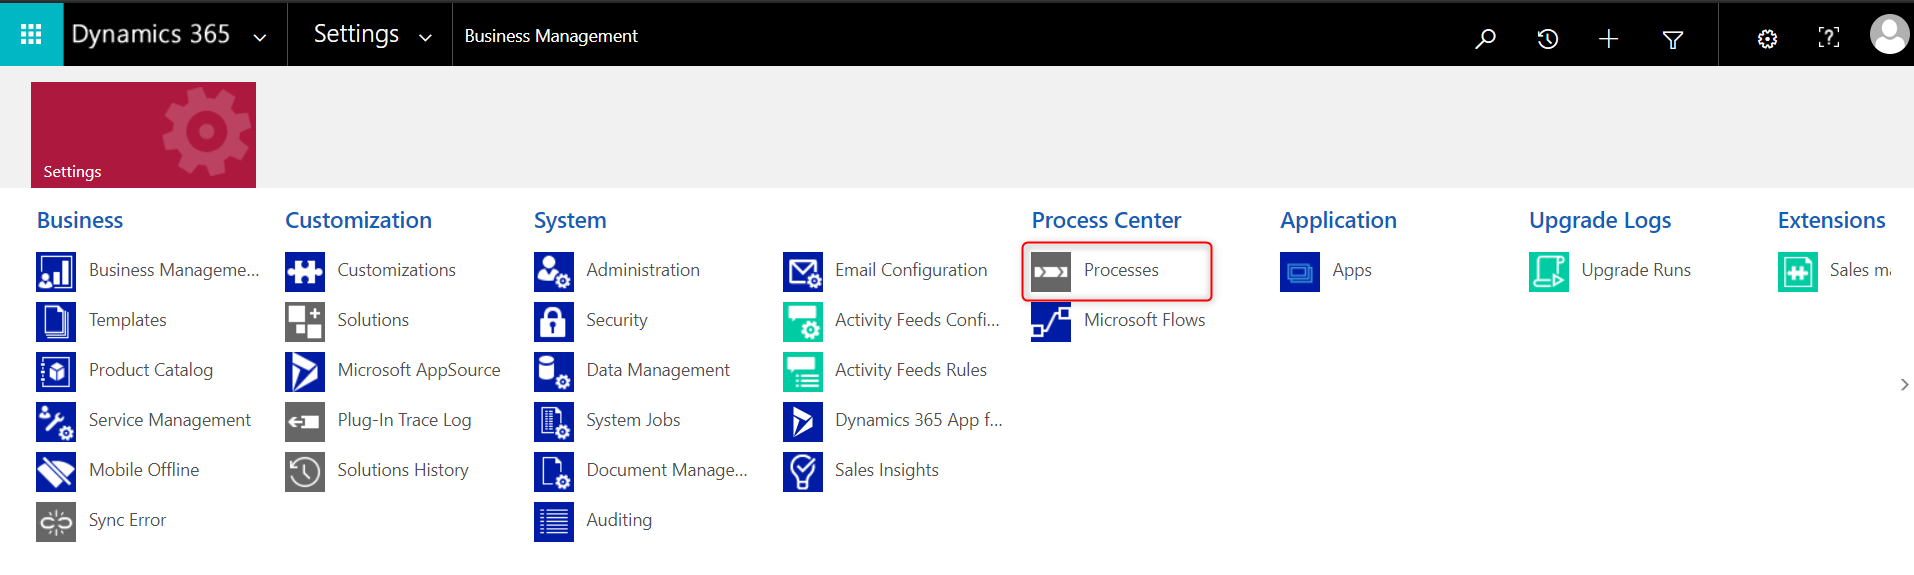 The following window will appear, select “+ NEW” from the top menu:

Complete the data according to the scheme below:
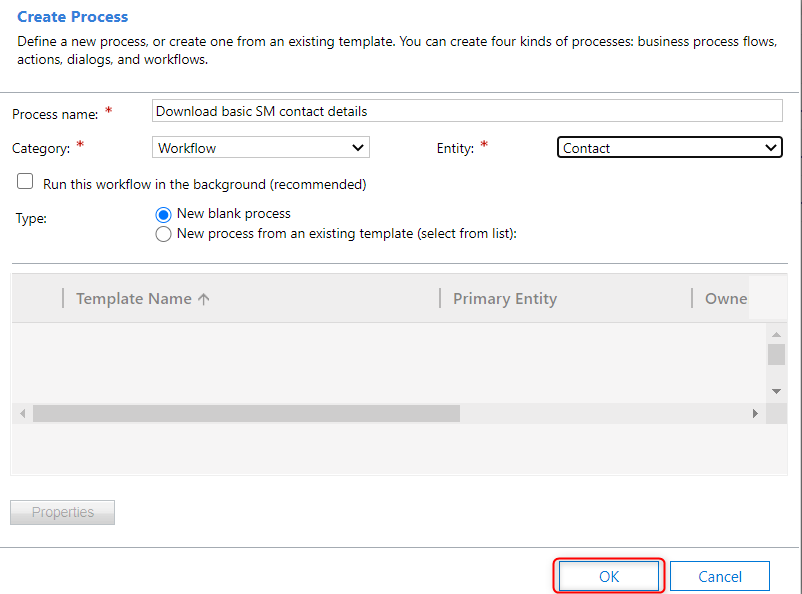
IMPORTANT: Since in this case the action is performed on a single contact, you can uncheck the “Run this workflow in the background” option to see the action result immediately.
After clicking “OK”, the following window will pop up:

All settings should be selected as in the picture above.
By setting the “As on-demand process” option, we create a button that triggers the action.
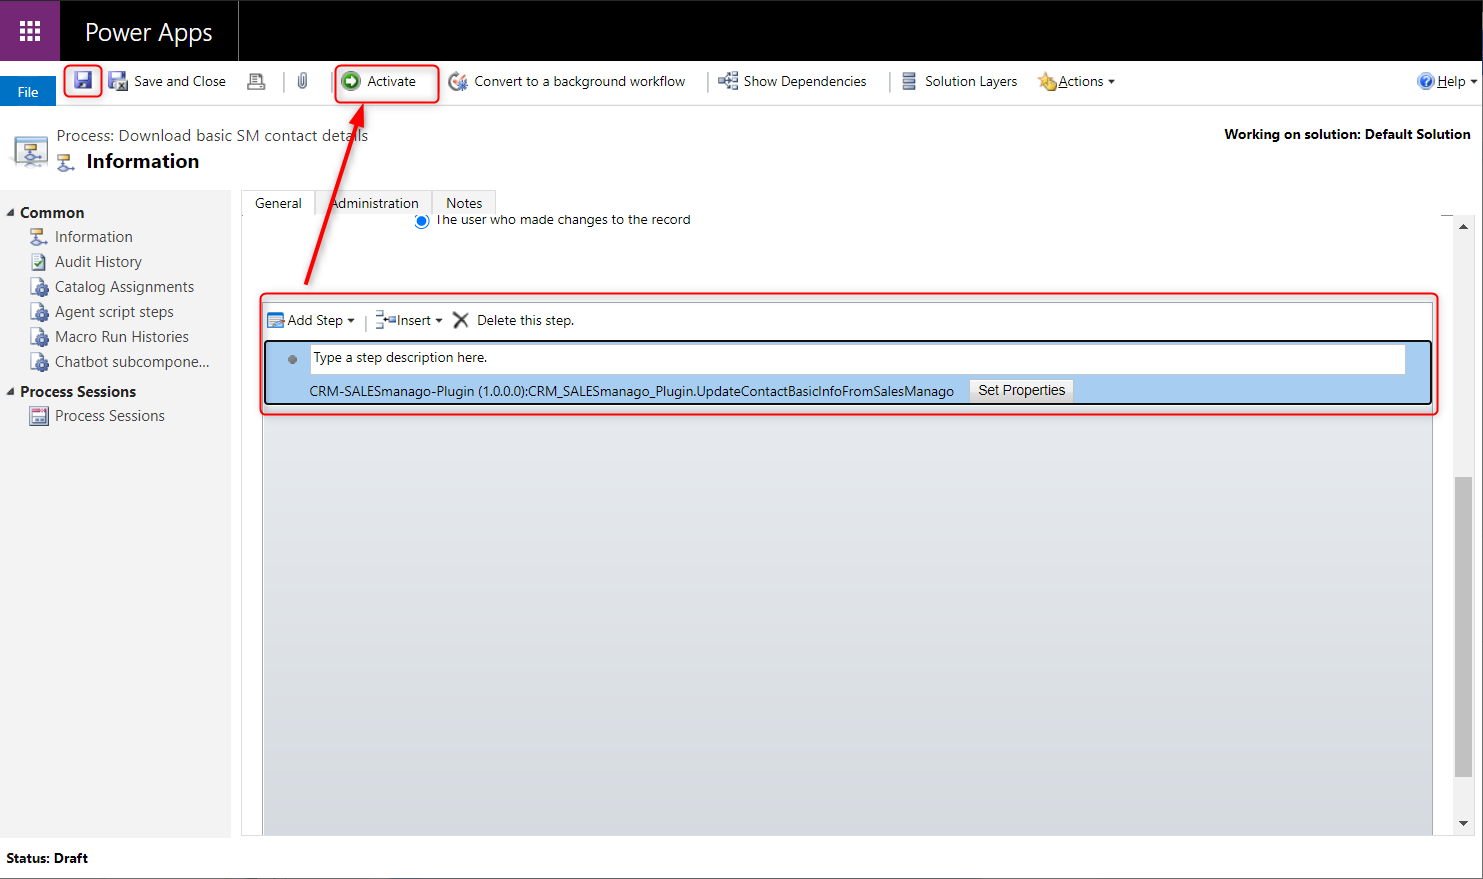
The next step in the configuration is adding a new step, go down and click “Add step”. Select CRM-SALESmanago-Plugin and then the action marked on the screen.
Finally, click the saving icon in the top menu, and the “Activate” button:
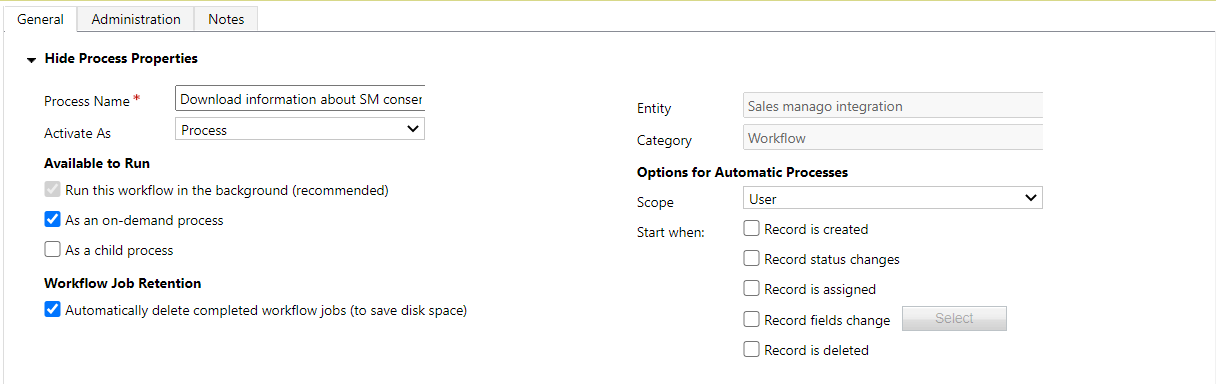
12. Adding a button for downloading information about consents with SALESmanago
IMPORTANT: In the case of this action, it should be noted that it is performed on a different entity than the previous one (SALESmanago integration).
Go to Advanced Settings, pull down the Settings panel, and then select “Processes” in the Process Center list. In the new window, select “+ New” to add a new process.
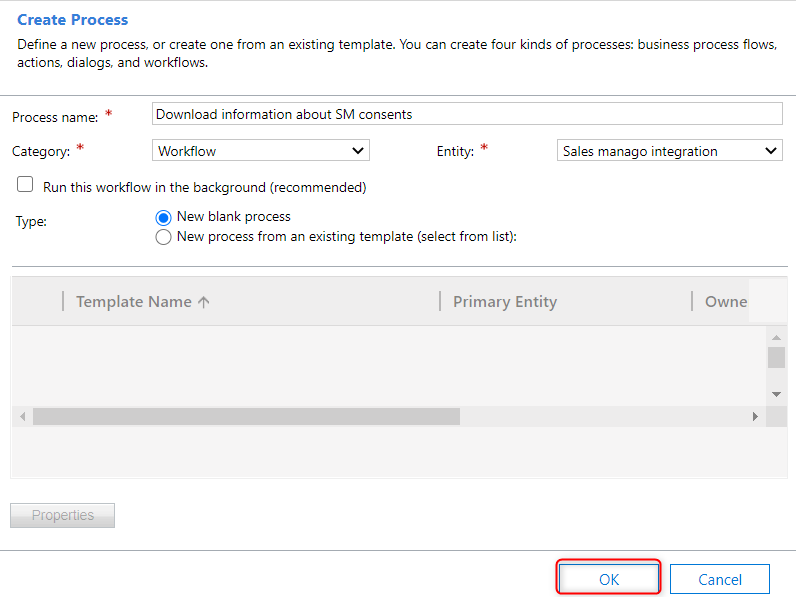
Complete the new process according to the scheme in the picture above.
IMPORTANT: In this case, the process should be run in the background due to the longer execution time (depending on the number of contacts):
The next thing to do in the configuration is adding a new step. Scroll down and click “Add step”:
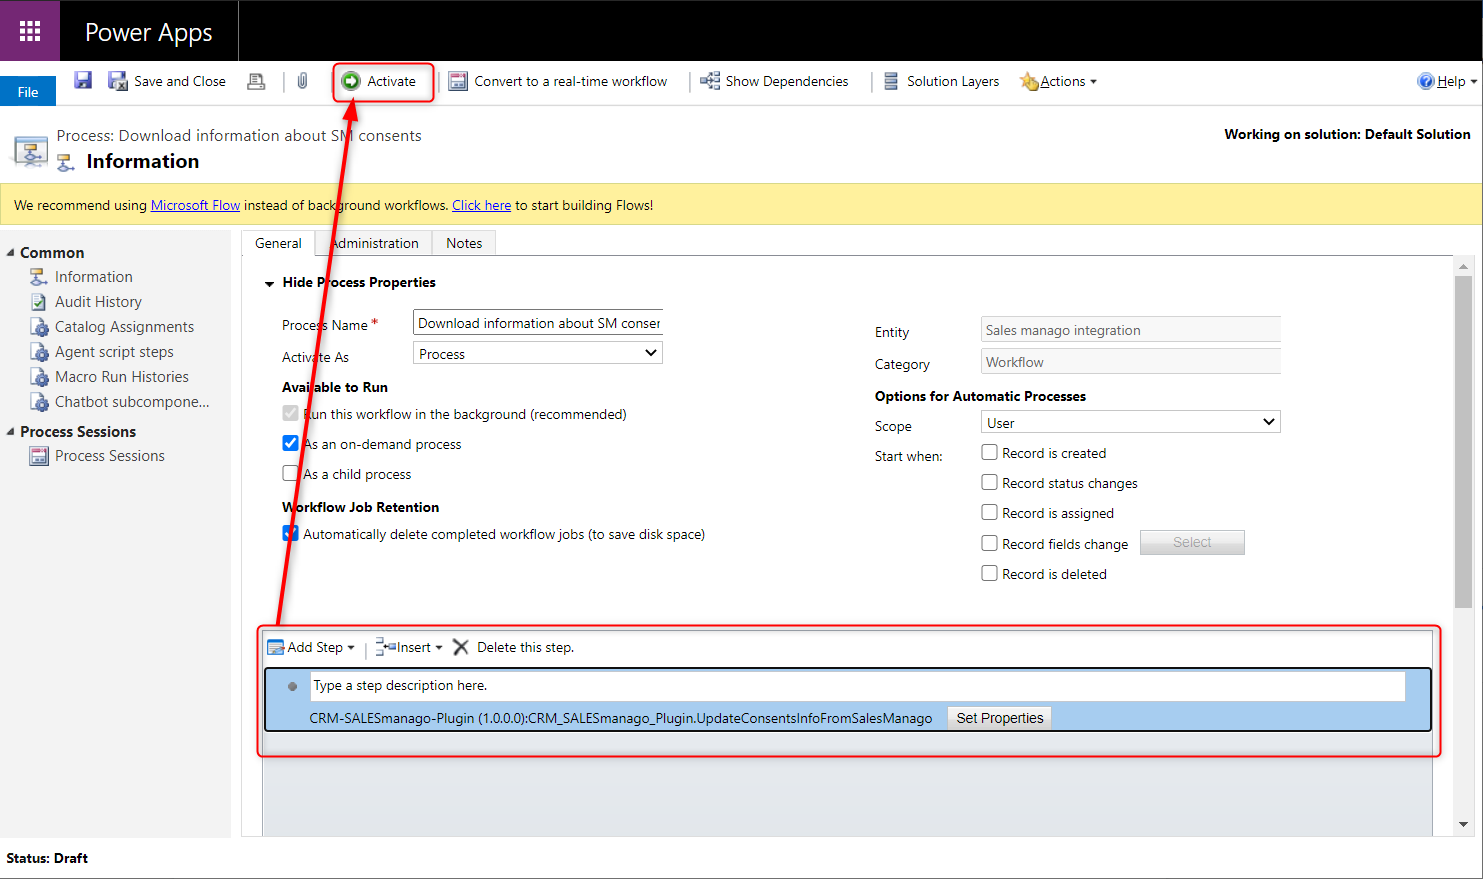
Select CRM-SALESmanago-Plugin and then the action marked in the picture.
Finally, click the saving icon in the top menu, and the “Activate” button.
13. Adding a button for exporting contacts to SALESmanago
Go to Advanced Settings, pull down the Settings panel, and then select “Processes” in the Process Center list. In the new window, select “+ New” to add a new process.
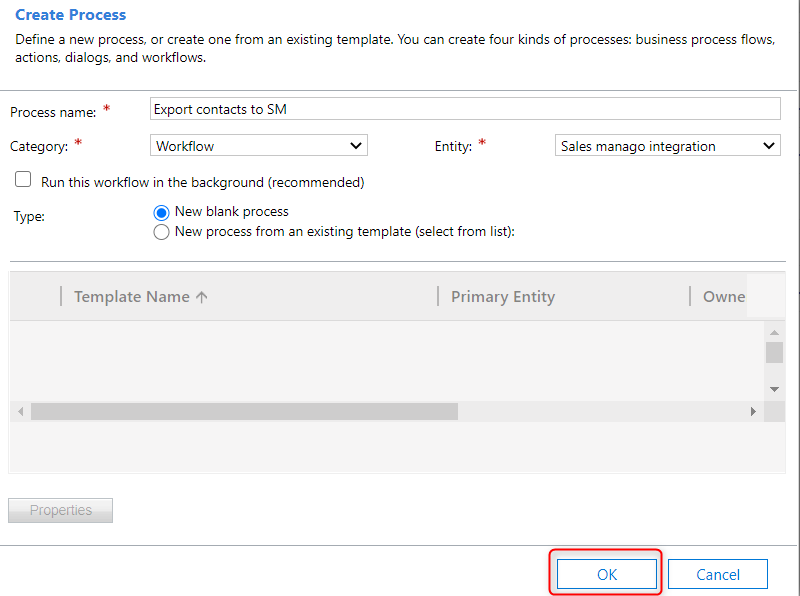
Complete the new process according to the scheme in the photo above.
IMPORTANT: In this case, the process should be run in the background due to the longer execution time (depending on the number of contacts):

The next thing to do in the configuration is adding a new step. Scroll down and click “Add step”:
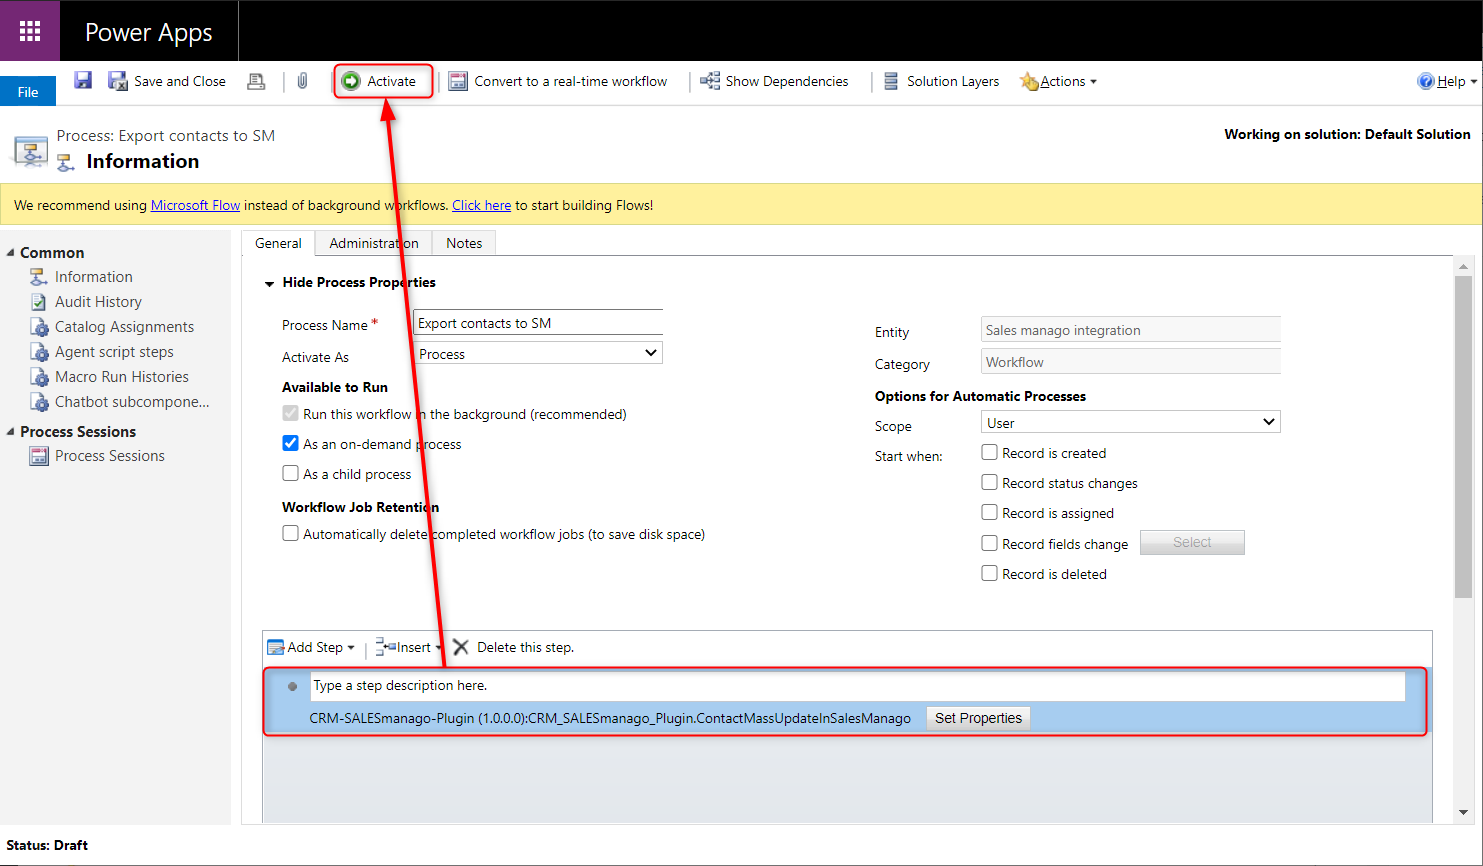
Select CRM-SALESmanago-Plugin and then the action marked on the screen.
Finally, click the saving icon in the top menu, and the “Activate” button:
After saving and activating the last process, you must republish the changes.