Sending automatic emails is characteristic of Marketing Automation. By using SALESmanago, you can send all kinds of emails with personalized content, including:
- Welcome messages.
- Dynamic emails.
- A predefined email using the Trigger Point feature, that can be sent to contacts that pass a scoring threshold.
- Cyclical email Drip Campaigns.
- Emails sent with the Lead Nurturing Campaign.
- Emails containing content the contact viewed on the monitored website.
- Emails containing products the contact browsed for on the monitored website.
- Emails containing coupons and promotional offers.
Below you can see an example automation rule. This particular example is of a rule that sends automatic emails in response to contact visits on the monitored website.
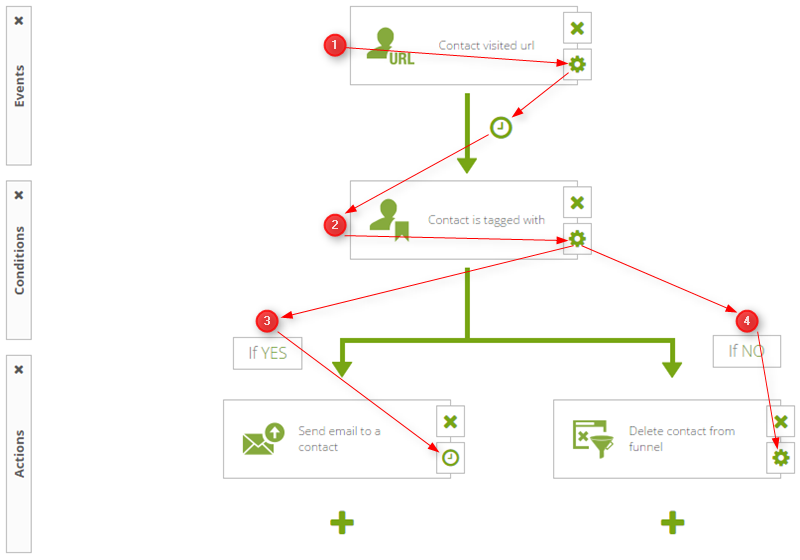
[1] The event
Select “Contact visited URL“ from the event list. Then follow the arrows and proceed to event settings by clicking the cog icon.
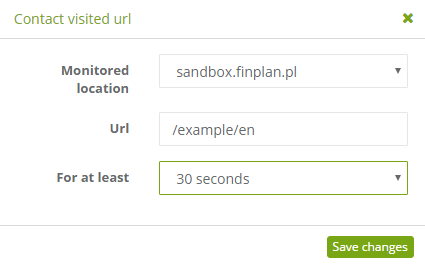
In event settings, you can choose a monitored site location. Enter the URL on which you want visits to be counted as event occurrences. Then decide how long must the visit on the URL last for it to count as an event occurrence.
Follow the arrows and proceed to event-condition link settings by clicking the clock icon in the middle of the arrow.
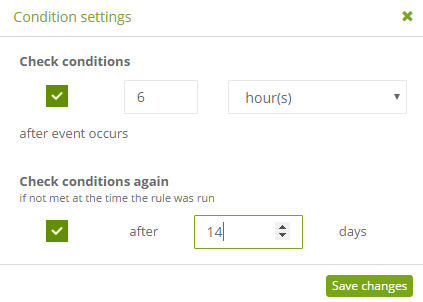
Specify the delay after which you want the system to check if conditions were met. Then specify the delay of a return check if conditions were not met during the first attempt. Save changes and add a condition “Contact is tagged with” from the list of conditions.
[2] The condition
Follow the arrows and proceed to condition settings (click the cog icon on the condition).
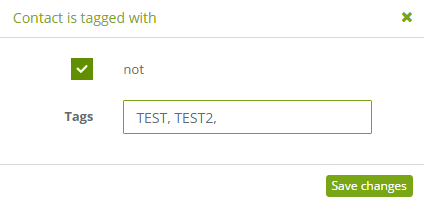
Specify tags that you want the system to check as a condition for this action. You can select the Not checkbox to reverse the condition so that it checks events for the lack of specified tags (meaning that if the event occurred, and that particular contact did not have the specified tags, the If NO action will be triggered).
Save changes and proceed to add actions. From a list of actions, select and drag onto the field “Send email to a contact” and “Delete contact from funnel” onto their appropriate branches.
[3] The action if condition was met (if YES)
Follow the arrows and proceed to action settings.
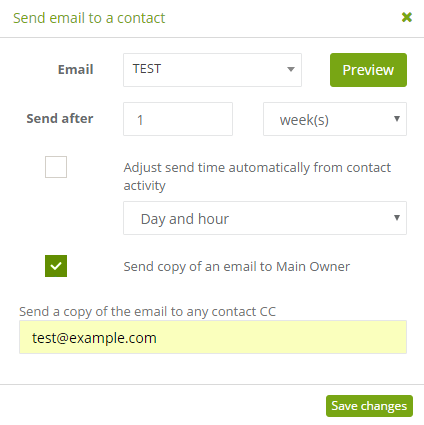
Choose an email template, the delay after it will be sent and the time of sending. Specify to whom you want to send a carbon copy of the message. Save changes.
[4] The action if condition was not met (if NO)
Follow the arrows and proceed to action settings.
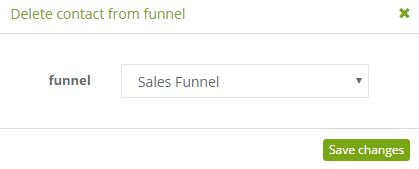
Choose a funnel from which you want the contact to be removed upon triggering the If NO action. Save changes.
Now, Activate the rule and Save it.
![]()