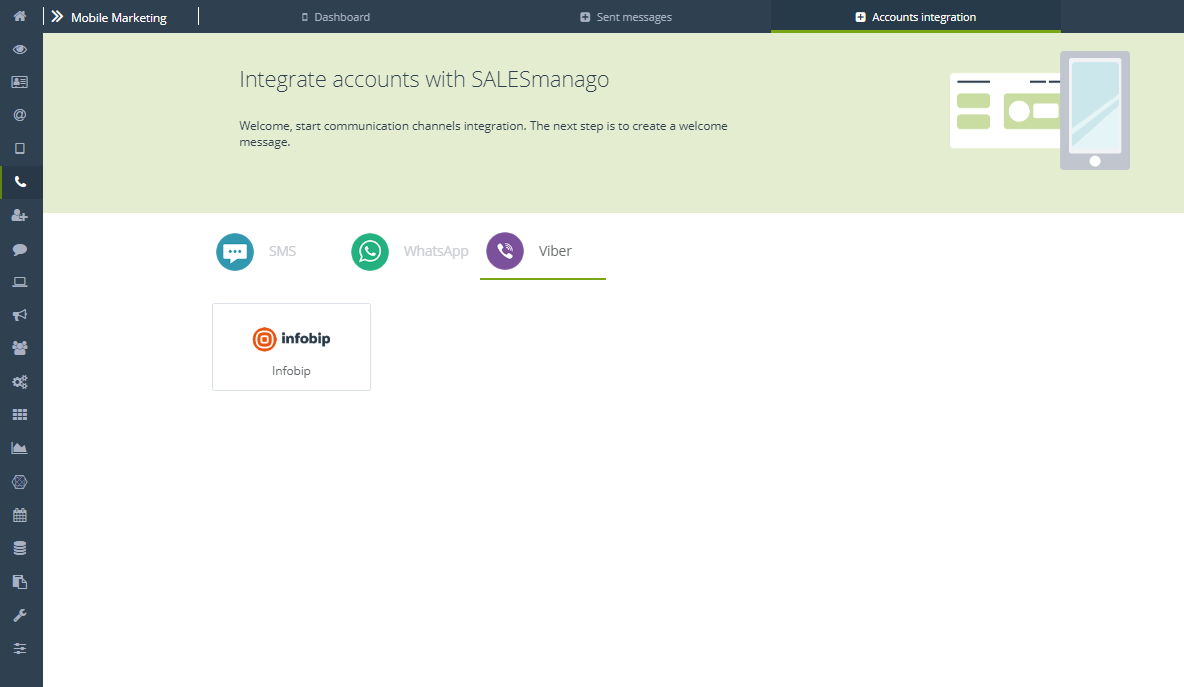
In order to meet the highest expectations of our customers, we have introduced the Mobile Marketing 2.0 module with the function of sending text messages. Integrate and use any number of gateways and messengers in various communication channels without limits. Check how to integrate Viber in the Accounts integration panel and start using the possibilities of Mobile Marketing 2.0 today!
In order to integrate Viber in Mobile Marketing module, go to
Channels → Mobile Marketing → Integrations → Viber
Contents
- Viber integration
- Integration settings
1. Viber integration
Viber is a communicator and an application for making phone calls for smartphones and computers. It has over 100 million monthly active users with over 280 million registered users globally. It allows you to send text messages, images, videos to various platforms, and also offers voice calls in such systems as iOS, Android, Windows Phone. Integration with Viber will allow you to send advertising messages and birthday messages, sending text messages from Workflow, and from Automation Rules.
To start integration with Viber, you first need to create an account in the sendings operator’s system – currently, SALESmanago offers one operator – Infobip.
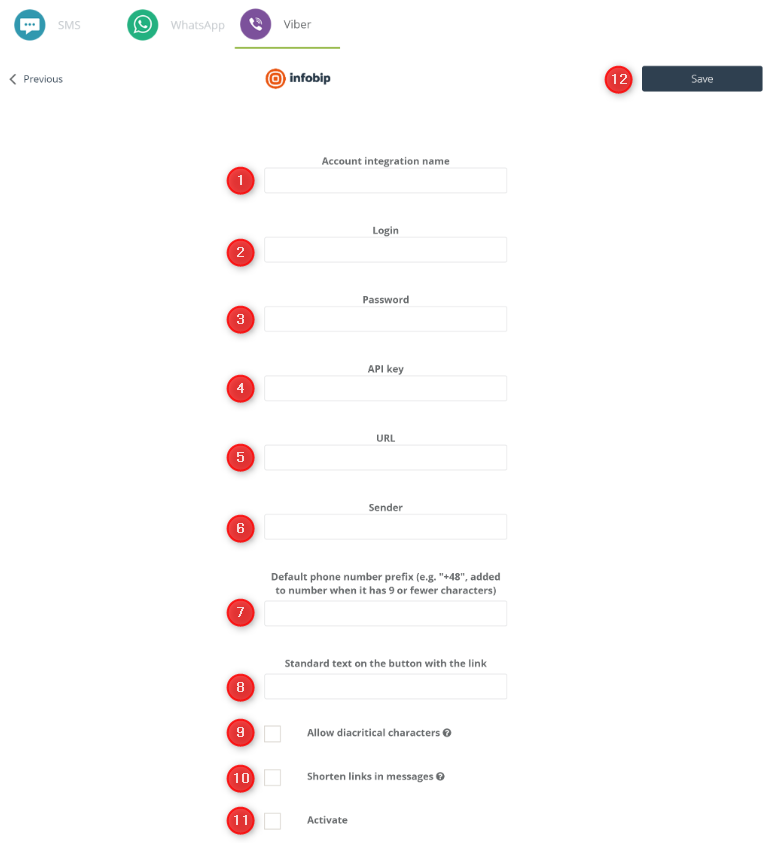
[1] Account integration name – choose a name for your account integration, which you can later find and edit in the messenger integration details.
[2] Login – login to your account in the Infobip system that you used during the registration.
[3] Password – the password for your Infobip account that you used during registration.
[4] API key – a unique identifier used to authorize the user, issued by the operator’s system, thanks to which it is possible to integrate account with SALESmanago, and thus send messages from our system. You can generate a new API Key in the Infobip system.
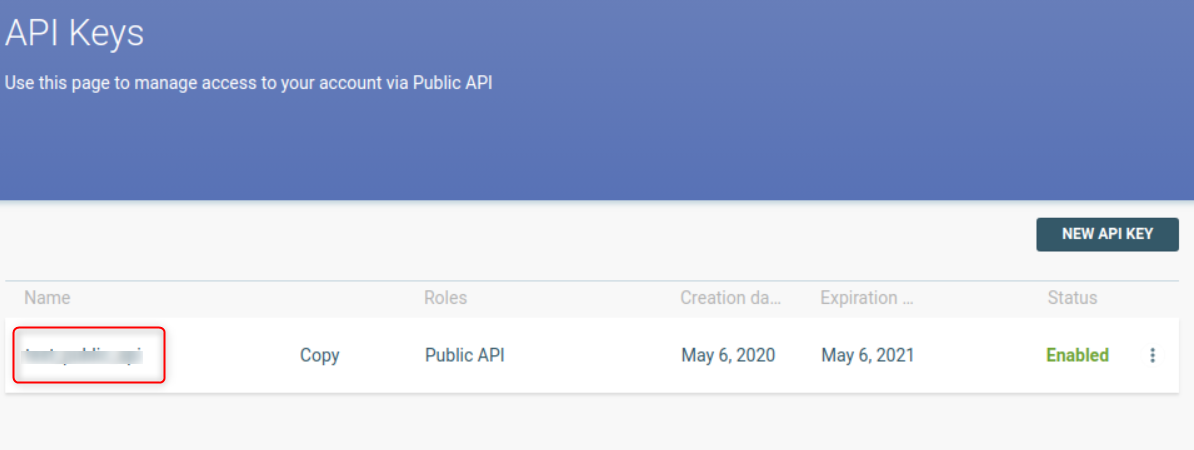
You can find your API Key right here >>
IMPORTANT: You can authorize the integration by entering [2] Login and [3] Password for your account in Infobip, or by entering [4] API key. The SALESmanago system prefers to use the API key.
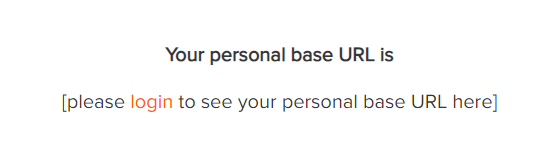
[5] URL – unique URL address related to your account in the Infobip system. You can generate required URL right here >>
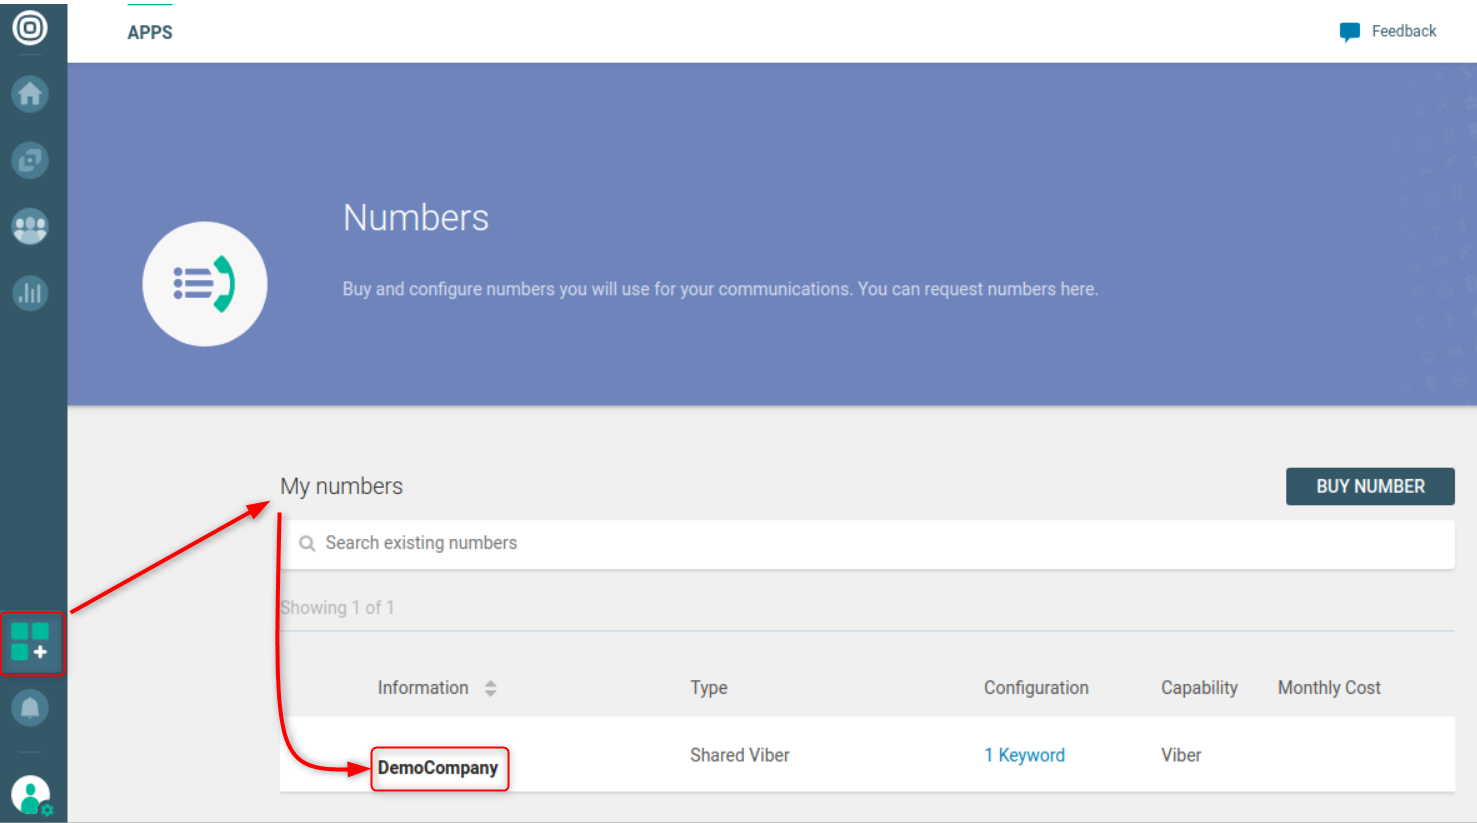
[6] Sender – identifier in the Infobip system for a specific number from which the text messages are sent. To find the system sender name, go to Apps from the Home page, then Numbers.
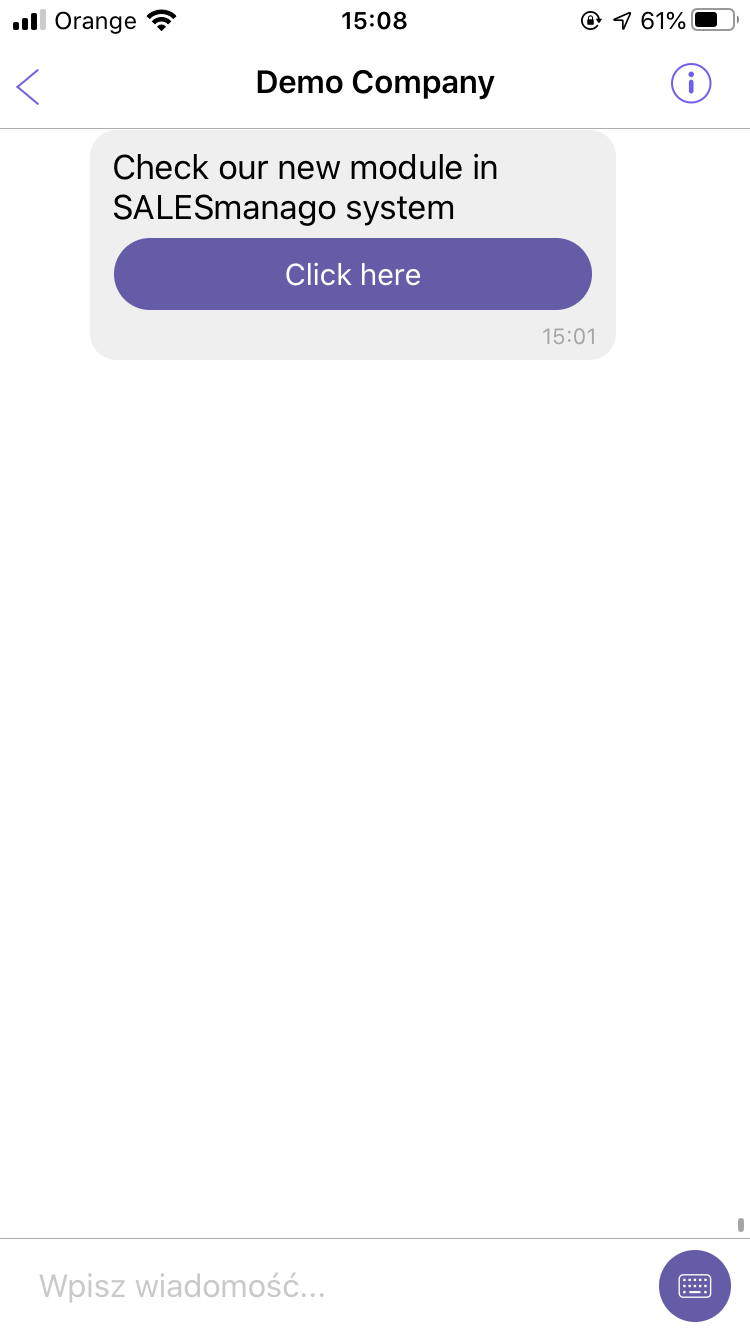
IMPORTANT: The sender’s name will appear to your contacts as the sender of the message.
[7] Default phone number prefix – if the phone number consists of 9 or less characters , the prefix will be added to it by default.
[8] Standard text on the button with the link – Viber allows you to send a single link in a message, which will be displayed under the button. Define the default text of the button added when a link to a page is attached to a message. It will appear on the button in every message you send via the Viber channel. E.g.:
[9] Allow diacritical characters – Viber allows the use of diacritical marks in text messages. You can click the checkbox to allow using them. Diacritical marks are e.g. ę, ż, ä, ü, ß, and emojis.
[10] Shorten links in messages – automatically shorten links to reduce the number of characters used by the sendings operator.
[11] Activate – activate your integration and start sending text messages from Viber.
[12] Save – after entering all the data, click the “Save” button to confirm the integration.
2. Integration settings
After integration, in the panel, you can change the basic settings of your integration.
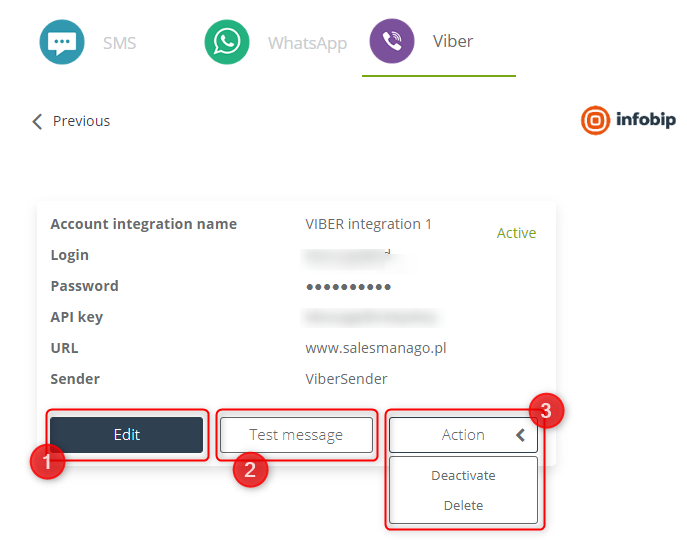
[1] Edit – click the button and you will be taken to the edit settings, which are identical to adding a new integrated account panel.
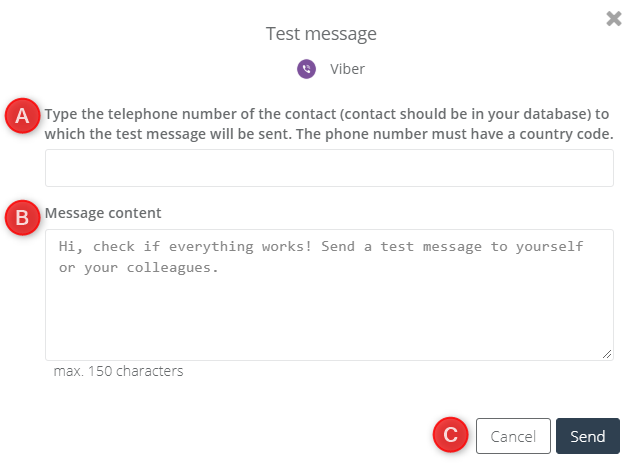
[2] Test message – send a test message to check if you have successfully integrated your account with Infobip and if your sending is working properly.
[A] Telephone number – enter the phone number with area code to which the test message is going to be sent. Remember that the number has to be included in your contacts database.
[B] Message content – enter the content of the message, you cannot use links, photos or add products from the store in the test message.
[C] Send – click the “Send” button to confirm the sending of the test message.
[3] Action – select the action you want to perform on the selected integration:
- Deactivate – disable integration, sending messages via Viber channel will be suspended until activated.
- Delete – delete integration, sending messages via Viber channel will be impossible.