Useful links
If you have an e-store created in WordPress (WooCommerce) and transfer product data to SALESmanago using Product Catalogs, you can choose between three product data synchronization methods. This article describes them in detail and explains how to implement them.
NOTE: The information provided in this article applies only to Product Catalogs (and not XML Product Feeds).
Contents
1. Getting started
The SALESmanago-WordPress (WooCommerce) integration offers three ways of synchronizing product data:
- Real-time synchronization
- Custom CRON mechanism
- WordPress’s native CRON mechanism
To select the desired method, in the WordPress panel, open the SALESmanago plugin and go to the Product Catalog tab:
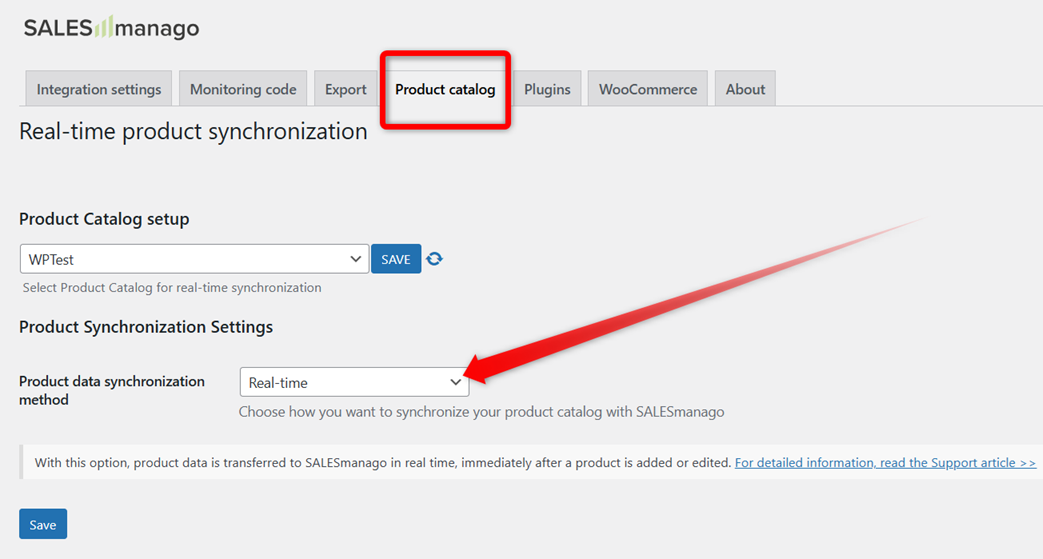
There, you can select the desired method from the drop-down list (indicated with an arrow in the screenshot above).
All these methods have their pros and cons. Each of them is described in detail in a dedicated section below.
What is CRON?
CRON is a tool that schedules and automatically runs tasks on a website’s server. It allows users to automate repetitive tasks by running scripts or commands at specified intervals.
E-stores can use CRON to automate tasks such as updating product inventories, cleaning up logs, or running regular database backups. This supports smooth and efficient store management with minimal manual effort.
In the context of the SALESmanago-WordPress integration, a custom CRON mechanism (see Section 3 below) can facilitate the smooth transfer of product data to SALESmanago, enhancing the performance of your e-store and product management processes.
2. Real-time synchronization
With this option, product data is transferred to SALESmanago in real time, immediately after a product is added or edited.
The advantage of this method is that any changes are immediately recorded by SALESmanago and reflected in product recommendations. However, this updating frequency can affect the operation of the SALESmanago-WordPress integration—changes to product data may take longer to save, which may affect your user experience.
This option is the default in the SALESmanago plugin. It should not require any additional configuration. However, if there are any issues, follow the instructions provided in this article >>
3. Custom CRON mechanism
A custom CRON mechanism can increase the performance of your e-store by transferring data in larger batches. In this method, updates are accumulated in real-time but transferred at predefined intervals. This approach reduces the number of API calls and lowers server load, ensuring smoother operation of the SALESmanago-WordPress integration. However, changes to product data may not be transferred immediately, but with a certain delay (the interval is determined on your side).
The configuration of the CRON mechanism for the SALESmanago-WordPress integration consists of two steps:
- Step 1: Creating a CRON job for your domain on your hosting platform—This must be performed individually by each SALESmanago Client.
- Step 2: Activating the dedicated option in the plugin settings in WordPress.
IMPORTANT:
- If you activate the dedicated option in the plugin but do not create a CRON job for your domain, product data will not be transferred to SALESmanago at all. Therefore, the recommended order is as above: first, create the CRON job (and activate it, if necessary), and then adjust the plugin settings.
- Depending on the software or hosting platform you use, the new CRON job may need to be activated after its creation. As long as the dedicated option in the SALESmanago plugin is active, ensure that the CRON job is also set as active. Otherwise, product data will not be transferred to SALESmanago.
Generic instructions for implementing a CRON job (Step 1) are provided in the article for PrestaShop >> The article includes a comprehensive example for cPanel >>
The only difference is the command, which takes the following form for WordPress:
https://yourdomain.com/?salesmanago_cron=run
Remember to replace the highlighted fragment with your own domain.
To complete the configuration (Step 2), open the SALESmanago plugin in WordPress, go to the Product catalog tab and select Custom CRON from the list.
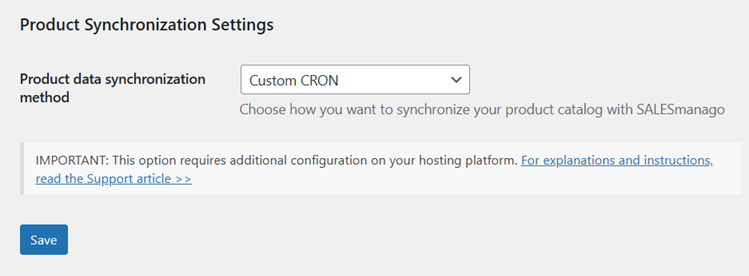
Click Save.
After completing Steps 1 and 2, remember to test your configuration by following the steps below:
- Make changes to the details of several products.
- Wait for the time set as the interval for the execution of the CRON job.
- Open the SALESmanago product gallery and check whether the changes are visible in the products’ details.
4. WordPress CRON mechanism
This option is the least recommended of all three as it may increase page loading times in your e-store, potentially affecting the user experience. The more traffic your website receives, the more effect this mechanism will have on your visitors.
The native CRON mechanism offered by WordPress is a pseudo-CRON system because it relies on site traffic to trigger events.
With this method, changes to product data are collected into batches (tasks). Whenever someone visits your website, WordPress checks if there are any scheduled tasks that need to be run, and only then processes all tasks that are scheduled to run at or before the current time. This can extend the page loading time. Additionally, WP-CRON can conflict with cache plugins or hosting setups (some hosts disable wp-cron.php for performance).
If you want to use this method despite its potential negative effect on the user experience on your website, in the SALESmanago plugin, select WP-CRON [1] from the list. Then, specify the interval [2] at which tasks will be scheduled.
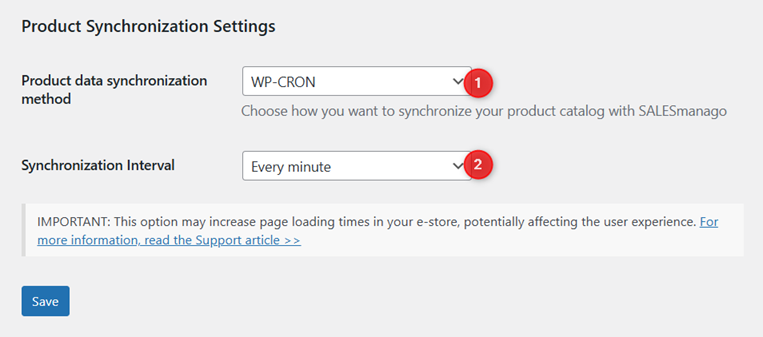
Click Save.
Make sure to test your configuration by following the steps below:
- Make changes to the details of several products.
- Wait for the time set as the interval for the execution of the WP-CRON job.
- Visit your website.
- Open the SALESmanago product gallery and check whether the changes are visible in the products’ details.
If product data fails to be transferred, you need to edit your website’s code to enable the WP-CRON mechanism.
Open the wp-config.php file in the main WordPress folder. In the section: For developers: WordPress debugging code, add the following line:
define(‘DISABLE_WP_CRON’, false);
just as shown in the screenshot below:
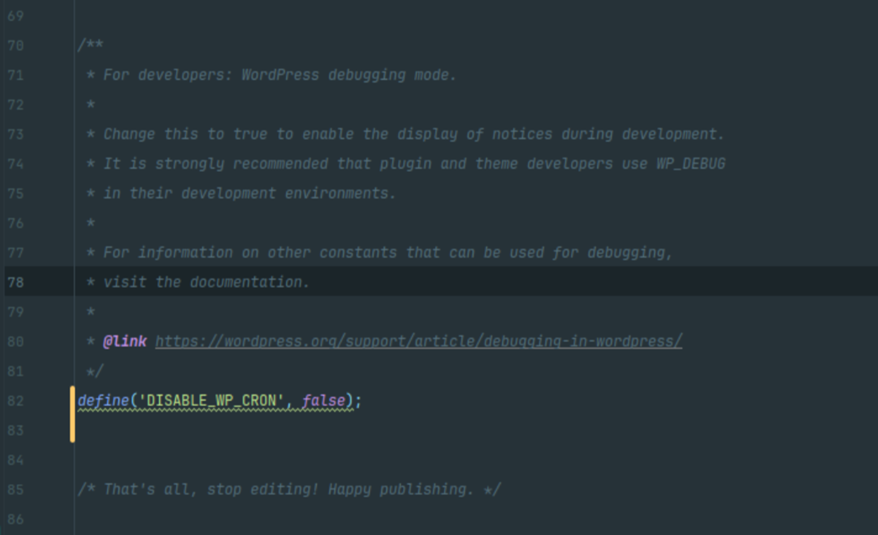
The mechanism should now work correctly. If you continue to experience issues, please contact us at: [email protected].