Useful links
Segmentation matrices allow you to segment Contacts based on their visits to your website. You can create a matrix that will add a tag to a contact when they have visited your domain or a particular URL. You can also specify the visit duration after which the tag will be assigned.
To create a segmentation matrix, go to Audiences → Segmentation→ Segmentation Matrices.
Contents:
- Adding a new segmentation matrix
- Basic settings
- Rules
- Summary
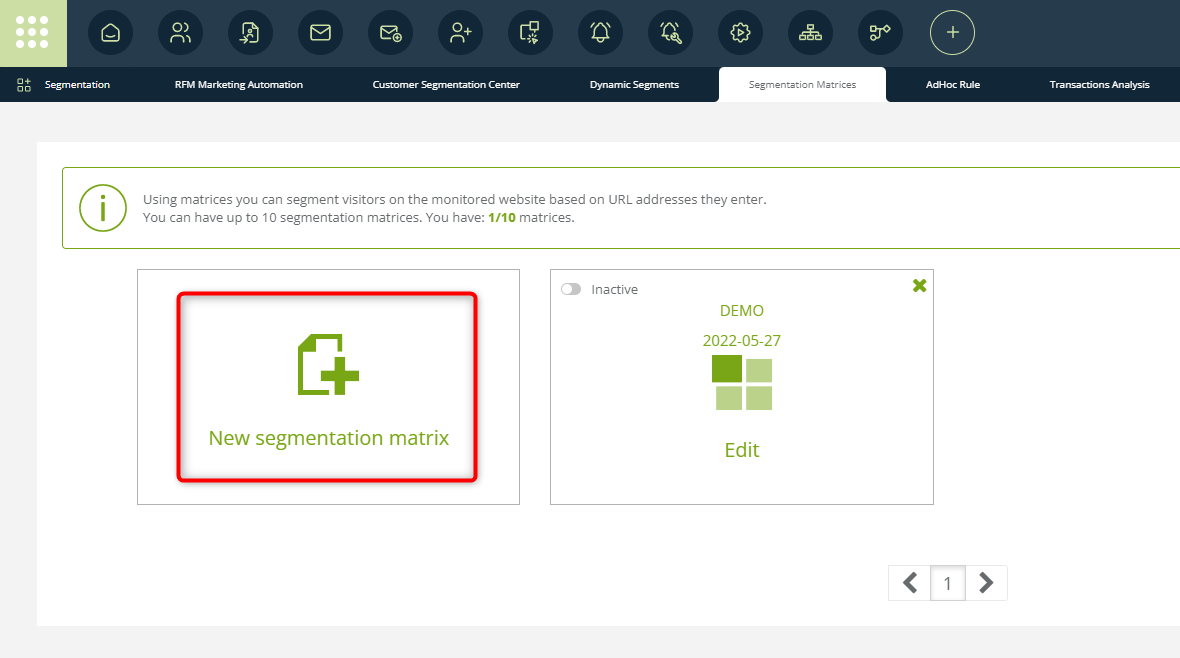
1. Adding a new segmentation matrix
Click “New segmentation matrix” to add a new matrix.
TIP: After you have created a segmentation matrix, you can easily activate or deactivate it on the list of segmentation matrices, by clicking the Active/Inactive switch: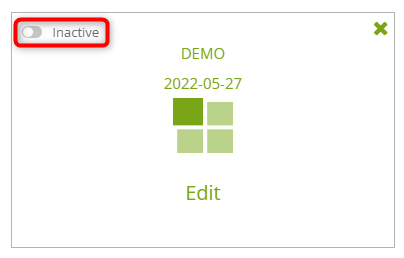
2. Basic settings

[1] Segmentation matrix name – enter the name of your new matrix to be able to identify it in the system.
Then press “Next”.
3. Rules
The next step is to set the rules based on which your matrix will operate. You can set a simple or a dynamic rule.
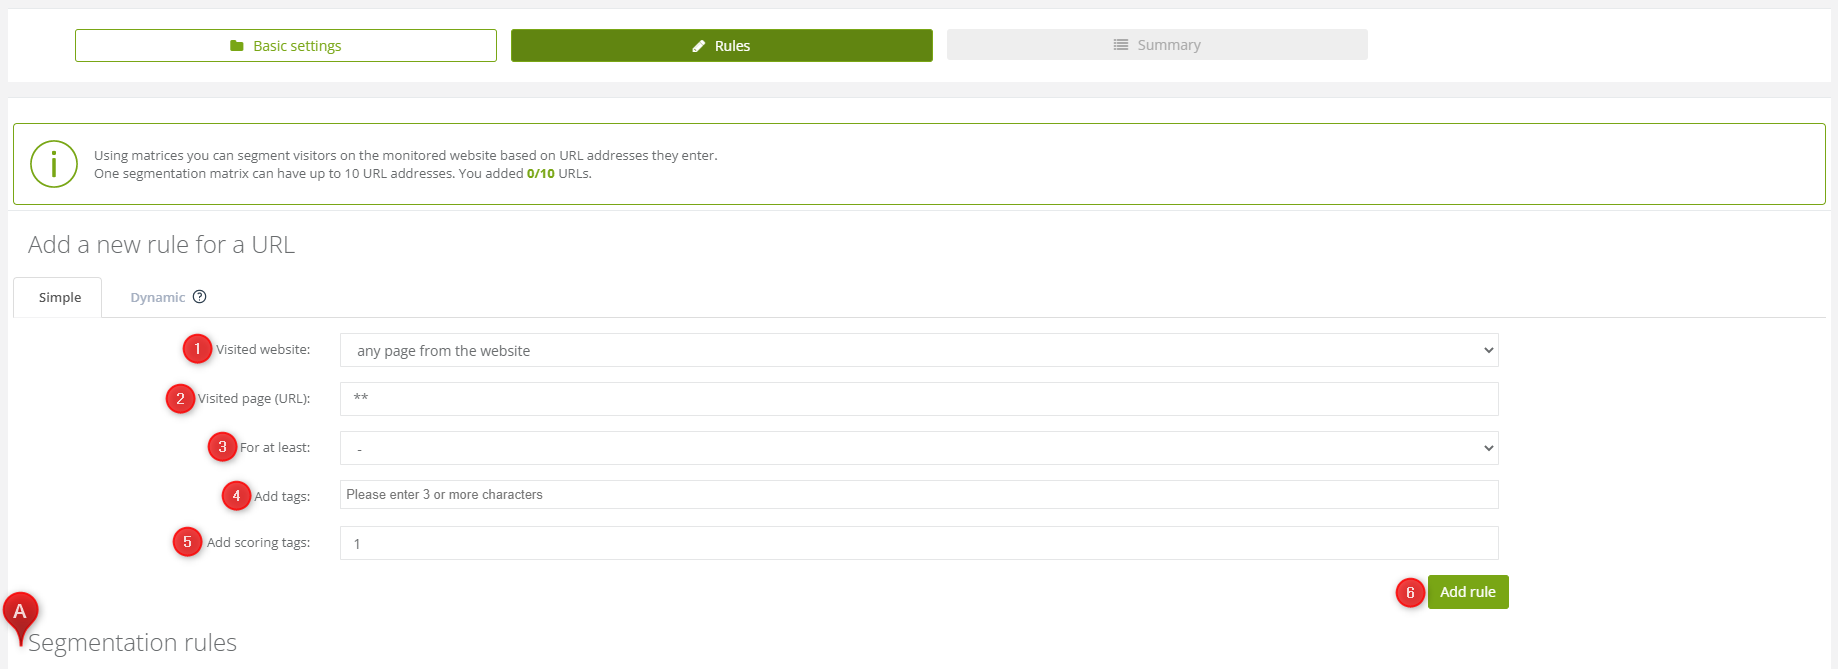
Simple rule:
[1] Visited website – select the domain address for which the rule will apply from the drop-down list.
[2] Visited page (URL) – enter a URL address if you want the rule to apply to a particular page.
IMPORTANT: This field must not remain empty even if the rule is to apply to an entire domain. If this is the case, it must contain one or two asterisks (*). With one asterisk, only the pages directly under the domain will be matched, e.g. example.com/about or example.com/contact. With two asterisks, any path on the given domain will be matched.
The field contains two asterisks by default.
[3] For at least – define the minimum time that a contact needs to spend on the page for a tag to be assigned to it.
[4] Add tags – specify the tags that will be assigned to a contact after they have visited your page for the length of time specified in the field above.
[5] Add scoring tags – specify by how many points the tag scoring will increase each time the contact fulfills the conditions defined above.
[6] Add rule – when the rule is ready, click on this button to add it to the matrix.
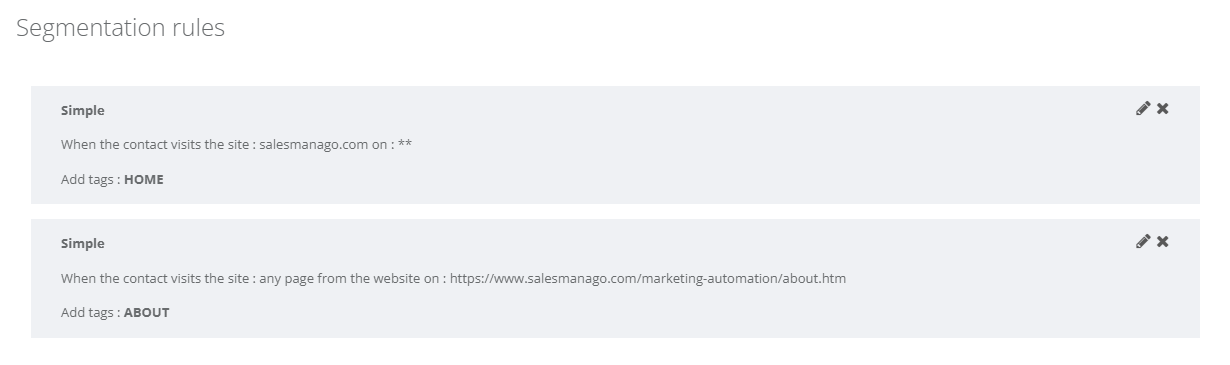
You can view, edit or delete all rules added in the section Segmentation rules [A] below:
If you want to add another rule, once again fill all the fields and click on Add rule [6]. One matrix can contain up to 10 rules.
Dynamic rule:
Dynamic rules work slightly differently than simple ones (the main difference is what you specify in field [2] – Visited page (URL), all other steps are the same).
Click “Next” to proceed to the last step: Summary.
Then press “Next”.
4. Summary
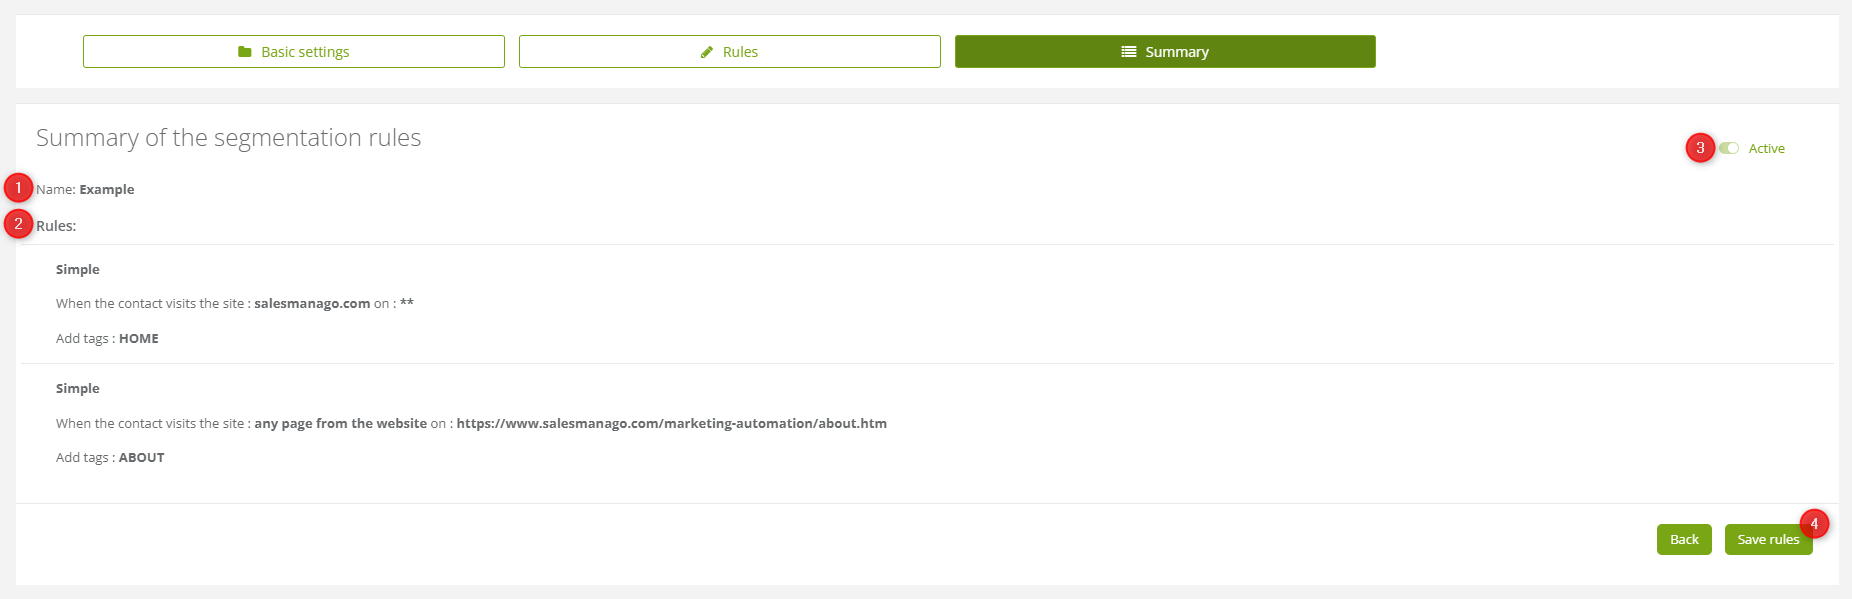
[1] Name – the name of the newly-created matrix.
[2] Rules – a list of rules set for the new matrix, including the type (simple/dynamic), domains or URL addresses, and the tags to be added.
[3] Activate segmentation matrix – the new matrix is active by default. You can deactivate it by clicking on the switch.
If you want to save the matrix, click Save rules [4].
Submit your review | |