Use mobile devices in mass campaigns and automation processes, and as a way to send birthday wishes with special discount coupons. Create a unique birthday message template in our new creator and start sending personalized messages using various communication channels like Viber, WhatsApp or SMS messages!
In order to create a birthday message, go to
Mobile Marketing => Dashboard => New birthday message
or
Mobile Marketing => Birthday messages => + Birthday message
Contents
- How to create a new birthday message?
- Basic settings
- Create a message
- Sending settings
1. How to create a new birthday message?
You can create birthday messages for users who have a date of birth on their contact card. Depending on their birthday, you can set up sendings for them. You can create birthday messages from the Dashboard panel or from the Birthday Messages panel.
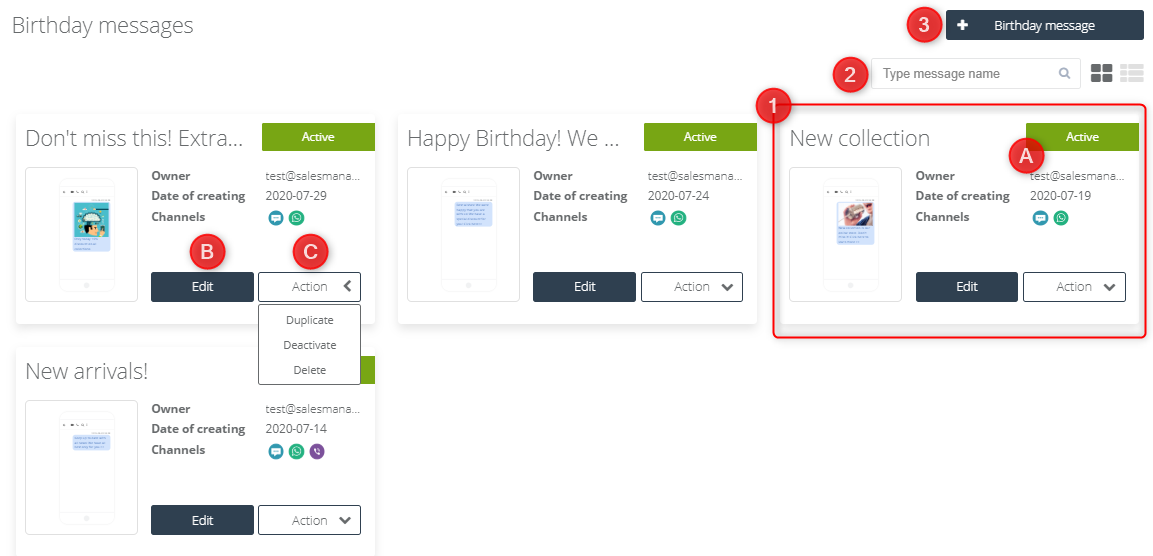
[1] Ready template – in the Birthday messages tab, there are ready-made birthday message templates that you can use. On the information tab, you can see the template creation date, the owner’s email address, and the channels to which the message sending is adjusted.
[A] Active / Inactive – information on whether the sending of the birthday message for this template and its settings is enabled or disabled. Active means that messages will be sent to contacts according to the selected settings.
[B] Edit – you can freely edit the template and its settings at any time by clicking the “Edit” button.
[C] Action – duplicate the birthday message and its settings to create an identical template with duplicated settings, deactivate it to stop the sending, or delete it. Remember that deleting a message will deactivate its sending.
[2] Type message name – type a part or the whole name of the message to shorten the list to the searched one.
[3] +Birthday message – click to go to the birthday message creator.
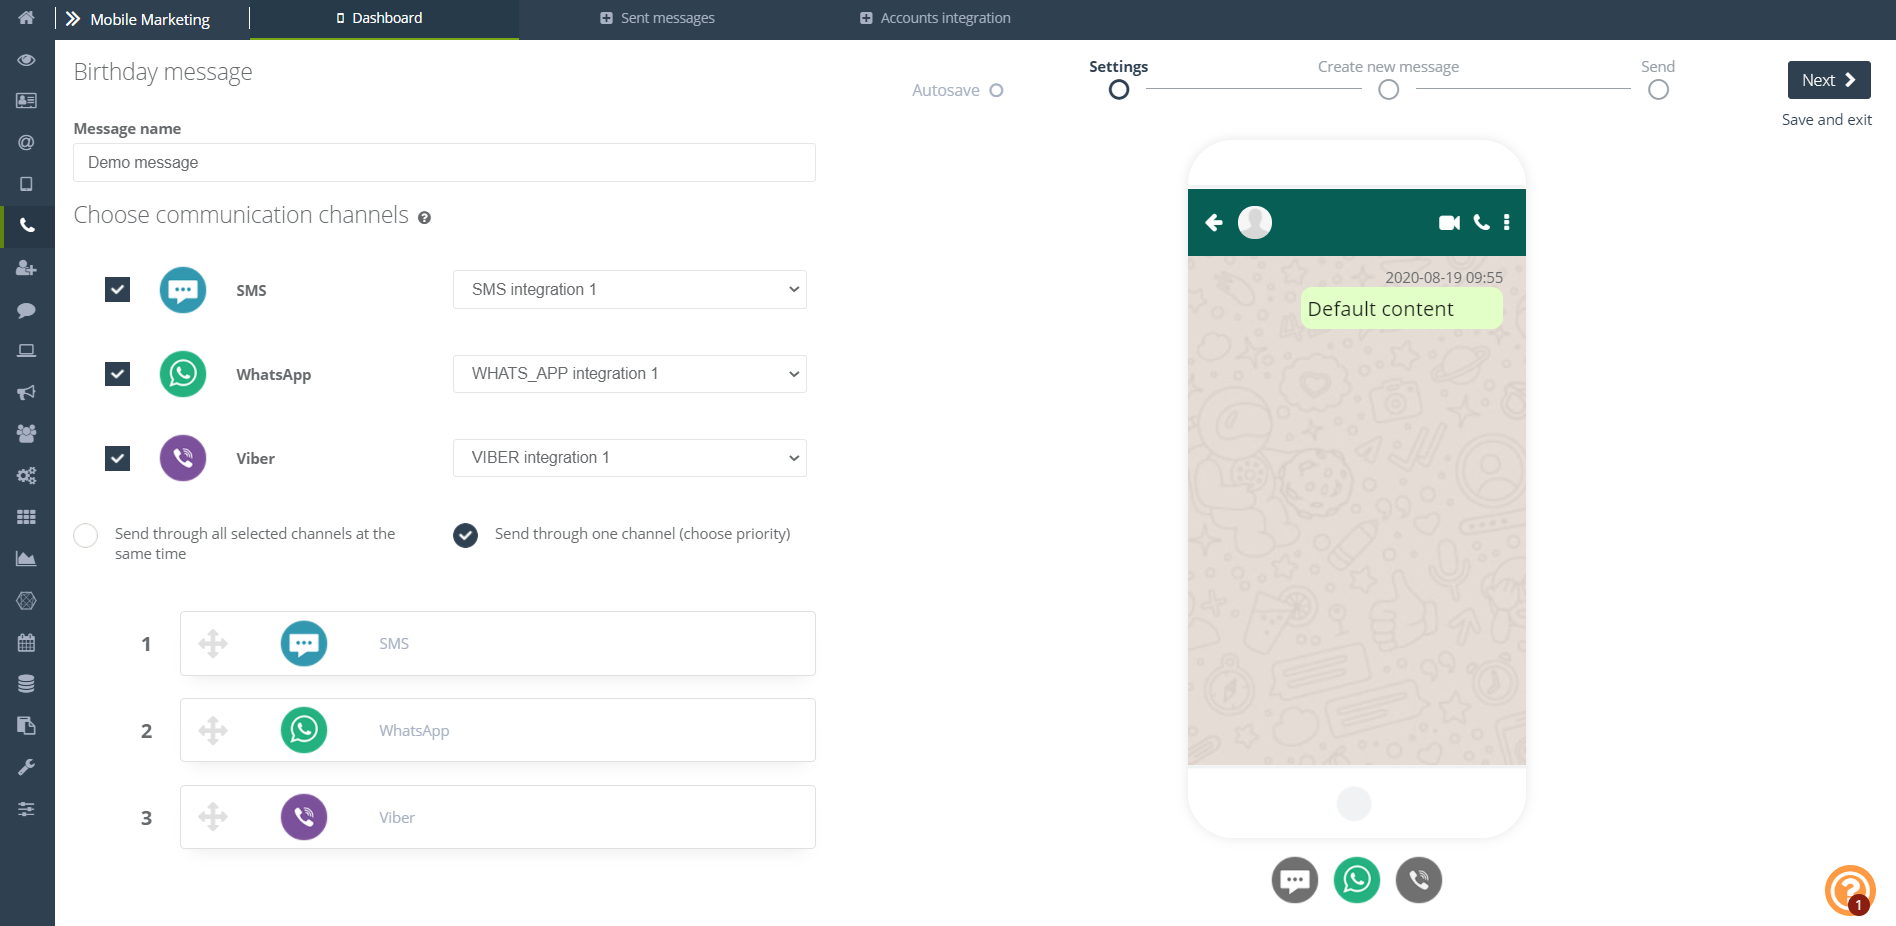
2. Basic settings
The birthday message creator works in a very similar way to the basic message creator:

[1] Message name – enter the name of the message under which you will find the added message pattern on the template list.
[2] Choose communication channels – select the integrated channel or channels through which you want to send the birthday message. From the drop-down list, select the name of the integrated operator from which the message will be sent. Remember to have funds available on your operator’s account to send messages.
IMPORTANT: When selecting more than one communication channel, the settings are adapted to the channel according to specific restrictions, e.g. if you choose to send message via a channel that does not support messages with diacritics characters, any other communicator you plan to send the message will also not operate messages with diacritics characters – the system will ignore them, or if there is an SMS message among the selected channels, where the maximum number of characters is 150, the same message sent via other channels is adjusted to this limit.
[3] Send through all selected channels at the same time – the contact will receive the message through all channels for which he agreed to receive messages.
[4] Send through one channel (choose priority) – if you do not want the contact to receive duplicate text messages, you can set the sending priority for the integrated channels. Choose the sending order from the communication channels selected in [2]. For example, set the sending priority 1 with WhatsApp, and sending via SMS with priority 2, if the contact is subscribed to receive messages via SMS and the messenger, he will only receive the message via WhatsApp.
[5] Message preview – here you can preview your text message on each integrated messenger. This is a useful function, for example, when you are not sure whether your integrated SMS gateway supports sending messages with diacritics characters.
[6] Autosave – a function that is responsible for the automatic saving of your text message. If autosave occurs, the item will be displayed as follows:
[7] Next – go to the next stage of creating a text message or click [8] Save and Exit to finish work on the project later.
3. Create a message
In the next stage of creating a message, we can determine its content – added text, image and links. We can create it ourselves or use previously created templates:
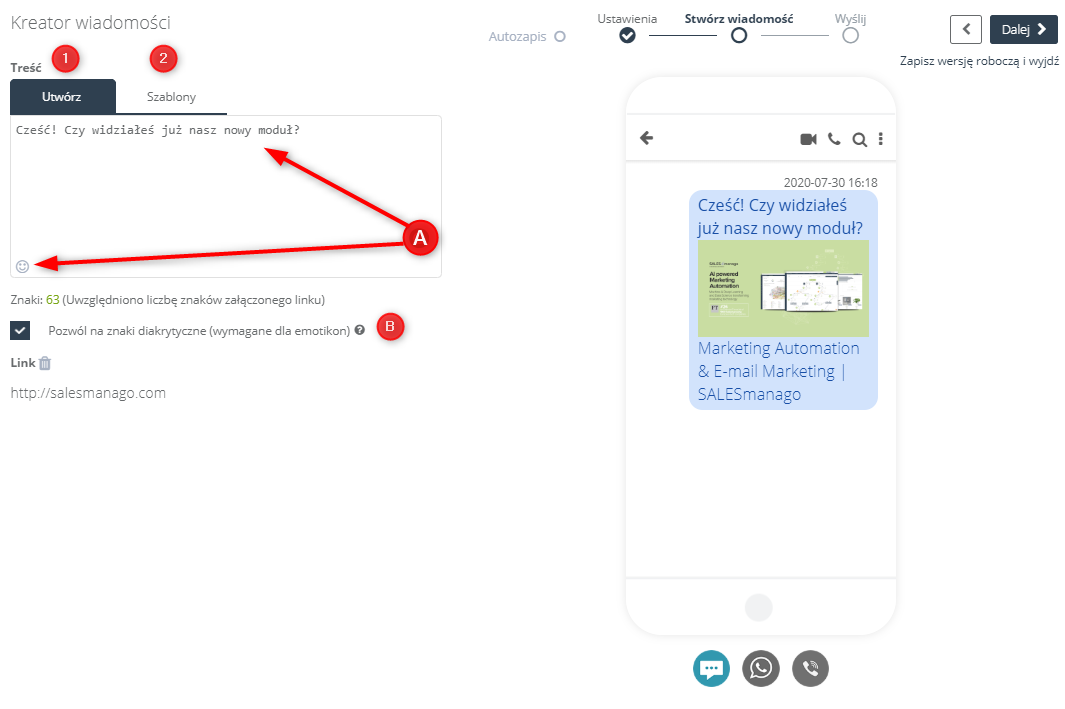
[1] Create – enter a content of the text message and decide whether you want to use diacritics characters, emoticons or links in it.
[A] Content – adjust the content of the message to your requirements, you can use in it:
![]()
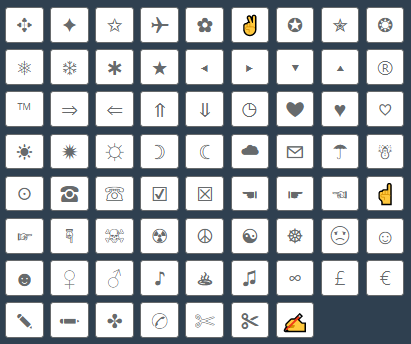
- system emoji (if you enabled diacritical characters). The following emoticons are available:
- photos from the gallery – remember that your photo must be in jpg format.
- products from the gallery – a linked image with the product’s url address will appear in the text message
- links – add a link of your website to the text message, it can be sent in shorten or full form depending on the settings of the integrated channel.
IMPORTANT: You can use up to 512 characters in the content window.
[B] Allow diacritical characters (required for emoji) – if you have selected a communication channel that allows to use diacritics characters in a text message, you can click the checkbox to allow using them. Diacritical marks are e.g. ę, ż, ä, ü, ß and emoji.
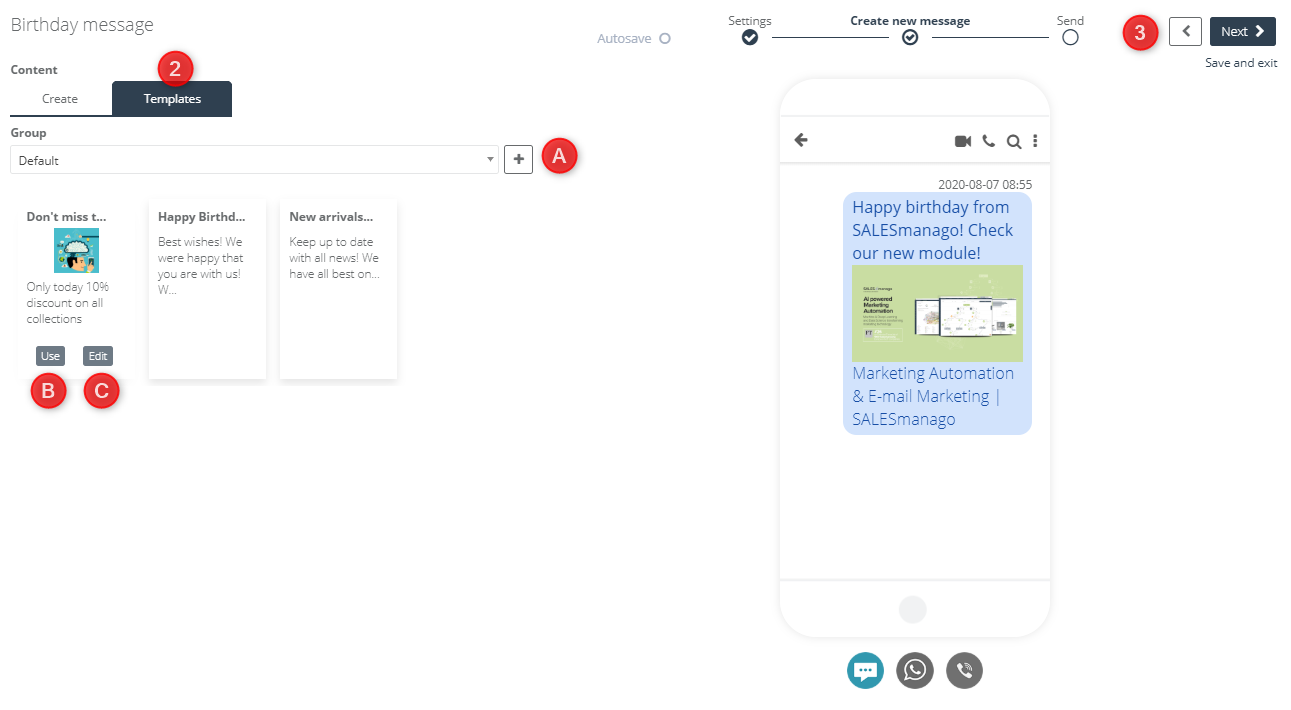
[2] Templates – use the templates that you created earlier.
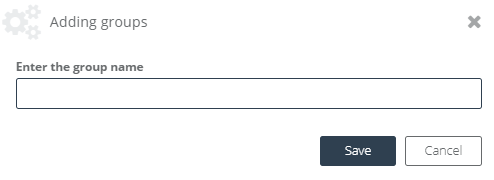
[A] Select or create a new group – select a group to shorten the list of templates to the searched ones, or create a completely new group to which you can add a message template designed in the wizard:
[B] Use – use your own pattern of the previously created template.
[C] Edit – you can edit the template at any time. After clicking this button, the template will be displayed in the creating new message window [1].
[3] Next – go to the next step of creating a text message or click Save draft and exit to finish your project later.
4. Sending settings
Select the target group to send the birthday message using the selectors, and define when before the birthday the user should receive the text message:
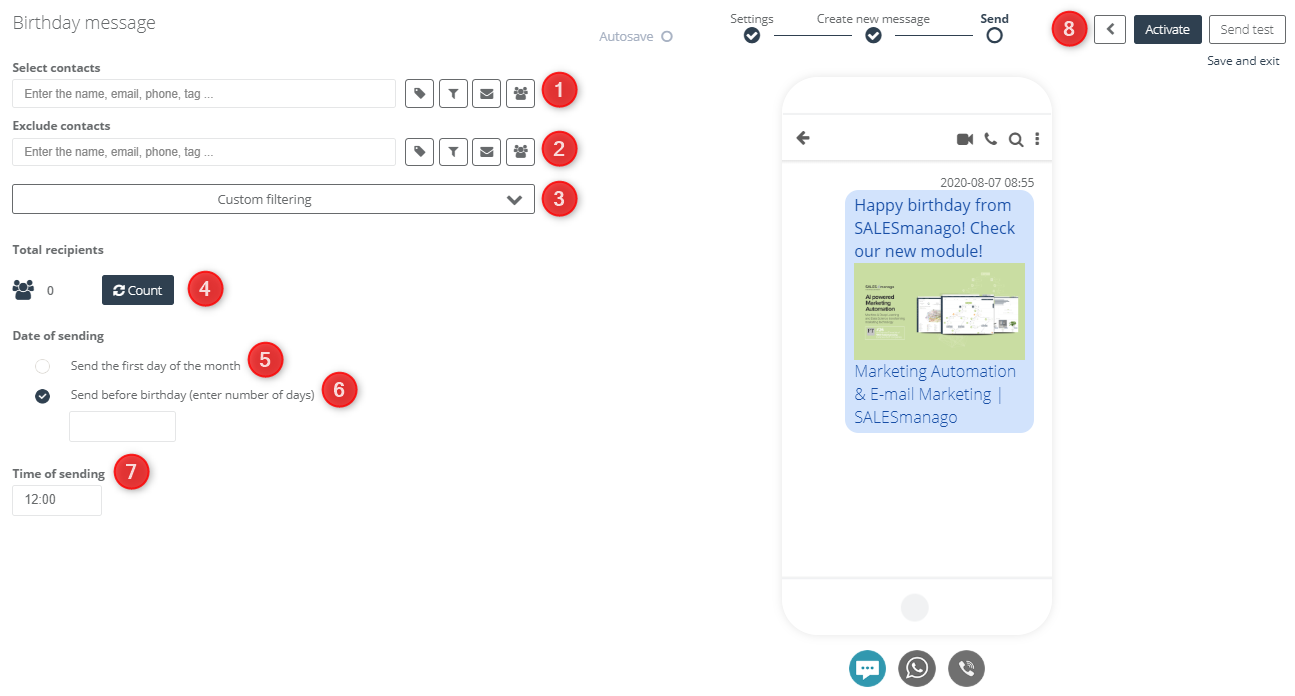
[1] Select contacts – specify the group of recipients to whom the text message is going to be sent. The choice of addressees is exactly the same as in mailings. More information about addressing selectors you can find here >>
IMPORTANT: Remember, that the message can only be sent to users with a given phone number on the contact card. It is important that only one number is given in this field.
[2] Exclude contacts – select recipients excluded from sending the message in the same way as in point [1].
[3] Custom filtering – select additional filters from the list. More information about advanced sending based on available filters you can find here >>
[4] Count – convert the number of people who will receive the text message.
[5] Send the first day of the month – set the sending date as the first day of the month in which the selected contacts celebrate birthdays.
[6] Send before birthday (enter number of days) – enter the number of days before the contact’s birthday when you want to send the birthday message in the empty field. For example, if the contact has a birthday on 10th of january and you enter 7 in the empty field, the contact will receive a birthday message on 3rd of january. You can enter a value less than or equal to 30.
IMPORTANT: If you enter the number 0 in the given field, the birthday message will be sent on the contact’s birthday.
[7] Time of sending – set the time you want to send a birthday message to your contacts.
[8] Activate – enable birthday messages sending with the specified settings, Send test message to check if the message will be sent correctly, or Save and exit, to return later to creating message using the created template.