Configuration of synchronization can be done after the installation of the package from the link is ready. However, bear in mind that currently our integration involves the following packages:
- Enterprise
- Unlimited
- Developer
If you have not done the installation of the package from the link yet, click here.
So as to start records synchronization between Salesforce and SALESmanago, provide data in Connection Settings section (you can find it when you click SALESmanago Synchronization tab on the upper ribbon).
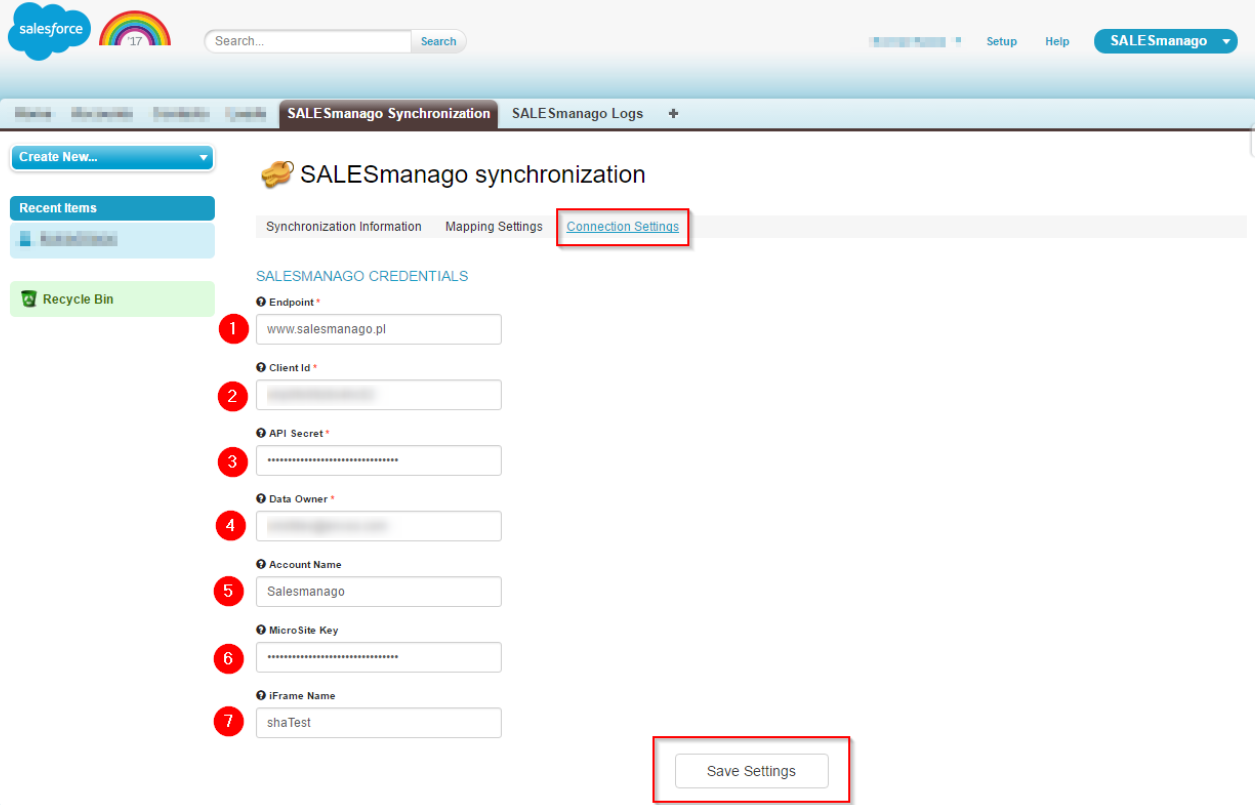
[1] Endpoint – the same as in this section Settings → Integration in SALESmanago system
[2] Client Id – the same as in this section Settings → Integration in SALESmanago system
[3] API Secret – the same as in this section Settings → Integration in SALESmanago system
[4] Data Owner – user name (in SALESmanago) whose account will be used while synchronization.
[5] Account Name – object name (in Salesforce) with which new records obtained from SALESmanago system will be assigned. It is not obligatory to provide the name of Account object, however bear in mind that without this name, records cannot be seen for other users of Salesforce.
[6] MicroSite Key – the same as in this section Settings → Integration in SALESmanago system
[7] iFrame Name – Landing Page name in SALESmanago system which will be displayed on synchronized records in Salesforce system.
Click Save Settings.
Monitoring of synchronization
In the application you can monitor synchronization when you go to Synchronization Information section.
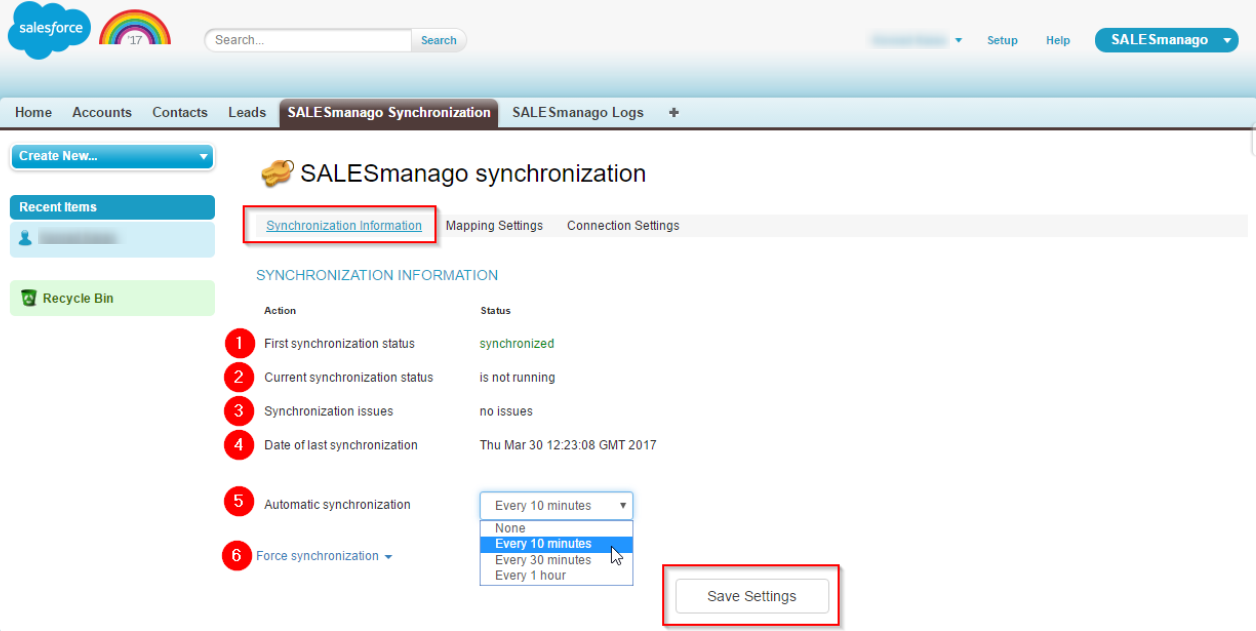
[1] First synchronization status – determines whether there is a full synchronization of data between Salesforce and SALESmanago (there should be a full synchronization after installation).
[2] Current synchronization status – current synchronization status.
[3] Synchronization issues – in case of the mistake you are informed about it in this section.
[4] Date of last synchronization – date of the last synchronization between Salesforce and SALESmanago.
[5] Automatic synchronization – there is an option of automatic synchronization between Salesforce and SALESmanago with the specified time interval.
[6] Force synchronization – in this section there is an option of manual synchronization. Click the arrow to unfold.

– Kick Off an Initial Sync – activation of full data synchronization between the systems
– Kick Off an Instant Sync – activation of data synchronization since the moment of last synchronization specified in Date of last synchronization section.
Field mapping while records synchronization
In the application it is possible to assign fields for both systems when you go to Mapping Settings.
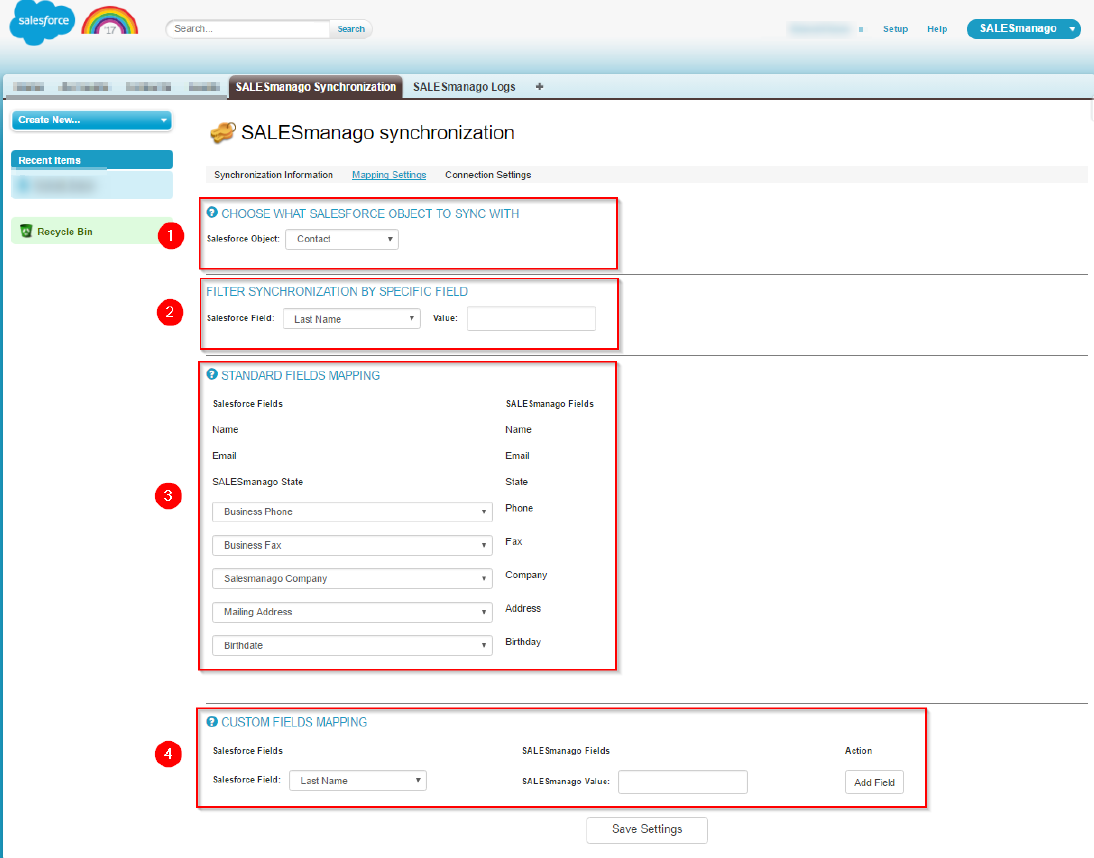
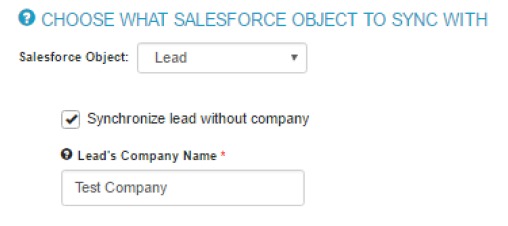
[1] The user can specify what is synchronized in Salesforce (objects like Lead, Contact, Person Account).
– when objects such Lead are synchronized, the user can decide whether to synchronize records which in SALESmanago have a field Company empty. In order to save Lead record in Salesforce system, it is required to fill in the field Company. When this field (SALESmanago) is empty and the user wants to synchronize the records, the field needs to be filled in in the app.
[2] The user can specify the criterion for records in the synchronization.
[3] The user can assign object fields from Salesforce system to the standard fields in SALESmanago system.
[4] The user can specify object fields in Salesforce system whose values will be seen in SALESmanago system (section: Details).
Page Layout
In Salesforce it is possible to set layout (what is visible and fields order) of contact cards, leads etc. The application has a default layout in which you can find fields that are connected with SALESmanago and iFrame.
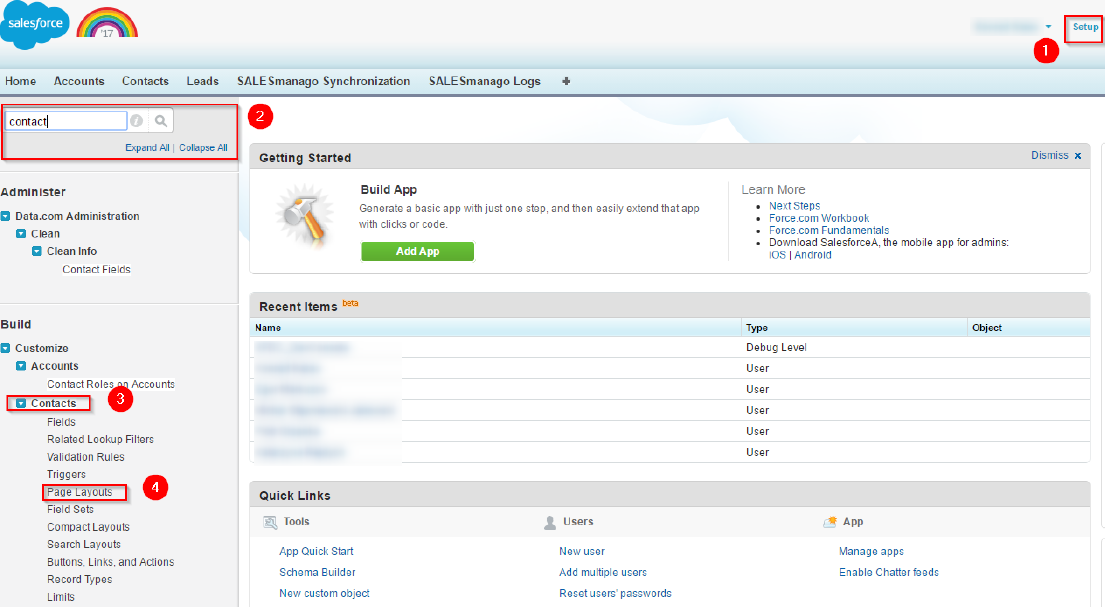
How to set the layout:
[1] Setup – in this section in the browser [2] look for the object (e.g. Contact) and go to settings of the Page Layout (Contacts → Page Layouts).
You will be redirected to the window as you can see below.
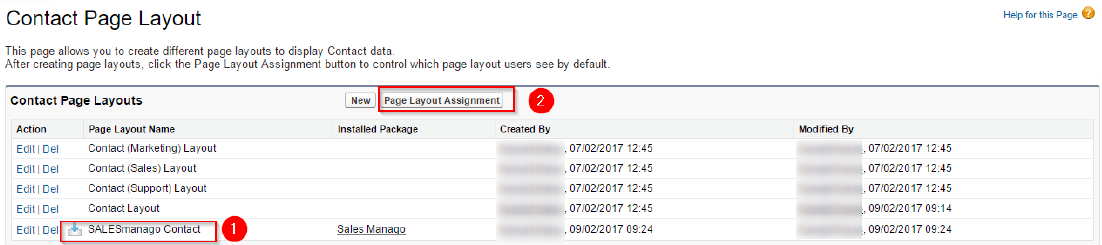
Here you can see Contact Page Layouts with the package installed [1]. Now you can assign the layout to the contacts’ records when you click [2] Page Layout Assignment
Click Edit Assignement.
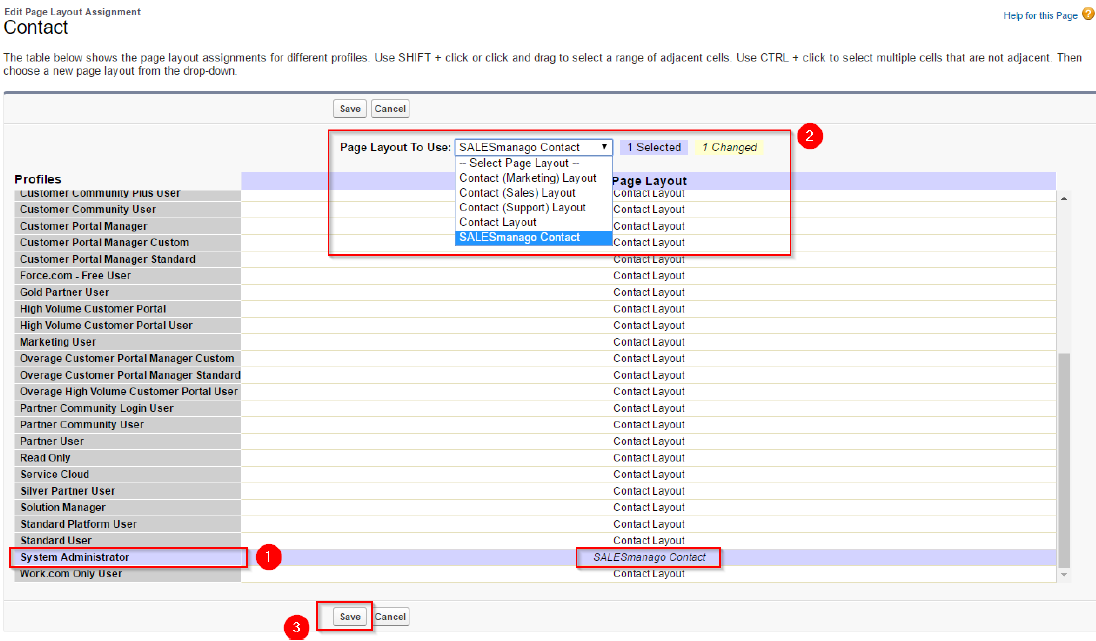
For the selected user profile [2] you assign contact layout (accounts on the testing environment have System Administrator profile [1]). Click [3] Save.