1. So as to start SALESmanago – Salesforce integration, click the link
IMPORTANT: If you want to install the package inside sandbox environment, replace „login.salesforce.com” with the domain of your environment e.g. https://ap4.salesforce.com/packaging/installPackage.apexp?p0=04t6F000000cbUu
2. When you click the link, you are redirected to Salesforce website. Log in.
3. In the next step, select who can see the integration.
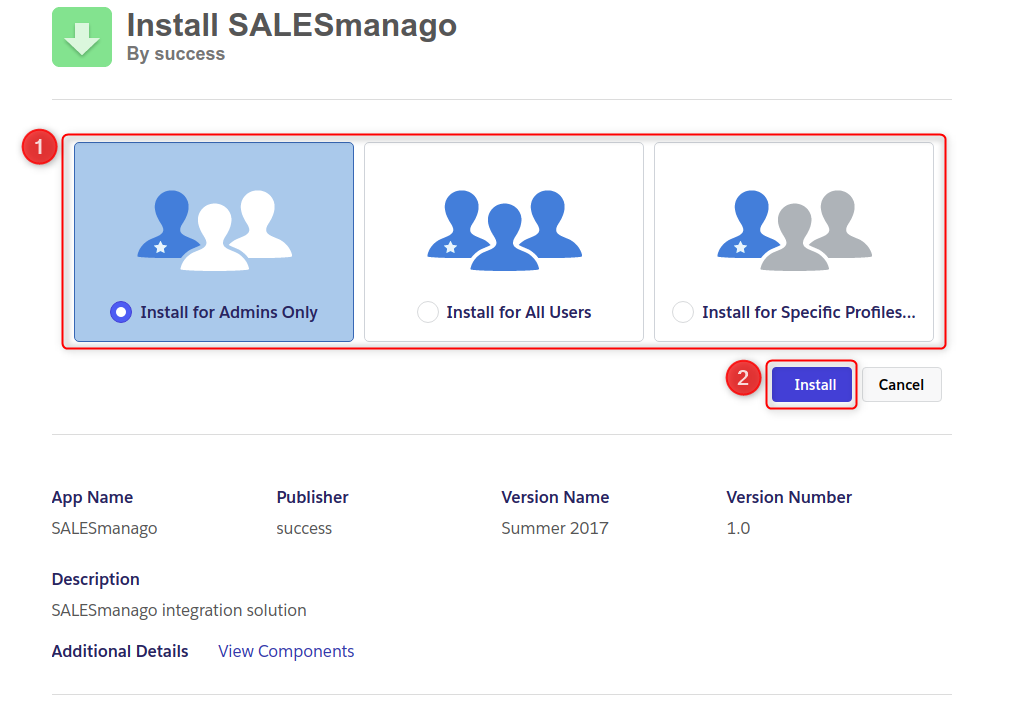
[1] Select users (system users – not clients). The system selects Admins by default.
Click [2] Install. Then you are asked to give a consent to connecting with app1 app2 app3.
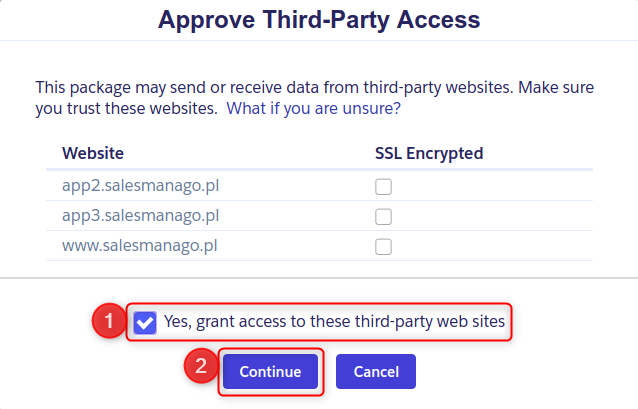
Check [1]Yes and click [2]Continue. Now installation is in progress.

You are informed when the installation is completed.
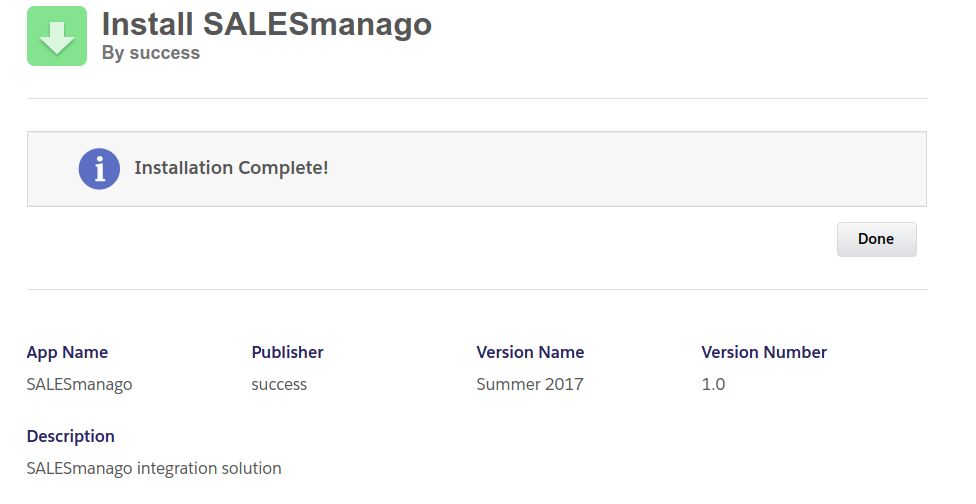
4. Click Done and you are redirected to Salesforce panel where you can adjust your layout and take benefits from SALESmanago-Salesforce integration.
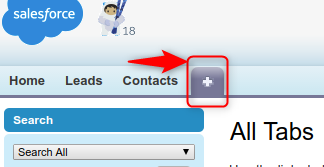
Click + next to the main tabs.
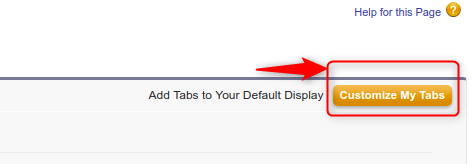
Click Customize My Tabs on the right-hand side.
In this panel you need to add SALESmanago tabs to the right column.
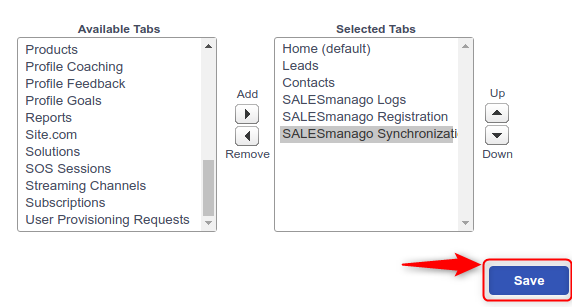
Then click Save. Now you can see the tabs on the main ribbon.

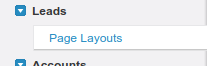
5. In the next step you need to set the layout for Contacts and Leads. Click Setup in the right top corner and next, look for Page layout in the browser. Select the option as you can see below:
When you click this option, you will see the window as below. Click Page Layout Assignment in this window.
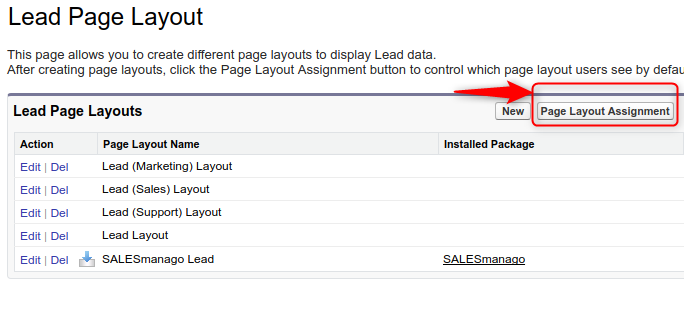
There you will see Lead Page Layout. Edit Assignment, select the role (System Administrator in this case) and SALESmanago layout. You can also edit your own layout.
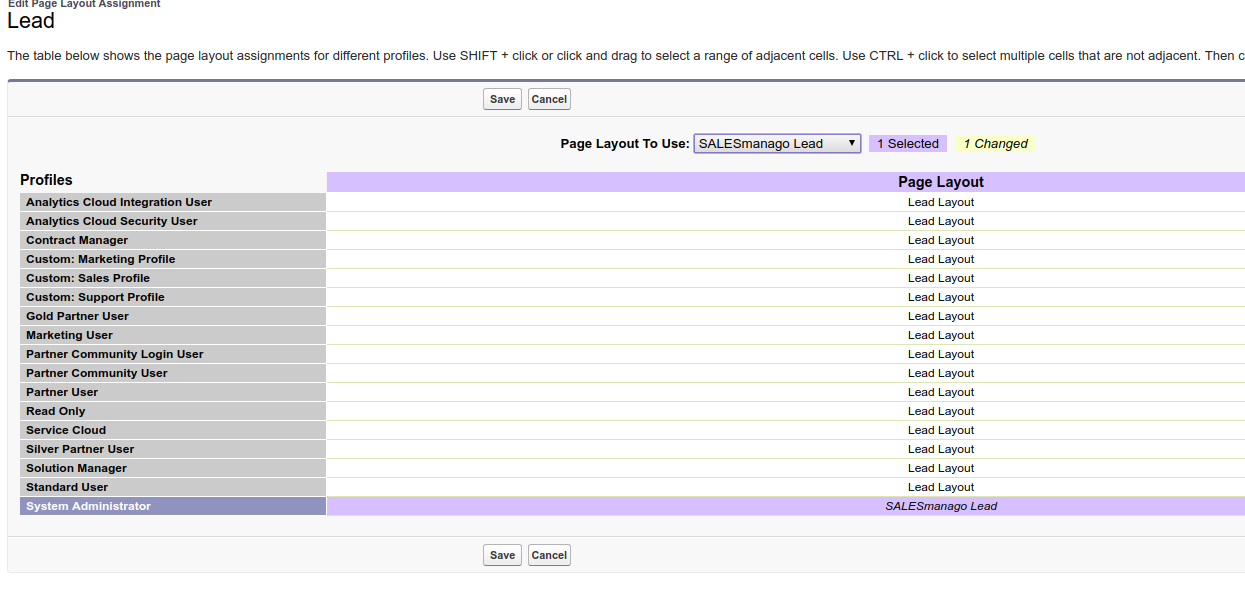
Save changes and do the same for Contacts – start from point 5. and make changes for Contacts Page layout.
Now you can see SALESmanago in the window.

IMPORTANT: The integration also includes sending tags (SALESmanago) and topics (SalesForce). These data are transferred correctly during the first synchronization, and in the case of subsequent synchronizations:
- Changing topics in Salesforce is assigned to tags in SALESmanago.
- Changing tags directly in SALESmanago (e.g., removing a tag) does not affect the contact modification date (modifiedOn), on which the synchronization is based, and such a change may not be registered.
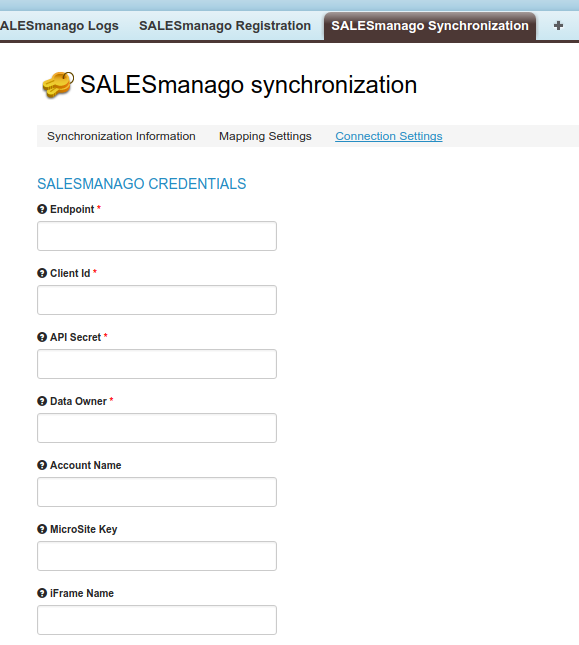
6. The last step is to provide access data in Salesmanago Synchronization (iFrame name is microsite name from SALESmanago system, it is displayed in Contacts and Leads layout) – other data can be found in SALESmanago panel:
After successful installation, go to this article to step-by-step configuration of synchronization.