Shopware 6 is a leading eCommerce platform intended for B2B and B2C activities. The platform offers broad possibilities for configuring your e-store and enriching your range of functionalities with various plugins and integrations. Now you can integrate your Shopware 6 platform with SALESmanago and transfer Contact and transaction data between the two. You can use this information in your marketing automation activities.
To download the plugin, click here.
Contents
- Basic information
- Scope of integration
- Installation
- Configuration
A. Logging in
B. Account settings
C. Platform settings
D. Export Data - Technical description
A. Monitoring code
B. Database
C. External Event data fields
1. Basic information
In this article, you will find detailed information about integration with the Shopware 6 platform. The plugin is available for free for our customers and is constantly being improved.
The integration will allow you to transfer relevant Contact and transaction data between the two platforms. You can use this information to automate your marketing activities and thus boost your e-store sales.
The plugin supports all stores created on a given account under the multistore functionality. After you have installed the plugin, you need to activate the integration by logging in to the store that you want to integrate. To this purpose, select the store and type in your login data (see section 4 – “Configuration”).
IMPORTANT: A single store can be integrated with only one SALESmanago account at a given time (whereas a single SALESmanago account can be integrated with a number of stores).
When uninstalling the plugin, you have the option to keep your selected SALESmanago settings (in case you want to reinstall it in the future).
Check the current plugin version, system requirements, and additional information >>
2. Scope of integration
After logging in to the plugin, synchronization and data transfer are performed automatically.
The scope of integration includes sending the following data to SALESmanago:
- Data of Contacts registering or making a purchase in your store.
- Newsletter subscription status (opt-in/opt-out).
- External Events: CART and PURCHASE (see section 5.C).
- Tags assigned to Contacts following specific External Events.
- Multistore support.
- Cart recovery.
- Previous interactions (export of historical Contact and transaction data).
3. Installation
Click here to download the plugin >>
After downloading the plugin, go to the Shopware 6 platform and from the sidebar navigation menu, select Extensions [1] => My extensions [2]. Then click on “Upload extension” [3] and select the downloaded ZIP file.
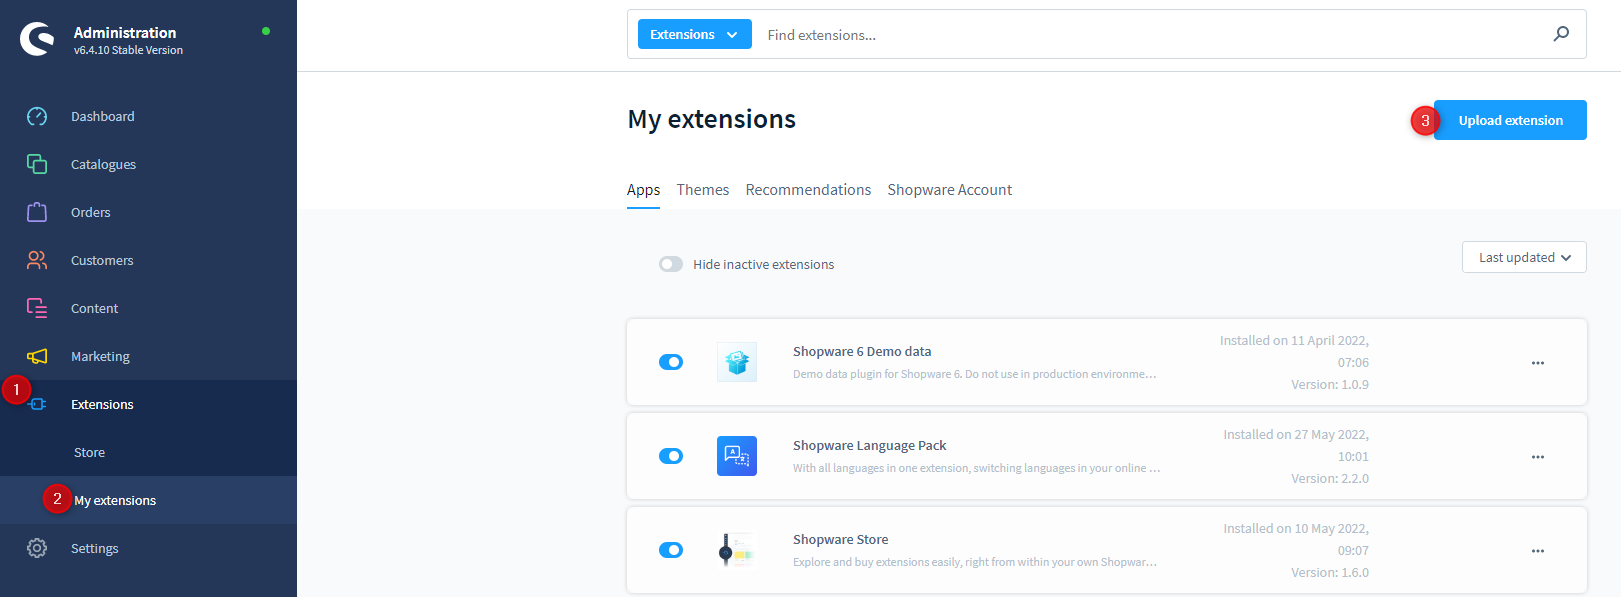
When the plugin has been uploaded, click “Install app” [4].

NOTE: The plugin will only work when activated (and when you are logged in – see section 4.A below). To this purpose, make sure that the toggle button is “on”, i.e. is marked in blue.

If you have completed the steps above, you can proceed to Configuration.
4. Configuration
A. Logging in
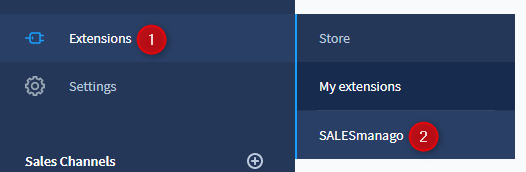
To configure the plugin, go to the side navigation menu and select Extensions [1] → SALESmanago [2].
You will see a login panel. First, select the store to which you want to log in [1]. Enter the login data for your SALESmanago account: the e-mail address [2] and the password [3].
NOTE: The plugin will only work when you are logged in (and when the plugin is activated – see section 3 above).
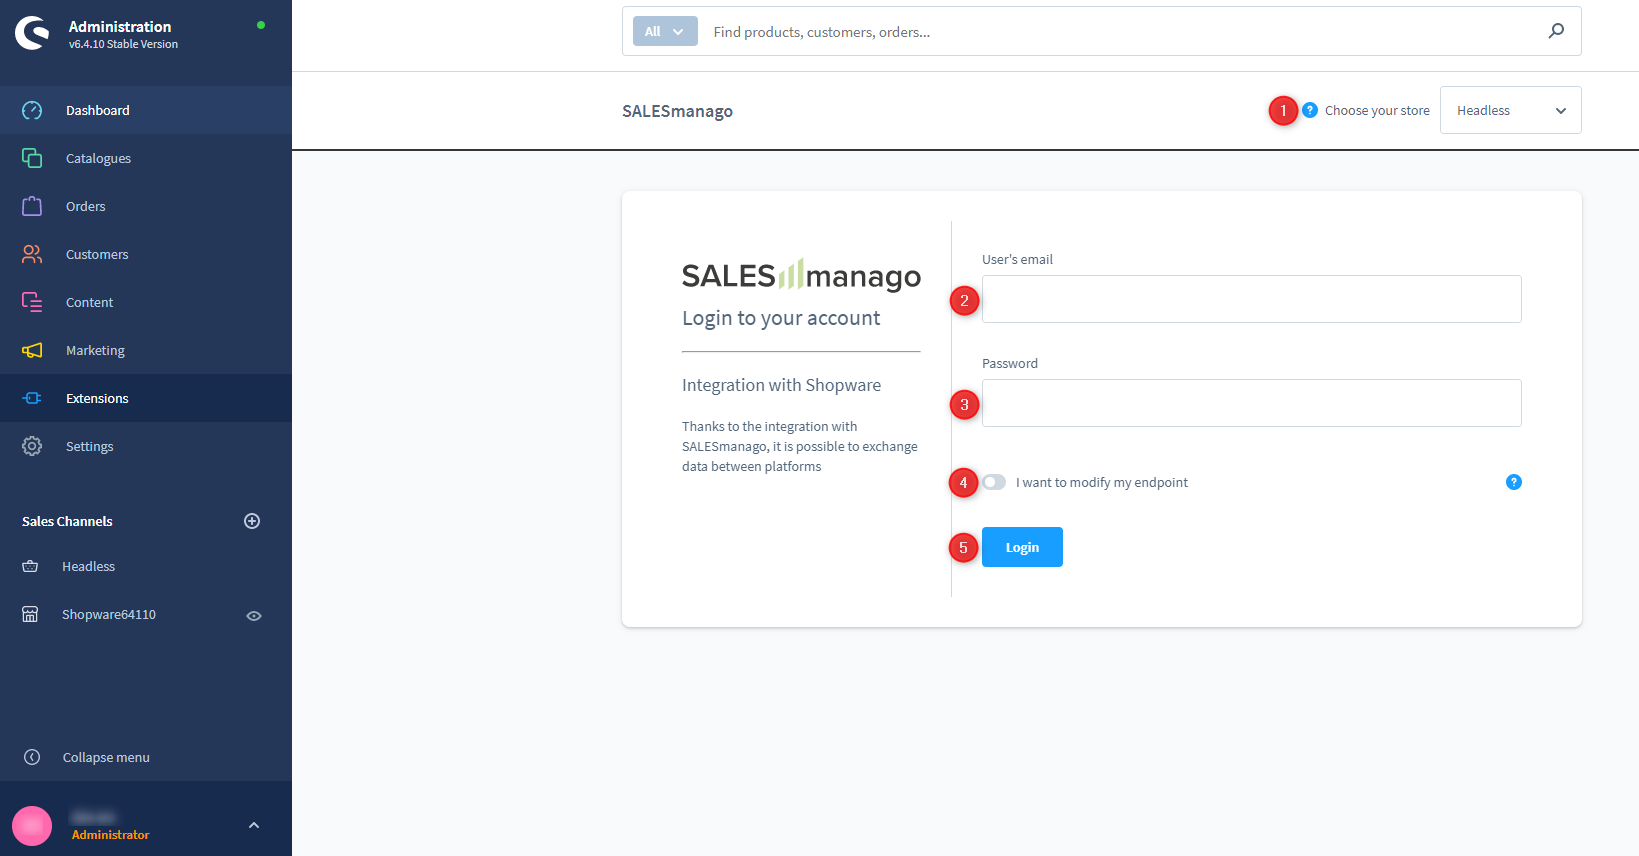
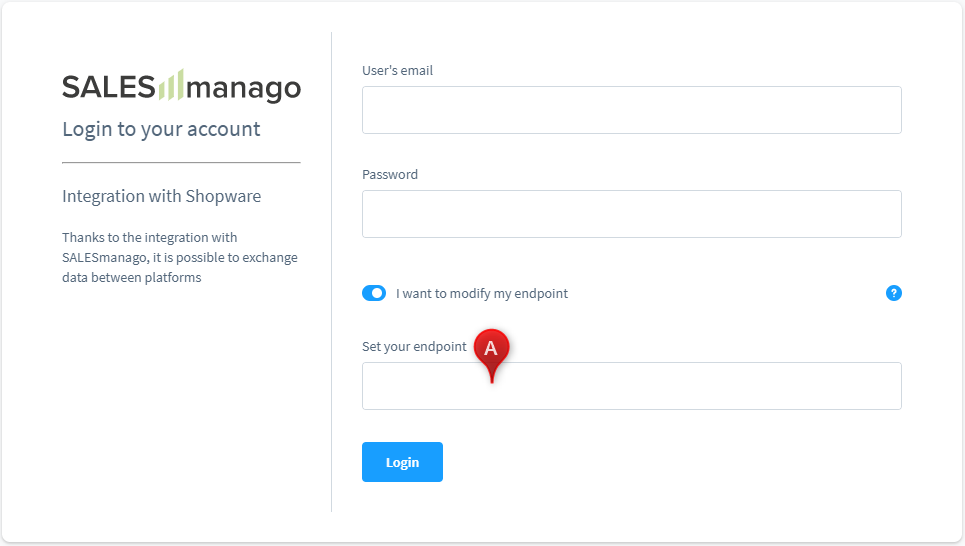
If your account uses a non-standard endpoint (i.e. other than www.salesmanago.com, app2.salesmanago.com or app3.salesmanago.com), you can modify your endpoint. Activate this option by clicking on the toggle button [4]. Then enter the URL for your custom endpoint in the text field [A].
Click the “Login” button [5].
If you have entered the correct login data, you will see a SALESmanago logo and a top navigation menu.
B. Account settings
This is where you can define the basic integration settings.
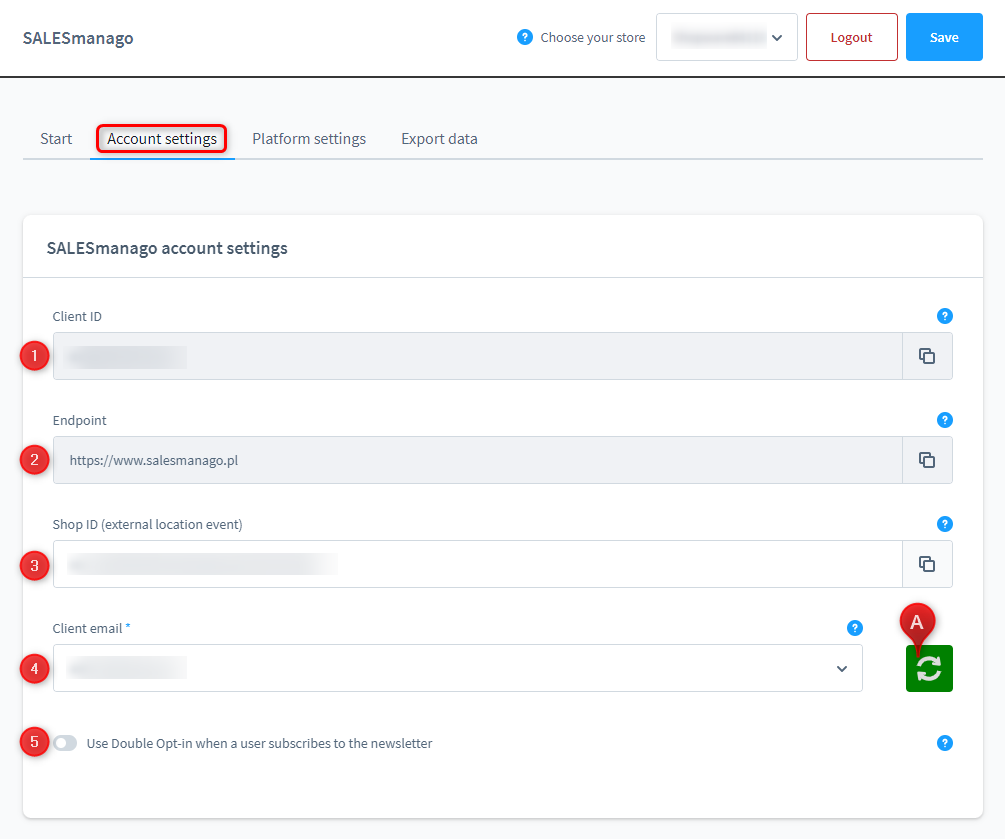
[1] Client ID – your Client ID in the SALESmanago system. This field cannot be edited as the value is uploaded automatically from SALESmanago.
[2] Endpoint – informs about the location of your account. This field cannot be edited as the value is downloaded automatically from SALESmanago.
[3] Location (e-store ID) – specify the value of the location field that will be sent to SALESmanago as part of External Events. You can leave the default name or give your shop a name of your choice (e.g. MyShop). The value of this field must match the location field configured in the SALESmanago system (Menu → Integrations → Integration Center → Product Catalogs). It is important to make any necessary changes so that they both have the same value. This data will be used to display products in e.g. recommendation frames, newsletters, and Web Push notifications.
[4] Client email – select the Contact owner to whom Contacts acquired through your shop will be assigned.
NOTE: The owner list is received from SALESmanago when you log in to the SALESmanago plugin. If there have been any changes to the owner list since then, click on the “Refresh” button [A] to update it.
[5] Use Double opt-in when a user subscribes to the newsletter – click on the slide button to enable the double opt-in option.
Learn more about the double opt-in (double consent) mechanism >>
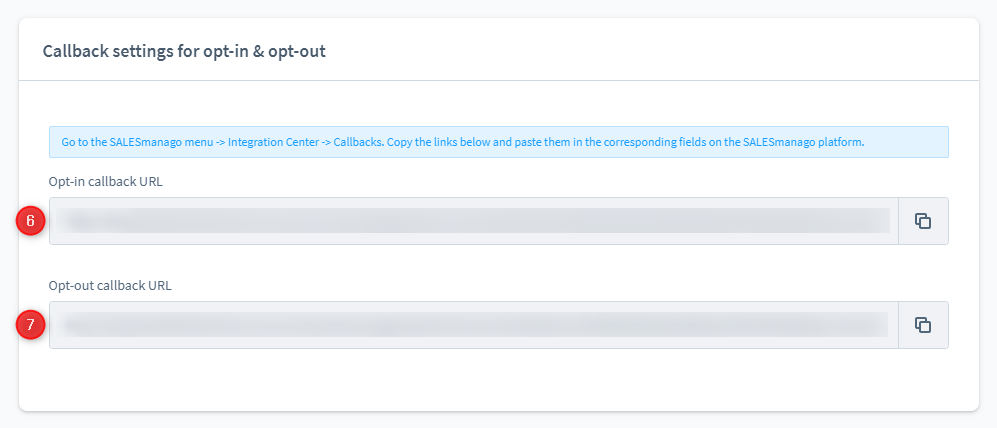
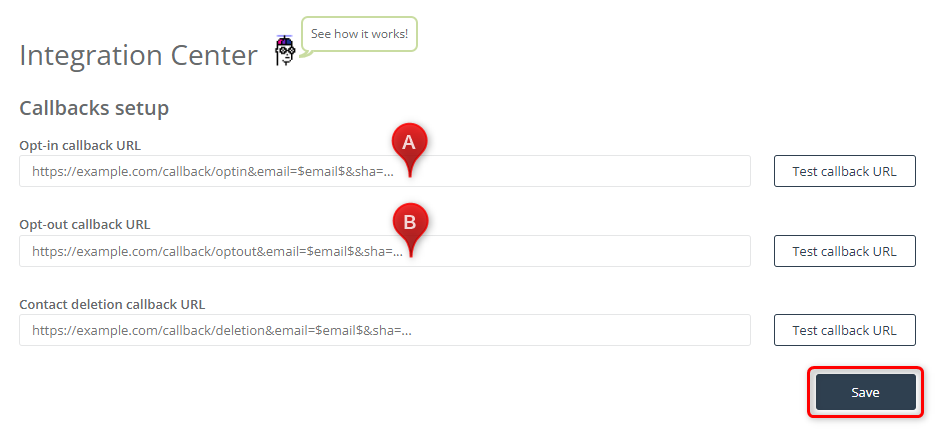
Callbacks allow you to synchronize the opt-in/opt-out status from SALESmanago to Shopware 6. If the opt-in/opt-out status of a Contact changes in the SALESmanago system, this information will also be updated on the Shopware 6 platform.
To set the callbacks, copy the automatically generated URLs provided in fields [6] and [7]. Then go to the Menu → Integrations → Integration Center → Callbacks and paste them in the corresponding fields ([A] and [B], respectively). Click “Save”.
C. Platform Settings
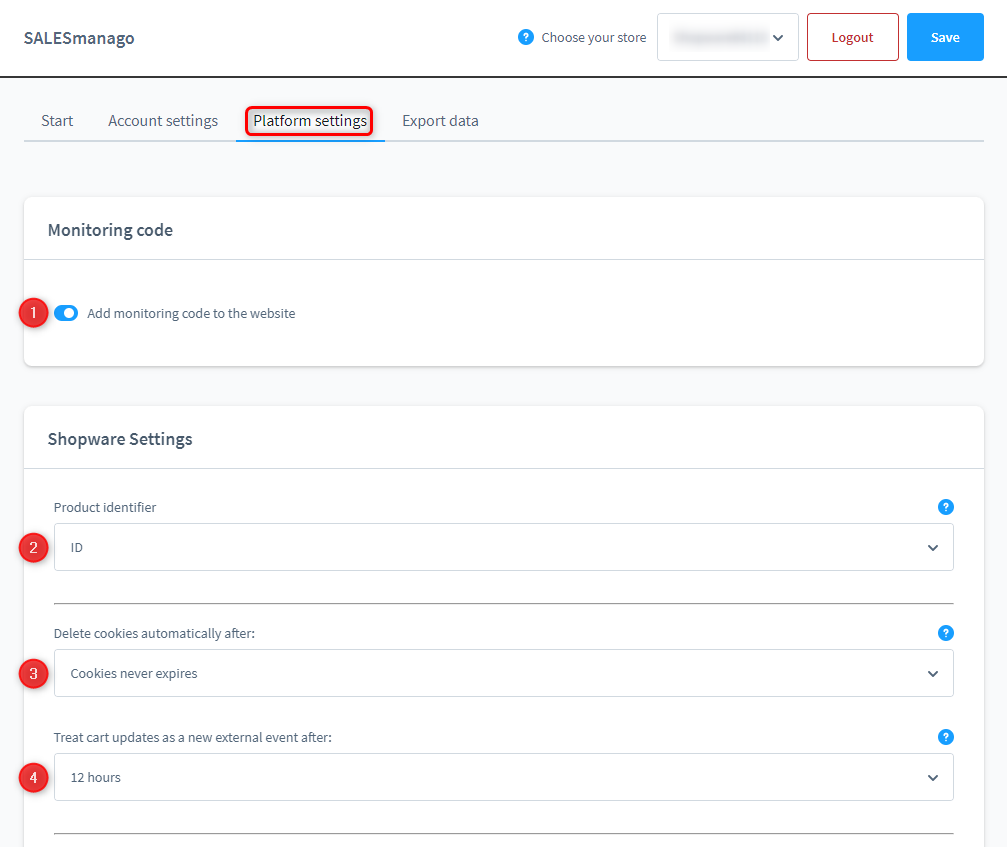
[1] Add monitoring code to the website – this option is active by default. If you prefer to add the monitoring code manually, deactivate it by clicking on the slide button.
[2] Product identifier – select what type of product ID will be sent to SALESmanago as part of external events (mainly CART and PURCHASE). You can choose from the following options:
- ID,
- Variant ID,
- SKU.
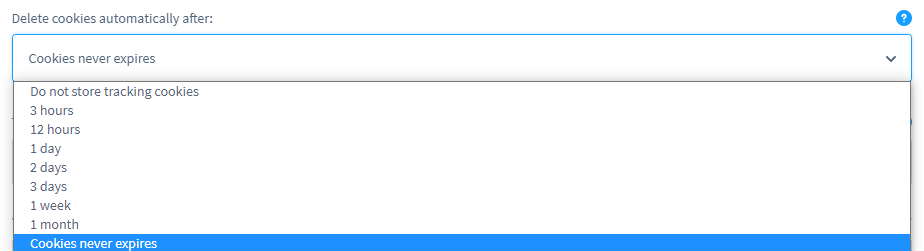
[3] Delete cookies automatically after – specify how long SALESmanago cookies will be active, i.e. after what time they will expire.
The default option is “Cookies never expire”.
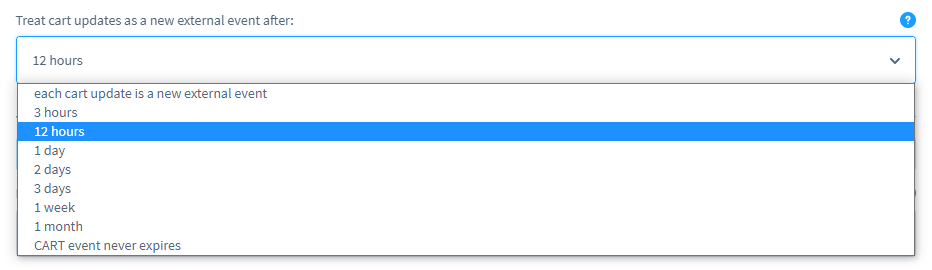
[4] Treat cart updates as a new external event after – specify the time after which a cart update will be treated as a new external event. Any changes to the cart before the expiry of this period will be treated as part of the same external event.
The default option is “12 hours”.
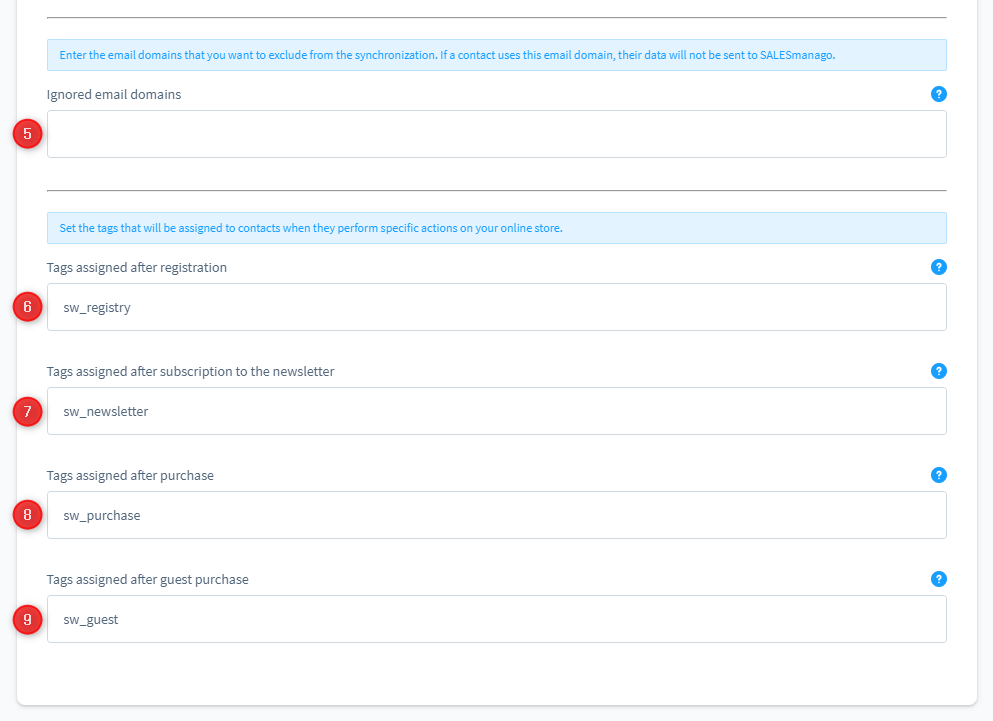
[5] Ignored email domains – specify the email domains to be ignored, i.e. domains for which no data will be sent to SALESmanago.
Example: If you enter example.com in this field, Contacts using this email domain (having email addresses ending with @example.com) will not be sent to the SALESmanago platform.
IMPORTANT: Separate the domains with commas.
The next step is to set the tags that will be assigned to Contacts whose data are sent to SALESmanago.
[6] Tags assigned after registration – enter the tags to be assigned to a user when they create a new account in your online store.
[7] Tags assigned after subscription to the newsletter – enter the tags to be assigned to a user when they give their consent to the receipt of marketing emails.
[8] Tags assigned after purchase – enter the tags to be assigned to a registered user when they make a purchase in your online store.
[9] Tags assigned after guest purchase – enter the tags to be assigned to a non-registered user making a purchase as a guest.
IMPORTANT: Separate the tags with commas.
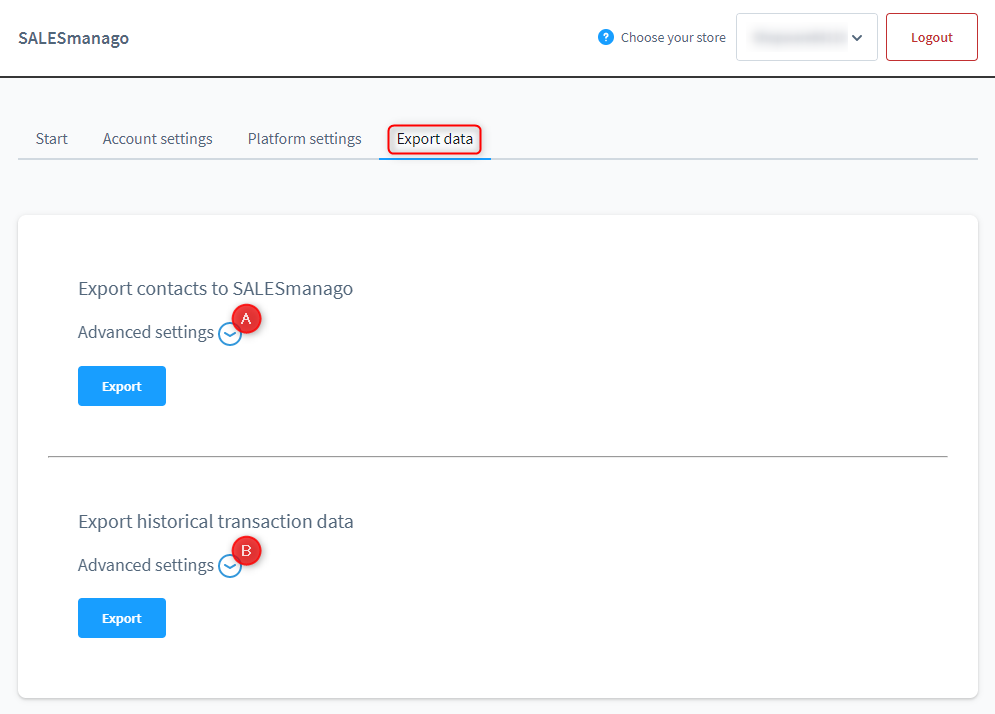
D. Export data
Here you can export two types of data – Contact data and historical transaction data – to SALESmanago.
NOTE: The export options apply to data from before the installation and activation of the plugin. Starting from the activation, Contacts and Events are transferred to SALESmanago automatically.
IMPORTANT: Make sure that you export Contact data first, before exporting the transaction data.
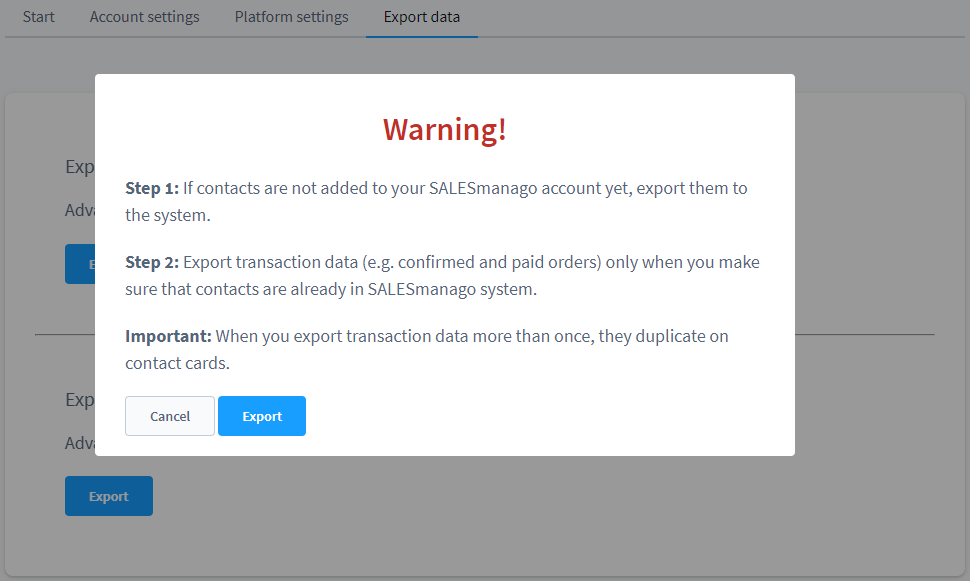
IMPORTANT: The option: Export historical transaction data should only be used to export historical transactions (transactions that took place before the activation of the plugin). Any new transactions (since the activation of the plugin) are sent to SALESmanago on an ongoing basis. This means that historical transaction data should only be exported ONCE.
If you export transaction data more than once, they will be multiplied on the SALESmanago platform.
You will see these warnings each time you try to export historical transaction data.
Click on [A] or [B] to define Advanced Settings.
[A] Export Contacts to SALESmanago – Advanced Settings
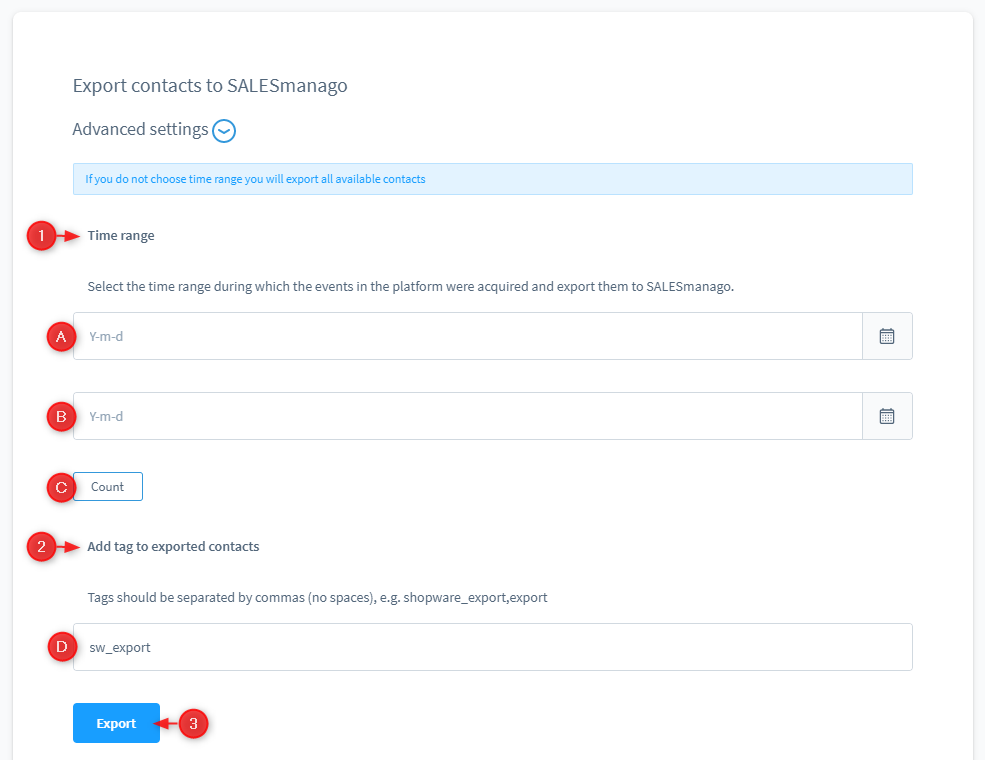
[1] Time range – here you can specify the time range for which you want to export Contact data.
If you do not specify a time range, all available events will be exported.
[A] – click on this text field to select the start date from the calendar.
[B] – click on this text field to select the end date from the calendar.
IMPORTANT: If you provide only the start date, all data collected since that date up to the present moment will be exported.
If you provide only the end date, all data collected since the creation of your store up to that date will be exported.
[C] Count – click on this button to see how many Contacts will be included in the export based on the time range specified.
[2] Add tag to exported contacts – here you can define the tags to be added to the Contacts included in this export. Enter the tag(s) in field [D]. If there is more than one, separate them with commas. The default tag is sw_export.
Having defined the settings, click Export [3].
[B] Export historical transaction data – Advanced settings
Here you can specify the time range for which you want to export transaction data (data concerning PURCHASE and GUEST PURCHASE events).
If you do not specify a time range, all available events will be exported.
IMPORTANT: If you export transaction data more than once, they will duplicate on Contact cards.
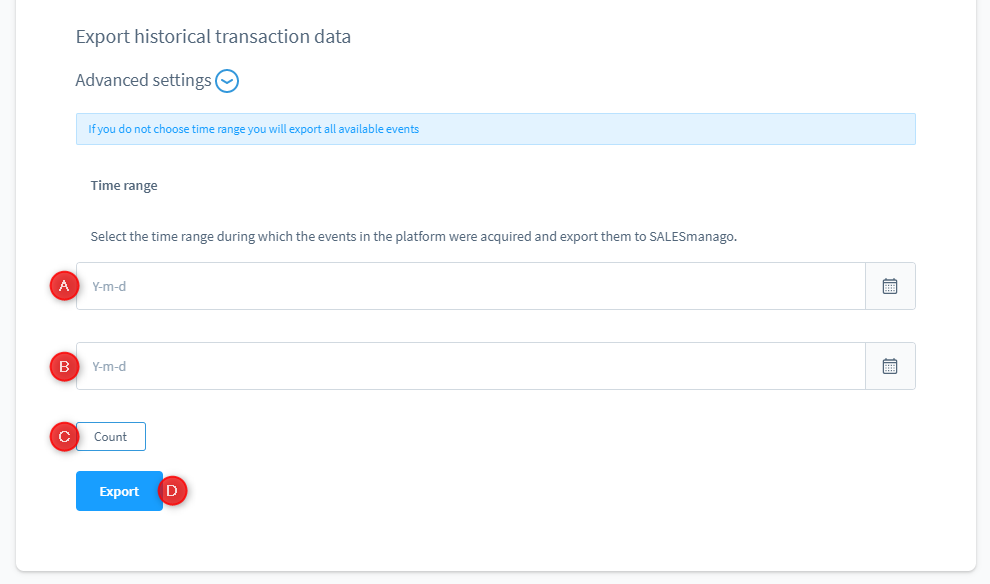
[A] – click on this text field to select the start date from the calendar.
[B] – click on this text field to select the end date from the calendar.
IMPORTANT: If you provide only the start date, all data collected since that date up to the present moment will be exported.
If you provide only the end date, all data collected since the creation of your store up to that date will be exported.
[C] Count – click this button to see how many transaction events (PURCHASE and GUEST PURCHASE) will be included in the export based on the time range specified.
Having defined the settings, click Export [D].
5. Technical description
A. Monitoring Code
When the integration is activated, the monitoring code is added automatically to your e-store.
You can deactivate the monitoring code in the Platform Settings tab (see section 4.C [1] above).
B. Database
For the SALESmanago plugin to work, the Shopware database must store its configuration data. As a result of the plugin installation, two tables are created in the Shopware database:
- salesmanago_config – this table contains data required for the authorization of the SALESmanago account and settings related to the SALESmanago platform (double opt-in management, selection of the Contact owner). The table contains all entries from the Account Settings tab.
- salesmanago_system – the table contains settings related to the manner in which data from the SALESmanago plugin are processed by the store, including the cookie lifetime and External Event tags. The table contains all entries from the Platform Settings tab.
C. External Event data fields
C.1. PURCHASE
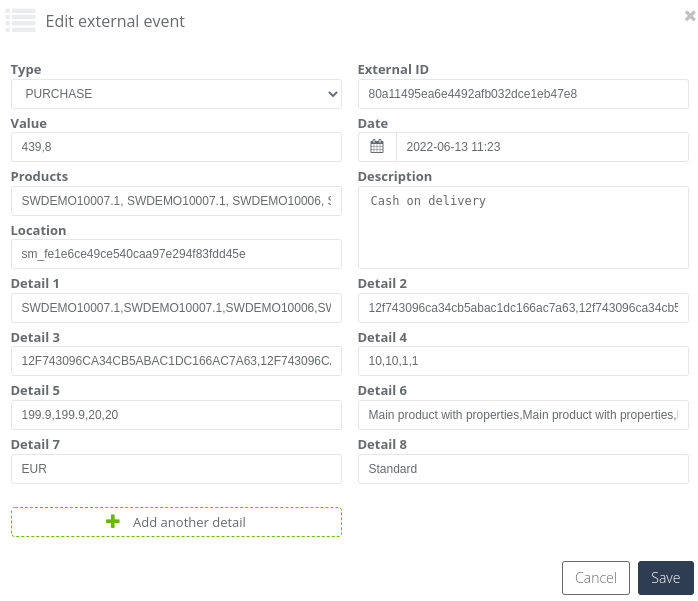
Data sent in PURCHASE events:
- Type – PURCHASE;
- External ID – the event’s identifier on the Shopware platform;
- Value – total PURCHASE value;
- Date – date of occurrence;
- Products – the products’ IDs / SKUs / Variant IDs (depending on your settings – see section 4.C [2] above);
- Description – payment method;
- Location – contents of the Location field on the Shopware platform;
- Detail 1 – product SKUs;
- Detail 2 – variant IDs;
- Detail 3 – product IDs;
- Detail 4 – product quantities;
- Detail 5 – product values;
- Detail 6 – product names;
- Detail 7 – currency;
- Detail 8 – delivery method.
C.2. CART
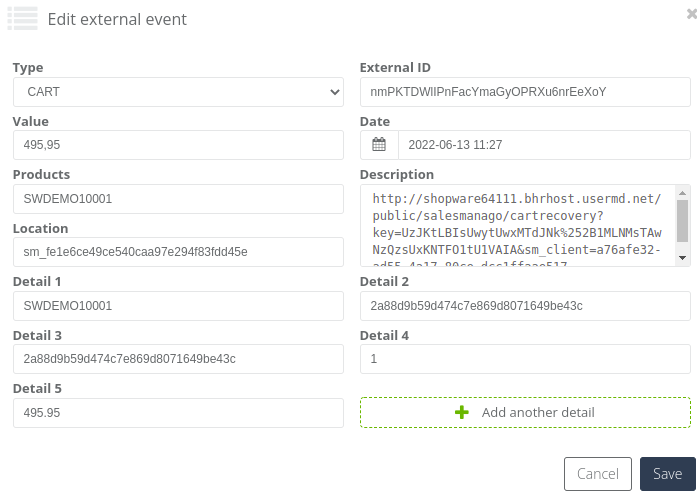
Data sent in CART events:
- Type – CART;
- External ID – the event’s identifier on the Shopware platform;
- Value – total CART value;
- Date – date of occurrence;
- Products – the products’ IDs / SKUs / Variant IDs (depending on your settings – see section 4.C [2] above);
- Description – cart recovery URL;
- Location – contents of the Location field on the Shopware platform;
- Detail 1 – product SKUs;
- Detail 2 – variant IDs;
- Detail 3 – product IDs;
- Detail 4 – product quantities;
- Detail 5 – product values.