Useful links
Use the List of sent emails to evaluate basic statistics of all your email campaigns and to easily access the analytics of each individual email campaign. Analyze the statistics for sent, scheduled, and test messages. Search the list using the calendar, search engine, or filters to quickly find the campaigns you are interested in. Make the most of the Email Analytics panel.
In order to open List of sent emails, go to
Channels → Email Marketing → Email Analytics

List of sent emails
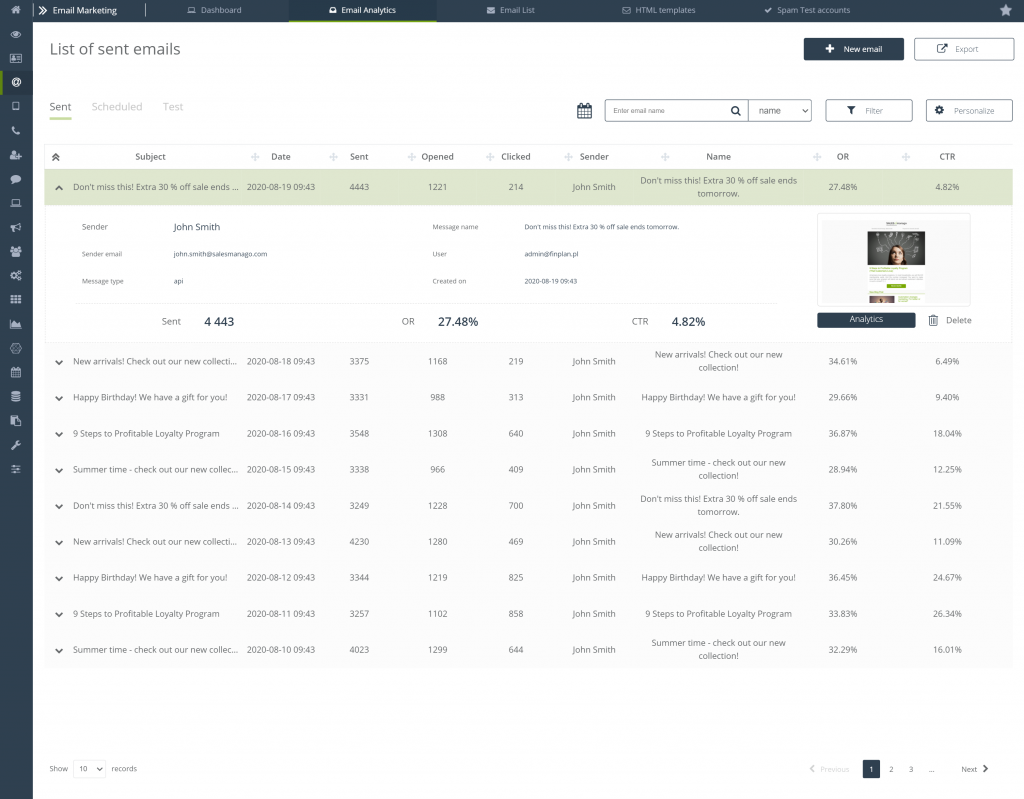
List of sent emails is the place where you will find all sent, scheduled, and test e-mails from the Email Marketing module. You can personalize it as you like – add, delete, and move its elements among themselves.
View messages:
- Sent – all messages sent, except for messages sent from Workflow and Automation Rules,
- Scheduled – these are ready-to-send messages for which the sending time has been set,
- Test – messages sent as a test in the Email Marketing module,
From here, you can go to the detailed analytics for each email. Check the basic data for the selected mailing, or go to their detailed analysis.

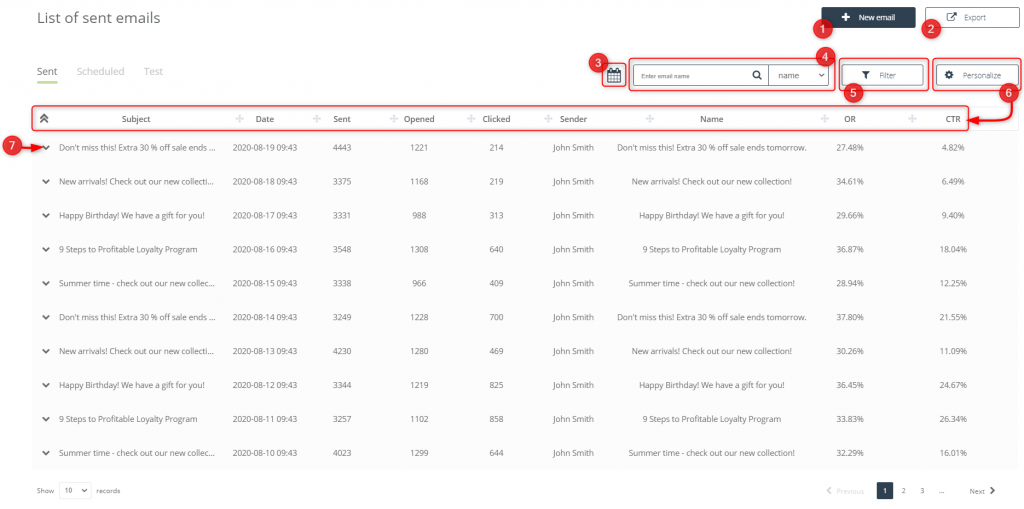
[1] +New email – click the button to proceed to compose an email using Email Designer or HTML Creator.
[2] Export – allows you to export all types of messages to a specific folder:
[A] Choose folder – select the destination for exporting messages.
[B] Time period – specify the dates of the emails you want to export using the calendar.
[3] Calendar – select the time period for which you want to display the messages, the selected dates refer to the time of sending the mailing. You can select any number of days as a range or one specific. After clicking “Save” the list will automatically shorten to the searched ones.
[4] Searcher – you can search for messages on the list also by their subject or name, after entering the phrase, the list will automatically shorten.
[5] Filter – use filters to find the message that you are interested in:
[A] Emails – filter the list based on the source and type of messages. You can also preview data for deleted emails by checking the “deleted” checkbox.
[B] Advanced – enable advanced filters to display campaigns for which the number of sent, opened, and clicked messages was >, = or < to the entered number.
[6] Personalize – click the button to freely edit the table. You can enable or disable the display of data, and rearrange the following elements:
- Date
- Sent
- Opened
- Clicked
- Sender
- Name
- OR
- CTR
The only one necessary element that is always displayed is the Subject.
[7] Open the mailing data
[A] Basic data – the sender’s details, message type, name and creation date are displayed here.
[B] Sent – total number of messages sent for a given mailing.
[C] OR – openness ratio, showing the ratio of unique openings of a message to the number of messages sent, expressed as a percentage (excluding soft and hard bounces).
[D] CTR – click-through rate, which shows the ratio of unique clicked links on a message to the number of messages sent, expressed as a percentage (excluding soft and hard bounces).
[E] Analytics – go to a detailed analysis of the given mailing.
[F] Delete – delete a message from the List of sent emails, remember that deleted messages will not be displayed in the statistics shown on the Dashboard.
[G] Go to preview – click to preview the given mailing and the way it is displayed to users of your contact database.


