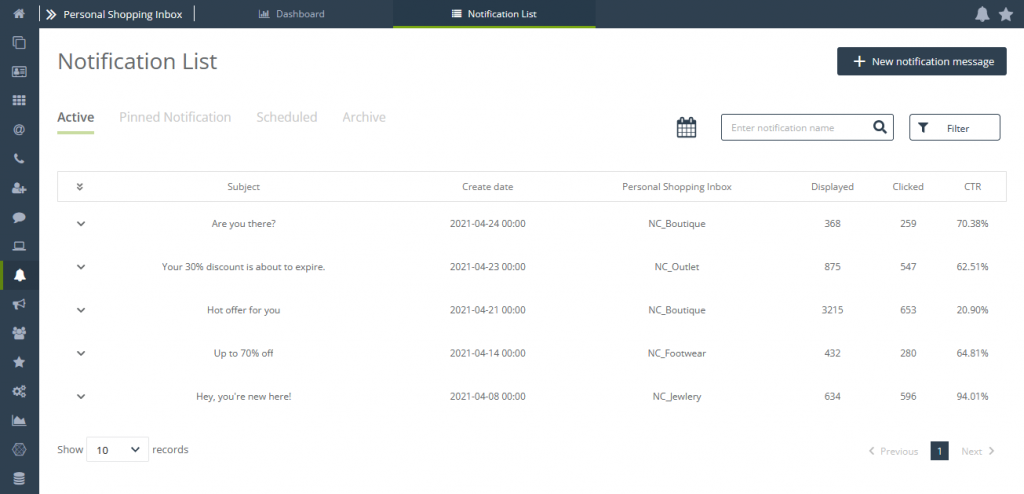
Personal Shopping Inbox notifications are a vital part of marketing communications. Consisting of an icon and a short text, messages are a quick and effective way to reach your contacts. Thanks to SALESmanago’s intuitive wizard, you can easily prepare your own notifications. Active, Scheduled, and Archived notifications can be found on the Notification List.
To open the Personal Shopping Inbox Notification List, go to
Channels → Personal Shopping Inbox → Notifications
Contents
1. Basic Information
2. Notification List
a. List tabs
b. List filters
c. Notification view on the list
3. Notification analytics
1. Basic Information
Personalized notifications sent through the Personal Shopping Inbox are a carrier of special offers. Contacts can store these notifications in a separate inbox provided by Personal Shopping Inbox (Notification Tab). Active, Scheduled, and Archived messages can always be viewed and analyzed. In the system, they are collected in a convenient Notification List. The list provides quick access to basic statistics and also allows you to easily enter the analytics of a single notification.
ATTENTION: You can only see your notification data if you choose to display notifications in your Personal Shopping Inbox.
2. Notification List
The Notification List gives you quick access to Active, Pinned (set to display at the top of the list in Personal Shopping Inbox), Scheduled, and Archived notifications. The list has several filtering options. It also allows you to go to the analytics of a specific notification with one click.
IMPORTANT: Summary notification analytics are available on the Personal Shopping Inbox Dashboard.
List tabs
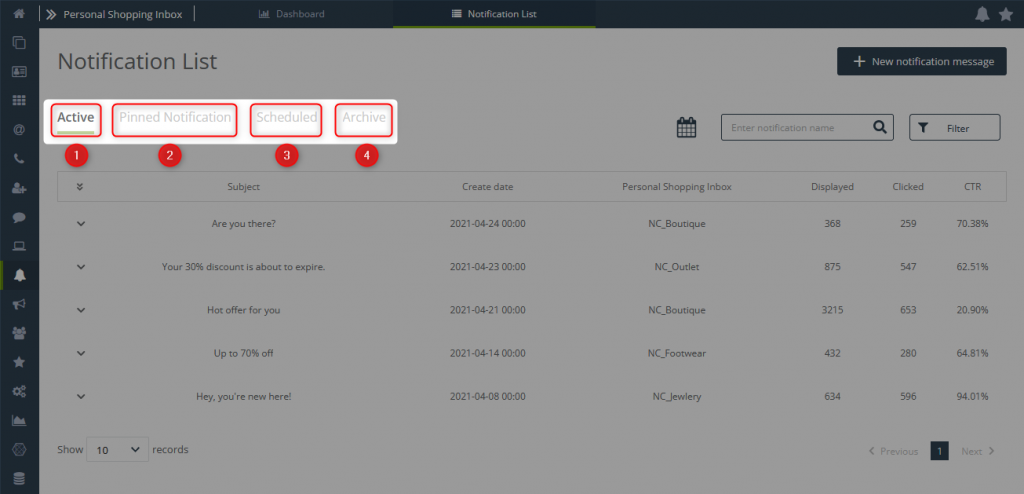
[1] Active—A list of active Personal Shopping Inbox notifications along with basic information and statistics. The list will include all notifications that are displayed to your contacts at the time of viewing the list, with the exception of notifications marked as “Pinned” when created in the wizard. Scheduled notifications that have already been sent will also appear in the list. Notifications are listed by date of creation, from newest to oldest. From this level, you can edit or delete the notification as well as go to its analytics.
Read more about Notification Wizard >>
[2] Pinned Notification—A list of notifications marked as “Pinned” during creation. These are the notifications that always display at the top of the list in the Personal Shopping Inbox. From here, you can edit or delete a notification as well as access its analytics.
[3] Scheduled—List of notifications scheduled for display in the future along with basic information. In the list, you will find notifications that haven’t yet reached the display time set in the wizard when creating a notification. From here, you can edit or delete a notification as well as access its analytics.
ATTENTION: Since these notifications are not yet active, there will be no statistics on the list.
[4] Archive—List of notifications that have expired.
List filters
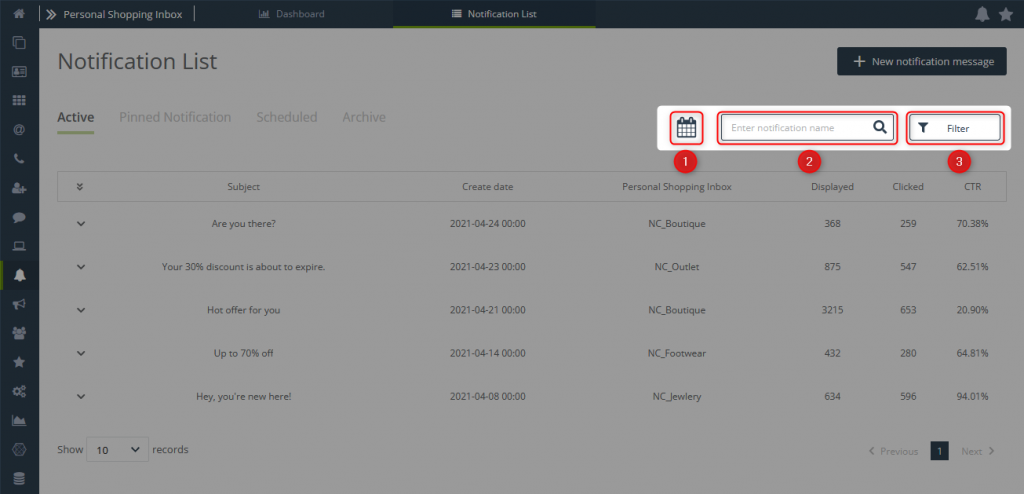
1. Time range
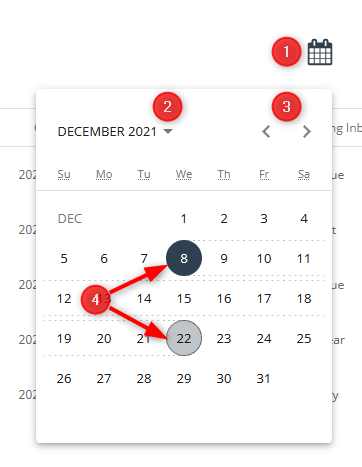
This filter allows you to quickly find notifications sent within a specific time range.
[1] Filter by date—Click the calendar icon to expand the calendar and select a date range.
[2] Year and month—Use the drop-down menu to quickly jump to the time you are interested in. Select the year first and then the month.
[3] Navigate between months—You can also use the arrows to find the date you want.
[4] Date range—Once you have found the start date, click the appropriate date and then hover over the end date and click this date. Doing this will select the date range that will form the basis of this filter.
2. Search
The search option makes it easy to quickly find a notification by typing in its name.
To search for a notification, start by typing its name. After typing three characters, you will notice that the list starts to dynamically match the query.
3. Filters
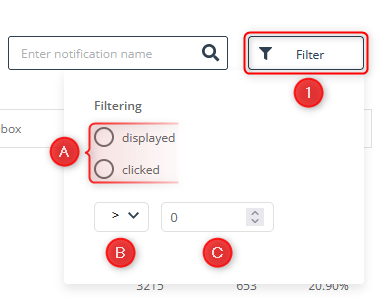
The system also enables you to filter messages according to the selected metrics.
[1] Filter—If you hover over and click on the button, you will see an expanded menu that allows you to select the notification performance indicators you are interested in.
[2] Filtering—Choose one of two values:
- displayed—Filters messages according to the number of displayed notifications.
- clicked—Filters messages according to the number of clicked notifications.
[3] Specifying a value for the selected filter—For a filter to be complete, you must also specify the cut-off value. You can do this by using the following mathematical operators:
- “=” if the value is to be equal to the set number.
- “<” and “>” for a smaller or larger value.
In the box next to it, specify a numeric value.
EXAMPLE: If you want to find messages that were less effective than others, check the average notification click-through rate on your dashboard as well as the number of displayed messages. Then, go to the list and filter out all the messages that have less clicks than the average (number of displayed messages x average CTR). By analyzing these notifications and comparing them with the best-performing ones, you will be able to create more effective notifications that convert at a higher rate.
4. Deleting filters
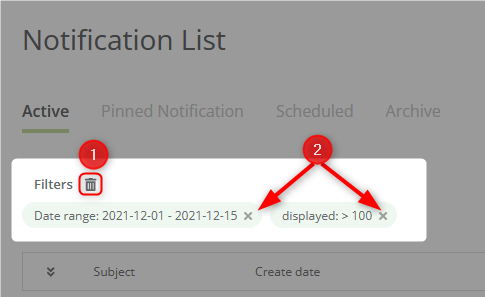
Filtering can be modified at will.
[1] Delete all filters—By clicking the trashcan icon, you can quickly delete all the filters you have entered.
[2] Delete filter—Filters can also be deleted individually. If you want to remove a single filter from the list, click the “x” in the box next to the filter name.
Notification view on the list

[1] Collapse/expand the view of all notifications—Use the double arrow to collapse or expand the view of all the notifications on the list.
[2] Collapse view of a single notification—Use the single arrow to collapse or expand the view of a selected notification on the list.
[3] Selected statistics—A quick overview of the statistics for the values selected in the Personalize menu. These statistics are the only ones that are also visible when the notification view is collapsed.
IMPORTANT: For the “Scheduled” list tab, the system does not display any statistics. This is because the notification has not been sent yet.
[4] Basic Information—Information about the sending date, creation date, notification lifespan, and its language versions.
[5] Notification preview—A general preview of the sent/scheduled notification.
[6] Key metrics—Information about the number of notifications displayed, clicked, as well as the CTR of the selected notification.
IMPORTANT: For the “Scheduled” list tab, the system does not display any statistics. This is because the notification has not been sent yet.
[7] Analytics—Button that allows you to go to the detailed analytics of the selected notification.
[8] Actions—Drop-down menu that contains options: Edit (redirects to the wizard) and Delete.
3. Notification analytics
Clicking on the Analytics button in the list of notifications automatically takes you to the analytics section of the selected notification.
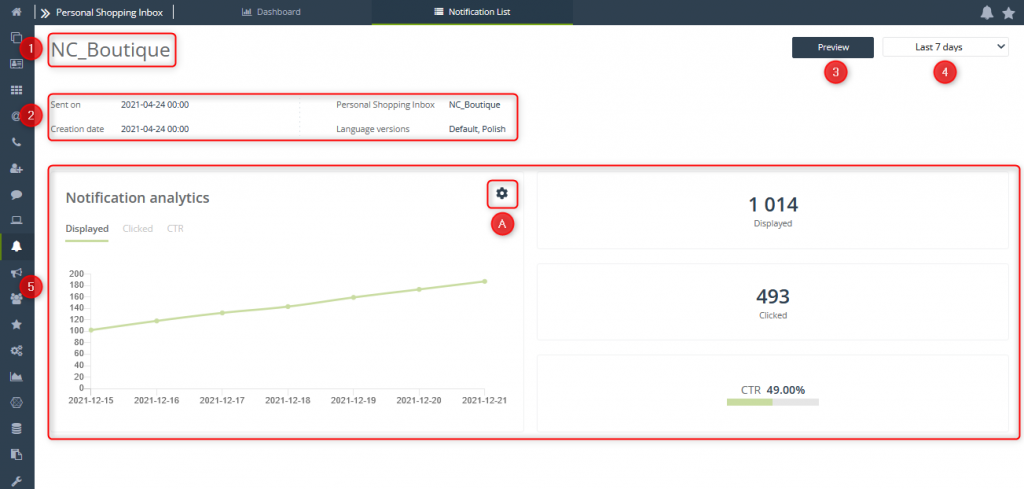
[1] Name—Name of the Personal Shopping Inbox that displays the analyzed notification.
[2] Basic information—Information about the sending date, creation date, Personal Shopping Inbox that displays the analyzed notification, and its language versions.
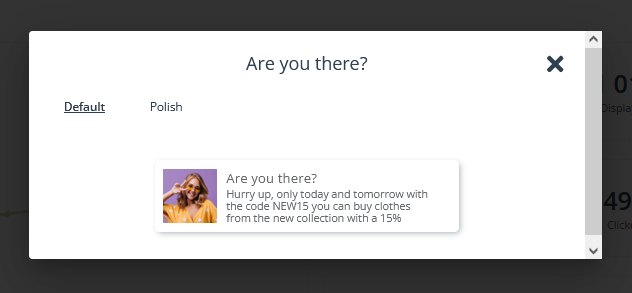
[3] Notification preview—General preview of the notification. Clicking the button opens a window with the default notification preview.
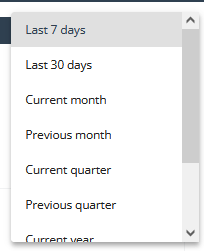
[4] Analytics time range—You can select what time range of notification performance you want to analyze. Select the option you are interested in from the drop-down menu.
[5] Notification analytics—Data on the impact of a given notification on sales:
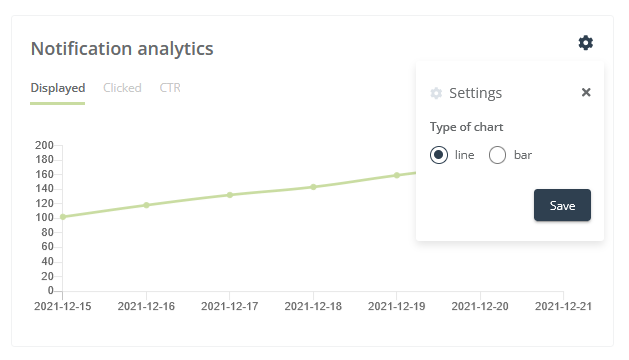
- Notification Analytics Chart—A graphical representation of the analytics of the selected notification broken down by selected metrics. In the chart, you have the ability to seamlessly switch the view depending on the performance metric you are interested in (Displayed, Clicked, CTR).
[A] Change chart type—You can also go into the chart settings and change the type from line to bar or vice versa.
- Displayed—Number of notification displays.
- Clicked—Number of notification clicks.
- CTR—The click-through rate of the notification.
