One of the features of Personal Shopping Inbox is the ability to deliver notifications to anonymous and identified contacts. Notifications can carry personalized special offers, newsletter sign-up incentives, or loyalty program information. This option will be available if you set up a notifications tab in your Personal Shopping Inbox. Before you can send notifications, you must first create them. Use the Personal Shopping Inbox Notification Wizard to do this.
To create a notification, go to
Personal Shopping Inbox → Notification List→ +New notification message
Contents
1. Basic Information
2. Create a new notification
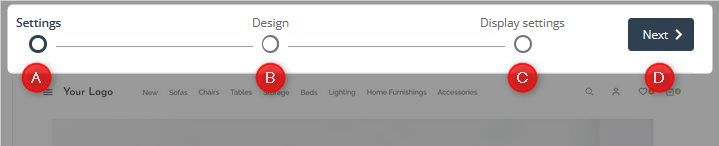
a. Settings
b. Design
c. Display settings
1. Basic Information
Personal Shopping Inbox notifications are a versatile tool designed with eCommerce in mind. They allow separate marketing communication for identified and anonymous contacts. They help to increase customer retention through special, individually prepared discounts and information about Loyalty Program points. They enhance customer lifetime value by providing personalized offers that will be stored in a personal inbox.
Notification Wizard is a simple, intuitive tool that allows you to create, step by step, effective and attractive notifications to display in your Personal Shopping Inbox. For your convenience, the notification creation is broken down into several steps. Each of them is a separate step referring to a particular aspect of the notification creation process. Notifications created with the wizard can be found on the Notification List. From the list, you can edit them, delete them, or go to their analytics.
Learn how to create a Personal Shopping Inbox >>
Read more about the Notification List >>
Read more about the Loyalty Program >>
2. Create a new notification
Notifications will appear in the appropriate tab in the selected Personal Shopping Inbox. Before you start creating a notification, prepare the place where it will appear, i.e., the Personal Shopping Inbox with the Notifications tab.
If you haven’t yet created your Personal Shopping Inbox, the sequence of steps for creating a new notification looks like this:

- Create a Personal Shopping Inbox—Go to Personal Shopping Inbox → +New Personal Shopping Inbox. If you already have a Personal Shopping Inbox that you want to use for this notification, skip this step.
- Create a new notification—Go to Personal Shopping Inbox → Notification List→ +New notification.
If you already have a Personal Shopping Inbox created, go straight to creating a notification.
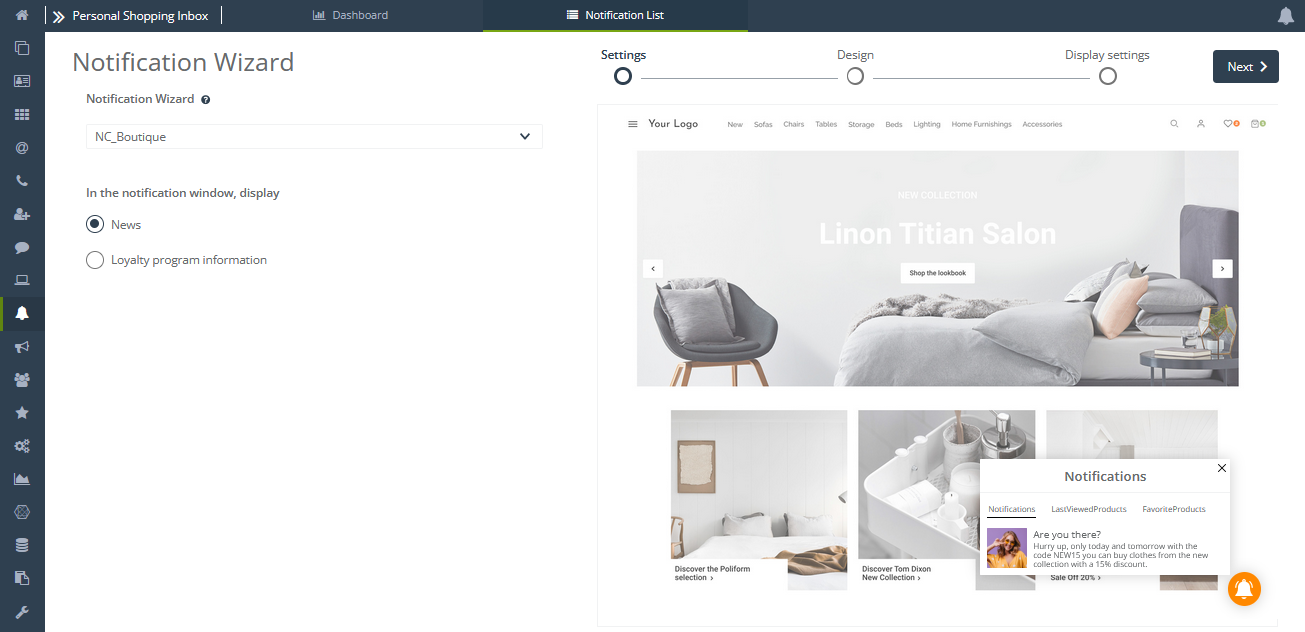
After clicking the button, you will see a notification wizard consisting of 3 steps:
- Settings
- Design
- Display settings
Additionally, you will find a Next [D] button that allows you to move between steps.
A. Settings
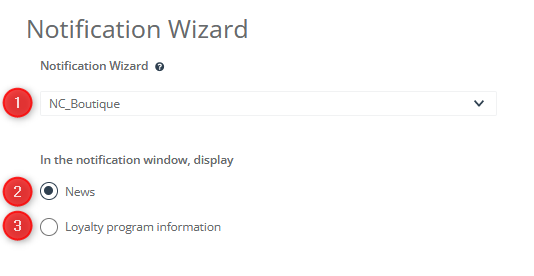
[1] Personal Shopping Inbox selection—Select the Personal Shopping Inbox where you want to display the notification.
[2] News—Select to display notifications with news.
[3] Loyalty Program Information—Select to display notifications related to the user’s activity in the selected loyalty program.
ATTENTION: You can only display loyalty program information if you use the SALESmanago Loyalty Program feature.
The right-hand part of the screen is the area where you will see a visualization of the notification you are currently working on.

[1] Notification preview—A real-time preview showing how your changes affect the appearance of the notification.
Once you have entered the basic settings, click [2] Next.
B. Design
This step will be slightly different for notifications like News and Loyalty Program Information.
Details
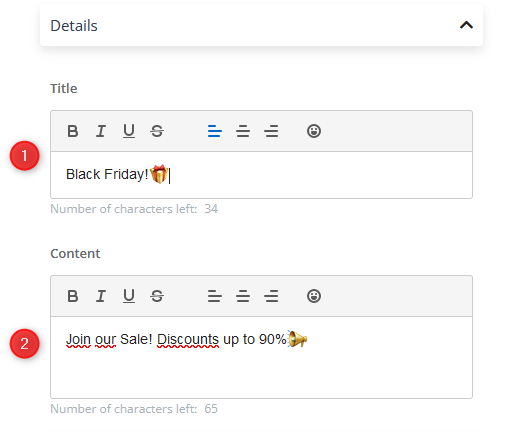
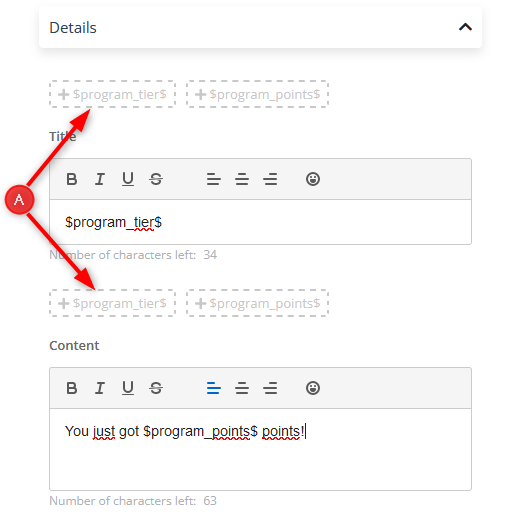
[1] Title—Enter the title of the notification that your subscribers will see. For a notification with loyalty program information, you can use ready-made elements [A] that will pull the relevant data from the system:
- threshold reached (program tier)
- number of points added (program points)
You have a 48 character limit.
[2] Content—Enter the content of the notification that your subscribers will see. For a notification with loyalty program information, you can use ready-made elements [A] that will pull the relevant data from the system:
- threshold reached (program tier)
- number of points added (program points)
You have a 100 character limit.
Additional emoticons—You can add emoticons to both the title and the body of the notification to make it more appealing and better capture the attention of your audience. You can also use them to replace certain words and to convey more information in the notification. However, make sure that the message is still understandable to the reader.
Picture
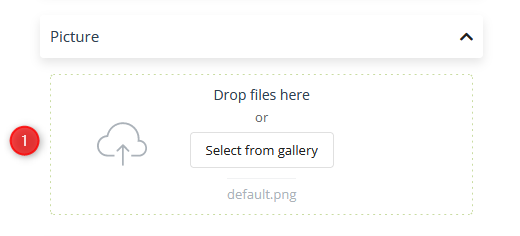
[1] Drop file / Select from gallery—Add a graphic to the notification. You can either drag an image stored on your hard drive or select a file previously uploaded in the gallery. You can use JPG, PNG, WebP, ICO/CUR, and BMP files as icons. The GIF format is not supported by browsers. The suggested icon size is 150×150 px.
Label
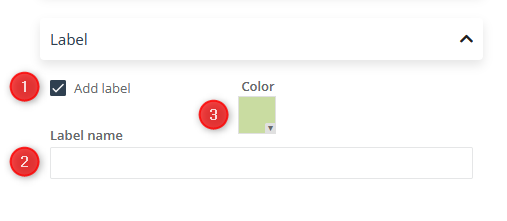
[1] Add label—Check this box if you want to further distinguish the notification and color code it.

[2] Label name—Enter the label name that your subscribers will see.
You have a 10 character limit.
[3] Color selection—Click this box to select the color of the “like” button.
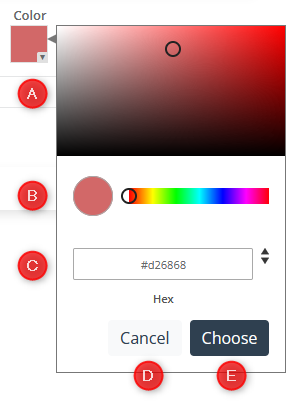
[1] Select color hue—Move the cursor within the rectangle filled with the gradient of the indicated color to select the hue you want to assign to the selected element.
[2] Select color—By moving the pointer left and right, pick the color you want to assign to the selected element. You can adjust the hue of the color by returning to the hue selection box [1].
[3] Enter color manually—Enter the designation of the selected color. Use the arrows to switch between different input methods (Hex, RGB, HSL).
[4] Cancel—Click to cancel the color selection.
[5] Choose—Click to save the selected color.
URL
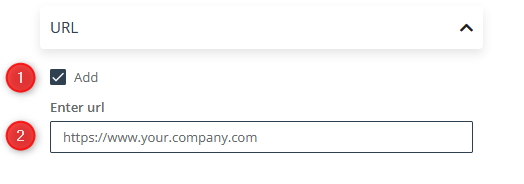
[1] Add—Check this box if you want to add a URL to the notification. When users click the notification, the contact will be taken to the specified address.
[2] Enter URL—Add a full link to the notification. A user who clicks on the notification will be redirected to the specified address. You have a 255 character limit.
Choose language
To add different languages to a Web Push or Rich Web Push notification, click +Add language. The notification language will be matched to the browser language of the person who receives the notification.
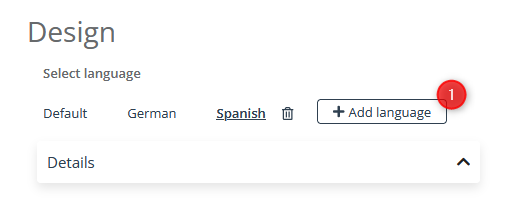
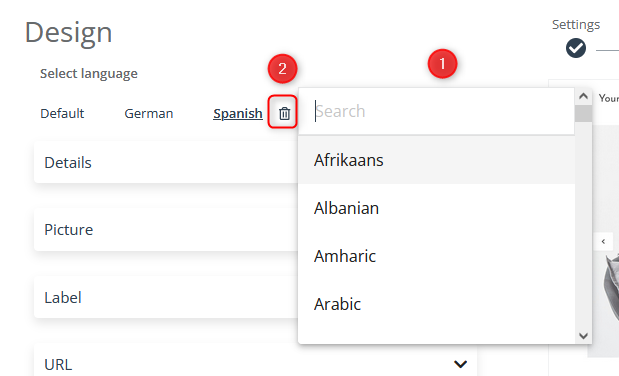
Then, select the languages you are interested in from the drop-down menu [1]. You can also use the search engine and type in your desired language. If you want to stop using a particular language, simply remove it from the list by clicking on the trashcan icon [2] next to its name.
ATTENTION: Before you select the next language, enter the Title and Body of the notification (as well as the Label Name, if you are using it in this language version) in the selected language.
When you are done making changes, click Next.
C. Display settings
This step will be slightly different for notifications like News and Loyalty Program Information.
Groups
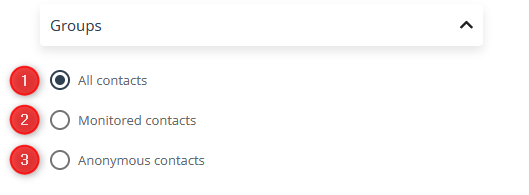
[1] All contacts—The notification will be displayed to all contacts.
[2] Monitored contacts—The notification will be displayed only to monitored contacts.
[3] Anonymous contacts—The notification will be displayed only to anonymous contacts.
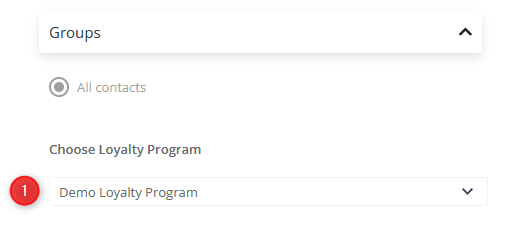
In the case of a Loyalty Program information notification, the recipient group will consist of all members of the selected program.
[1] Choose Loyalty Program—Select the correct Loyalty Program from the drop-down list.
Display
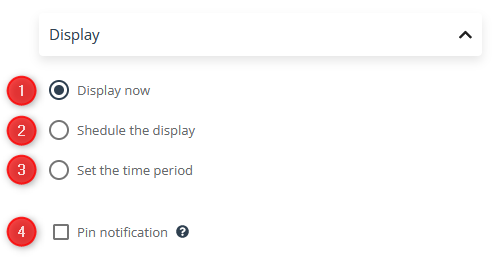
[1] Display now—Select this option if you want to activate the notification immediately after saving and display it in your Personal Shopping Inbox.
[2] Schedule the display—Select this option if you want to activate the notification with a delay and only display it in the Personal Shopping Inbox starting on the specified date.
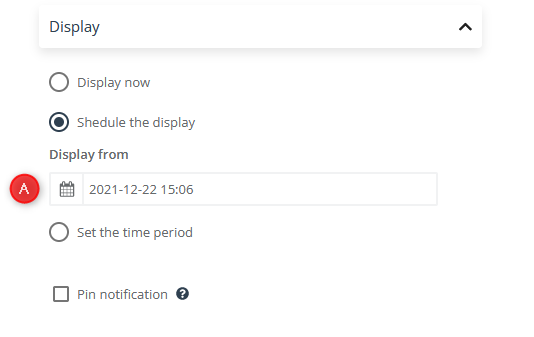
[A] Display from—Click this field to expand the calendar. Then, select the date and time that the notification will first appear.
[3] Set the time period—Select this option if you want to activate the notification for a specific period and display it in the Personal Shopping Inbox only during the selected time period.
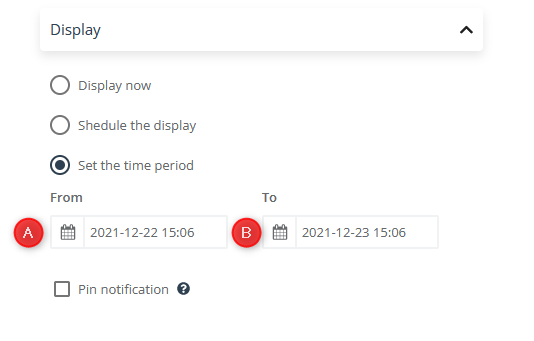
[A] From—Click this field to expand the calendar. Then, select the date and time that the notification will first appear.
[B] To—Click this field to expand the calendar. Then, select the date and time to stop the notification display.
[4] Pin notification—Check this option if you want the notification to always appear in your Personal Shopping Inbox in the first position in the Notifications tab. You can find all your pinned notifications in the Notifications List in the Pinned Notifications tab.
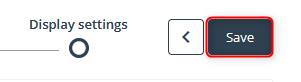
When you have finished entering data for the notification, click Save to save the notification.