Product recommendation frames are the most modern tool enabling full personalization of the offer presented in your online store, for both monitored and anonymous users, using its own unique technology to place frames on the website.
- A dedicated CMS to manage the recommendation frames in your store from the system level, designed in such a way that no IT support is needed.
- Advanced creator for responsive frames of any layout and appearance, enabling the addition of any automatic recommendation scenarios including AI mechanisms and live frame preview on the page.
- The ability to place any number of frames adapted to the various stages of the customer’s buying process (product page, product list, checkout).
- Complete analytics of revenues, displays, and clicks generated by each frame.
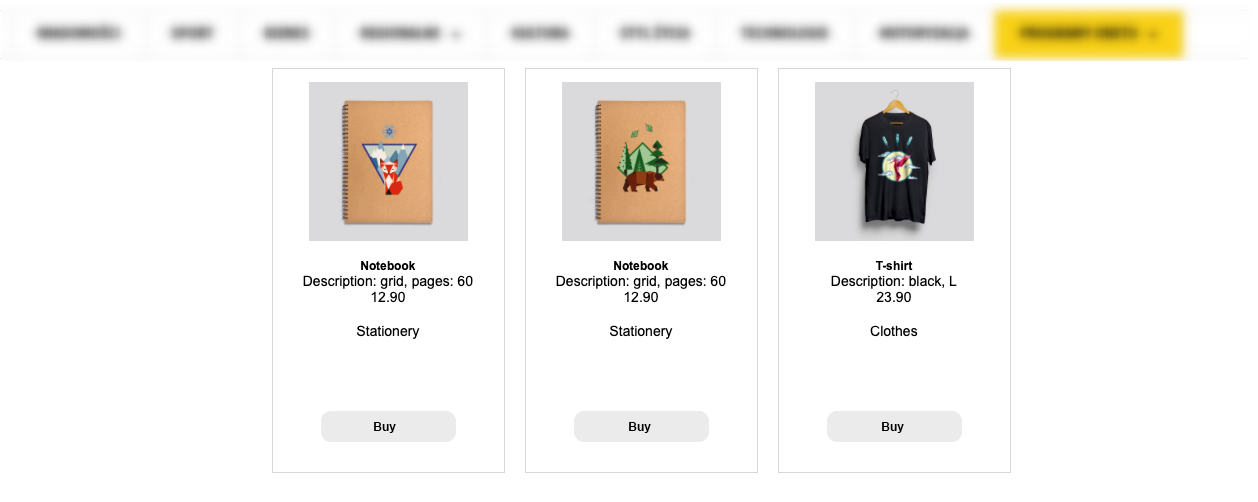
Below you can see an example of a recommendation frame that has been created. Remember that, apart from the products, you can also decide how the recommendation frame looks and adjust it to your needs.

In order to create your own recommendation frame, go to:
Web Tools → Website Personalization → Recommendation frames
Content:
- Section: Placing recommendation frame on the website:
- Templates
- Structure
- Product fields
- Design
- Settings
- Insert
- Option 1 – Placing recommendation frame directly from the website preview
- Option 2 – Placing recommendation frame by means of Div ID element
- Section: Recommendation frames list
PLACING RECOMMENDATION FRAMES ON THE WEBSITE
Templates
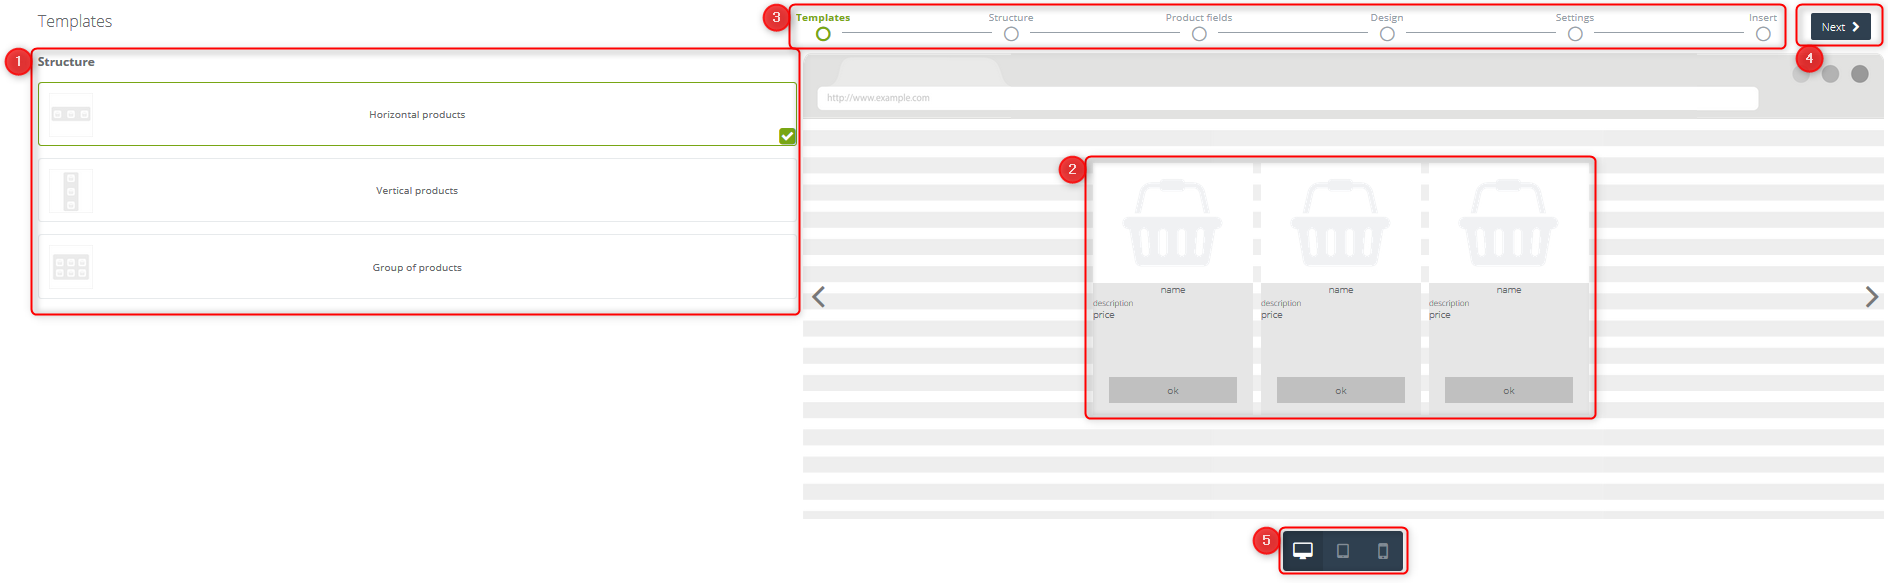
[1] Structure – here you select one of three structures:
- horizontal,
- vertical,
- group of products.
IMPORTANT: Maximum number of products is 16.
[2] Preview – here you can see how the products look in your recommendation frame.
[3] Stages – these are all steps of creating a recommendation frame. The current stage is marked in green.
[4] Next – click and go to another stage.
[4] Preview on mobile devices
Structure.
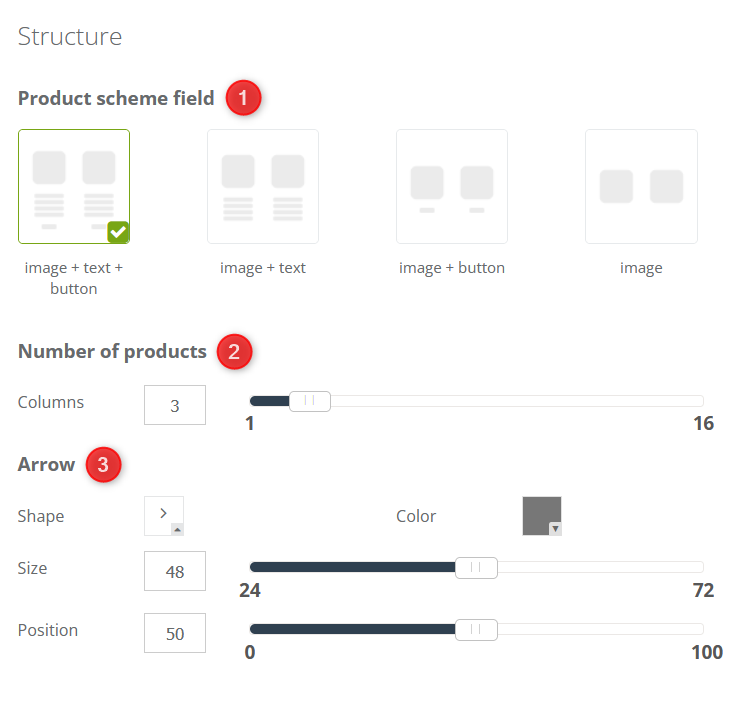
[1] Product scheme field – select one of four options:
- image + text + button,
- image + text,
- image + button,
- image,
[2] Number of products – select how many products you want to have in your recommendation frame. The maximum number is 16. What is more, you also decide about the number of columns and/or rows, depending on the scenario. In the horizontal structure, select the number of columns, in the vertical structure select number of rows, in the case of a group of products, select both: number of columns and rows.
[3] Arrow – adjust it by selecting shape, size, position, and color. The arrow is used to scroll the products.
IMPORTANT: On mobile devices, you can also scroll the products (look for the arrow) swiping the screen with your finger.
Product fields.
If in the previous step (Product scheme field) you select image + text + button, you have the following view. The view is slightly different for other Product scheme fields.
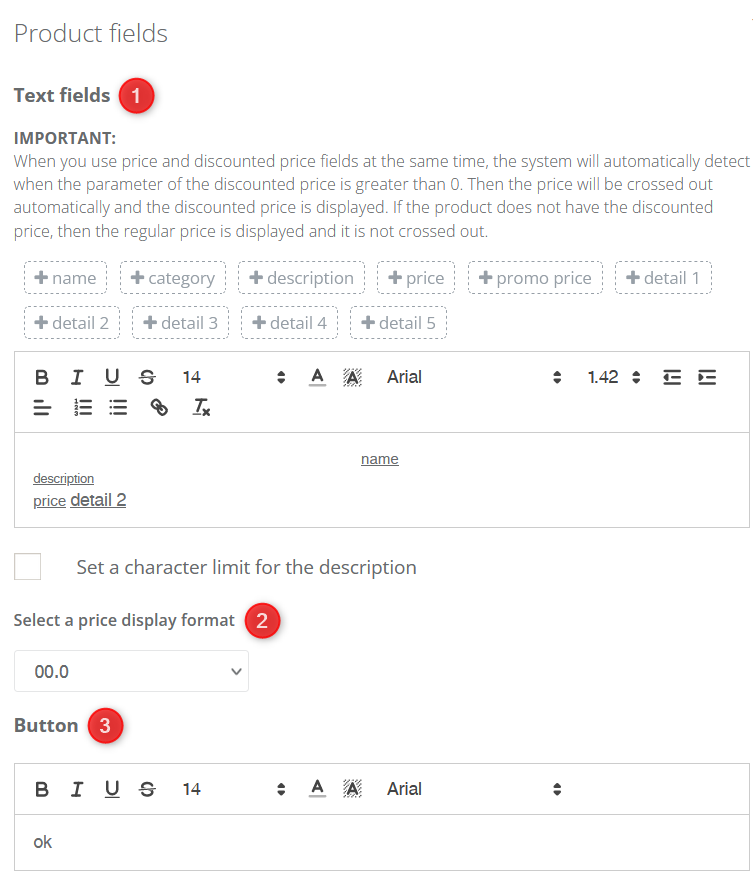
[1] Text fields – select what information about the product you want to have in recommendation frames. Available options: name, category, description, price, discounted price.
IMPORTANT:
- When you check the option Set a character limit for the description you can decide about the maximum number of characters. However, bear in mind that the default value is 80 characters. Such a description takes about 3 lines. When the text is longer, the rest of it is a dotted line.
- When you select e.g. “name” here, the value for this field is taken from the XML file specified there as the name of the product.
- Some information can be not displayed in case of a too-long name.
- The displayed currency of products (both price and discount price) is the same as the currency in the product feed from where products are taken.
[2] Select a price display format – you can choose from the following formats: 00, 00.0 and 00.00.
[3] Button – adjust it to your preferences, decide about its text and style.
Design.

[1] Frame design – adjust how your frame looks by deciding about its width, height, shape, contour color, and background color.
[2] Margins – use sliders to set: top padding, side padding, bottom padding, margin.
[3] Picture – decide about height and background color.
[4] Button – adjust how your button looks by deciding about its width, height, align, shape, color, on mouse color.
Settings.

[1] Name – provide the name of your recommendation frame. The maximum number of characters is 80.
[2] Select e-shop – use the drop-down list. It is an obligatory field. Only when you select an e-shop, you can select products for the recommendation frame that the shop offers.
[3] Choose scenario – there are four options available here:
-
- Recently viewed products – products which the user was interested in and viewed in the e-shop,
- The most-bought products – products which were bought most frequently by all users,
- Products bought by contact – products which were bought by the user,
- Products purchased with the product being viewed – products which were bought by all users along with the product that the contact is interested in,
- Products in the same category as the last viewed product – products from the same category as the product which the user was recently interested in and viewed in the e-shop,
- Products from the selected category – products that belong to the category you choose,
-
- AI: Collaborative filtering – this type of recommendation involves two approaches. The first one called Product-Product is connected with the probability and frequency of co-occurrence of different products (not necessarily similar to each other). The second approach is called User-Product approach and it shows which products may interest a user based on the interests of other users who have a similar profile to the chosen one. Generally speaking, the idea behind this type of AI recommendation is to offer products based on the similarity of users and concurrence of various products,
- AI: Most frequently bought after visit other – based on which product the customer is currently displaying on the website, the system analyzes purchases of other customers who also displayed this product and recommends the products purchased by other users to the user,
- AI: Most frequently visited together – as the name suggests these are the products that are often viewed together by all users. The system offers products which were browsed by other users along with these products,
- AI: Most frequently bought together – the system analyzes the products the customer has purchased. And also the system analyzes the products which have been purchased by other users along with the same products,
- AI: Mixed statistics with weight – the mechanism behind this recommendation type employs all previously enlisted types of recommendations and additionally assigns a weight for each action. The value of the weight can be determined by you. How does it translate into practice? The system creates connections and analyses products bought by the contact, recommending in the first place several products which are probable to be bought, then products which the user wants to see and so on and so forth prioritizing the rest of the products with regard to the actions,
- Products based on contact preferences – products that you can select from the Customer Preference Center.
IMPORTANT: AI recommendations can be used for monitored contacts only. When you select one of AI scenarios, remember to select an alternative scenario as well. Then for anonymous contacts e.g. most frequently products will be displayed in the recommendation frame.
[4] Additional settings for supplementing the frame with products – if the number of products consistent with the scenario is smaller than the number of products that you want to have in your frame, you can decide what scenario will be used alternatively. The same scenarios mentioned above are available, plus the possibility of using random products or choosing them from the gallery.
Example: The selected scenario is “Recently viewed products”. The number of products in the frame (Structure) is 5. A client has viewed 3 products recently. It means that 2 products in the frame will be selected according to the alternative scenario which you choose at this stage. In this particular example, the frame will be supplemented with the most-bought products.
[5] Don’t display products, which are not available in online store – products not available in the store are those with the status: available = false and quantity = 0 in the product feed.
Insert.
Here you can select where the frame is displayed on your website. Select one of two options.
Option 1 – Placing recommendation frame directly from the website preview
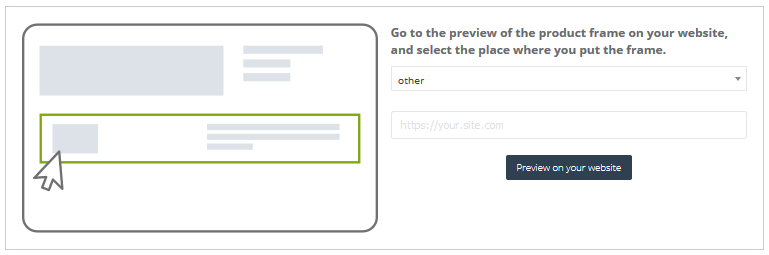
In the first option, you need to select the website from the list. If there is no website on the list, select other here. Then, provide the website address in the field which appears when you select other option.
Click Preview on your website to select where you want your recommendation frame to be displayed.

If you click Show all available places, you can see all places where your recommendation places can be displayed. Then you can see how they are displayed on the website in this particular place.
Below you can see the recommendation frame placed on the website.
IMPORTANT: The website needs to have an SSL certificate. In case that the website does not have it, here you can Check out another website and then select Show all available places to check all possible places where the recommendation frame can be placed.

As soon as you decide and pick where to place your recommendation frame, you can see the following view on the right:
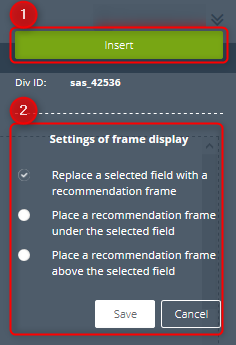
Here you can click [1] Insert to place the recommendation frame on your website and decide about [2] Settings of frame display. Select one of the following options: Replace a selected field with a recommendation frame, Place a recommendation frame under the selected field, Place a recommendation frame above the selected field. Then click Save or Cancel.
Option 2 – Placing recommendation frame by means of Div ID element
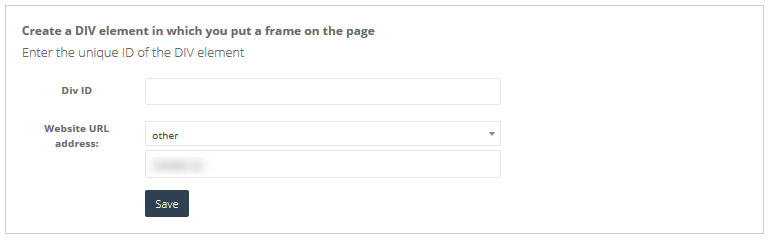
Create DIV element in which you can place a recommendation frame on your website. Then provide DIV ID and Website URL address. Here you can also select other and the field for providing a website (which is not on the list) will appear.
Click Save.
Now you are redirected to the following view.
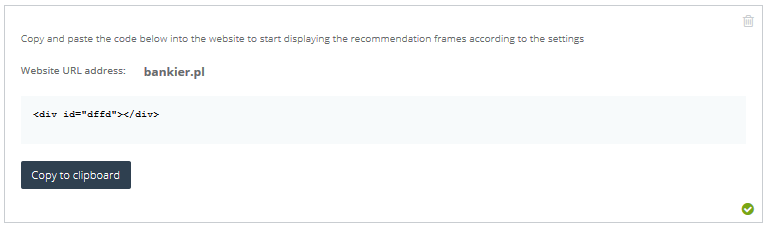
Click Copy to clipboard.
IMPORTANT: Remember to insert DIV ID on the website.
Your recommendation frame is ready. You can see it on the list of recommendation frames.
RECOMMENDATION FRAMES LIST

[1] Number of active recommendation frames.
[2] Basic information about the recommendation frame and the preview – here you can find the following information: created on, modification date, product feed, description.
[3] Status – here you can see whether the frame is active.
IMPORTANT: Remember that only frames with active status can be displayed. In order to activate your frame, go to: Action → Activate.
[4] Edit – you can edit frame, change its settings and look at any time.
Analytics – click it to get detailed analytics of the frame that you have created.
Go to Recommendation Frames Analytics
In order to use the whole potential of SALESmanago, including recommendation frames, you need integration of transactional data between an external platform and SALESmanago. Use the available plugins or click here to learn more about step-by-step integration of your own. Make also sure that in Menu → Integrations → Integration Center → Product Catalogs you have option Set this shop as default checked. Thanks to that you can create your recommendation frame since you know that the proper feed is taken to the list.
Recommendation frames can be a useful tool which can be used to recommend products to your clients and encourage them to buy in your shop.