Useful links
Web Push notifications are short messages that can be sent straight to the recipient’s device. First, however, you need to obtain consent for this type of marketing communication.
Web Push notifications are delivered by browsers. Therefore, consent is also collected by browsers, through a native prompt displayed on your website. This native, browser-based prompt can be preceded by a visually appealing website-based prompt that will encourage visitors to give consent and is likely to increase your opt-in rate.
This article will help you decide on the mode of consent you want to apply on your website and will guide you through the process of creating and configuring Web Push consent prompts.
To create a Web Push consent prompt, go to
Channels → Web Push → Consent prompts → + New consent prompt
Contents
1. Getting started
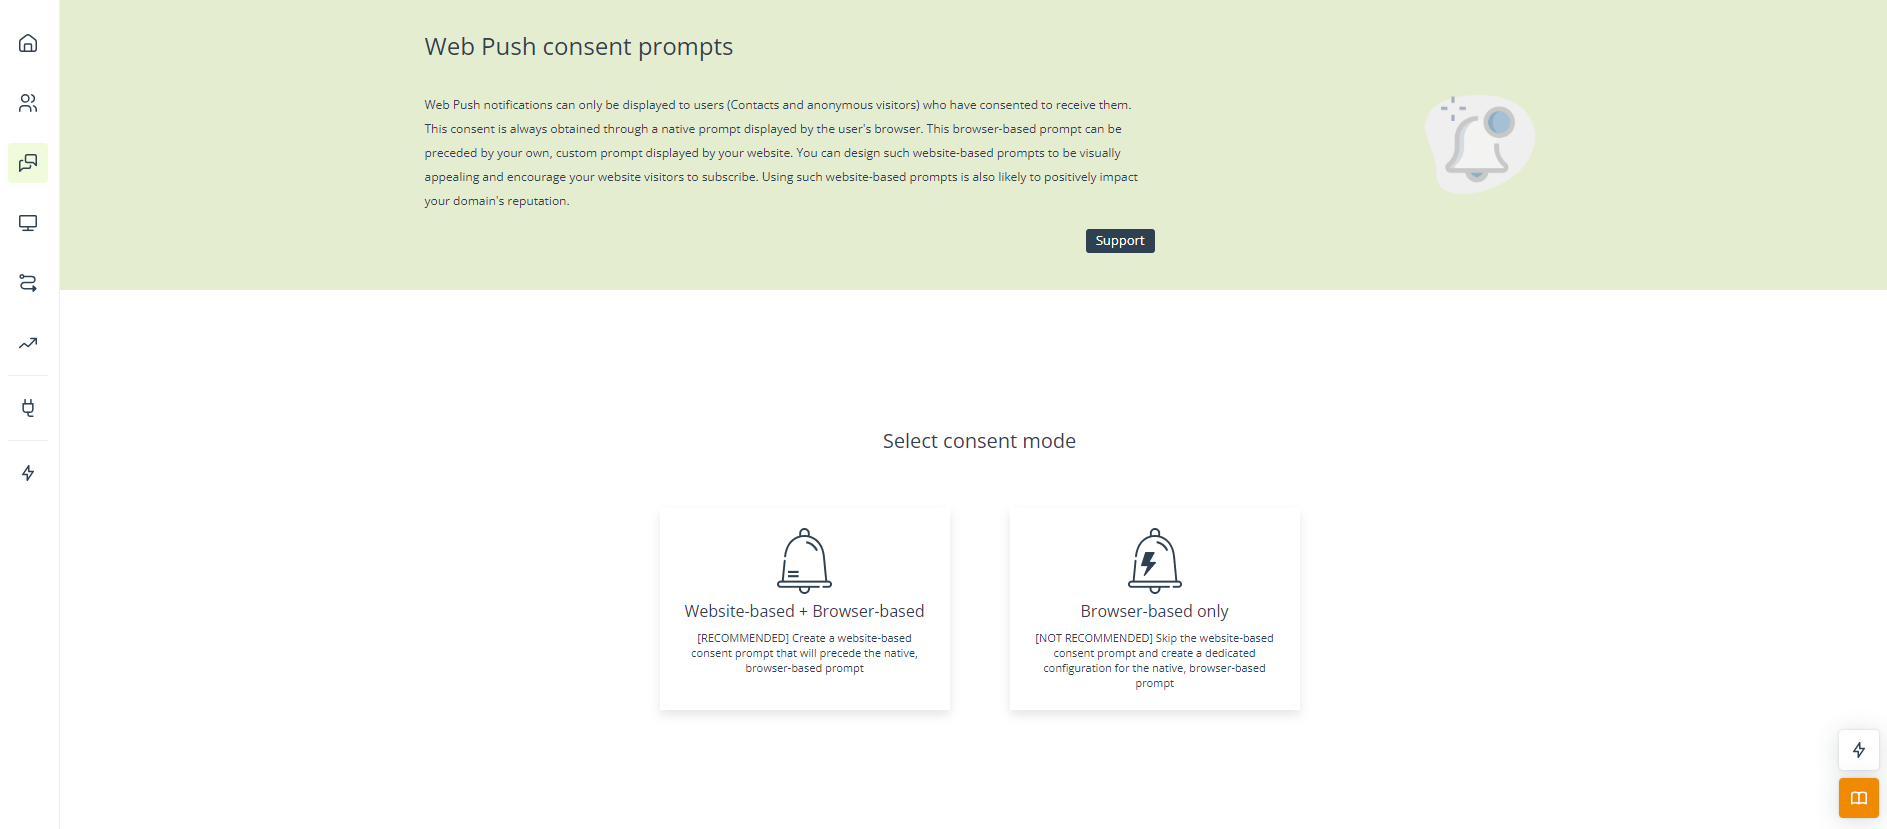
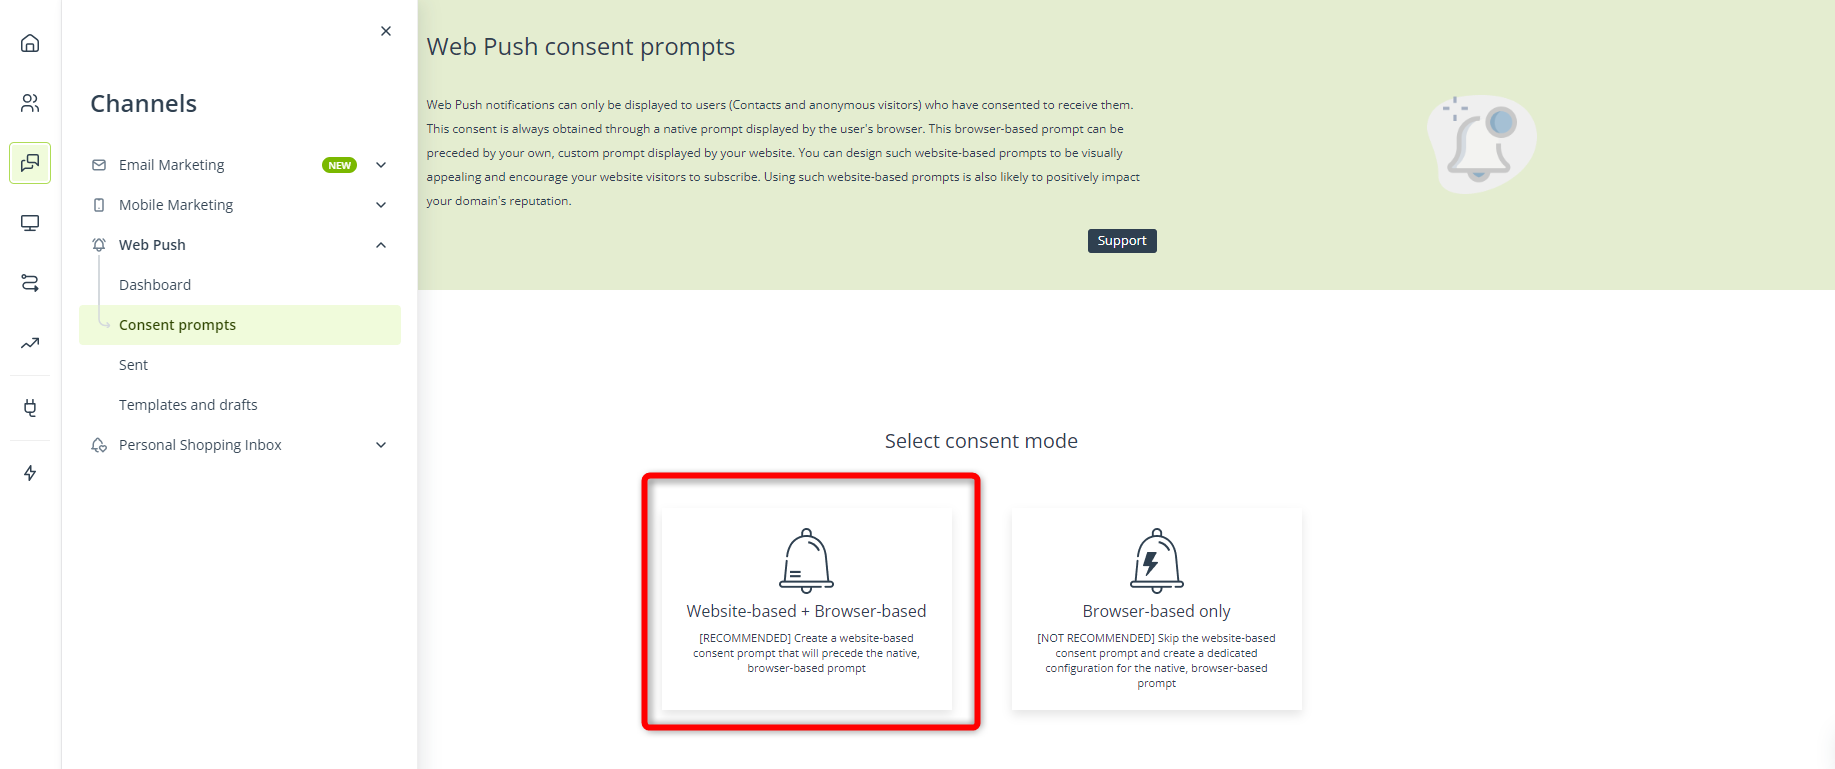
Web Push notifications can only be sent to users (Contacts and anonymous visitors) who have consented to receive them. Accordingly, to start sending Web Push notifications through SALESmanago, first, you need to create or configure a consent prompt. You can choose between two consent modes:
- Browser-based prompt—NOTE: Prompts created in this wizard will only work if Web Push consents are assigned to your own domain >>
- Website-based prompt + Browser-based prompt
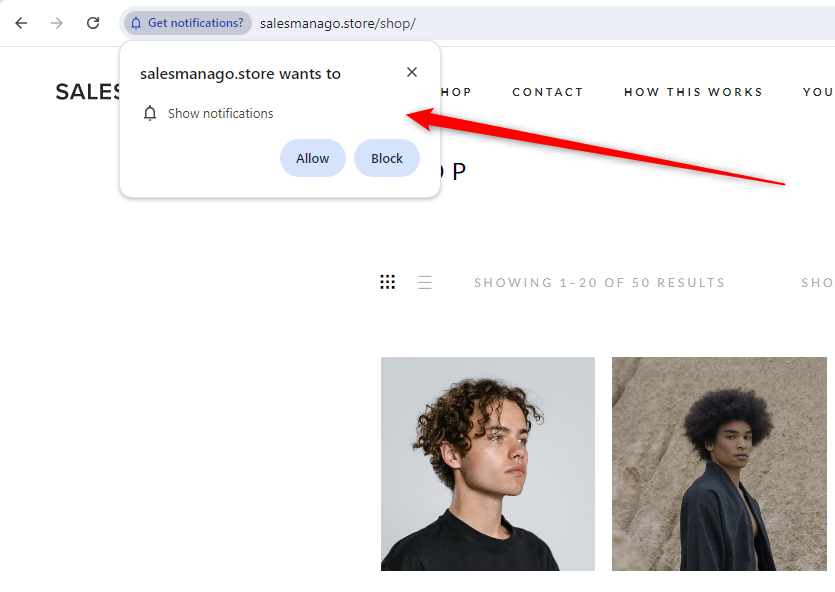
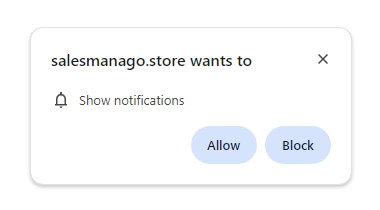
The browser-based prompt is displayed by browsers. It cannot be “skipped” – if you want to send Web Push notifications, you need to obtain consent, and this consent can only be obtained through the browser-based prompt.
The appearance and the text content of the browser-based prompt are predefined and cannot be modified in any way.
Still, you can configure when and where (on which pages) the prompt will be displayed.
The browser-based prompt is displayed to any individual website visitor only a limited number of times. For example, in Google Chrome, if someone closes the browser-based prompt three times (by clicking “X”), the consent prompt will be blocked and will not be displayed again. Even worse, if someone clicks the No button (Block, Reject, etc.), the consent prompt will be blocked straight away. This means that if a website visitor explicitly rejects your request, you will not be able to ask them again (unless they reset the notification permissions, use a different browser, or use a different device). This is why it is highly recommended that the browser-based prompt be preceded by the website-based prompt.
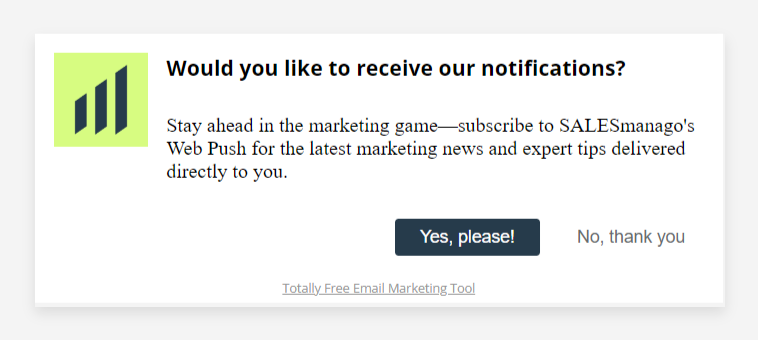
The website-based prompt is optional but highly recommended. It always appears before the browser-based prompt. You can configure its appearance, display time, location, and position on the page.

Just like the browser-based prompt, it is used to ask for consent. However, as opposed to the browser-based prompt, it can be displayed as many times as you want. Even if a website visitor clicks “No, thank you” or closes the prompt by clicking “X”, you can display it to them again. This way, you increase your chances that sooner or later you will convince them to subscribe to your Web Push notifications.
Using such website-based prompts helps you to appear trustworthy and more professional, in addition to increasing your opt-in rates. It also minimizes the chances that your notifications will be blocked by browsers. For example, Google Chrome automatically blocks Web Push notifications if they appear unreliable or have been declined by more than 90% of recipients. The huge advantage of website-based prompts is that they are not included in browsers’ rejection statistics.
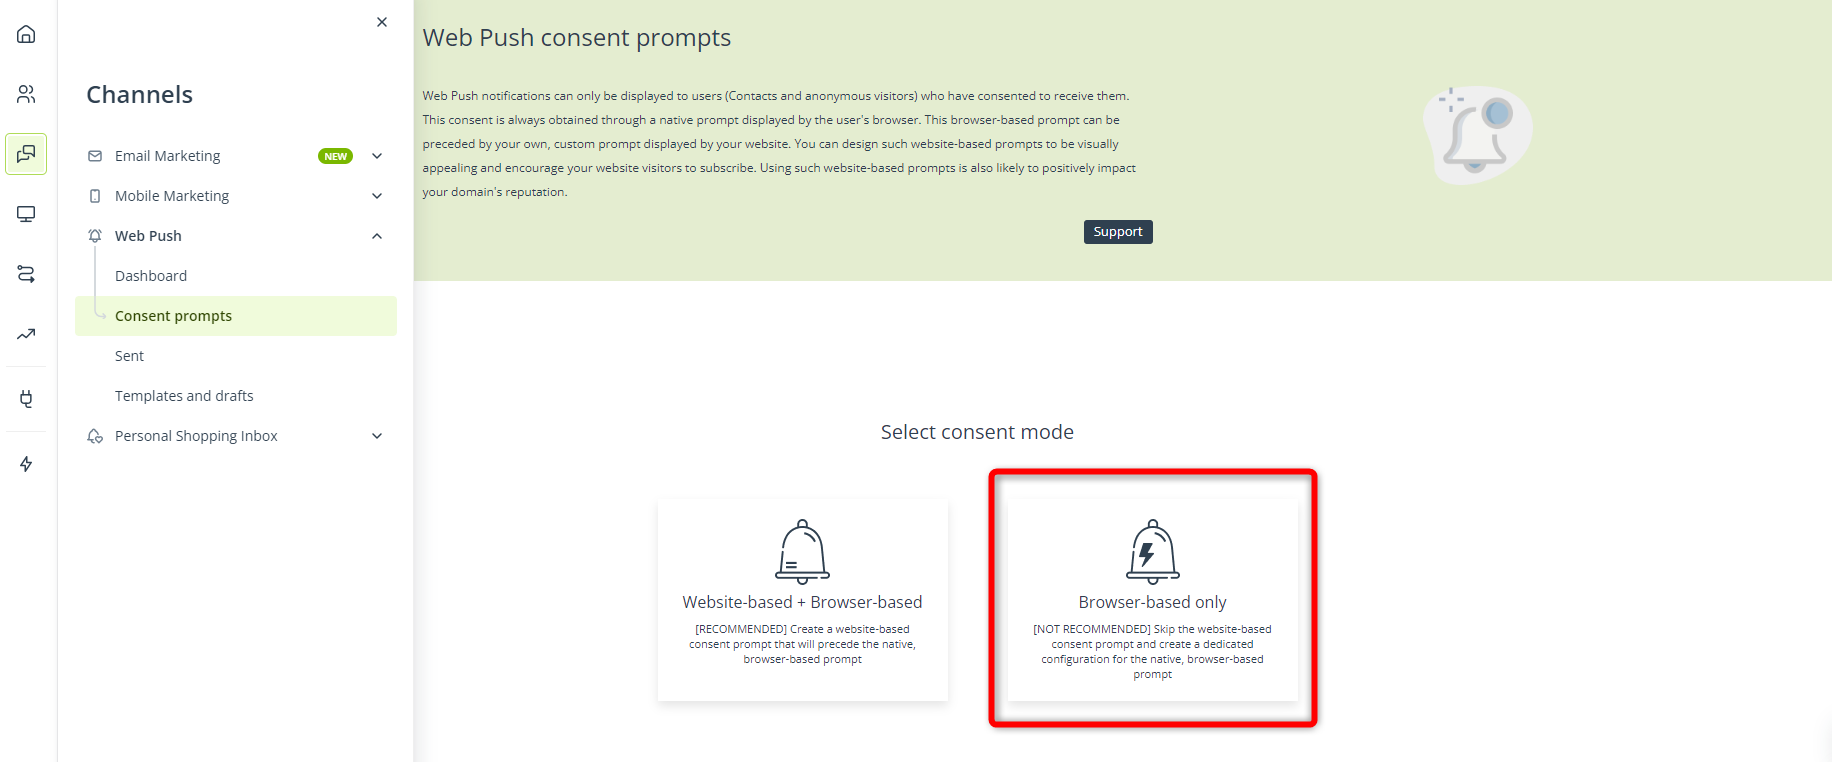
The two consent wizards available on the SALESmanago platform correspond to the two consent modes described above.
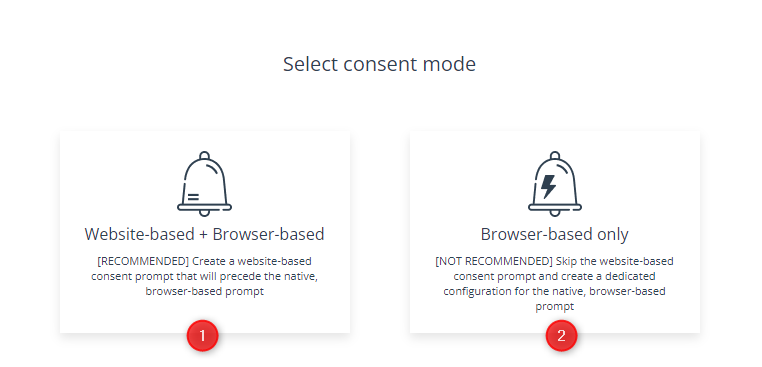
[1] [RECOMMENDED] Website-based + Browser-based—Use this wizard to design and configure a website-based consent prompt.
Additionally, this wizard allows you to design the confirmation pop-up – the small window (or landing page) that will be displayed to a website visitor if they click Yes (Allow, Agree, etc.) on the website-based prompt and if you have not configured Web Push consents to be assigned to your own domain >>
Note that you can create different language versions of the same consent prompt (Step 2: Design). For each individual website visitor, the language of the consent prompt will be matched to the language of their browser.
[2] [NOT RECOMMENDED] Browser-based—Use this wizard if you have configured your domain >> and want to skip the website-based prompt. The design of this prompt depends on the browser that displays it, so you can only configure its display settings. Additionally, this consent prompt will not be displayed again if the visitor clicks No (Block, Don’t allow, etc).
TIP: You can use this wizard in combination with your custom website-based prompt created outside of SALESmanago. Read more in the API documentation >>
IMPORTANT:
- Any consent prompt can be used for any type of Web Push notification (static and dynamic, simple and Rich).
- Any consent prompt can be displayed on both desktop and mobile devices (its dimensions will be dynamically adjusted to various screen sizes).
- A single consent prompt can be associated with many Web Push templates.
- By default, Web Push consents collected on your website will be assigned to the following domain: salesmanagopush.com. This may affect the credibility of your consent prompts. If you want to collect Web Push consents for your own domain, read this article >>
Without this configuration (i.e., if Web Push consents are assigned to salesmanagopush.com and not your own domain), consent prompts created in the “Browser-based only” wizard will not work on your website. Therefore, if you have not configured your domain, use the “Website-based + Browser-based” wizard. - Web Push consent prompts are only displayed on domains that have the HTTPS protocol.
2. Website-based + Browser-based
If you want to create a website-based prompt that will precede the native, browser-based prompt, go to Menu → Channels → Web Push → Consent prompts + New consent prompt. There, select the Website-based + Browser-based wizard.
The wizard comprises three steps, which are covered in detail below.

Note that on the right side of the screen, you can see a preview of the consent prompt you are currently working on.
A. Devices
In this step, you can select the device types on which you want to display this consent prompt.
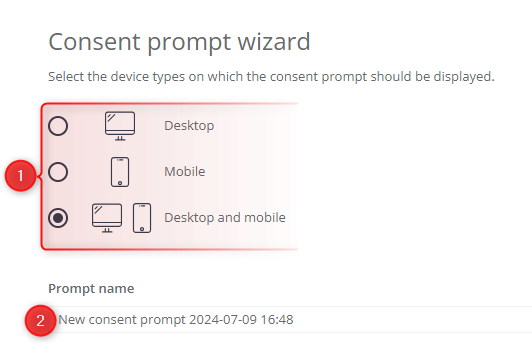
[1] Device type—Select whether this consent prompt will be displayed on desktop devices only, mobile devices only, or both device types.
[2] Prompt name—Enter a name for your consent prompt that will allow you to easily identify it in the SALESmanago system. This name is not visible to your website visitors.
B. Design
In Step 2, you can configure the appearance of your consent prompt, including the text content.
Note that if you selected Desktop and mobile in Step 1, you can switch between the previews for desktop and mobile devices:
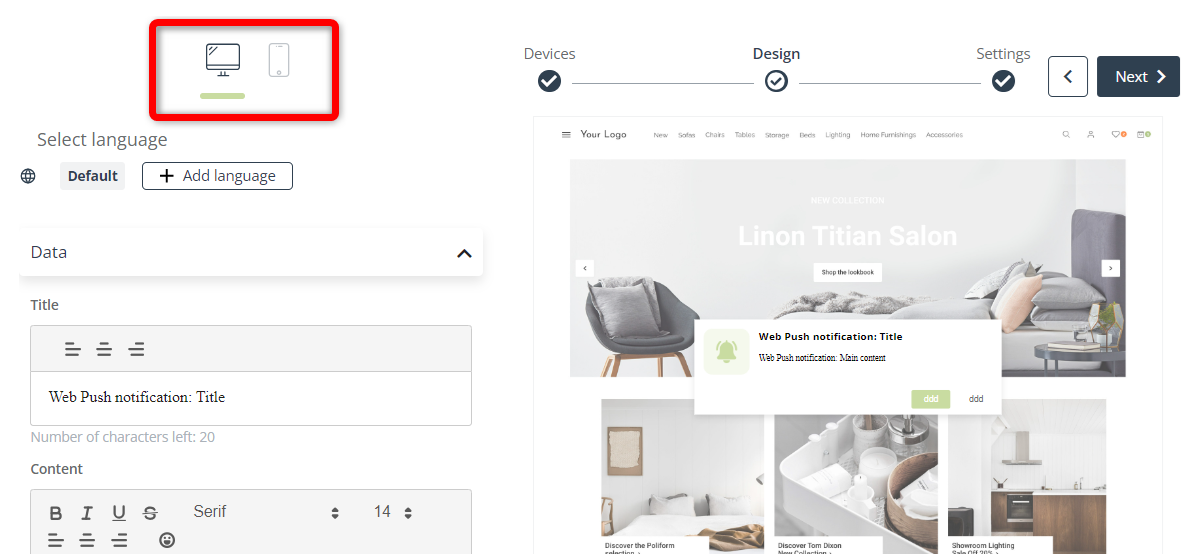
First, configure the content and appearance for desktop devices. This configuration will automatically be copied for mobile devices. Then, if you want to design something differently for mobile devices, switch to the mobile tab:
- Data
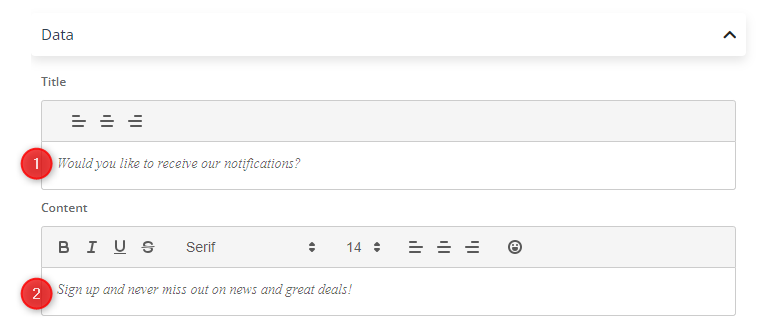
[1] Title—Provide a title that will be visible at the top of the consent prompt. The character limit is 48. You can select its alignment (left, center, right).
[2] Content—Enter the main content of your prompt. The character limit is 200. You can use the standard text editing options and add emoticons.
- Icon
In this step, select the small image that will accompany your text content. You can either select a previously uploaded image from your gallery [1] or drag and drop a file stored on your disk [2].
The allowed image formats are: JPG, PNG, WebP, and GIF. The suggested icon size is 150×150 px.
- Buttons
In this step, you can customize the text and colors of the Yes and No buttons that will be included in the consent prompt.
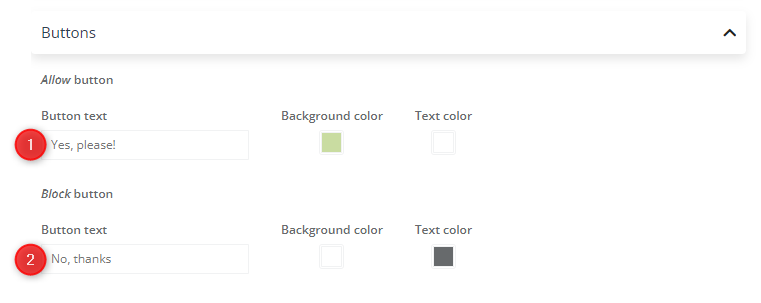
[1] Allow button—Enter the text that will be visible on the button which, when clicked, will open the browser-based prompt (or the confirmation pop-up with the browser-based prompt). The character limit is 20. You can personalize the button by selecting its background and text color.
[2] Block button—Enter the text that will be visible on the button which, when clicked, will close the consent prompt. The character limit is 20. You can choose the background and text colors.
- Position on page
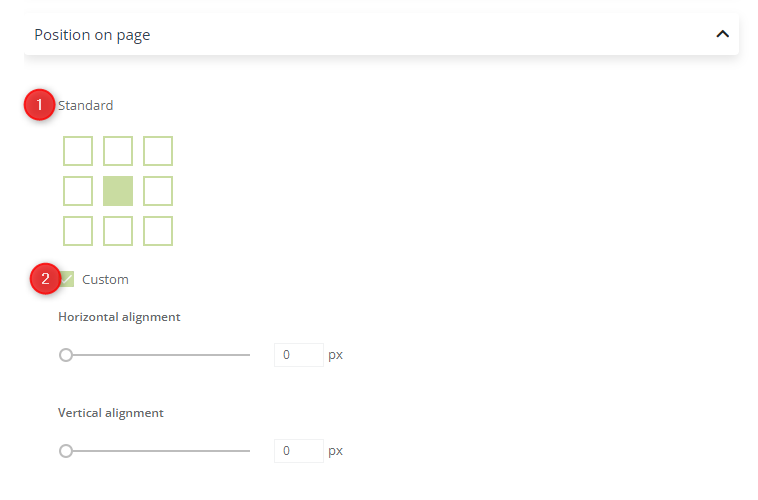
[1] Standard—Select one of the boxes to indicate where the prompt should be displayed on the page.
[2] Custom—Check this box to further specify the position of the prompt on the page. By using sliders or providing values manually (in pixels), you can specify the horizontal and vertical alignment of the consent prompt, starting from the selected page area.
- Width

Here, you can set the maximum width that your consent prompt can have on any device. Irrespective of this setting, the dimensions will still be adjusted to the screen sizes of individual devices.
- Confirmation pop-up
If you have not configured Web Push consents to be assigned to your own domain, when someone clicks the Yes button (Allow, Agree, etc.) on your website-based prompt, the browser-based prompt will not appear on its own—it will be accompanied by a new window (landing page), which is referred to as “confirmation pop-up” in the wizard.
In other words, if you implement a website-based prompt, the browser-based prompt can be displayed in two ways, depending on the configuration of your domain:
- If you have not performed the additional configuration and Web Push consents are assigned to salesmanagopush.com, when a website visitor clicks Yes on the website-based prompt, a confirmation pop-up will appear, with the browser-based prompt superimposed on it.
- If you have performed the additional configuration and Web Push consents are assigned to your own domain, when a website visitor clicks Yes on the website-based prompt, the browser-based prompt will appear directly on the visited page, in the default position determined by each individual browser.
Learn how to assign Web Push consents to your own domain >>
Below, you can see an example of a confirmation pop-up, with the browser-based prompt visible in the top left-hand corner:

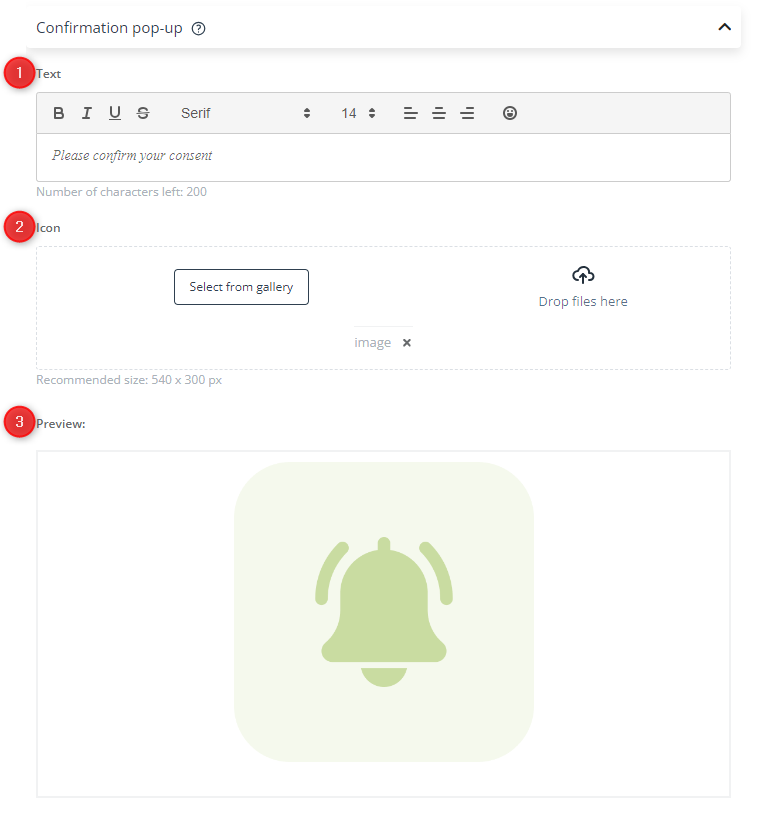
[1] Text—Enter the text content for your confirmation pop-up. The character limit is 200. You can change the font, text layout, and add emoticons to make the message more visually appealing.
[2] Icon—Provide your Confirmation pop-up icon. You can either select a previously uploaded file from your gallery or drag and drop an image stored on your disk. Accepted image formats include: JPG, PNG, WebP, and GIF. The suggested icon size is 540×300 px.
[3] Preview—Here, you can see a preview of your confirmation pop-up, which is updated in real time, as you make your changes.
- Select language
When you have finished creating your consent prompt in the default language, you can create its other language versions.

To add different languages, click + Add language and select a language from the drop-down list. The language of the consent prompt will be matched to the language of the visitor’s browser.
Click the trash bin icon to remove a language. Note that this operation will also remove all content created in that language.
C. Settings
In this step, you can specify a number of settings, including the location of the consent prompts (domain and pages), its display time, and the tags that will be assigned to Contacts who give their consent through this prompt.
- Prompt location

[1] Domain—From the drop-down list, select the domain (e-store) on which the consent prompt will be displayed. You can also select any domain if you want to display this consent prompt in all your e-stores.
[2] Pages—Specify on which pages of the domain(s) selected in point [1] the consent prompt will be displayed. This can be either every page; the homepage only; or all pages that include or do not include one or more specific phrases.
EXAMPLE: With the following configuration:
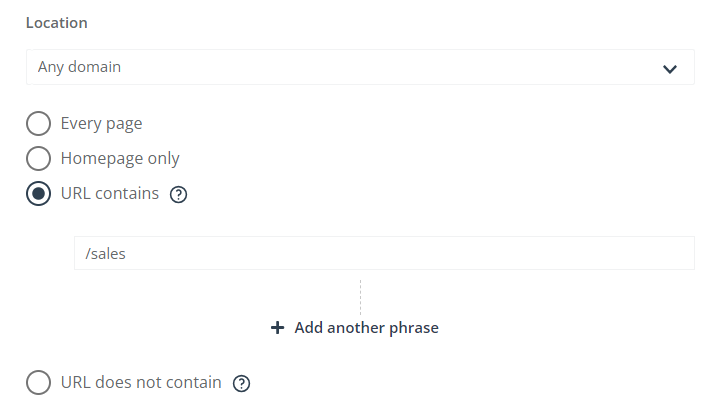
The consent prompt will be displayed in all e-stores associated with your SALESmanago account, on all pages that include the phrase “/sales”, such as: yourstore.com/products/sales, youre-store.de/summer/sales/women, etc.
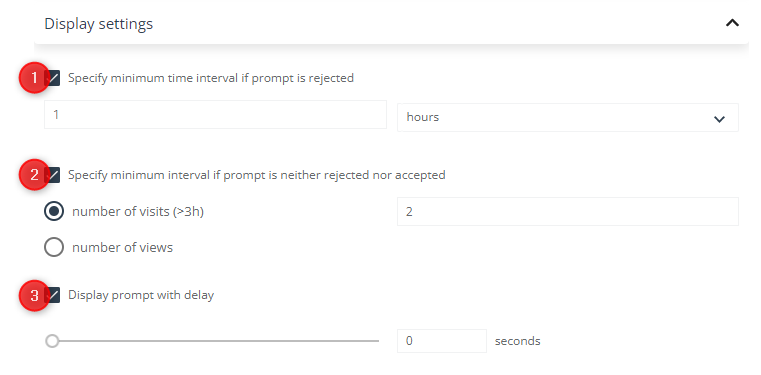
- Display settings

[1] Specify minimum time interval if prompt is rejected—Specify the time after which you want the website-based prompt to be displayed again to those visitors who declined it by clicking the No button. You can define this interval in hours, days, or weeks.
[2] Specify minimum interval if prompt is neither rejected nor accepted—Specify how many website visits or page views must occur before the consent prompt is displayed again to those recipients who ignored it by leaving the page or clicking the close button (X).
[3] Display prompt with delay—Specify the time (in seconds) that needs to pass before the consent prompt is displayed on a page.
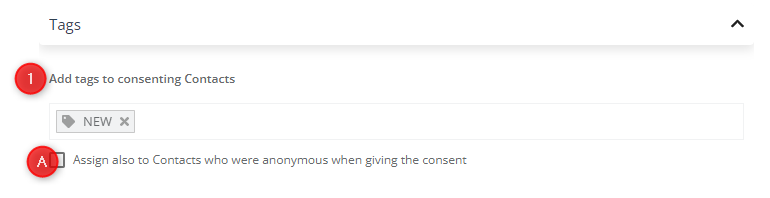
- Tags

[1] Add tags to consenting Contacts—Specify the tag(s) that will be automatically assigned to those Contacts who agree to receive your Web Push notifications through this consent prompt.
If you check option [A], the same tags will be assigned to those Contacts who were anonymous when giving their Web Push consent through this consent prompt. The tags will be applied as soon as those persons are identified based on their e-mail addresses.
Read more about assigning and using tags >>
- Check for existing consent

[1] If a user has previously consented to Web Push, do not display the prompt and automatically assign consent—Check this box to skip the display of this consent prompt for those website visitors who have already agreed to receive your Web Push notifications through any other consent prompt. In such cases, the consent will be assigned automatically.
Note that if you use this option, the SALESmanago analytics may show more consents (opt-ins) than prompt views.
3. Browser-based only
If you want to create a browser-based prompt without preceding it with a website-based prompt, go to Menu → Channels → Web Push → Consent prompts → + New consent prompt. There, select the Browser-based only wizard.
The wizard consists of two steps, which are described in detail below.

Note that on the right side of the screen, you can see a preview of the consent prompt you are currently working on.
A. Devices
In this step, you can select the device types on which you want to display this consent prompt.

[1] Device type—Select whether this consent prompt will be displayed on desktop devices only, mobile devices only, or both device types.
[2] Prompt name—Enter a name for your consent prompt that will allow you to easily identify it in the SALESmanago system. This name is not visible to your website visitors.
B. Settings
In this step, you can specify a number of settings, including the location of the consent prompts (domain and pages), its display time, and the tags that will be assigned to Contacts who give their consent through this prompt.
- Prompt location
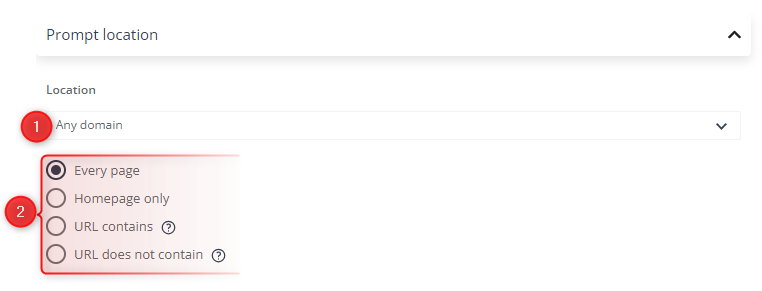
[1] Domain—From the drop-down list, select the domain (e-store) on which the consent prompt will be displayed. You can also select any domain if you want to display this consent prompt in all your e-stores.
TIP: Use different consent prompts for each of your domains for easier targeting in the future. When sending a Web Push notification, you can always select more than one consent prompt.
[2] Pages—Specify on which pages of the domain(s) selected in point [1] the consent prompt will be displayed. This can be either every page; the homepage only; or all pages that include or do not include one or more specific phrases.
EXAMPLE: With the following configuration:

The consent prompt will be displayed in all e-stores associated with your SALESmanago account, on all pages that include the phrase “/sales”, such as: yourstore.com/products/sales, youre-store.de/summer/sales/women, etc.
- Display settings
[1] Specify minimum time interval if prompt is rejected—Specify the time after which you want the website-based prompt to be displayed again to those visitors who declined it by clicking the No button. You can define this interval in hours, days, or weeks.
[2] Specify minimum interval if prompt is neither rejected nor accepted—Specify how many website visits or page views must occur before the consent prompt is displayed again to those recipients who ignored it by leaving the page or clicking the close button (X).
[3] Display prompt with delay—Specify the time (in seconds) that needs to pass before the consent prompt is displayed on a page.
NOTE: The settings described above will be ignored if you display the consent prompt using the Web Push API.
- Tags
[1] Add tags to consenting Contacts—Specify the tag(s) that will be automatically assigned to those Contacts who agree to receive your Web Push notifications through this consent prompt.
If you check option [A], the same tags will be assigned to those Contacts who were anonymous when giving their Web Push consent through this consent prompt. The tags will be applied as soon as those persons are identified based on their email addresses.
Read more about assigning and using tags >>
4. Saving options
When you have finished the configuration process in either of the wizards, after clicking Save, you will see a few options:
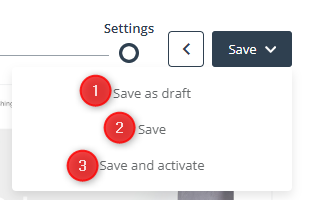
[1] Save as draft—Click here to save your work as an unfinished draft. You will find it under the Drafts tab on the list of consent prompts.
[2] Save—Click to save the created consent prompt as finished but not active. Only an active consent prompt will actually be displayed on your website. To activate a finished but inactive consent prompt, go to Menu → Channels → Web Push → Consent prompts → Templates tab. There, find the inactive consent prompt on the list, open the Actions menu and select Activate.
[3] Save and activate—Click to save the created consent prompt and immediately activate it.
You can see all your existing, finished consent prompts on the consent prompt list (Menu → Channels → Web Push → Consent prompts → Templates tab).
Read more about Consent prompt list >>