Useful links
A Workflow is an Automation Process that allows you to flexibly respond to Contact behaviors through various communication channels and thus streamline your marketing activities.
SALESmanago Workflows are built using convenient elements in the form of tiles that can be moved around the board and connected by arrows to create cause-and-effect relationships. The basic configuration of Workflow elements is Event → Condition → Action (ECA model), however, you can also apply more powerful connections to create intricate and comprehensive Automation Processes that allow you to respond to all possible developments and outcomes. This article provides inspirations for such advanced element combinations.
Before reading this article, a good idea is to become acquainted with the article: Workflow | First steps >>
Contents
- Conditional Events and how they differ from Conditions
- Connecting elements of the same type
- Configuring AND and OR operators
- Multi-path Conditions
- A/B/X tests
1. Conditional Events and how they differ from Conditions
All Events can be connected to the Start element and function as the triggering Events for a Workflow. However, you can also place an Event further along a Workflow path, preceding it with an Action, Condition, or even another Event. Such Events (placed anywhere in the middle of a Workflow and not directly after Start) are referred to as conditional Events, because they are used in a way similar to Conditions preceded by a Wait element.
NOTE: This option is not available for the Event: Contact added to system and the Event: Date from dictionary detail is approaching/approached, which must be connected to the Start element.
The difference between a Condition preceded by a Wait element and a Conditional Event is as follows:
- If you use a Condition preceded by a Wait element, the system will wait for the specified time period and then check whether the Condition is met.
- If you use a conditional Event, the system will wait for the Event to occur and then proceed, moving the Contact further along the path.
Note that if you precede an Event with anything other than the Start element, you will see that the option: Follow an alternative path after has appeared in its settings and that an hourglass connector has appeared below the standard connector:
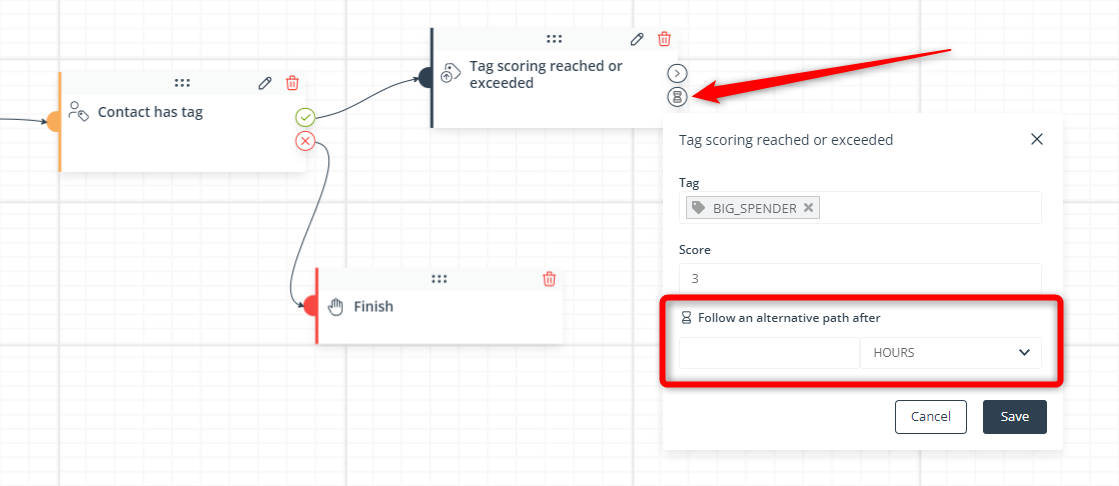
These new settings allow you to design an alternative path that will be followed if the conditional Event does not occur within the specified time limit.
These settings are mandatory: you must create a path starting from the hourglass connector, and you must enter a value in the input field and select a time unit. Otherwise some Contacts could get stuck at this stage of your Workflow for an indefinite time.
2. Connecting elements of the same type
You can connect elements of the same type directly with each other.
For instance, with the following configuration:
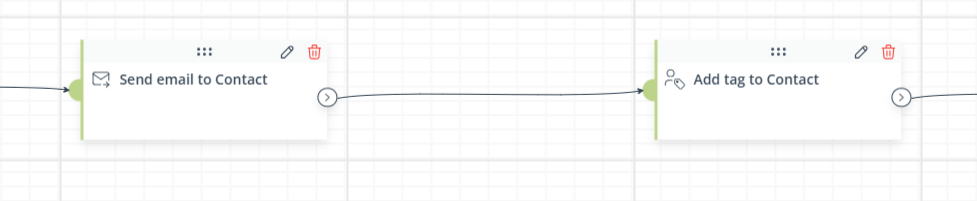
The system will first send an email to a Contact and then assign a specified tag to the Contact.
With the following configuration:
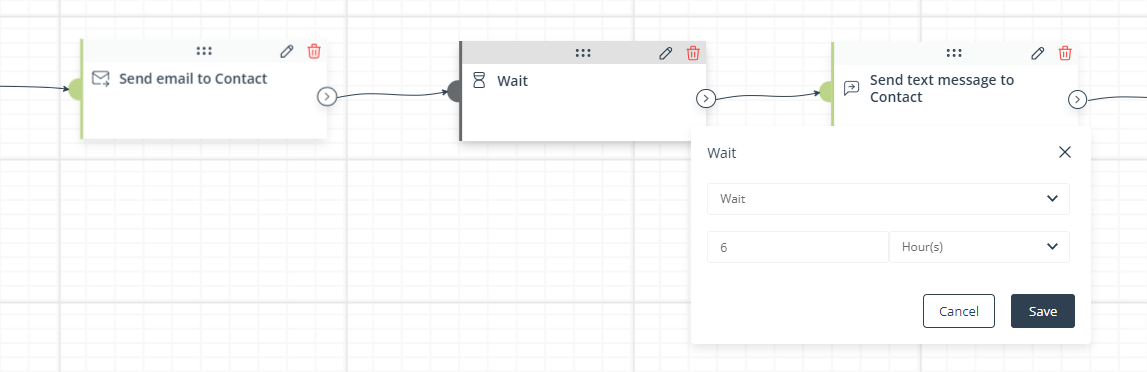
The system will send an email to a Contact; then wait for 6 hours; and then send a text message (e.g., SMS) to the Contact.
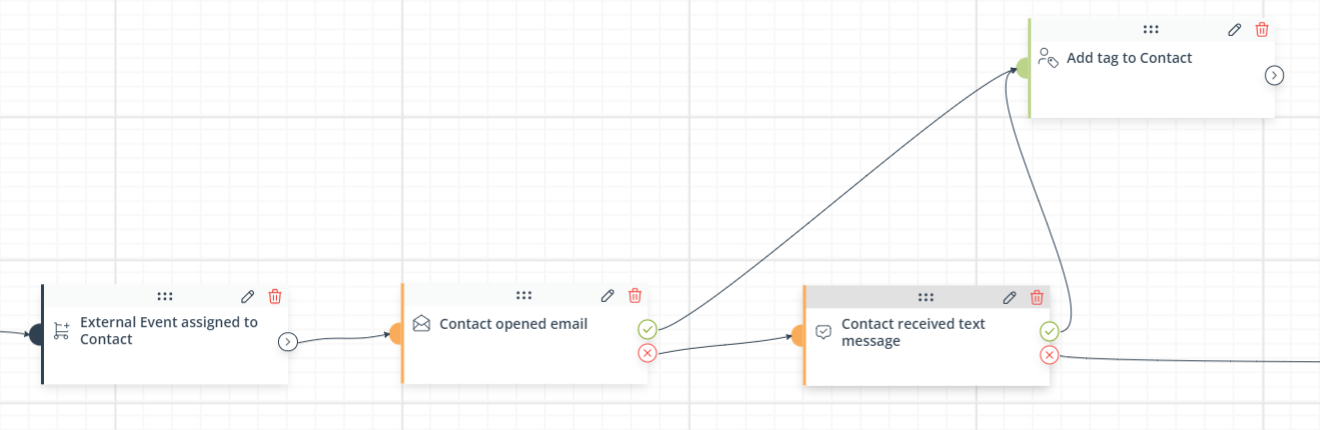
The following screenshot shows a configuration that could be used in a Workflow aimed at recovering abandoned carts:
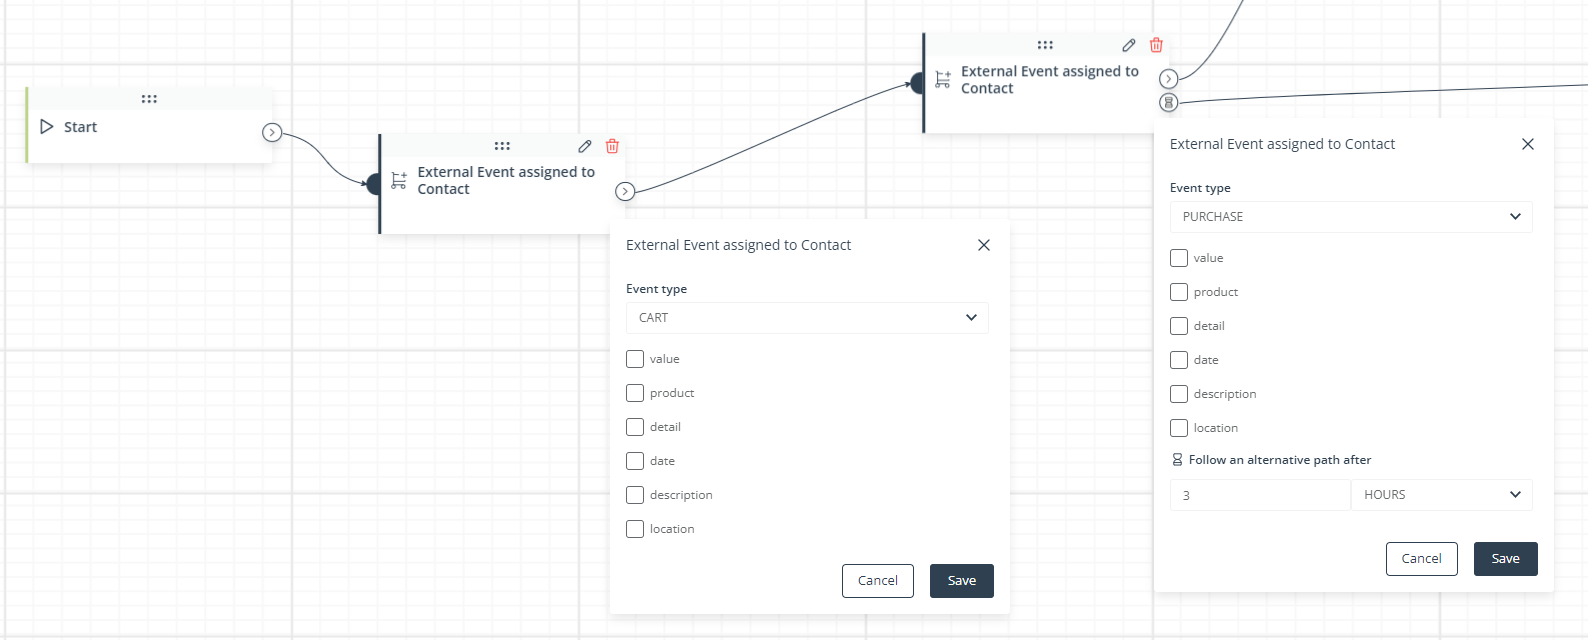
Instead of using the Condition: Contact has External Event assigned, preceded by a Wait element set to three hours, you can use another Event: External Event assigned to Contact. The system will wait for the PURCHASE External Event to occur. If the PURCHASE Event does not occur within 3 hours, it will follow the path starting from the hourglass connector.
Such setup is especially beneficial if you want to thank the customer for their purchase as soon as the PURCHASE event occurs. If the conditional Event is used, the system will be able to send a marketing communication right after the Event occurs, instead of waiting a predefined time before checking a Condition: Contact has External Event assigned.
See also Section 3 below.
3. Configuring AND and OR operators for Conditions
You can connect two or more Conditions directly to each other. Depending on the way in which you connect them to other elements, such Conditions will be connected by the AND operator or by the OR operator.
EXAMPLE: AND operator
If you connect a number of Conditions in the following way:

The Conditions will be connected by the AND operator, which means that a Contact will only move further along the path marked in green if all the Conditions are met.
EXAMPLE: OR operator
If you connect two or more Conditions in the following way and draw arrows from the green connectors to the same element:
These Conditions will be connected by the OR operator, which means that the Action: Add tag to Contact will be performed if either of these Conditions is met.
4. Multi-path Conditions
By default, each Condition has two connectors: one for the path that will be followed by Contacts that meet the Condition and one for Contacts that do not meet the Condition. However, many Condition elements can be configured to be the branching point for up to 6 paths instead of the default two.
Five of these paths can be followed if the Condition is met and one path can be followed if the Condition is not met.
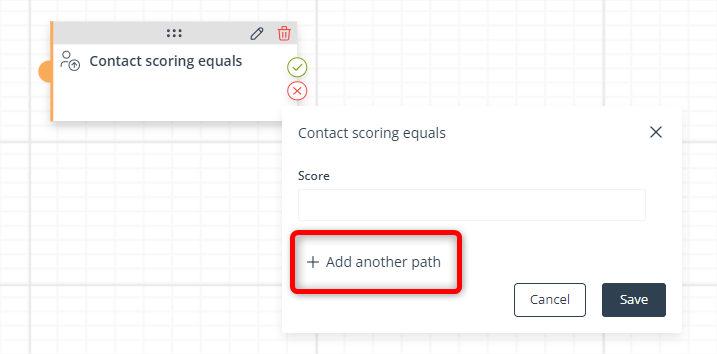
The configuration of additional, alternative paths is possible for Conditions that have the option: Add another path in their settings.
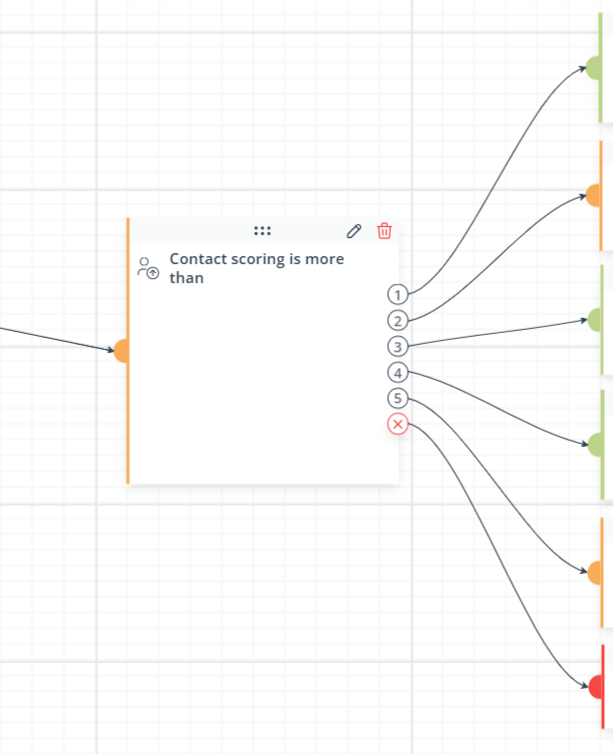
Each path should be configured to depend on a different configuration of the Condition element, for example:
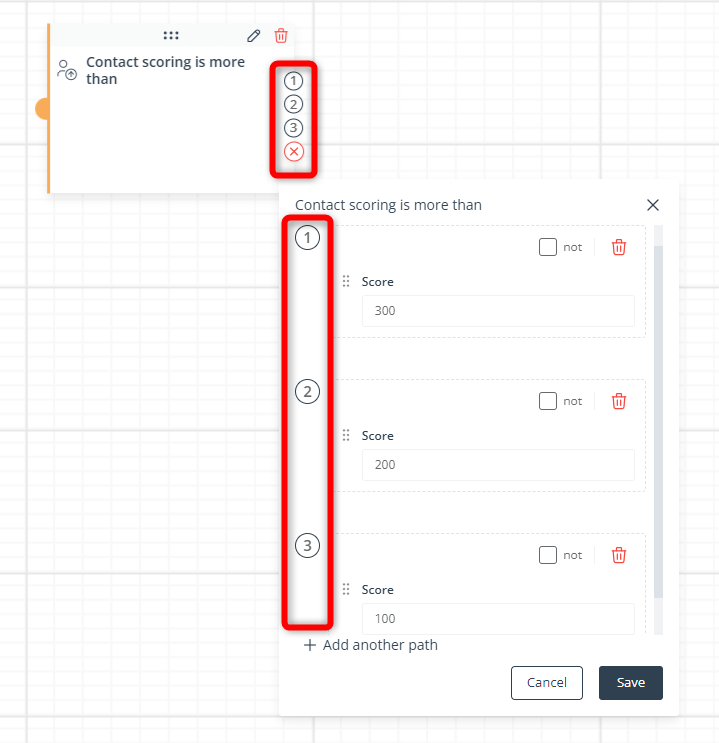
Path (1) will be followed if a Contact has a scoring greater than 300.
Path (2) will be followed if a Contact has a scoring greater than 200.
Path (3) will be followed if a Contact has a scoring greater than 100.
Path (X) will be followed if a Contact does not meet any of these criteria.
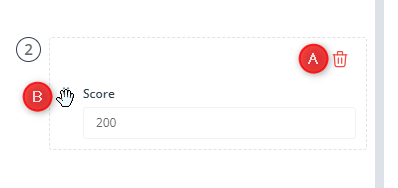
You can delete [A] a previously added path or reorder [B] the paths by dragging them to the desired position:
The alternative paths allow you to take specific actions based on precisely defined criteria that must be met by Contacts. For instance, in the example above, you can continue building the Workflow as follows:
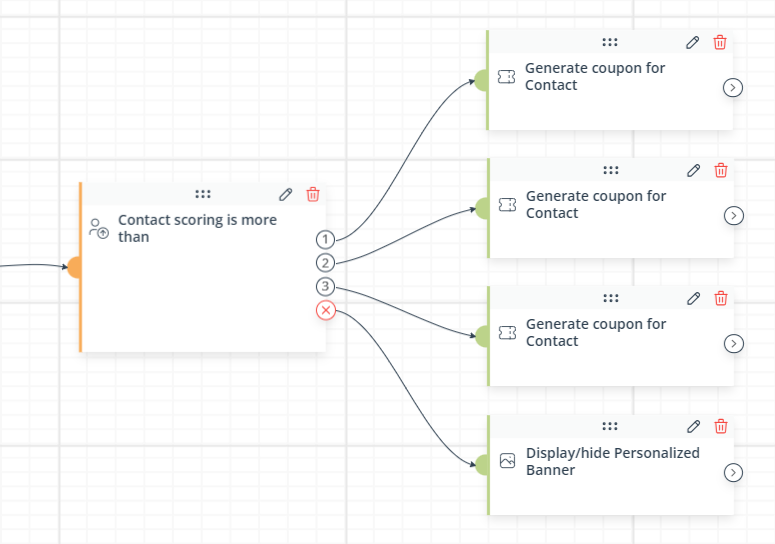
The Action: Generate coupon for Contact >> can be configured to assign an imported coupon to a Contact. In the example above, you can configure each of the three Actions to assign a different coupon (with a different discount value) to Contacts that have a scoring greater than, respectively, 100, 200, and 300 points.
If a Contact meets none of these criteria (i.e., has a scoring of 100 or less), you do not want to assign a discount to them, so instead, you display a selected Personalized Banner variant to such Contacts.
5. A/B/X tests
You can create a number of alternative paths and test their effectiveness using the element: A/B/X Test.
For instance, you can design very similar Workflow paths differing only in the communication channel:
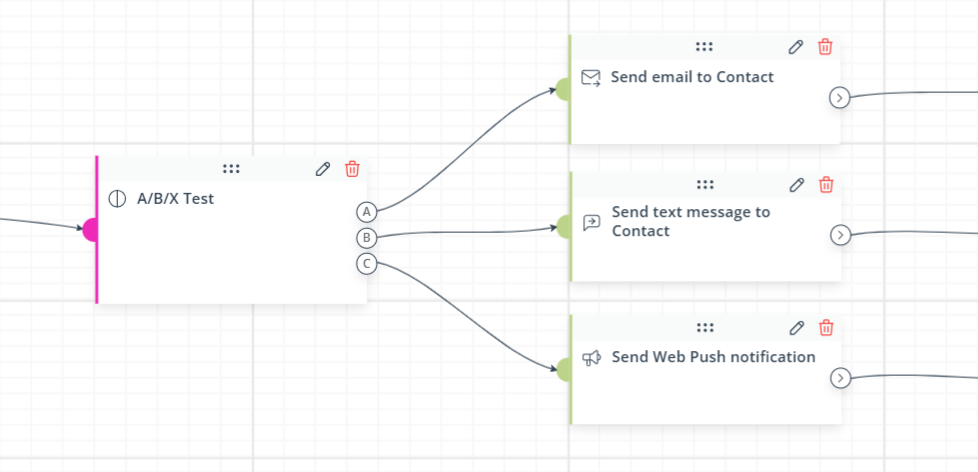
This way you can compare results achieved through three different channels: email, SMS (or, e.g., WhatsApp), and Web Push.
The element: A/B/X tests can be preceded and followed by any type(s) of elements: Events, Conditions and/or Actions.
After placing this element on the board, define its settings: the number of test paths and the percentage of Contacts that will follow each of the test paths. Note that the system distributes Contacts between the paths (i.e., selects the path to be followed by a Contact) on a random basis (taking into account your percentage settings).
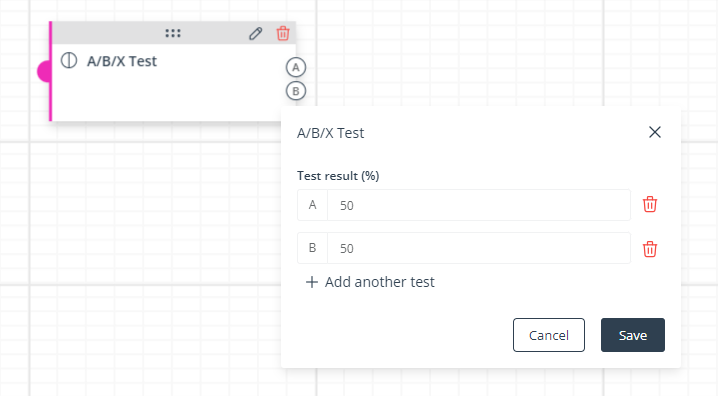
You can add up to 4 test paths. Note that the sum of percentages specified for all the paths must be equal to 100%.