Automation rules allow you to automate the processes of communication with the customer in different channels, speed up the sales process, provide salespeople with purchase-ready leads and react individually to the behavior of each contact on the website. In the automation rules you can use an Action: send Web Push notification, which will spice up your marketing campaigns.
To use the Send Web Push Notification action, go to
Automations → Automation Processes → Automation Rules → New Rule → Elements → Actions
Contents
- Basic information
- Examples of Web Push and Rich Web Push implementation in automation rules
- How to add a Send Web Push notification action
1. Basic information
Automation Rules is a group of processes, triggered by contact behavior across channels. An automation rule consists of 2 or 3 basic elements:
- Event that initiates the rule.
- Condition (optional) that must be met for the rule to take effect for the contact.
- Action, which is what the system does after the event occurs.
One of the Actions available in SALESmanago system is sending Web Push or Rich Web Push notification. Web Push notifications are a very effective marketing tool and should be used in various campaigns.
2. Examples of Web Push and Rich Web Push implementation in automation rules
Web Push and Rich Web Push notifications have numerous applications and benefits, such as:
1. You can reach contacts with opt-out status
If a person has unsubscribed from your marketing messages (changed their status to opt-out), you can no longer deliver messages to their email address. However, there are many reasons for unsubscribing. It could be that the person is interested in your product but just doesn’t read your messages. Create a rule: if the person has visited your website (Event) and is unsubscribed from your mailings (Condition), send a Web Push notification (Action). If you additionally use the notification to redirect the user to a landing page with a form, you can convert their opt-out status to opt-in.
2. You can recover abandoned shopping carts
There are plenty of strategies for recovering abandoned shopping carts. The first step of rescuing an interrupted transaction is usually a standard product email. A Web Push notification with a 30% discount that can be picked up in an email might also be a good idea. This way the contact will see the notification and be more likely to return to purchase.
3. You can increase contact engagement with a win-back campaign
A win-back campaign is designed to re-engage the contact. For example, if you see that a contact hasn’t visited your website in the last 30 days, you can get them to come back by sending Web Push or Rich Web Push notifications with information about your most recent offer.
With the Send Web Push notification action, you can automatically send both Web Push and Rich Web Push notifications (Static and Dynamic) to contacts who meet the conditions specified in the rule.
IMPORTANT: Remember that you can only send Dynamic Web Push notifications to monitored subscribers of this channel.
Read more about the marketing use of Web Push notifications >>
Learn how to create beautiful Web Push and Rich Web Push notifications >>
Learn how to create effective Dynamic Web Push and Rich Web Push notifications >>
3. How to add a Send Web Push notification action
In Automation Rules, from the list of Elements, select Actions → Send Web Push notification [1]. You can also use the search bar [2].

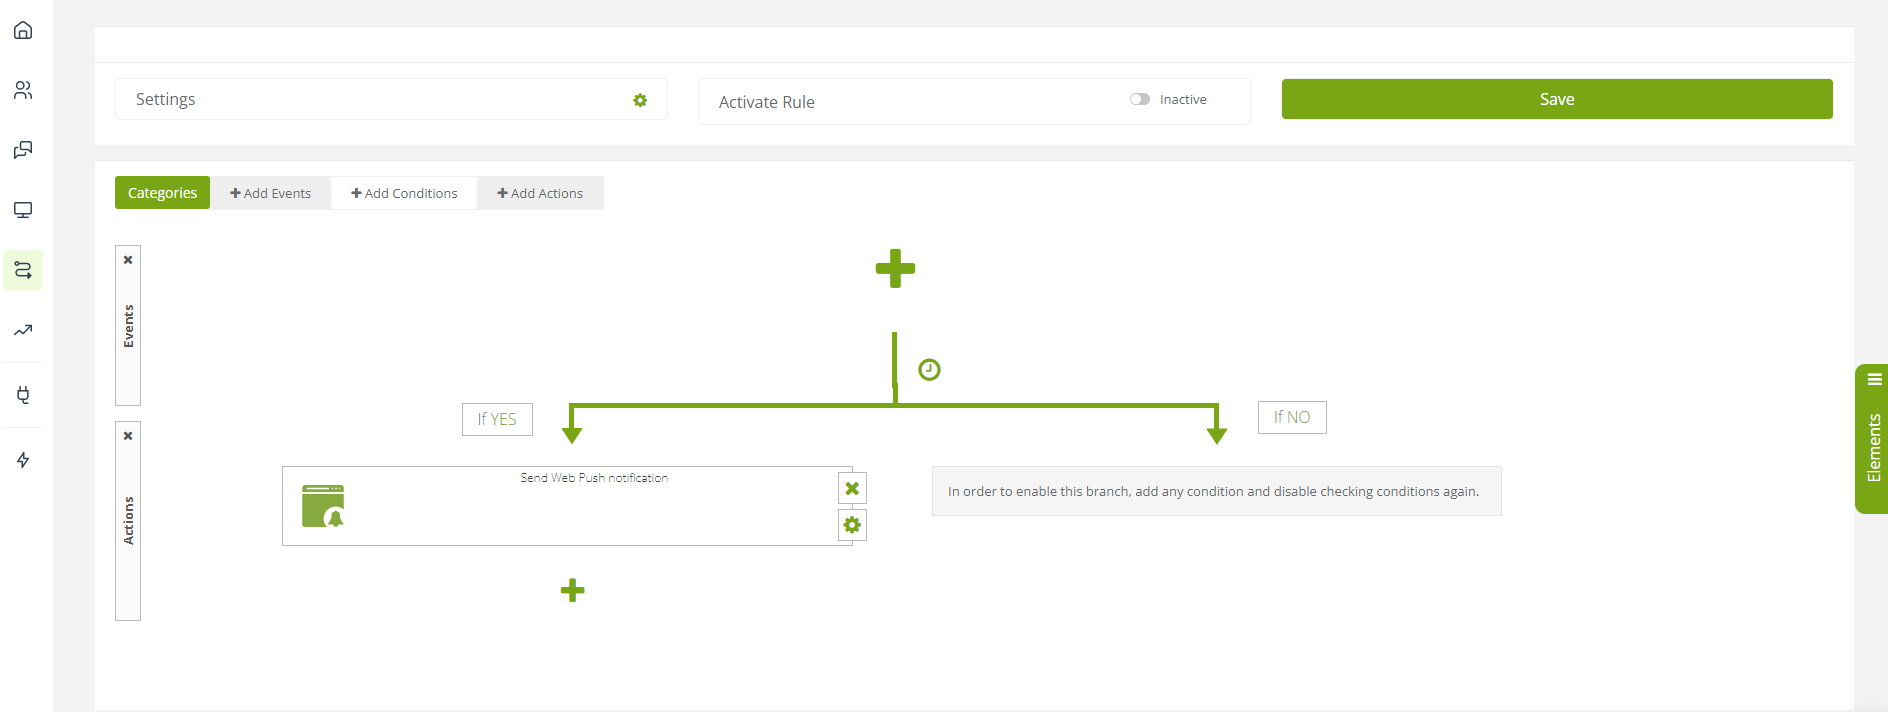
In the Actions list, find Send Web Push notification. Drag the selected action to the Automation Rules workspace.

Then click the Gear icon [1] to select the right notification.
[2] Select consent form – to select the consent form you are interested in, use the drop-down list. There, you will find the forms you have already prepared.
IMPORTANT: The consent form should be prepared beforehand using the wizard.
Learn how to use the consent form wizard >>
[3] Select the Web Push notification type – check the box next to the option you are interested in. You can choose a regular static notification (Web Push) or a Dynamic Web Push notification (Dynamic Web Push).
[4] Select the Web Push notification – use the drop-down list to choose the notification you are interested in. There, you will find the notifications you have already prepared.
IMPORTANT: The notification should be prepared beforehand using the wizard.
Learn how to use the Web Push notification wizard >>
Learn how to use the Dynamic Web Push notification wizard >>
ATTENTION: Only one agreement form may be active on one URL address, so you need to select the same agreement form for both Web Push and Rich Web Push notifications.
[5] Preview Web Push Consent Forms and Notifications – The icon with the eye opens a preview of the selected form and notification. It will let you make sure you are selecting the right items.
Finally, click Save [6] to save the action.