Useful links
Advanced Pop-up Creator is a tool that facilitates the creation of pop-up and exit pop-up forms.
Pop-up is a window that displays in the browser window and contains specific contents. SALESmanago uses pop-ups as contact forms and at the same time changes it for a tool that acquires leads within the website.
Exit pop-up is a window that displays at the moment when a user wants to go on other website or close the browser window. So to be more precise, it is a moment when a cursor is placed outside the window.
Thanks to the advanced Pop-up Creator you can create a pop-up and modify all its options.
Benefits:
- a complete tool for acquiring new contacts on the website
- a possibility of creating your own templates in a modern Drag&Drop Creator or HTML editor
In order to create a pop-up or exit pop-up in the Advanced wizard, you need to go to
Web Tools → Lead Generation → Lead Generation forms → Pop-ups
Contents
1. Start
2. Choose a pop-up type
3. Set the basic options
4. Create a pop-up in Drag&Drop Creator / Create a pop-up in HTML editor
5. Create Thank you page or Redirect to another page
6. Preview and Settings
7. Confirmation email
8. Options
9. Final settings
10. Add the pop-up code on the website
1. Start
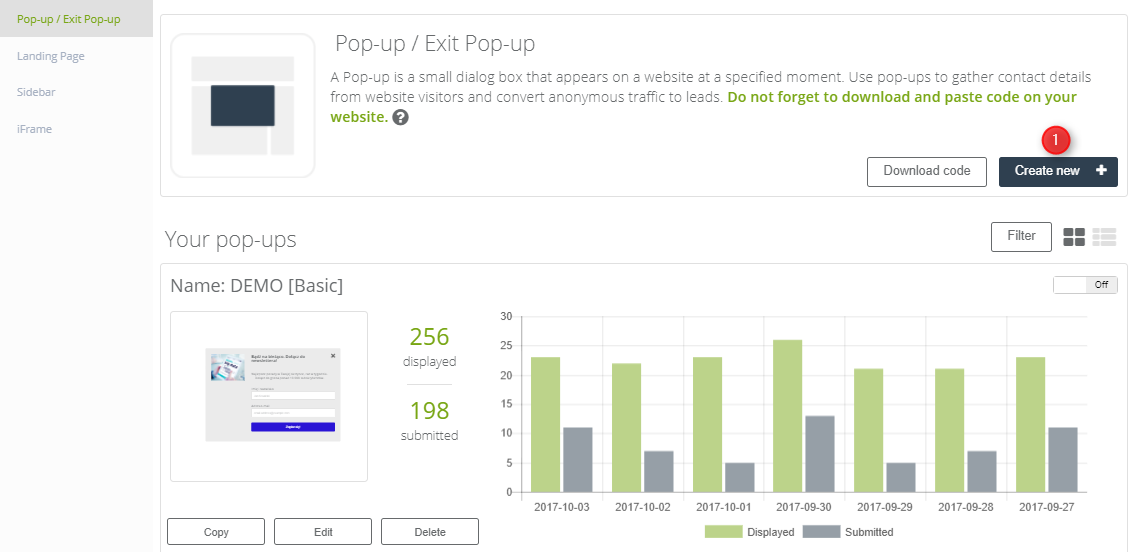
[1] Create new + – click to create a new pop-up.

Choose the advanced editor.
2. Choose a pop-up type
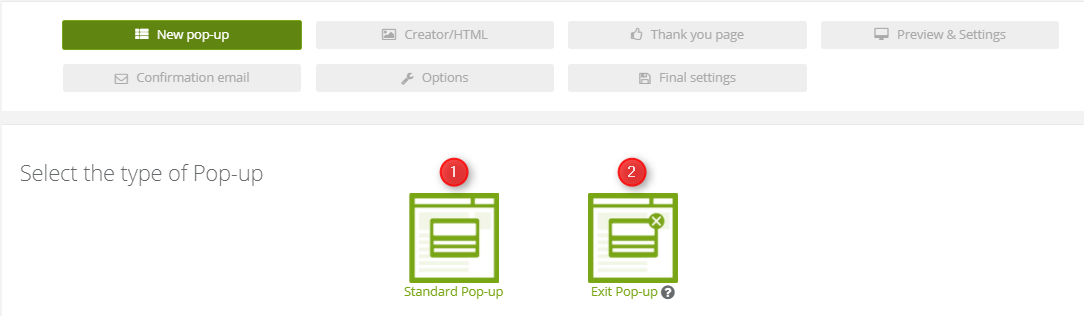
[1] Standard Pop-up
[2] Exit Pop-up – it is a window that appears at the moment when the user wants to leave the website
Regardless of the pop-up type, you will go through similar settings.
3. Set the basic options

[1] Pop-up name – type in the name that will identify the pop-up in the system.
[2] Select the main owner of new leads – type in the email address of the system user who will be the main owner of the contacts generated by the pop-up.
[3] Please enter your Google Analytics ID – you can enter your Google Analytics ID in order to receive statistics of the created pop-up on your Google Analytics dashboard. To find your ID, you need to log into your Google Analytics account, choose the Account column then select an account on an unfolding list. Next, you need to choose the service in the Property column and click Tracking Info → Tracking Code.
[4] Share this pop-up – mark this feature if you want to share this pop-up with other users. Click here to learn more.
[5] Create pop-up in Drag&Drop Creator – select this option to customize the layout of the form easily.
[6] Create pop-up in HTML editor – select this option to work in HTML editor.
4. Create pop-up in Drag&Drop Creator
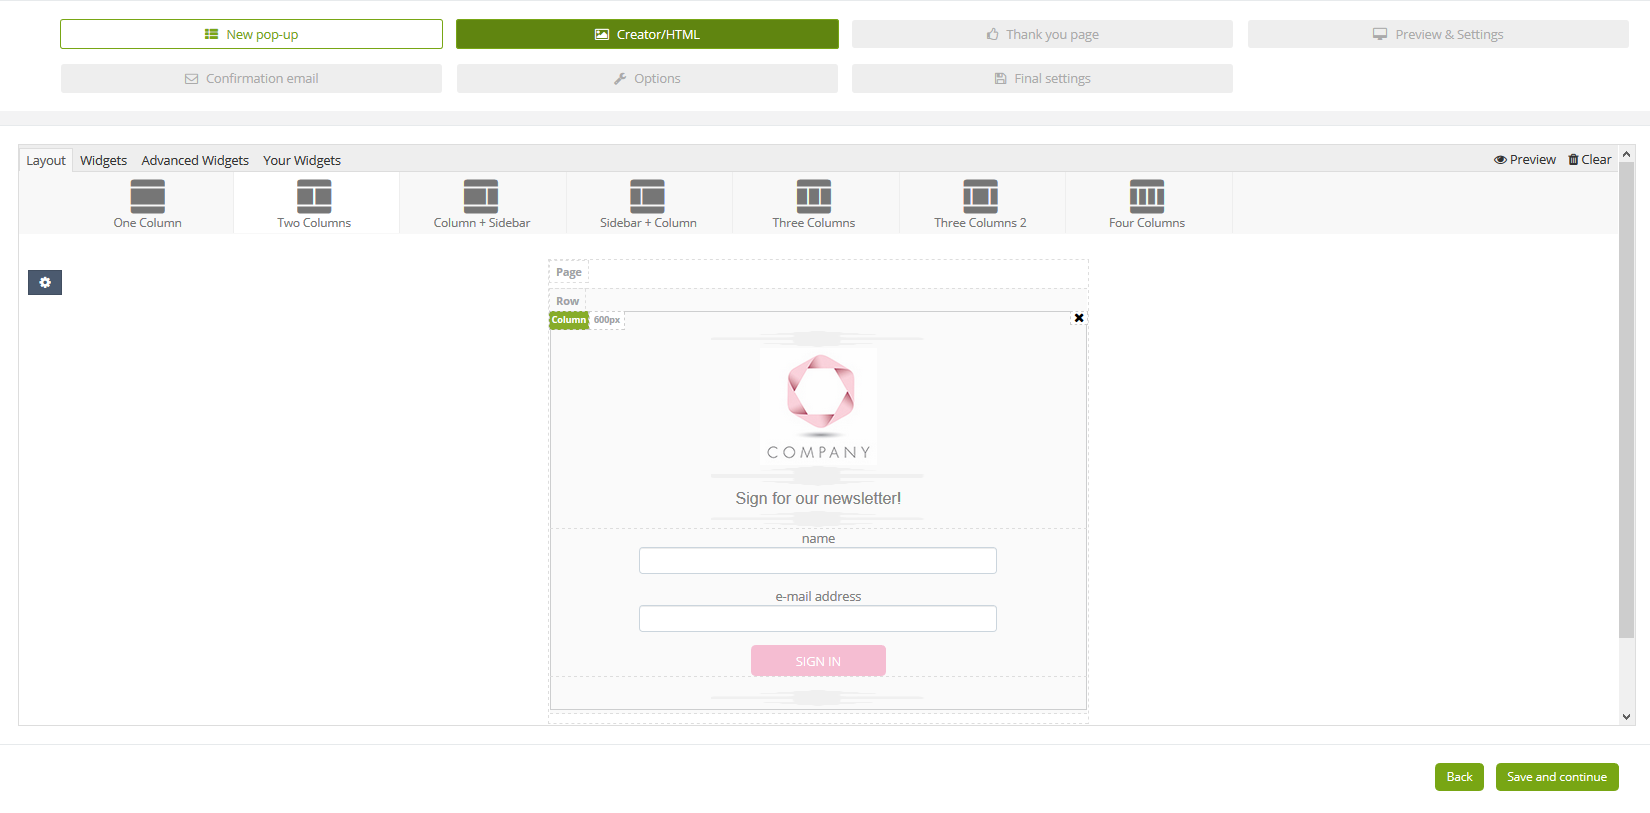
Begin with the choosing the structure of your pop-up. You can find them in a Layout section. Then, proceed to the Widgets section where you can find elements with which you can fill in the pop-up. Drag the chosen elements from the menu and drop them in the place of your choice. You can modify and delete the elements.
Learn more the widget settings of the sign-in form
Click ![]() to display additional settings for the website content
to display additional settings for the website content
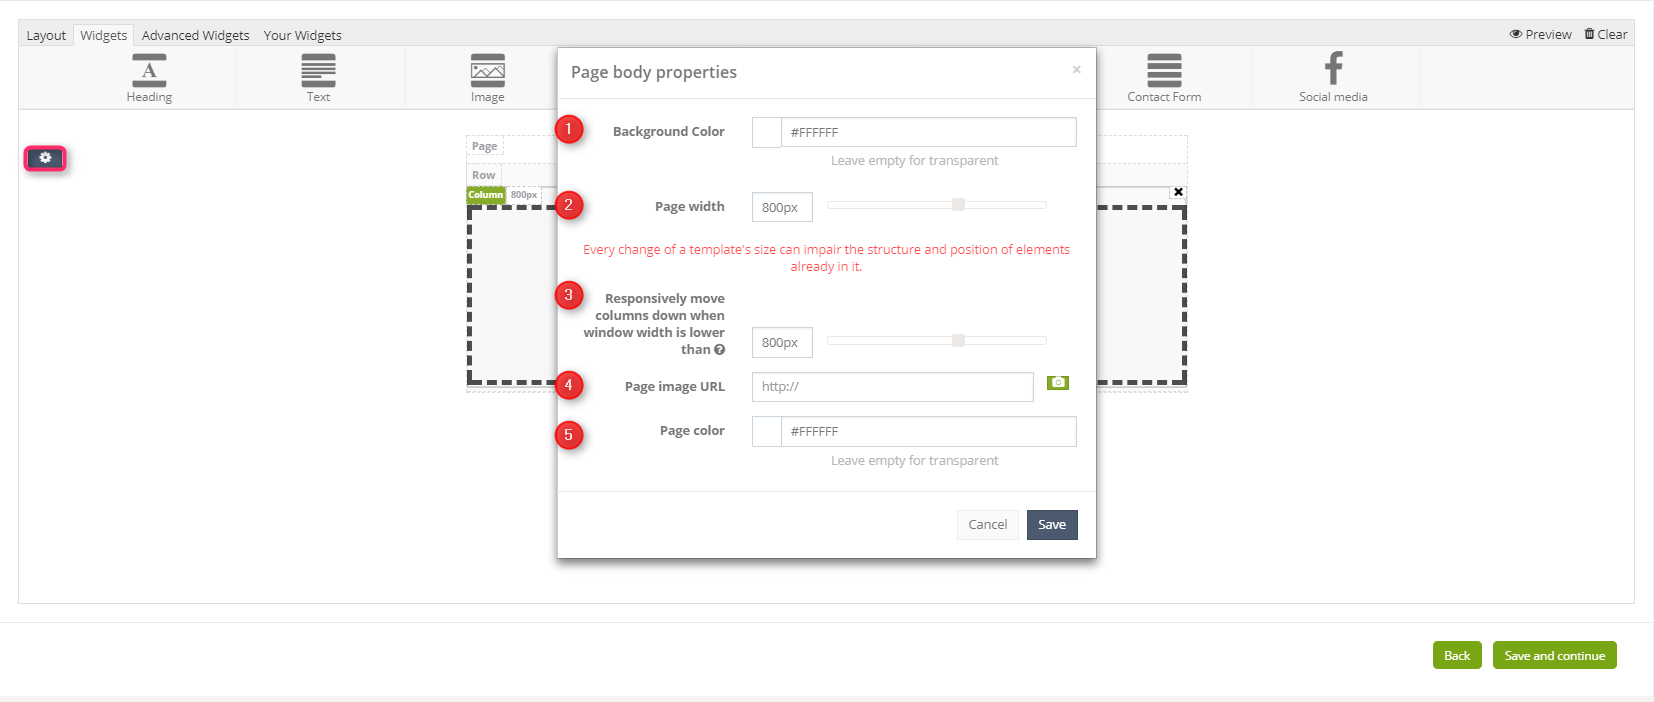
[1] Background colour – choose any colour of the background you like or leave this field empty if you want the background to be transparent.
[2] Page width – adjust the width of the page by means of a slider. Remember, the change in the width can affect the appearance of previously set elements.
[3] Responsively move columns down when the window with is lower than – this option lets you adjust when too large elements will be responsively moved to the lower part of the pop-up.
[4] Page image URL – paste the URL address to which the user will be redirected after clicking this image.
[5] Page colour – choose the colour of the page.
Create a pop-up in HTML editor

You can insert a ready-made pop-up template or create it from the scratch by means of HTML.
If you want to create your pop-up in the HTML creator, you need to use CSS styles. It is a language that describes the form of presentation. CSS styles enable you to set such parameters as size, thickness, colour, font style, background colour or spaces between the elements.
You need to insert CSS code in the head section (<head>) between <style> and </style>.
Using CSS styles gives you many possibilities such as receiving readable declarations that can be used many times by grouping them.
5. Create Thank you page or Redirect to another page
After filling in the form, the contact will be redirected to the thank you page. You can create such notification by yourself, choose ready-made templates or set redirection to the other website.

[1] Create new Thank You Page – select this option to use Drag&Drop Creator to customize the structure and layout of a Thank you page
[2] Redirect to another page – select this option if you want to use existing landing page or insert a URL address to which the contact will be redirected

Click Next once you’re ready with Thank you page or redirection.
6. Preview and settings
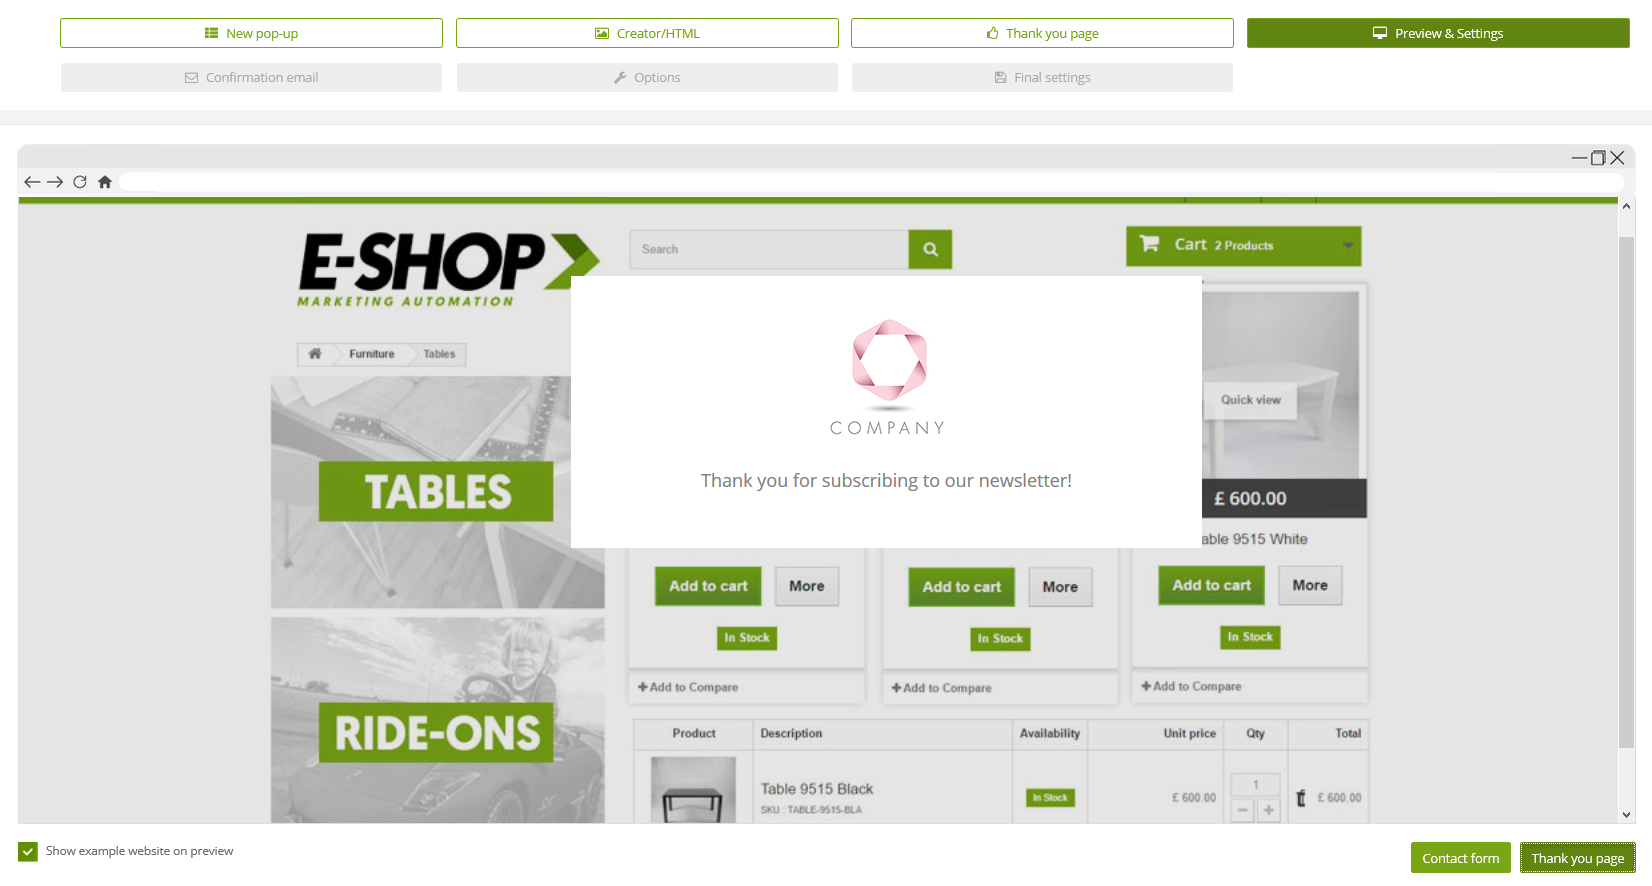
In preview section you can verify whether the form works correctly and thank you page looks properly.
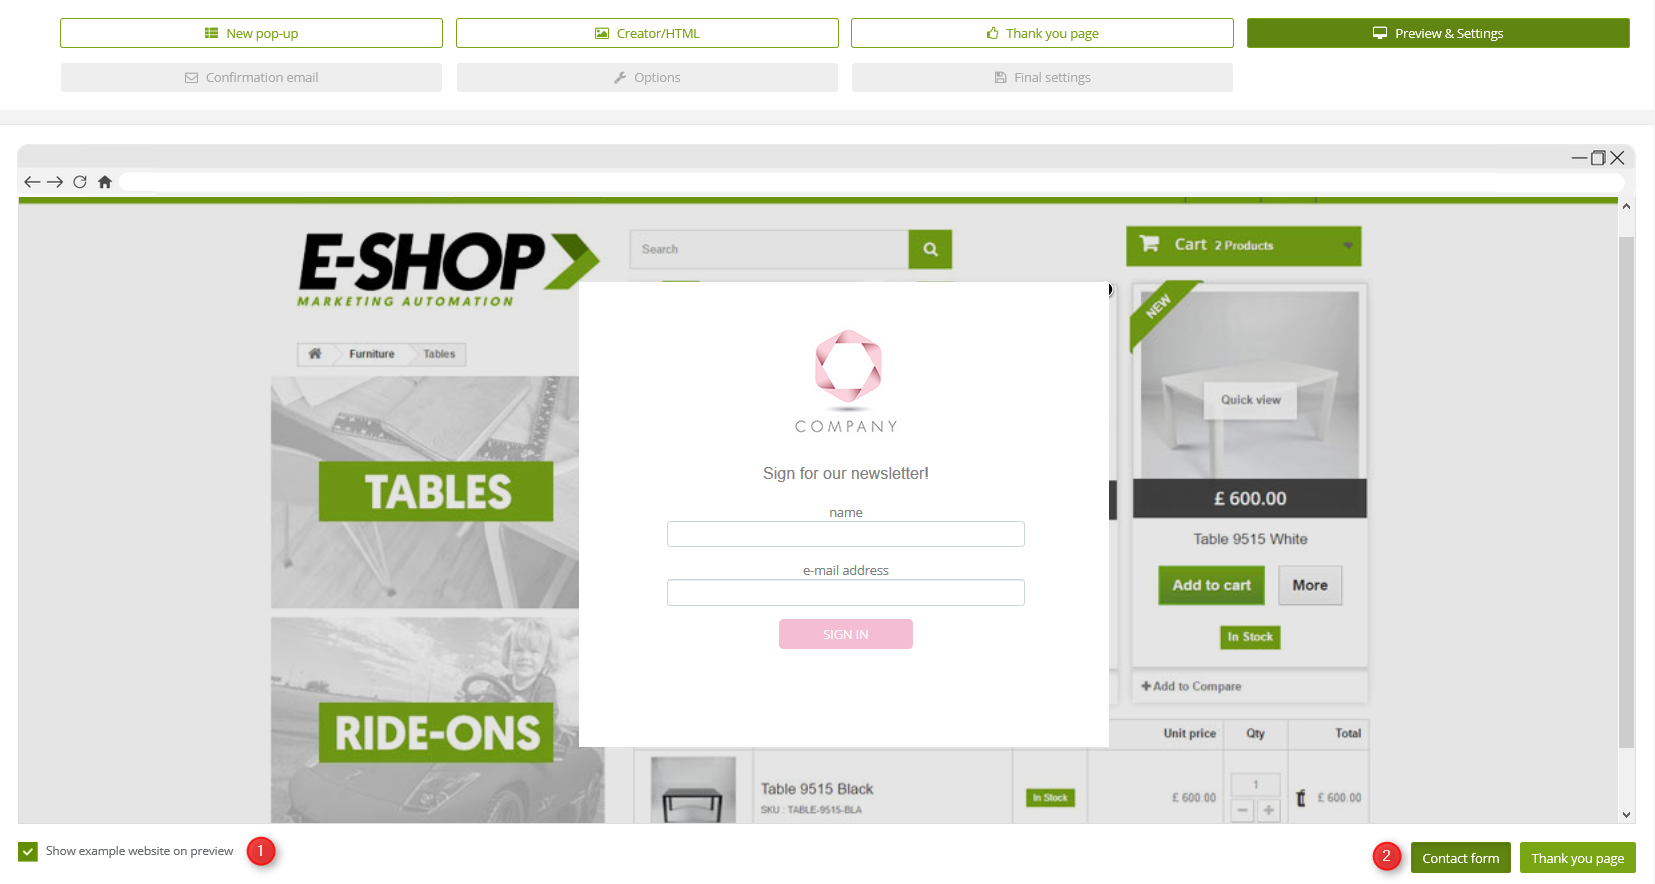
[1] Show example website on preview – click to see the preview of the form on the example website.
[2] Contact form / Thank you page – click to see how the contact form looks like.
Below the preview window, there are settings that you should go through.
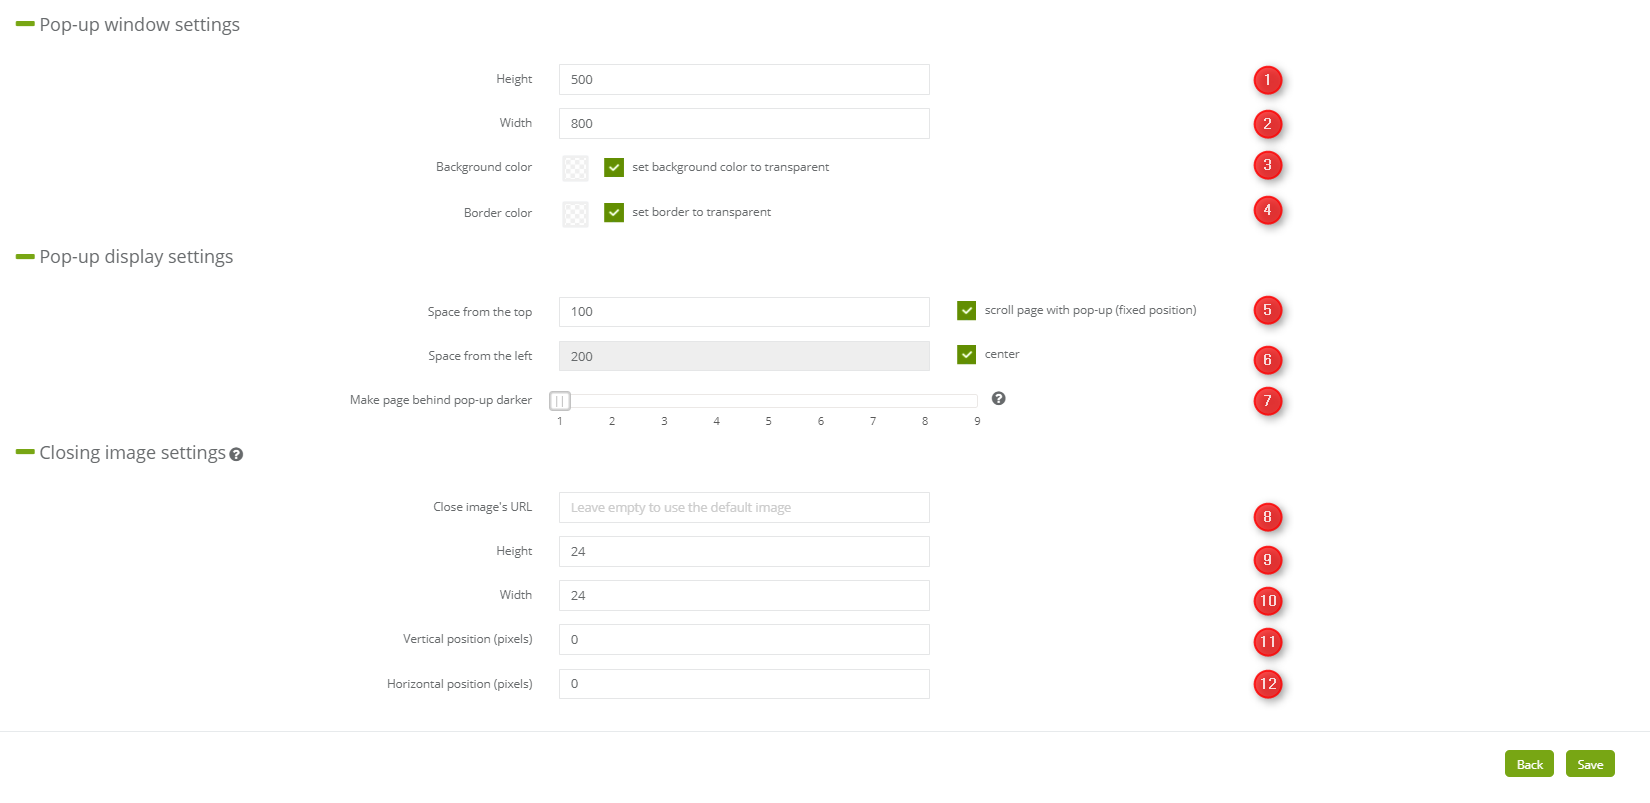
Pop-up window settings:
[1] Set the height of the pop-up window
[2] Set the width of the pop-up window
[3] Set the colour of the pop-up window background. Select the option to set the colourless background or choose a colour from the colour palette.
[4] Set the frame colour of the pop-up window. Select the option to set the colourless background or choose a colour from the colour palette.
Pop-up display settings:
[5] Adjust the space between the pop-up and the upper edge of the page. Select Scroll page with pop-up (fixed position) so that pop-up won’t change its position on the website while scrolling.
[6] Adjust the space between the pop-up and the left edge of the page or select centre option to place the pop-up in the middle of the page.
[7] Dim the page under the pop-up – use a slider to adjust the dimming from the brightest (1) to the darkest (9)
Closing image settings:
Default image for an exit button is X icon. You can either modify it or insert your own graphics.
[8] Enter a URL of selected graphics that replaces the default closing image.
[9] Set the height of the closing image
[10] Set the width of the closing image
[11] Set the vertical position of the closing image with regard to the right upper corner of the pop-up frame
[12] Set the horizontal position of the closing image with regard to the right upper corner of the pop-up frame
You can track the changes in the preview window. If everything is correct, click Save.
7. Confirmation email
In the next two steps, you can configure automatic message for contacts, who left contact details in the form. The aim of this message is to confirm saving the contact in the database.
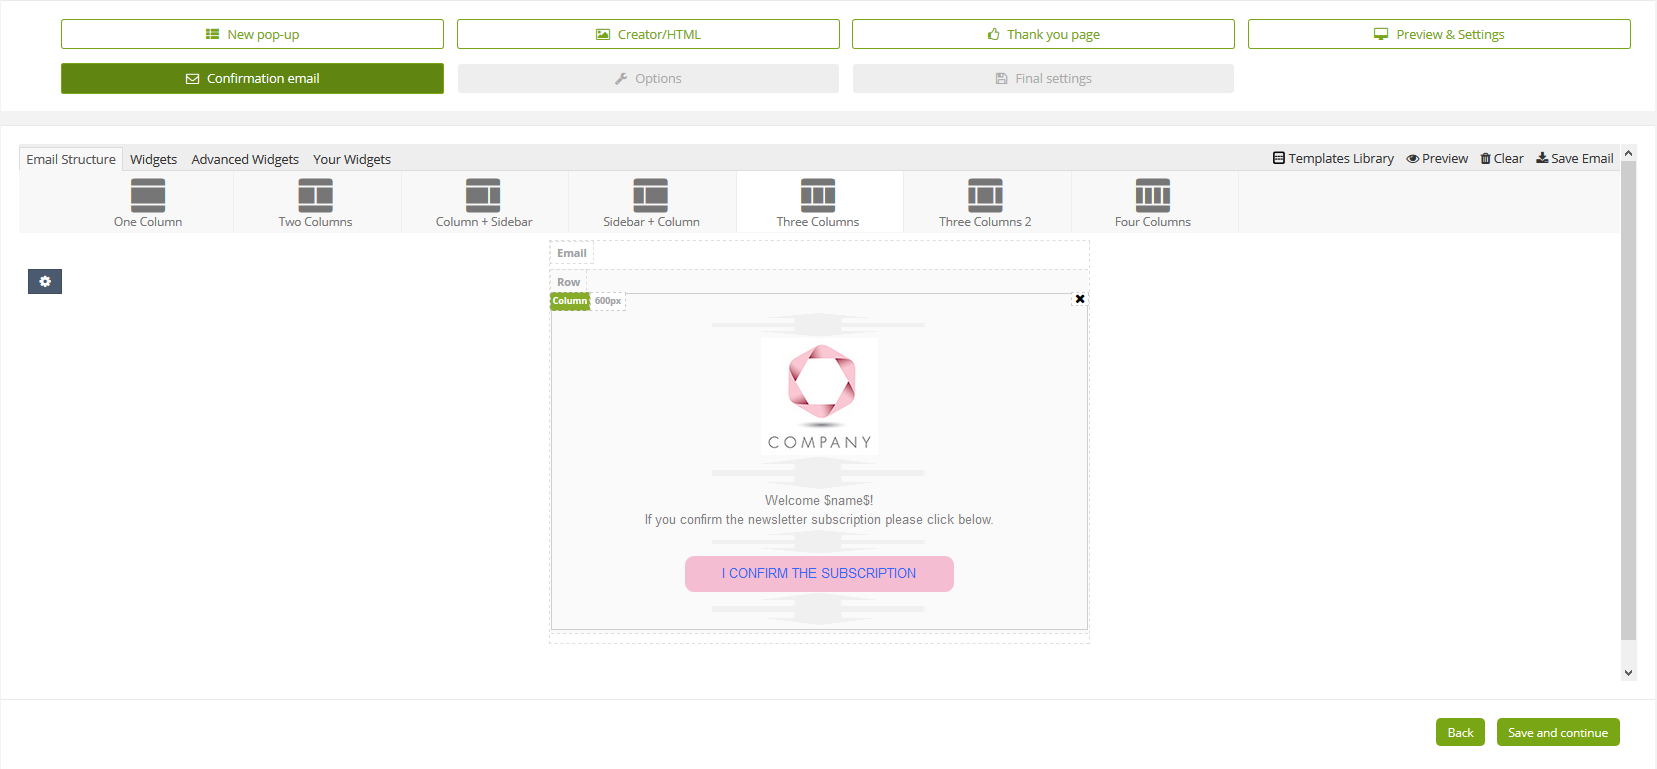
Drag chosen elements of the message.
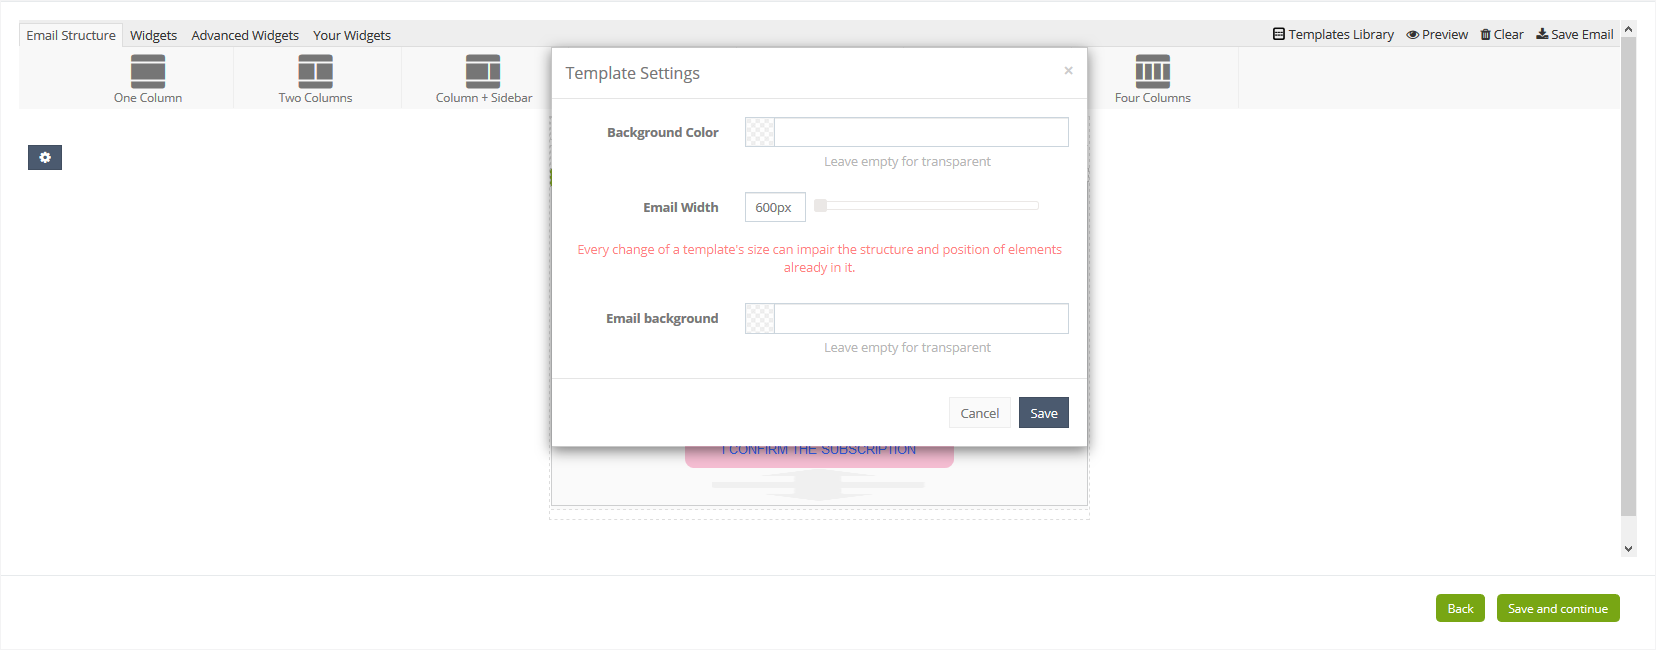
Click ![]() to display additional template settings, which let you change the colour, width and the transparency of the background. Once you finished creating a confirmation email, click Next.
to display additional template settings, which let you change the colour, width and the transparency of the background. Once you finished creating a confirmation email, click Next.
8. Options
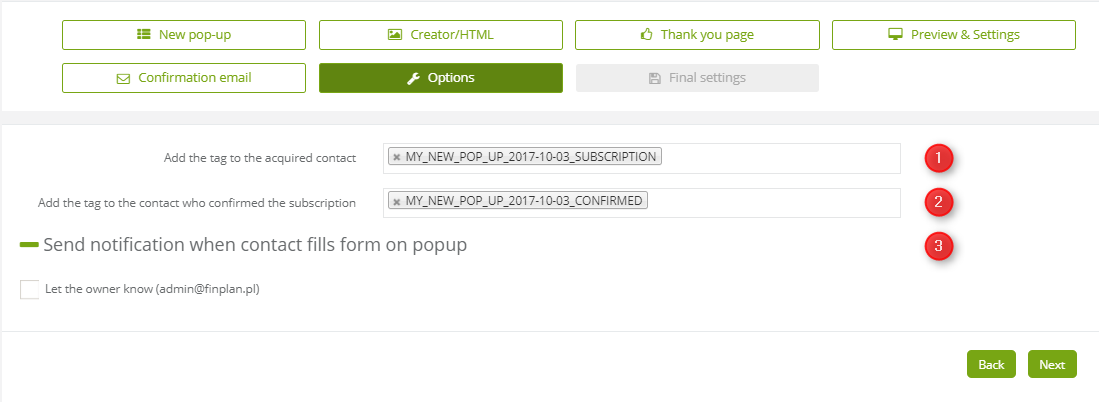
[1] Add the tag to the acquired contact – if the contact fills in the form, then a tag can be automatically assigned to this contact. You need to type in the name of the tag that you want to be assigned to a contact after filling in the form.
[2] Add the tag to the contact who confirmed the subscription – if the contact confirmed the subscription in the form, then a tag can be automatically assigned to it. You need to type in the name of the tag that you want to be assigned to a contact after confirmation of the subscription.
These settings are optional.
IMPORTANT: We recommend such a nomenclature of the tags that will indicate the way of generating contacts. It’s useful while generating Lead Generation analytics where you need to determine the source of contact acquisition.
[3] Send notification when contact fills a pop-up form – tick the Let the owner know option if you want that the owner of the contacts receives notification about a new contact.
Once the settings are selected, click Next.
9. Final settings
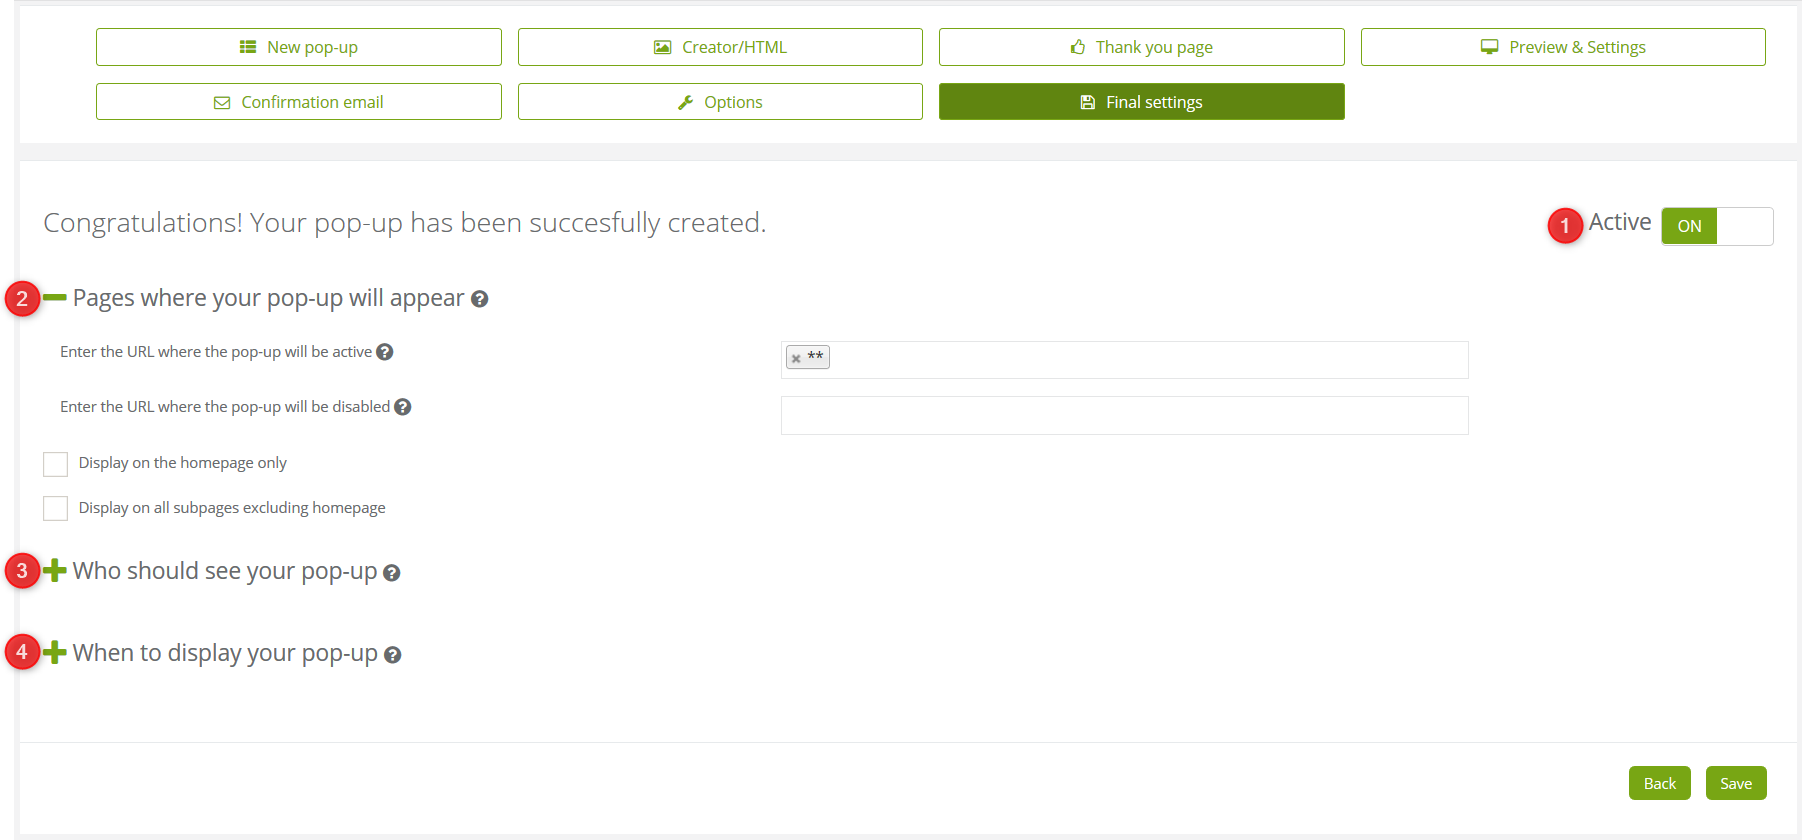
[1] Active – with this slider you can either activate or deactivate the pop-up
[2] Pages where your pop-up will appear – in these two fields you can paste a URL address where your pop-up will display and where your pop-up won’t be active, respectively. Bear in mind that maximum number of characters in each field is 255.
Here you can also check one of the following options:
- Display on the homepage only
- Display on all subpages excluding homepage
[3] Who should see your pop-up – you can choose the recipients of the form. You can choose from monitored and anonymous contacts. However, you may address the pop-up form to all contacts.
[4] When to display your pop-up – option for setting the pop-up or exit pop-up display time:
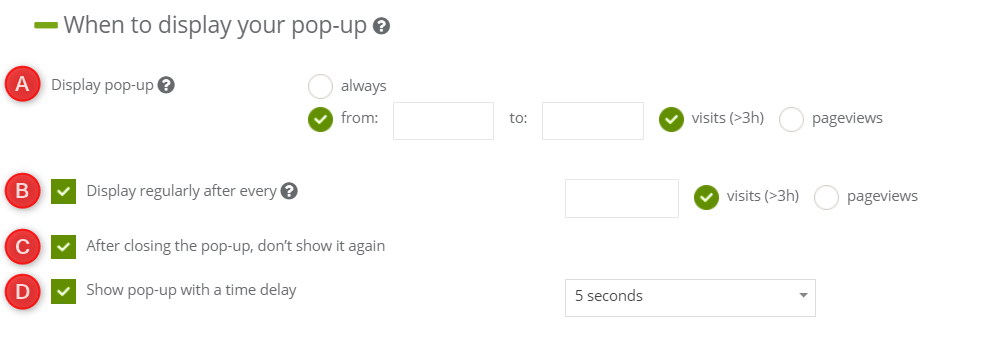
IMPORTANT: If the user has already completed the form and joined the database of your contacts, the pop-up will not appear again.
[A] Display pop-up – specify when you want the pop-up to be displayed:
-
- always – the pop-up will be displayed for all contacts, regardless of the number of visits and pageviews.
- from: X to: Y – The pop-up will be displayed in the ratio of the selected number of pages viewed (each page visited during the visit counts as a new page view) to the specified number of page views. The same rule works for visits. Remember that one visit is counted every 3 hours. For example, choose the option to display a pop-up from 2 to 5 visits. The pop-up will be displayed on the 2nd, 3rd, 4th, and 5th visit unless the user completes the form.
NOTE: After the start of a new visit (after 3 hours from the previous visit to the site), the pageviews are counted from the beginning.
[B] Display regularly after every – display a pop-up every specified number of visits or pageviews:
-
- visits – enter the number of times the contact has to visit the page to display a pop-up/exit pop-up. A new visit is counted after 3 hours of inactivity of the contact on the website.
- pageviews – enter how many times the contact has to refresh the page to display the pop-up/exit pop-up. The page view is counted as each reloads or refreshes of the page.
[C] After closing the pop-up, don’t show it again – if the user closes the pop-up, it will not appear until the next visit to the site.
[D] Show pop-up with a time delay – the pop-up will be displayed after the selected number of seconds after the user enters the site.
10. Add the pop-up code on the website
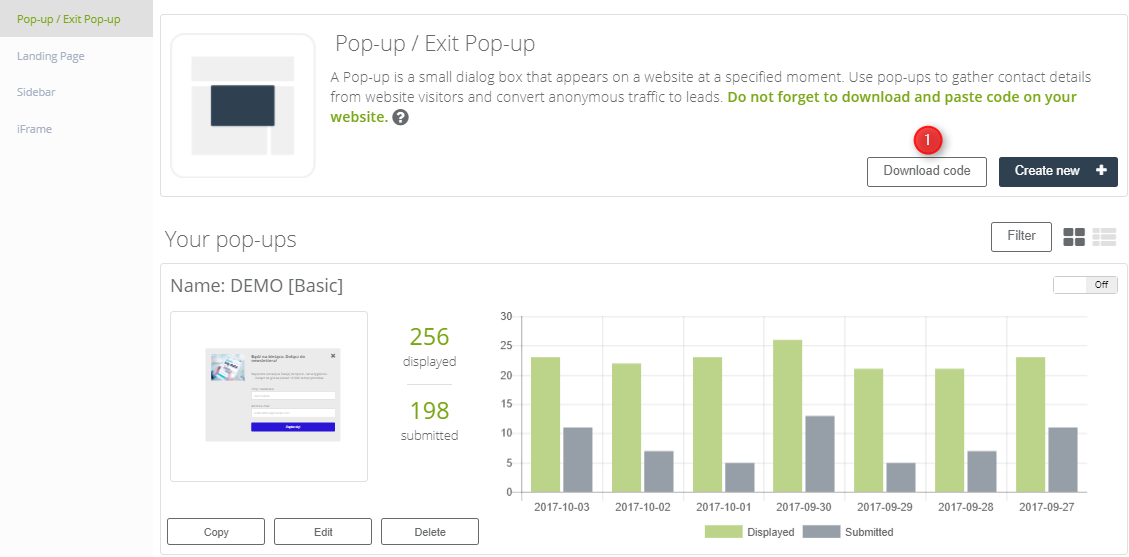
[1] Download the code – click to display the code you need to place on the website. A window with a pop-up code will display (see below)
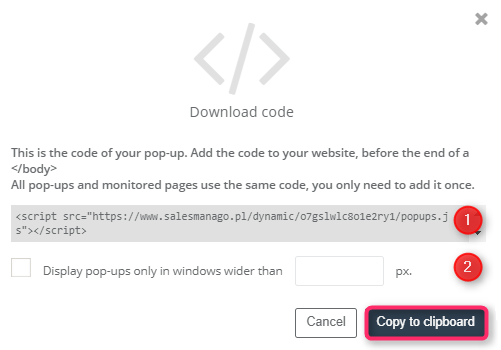
[1] Your pop-up code – paste this code on your website before <body/> section. You need to do it only once. Since then all your pop-ups will display on this particular website. You can use this code on other pages.
[2] Display pop-ups only in windows wider than x pixels – you can restrict the display of pop-ups to screens of a particular size. Use this option, if you think that displaying the pop up on a small screen (e.g. a smartphone) may make navigating on the website harder.
Finally, click Copy to clipboard and place the code on the website. From now on, the pop-ups will be active on the website.
IMPORTANT: One code enables all pop-ups on a particular website, so if you create more pop-ups, you don’t need to place a code on the website again.