The Custom Audience analytics dashboard allows you to view all custom audiences assigned to ad accounts connected to Facebook Ads Manager and SALESmanago. Here you can view the estimated contact flow between SALESmanago and Custom Audiences.
NOTE: On the SALESmanago platform, you can add a new custom audience or manage an already existing one. Read more about how to add a custom audience >>
To go to the Custom Audience analytics, select Social Media => Custom Audience.
[1] Ad account – select the Facebook ad account for which data will be displayed.
[2] Time period – select the time period for which you want to display the data.
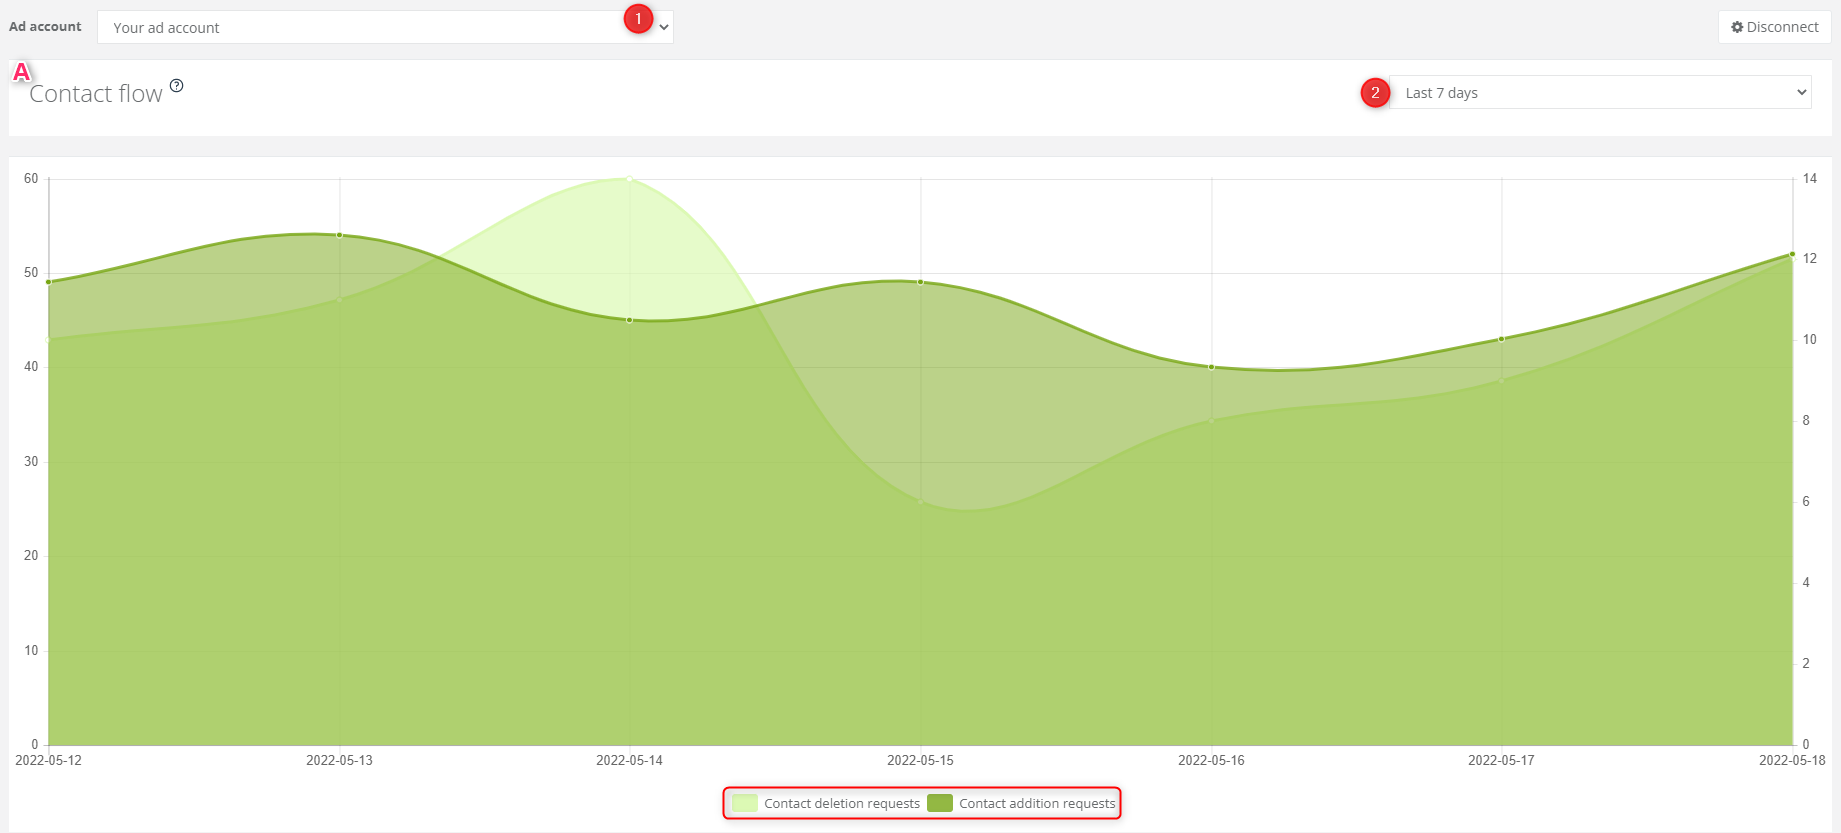
[A] Contact flow – the diagram shows the flow of contact deletion requests and contact addition requests sent from SALESmanago to Facebook within the specified time period.

[B] Custom audiences with the highest number of displays – this diagram shows data concerning custom audiences with the most displays of a given campaign. Move your cursor over the diagram to see the number of displays by particular custom audiences within the time period specified.
[C] Custom audiences with lowest CPA – this diagram shows data concerning custom audiences with the lowest CPA value. Move your cursor over the diagram to see the values for particular custom audiences.
[D] Custom audiences with highest CPA – this diagram shows data concerning custom audiences with the highest CPA value. Move your cursor over the diagram to see the values for particular custom audiences.
NOTE: CPA – Cost Per Action – is the cost of obtaining one conversion in a given ad campaign.

[E] Custom audiences – here you can see a list of all audience groups within a given campaign, including the dates of their creation, their availability (for a custom audience to be available, it must contain at least 1000 contacts), and estimated size (the approximate number of contacts that can be targeted by the campaign).
[E1] Add new custom audience – click here to go to a wizard where you can create a new custom audience.
[E2] Details – click here to see detailed information on a selected custom audience. This section contains a list of all campaigns launched for that custom audience.

- Start – the campaign’s start date,
- End – the campaign’s end date,
- Status – activity status (Active/Inactive),
- Reach – the number of people targeted by the campaign,
- Impressions – the number of displays,
- Spend – the total budget of the campaign.
[E2a] Manage – by clicking on this button, you will be redirected to the Facebook login screen. Log in to your ad account to manage your campaign.
[E3] Manage – by clicking on this button, you will be redirected to a custom audience management wizard.
[E4] Remove– click here to delete the custom audience.