The Customer Segmentation Center allows you to both manage existing segments and create new ones. Adding a new segment is simple and intuitive. Thanks to predefined elements, you can easily and quickly identify relevant groups of recipients. The system allows you to store up to 50 different segments.
To create a new segment in the Customer Segmentation Center in SALESmanago, go to
Audiences → Segmentation → Segmentation Center → + Add a new segment

Contents
- Basic information
- Data
- Filters
1. Basic information
The Segment Wizard allows you to create detailed audience groups step by step using hyper segmentation, which considers consumers’ interests and behaviors to understand their individual preferences. With predefined audience groups, the module allows you to engage all your contacts with a highly personalized approach. The design of the wizard allows you to select predefined groups, such as “customers with high churn risk,” with a single click.
2. Data
The first step in creating a new segment is to select your data. After clicking the +Add a new segment button, the system will redirect you to the first segment creation screen. Fill in all the fields:
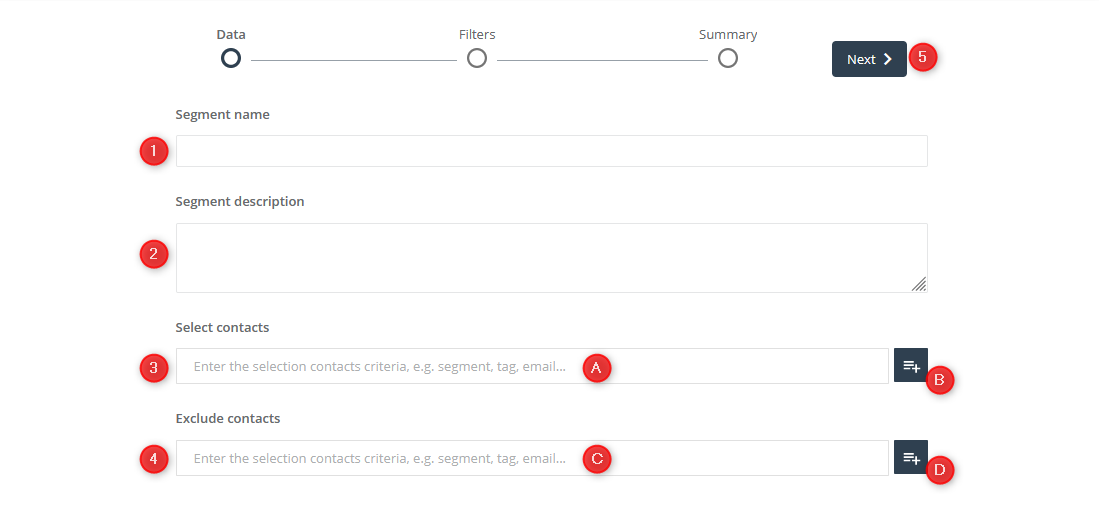
[1] Segment name – Enter the segment name so it can be easily identified later
[2] Segment description (optional) – Add a description that will further explain the purpose of the segment or will describe its audience
[3] Select contacts – Add contacts or contact groups to create a segment; you can choose one of two methods:
[A] Enter the selection – Manually enter your contact selection criteria and select the desired item from the suggestion list
[B] Select from a list – In the pop-up window, choose the selector group you are interested in and mark additional options if necessary.
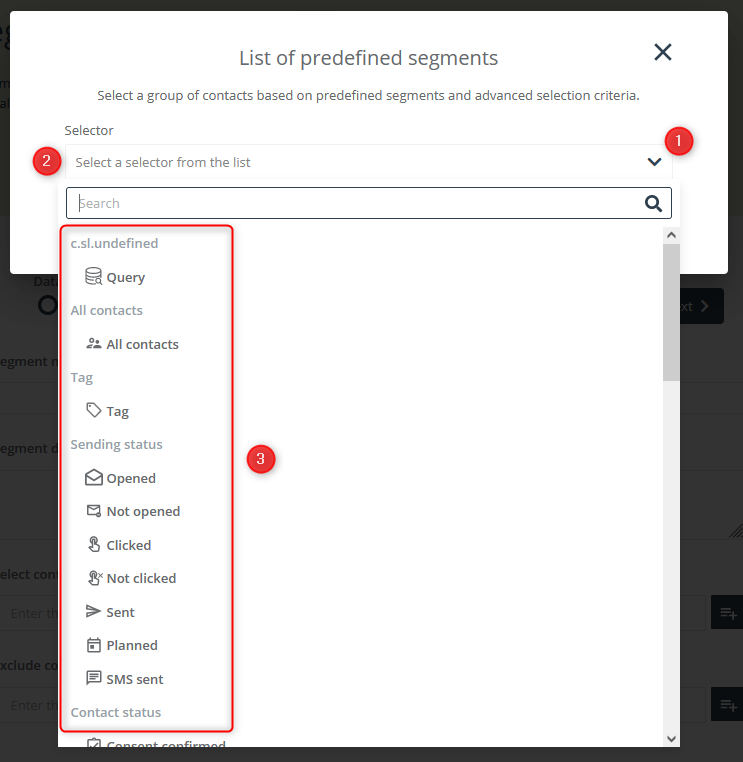
Start by expanding the drop-down menu [1]. Then start typing the name of the predefined segment [2] or browse the list [3]. Add all the contact groups you are interested in and click Save to save your work.
[4] Exclude contacts (optional) – If necessary, exclude from the group the contacts that should not be in the segment even though they fulfill the conditions set out in the previous step [3]:
[C] Enter the selection – Manually enter your contact selection criteria and select the desired item from the suggestion list
[D] Select from a list – In the pop-up window, choose the selector group you are interested in and mark additional options if necessary
[5] Next – Click to proceed to the next step of creating a segment
IMPORTANT: Each selector extends a group of contacts – that is, they are considered to be connected by the conjunction “or.” It means that in order to be included in the segment, a contact must meet at least one of the selected conditions.
You can find a list of all segments with description in the following article:
Predefined segments for addressing emails>>
3. Filters
The filtering option allows you to specify your target audience even more precisely.
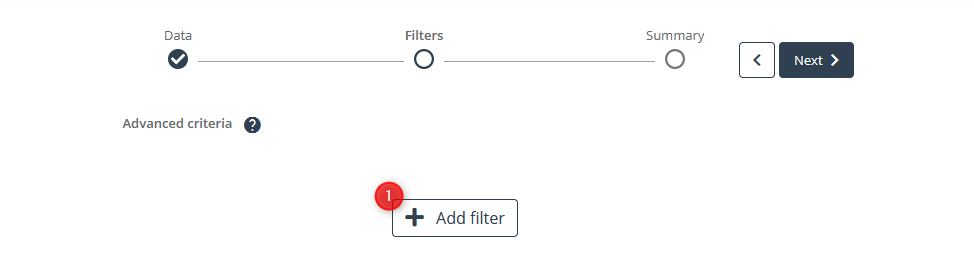
To add a filter, click the +Add filter [1] button.
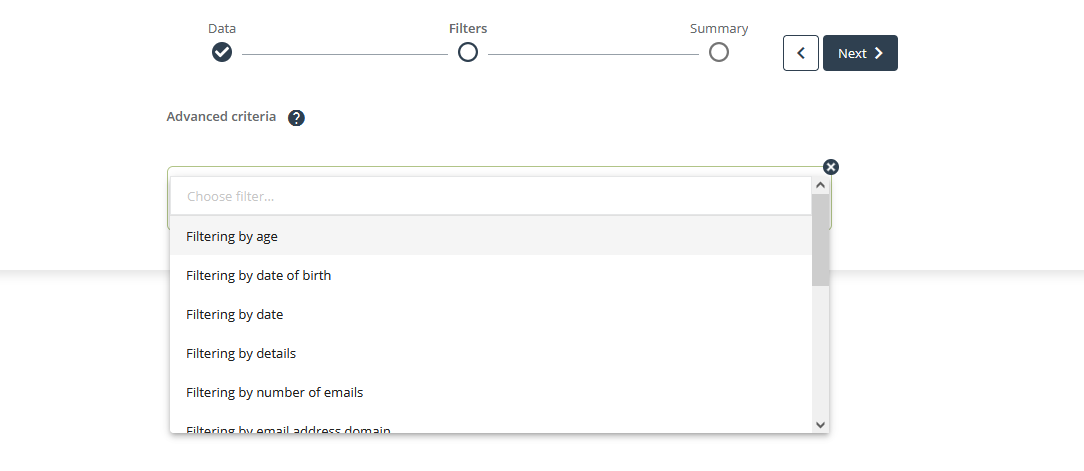
Next, select a filter or filters from the drop-down list, each time specifying filtering criteria in the desired range. When the group is ready, click Next to go to the summary, where you can save the group with the Save button.
IMPORTANT: Filters are considered to be connected by the conjunction “and.” This means that in order to be included in the segment, a contact must meet all of the marked conditions.
More detailed information about filters can be found in the following article:
Advanced email addressing options – filtering>>