In order to create a form in HTML code go to
Web Tools → Lead Generation → Lead Generation forms → HTML Forms
Steps:
1. Creating a form
- Option 1. Creating a new form in HTML editor
- Option 2. Pasting the form prepared in HTML
2. List of forms
1. Creating a form
Option 1. Creating a new form in HTML editor
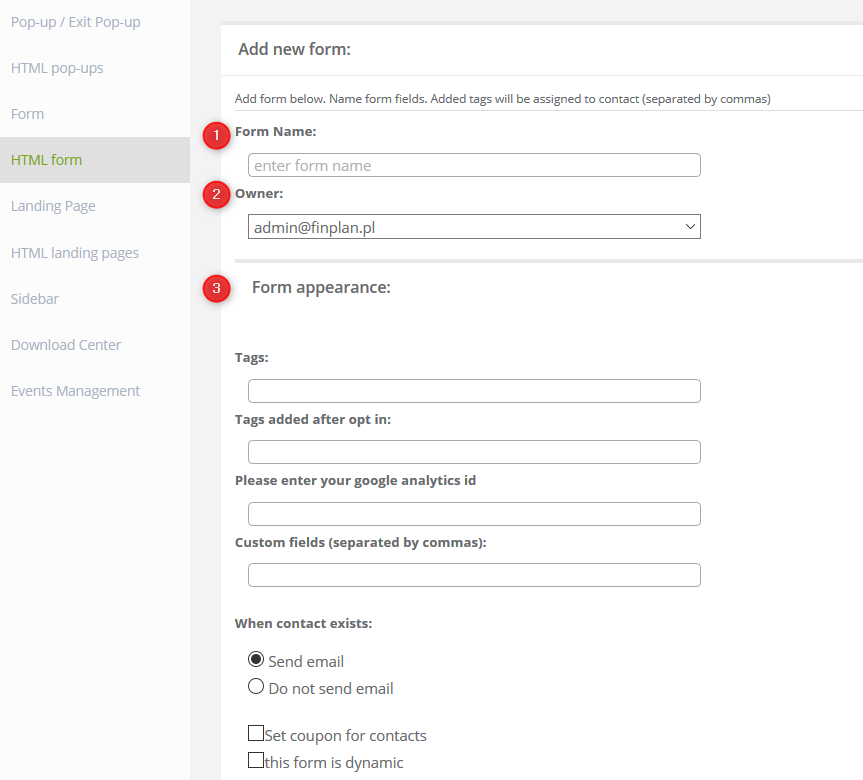
[1] Form name – enter the name of the form which will later make it easier to find it in the system. Once you save the form in the system, you will find it on the form list under this name.
[2] Owner – choose an email address of the owner of the form from the dropdown list.
[3] Form appearance
Options available when creating a form:
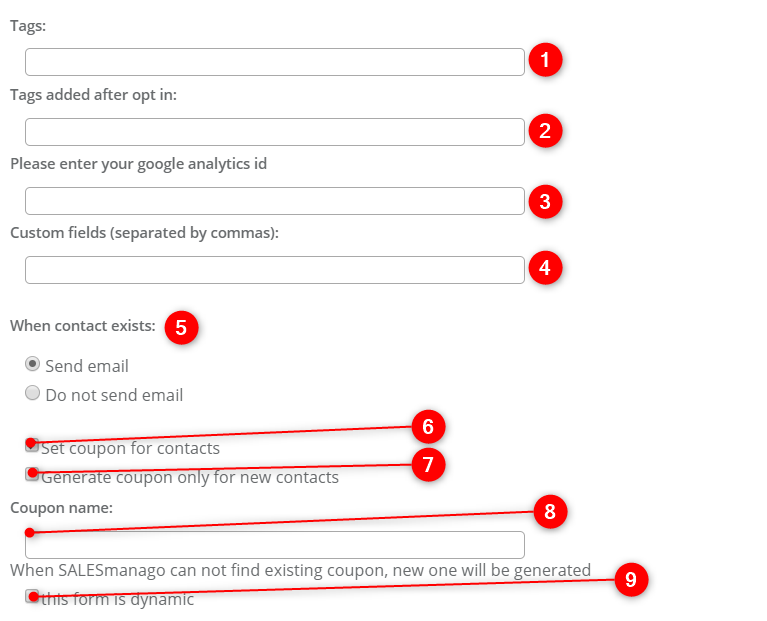
Tags – enter the names of tags that will be added to the contact after filling in the form. Names of tags should be written in capital letters and separated with commas.
Tags added after opt-in – enter the names of tags that will be added to the contact after he or she confirms subscription (that is, after clicking the link in the email confirming subscription).
Please enter your google analytics id – you can enter your google analytics id in order to receive statistics of the created pop-up on your Google Analytics dashboard. To find your ID, you need to log into your Google Analytics account, choose Account column then select an account on an unfolding list. Next, you need to choose the service in the Property column and click Tracking Info → Tracking Code.
Custom fields (separated by commas) – if you want to add custom fields to your form such as shoe size, you can create such field by typing its name in the field.
When contact exists in the database you can decide whether you want to send an email confirming subscription when you already have contacts in the system when they fill the form once again.
Set coupon for contacts – tick the checkbox if you want to add generated coupon on the contact card. You can later send the coupon to the contact in the email campaign. This form is dynamic – check this option when your form contains products.
Below you can see the Content.
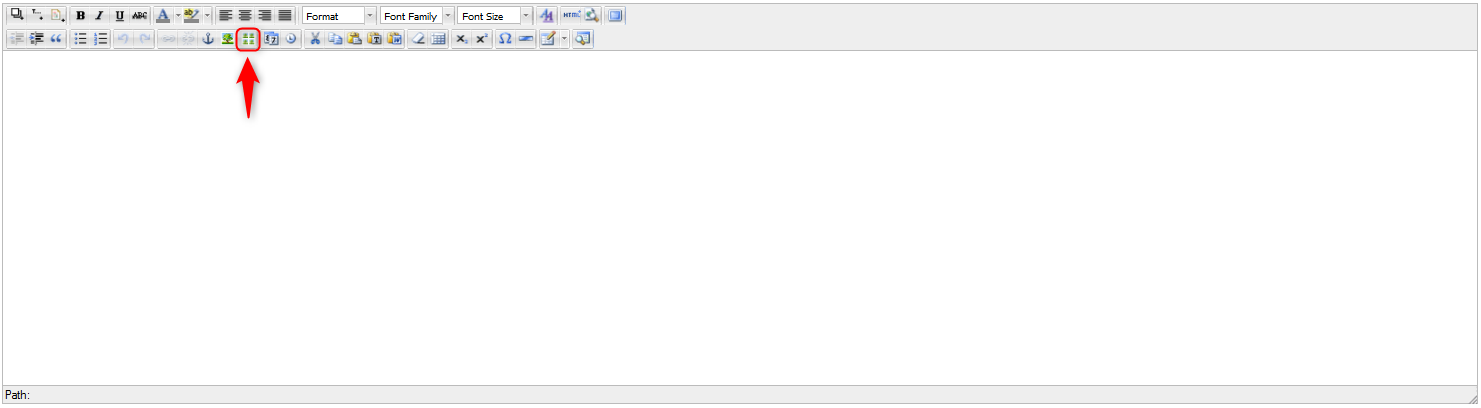
Click the marked place in order to add a graphic element.
Then you can use additional options.
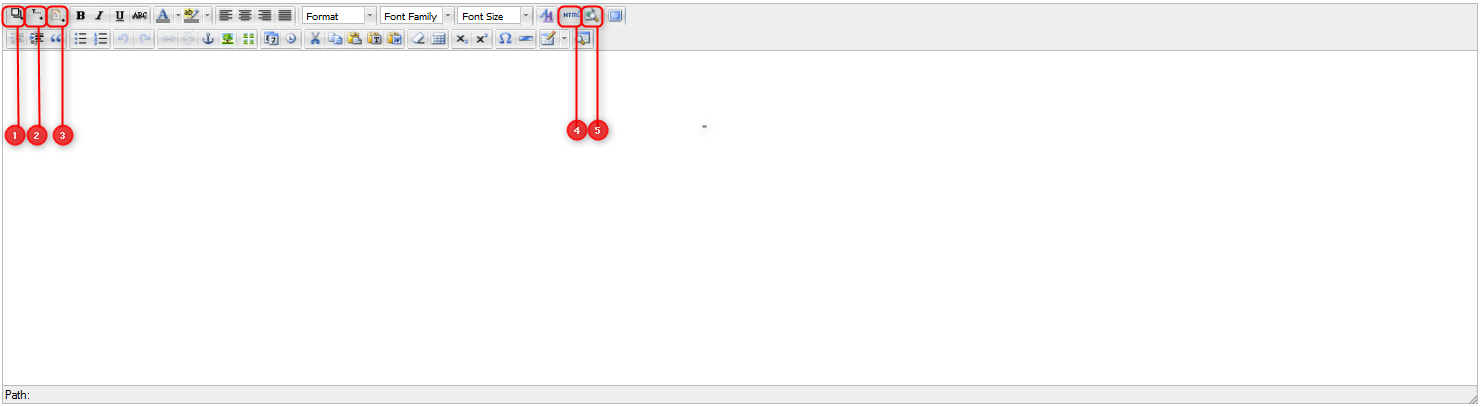
[1] – add a field to the template. In the pop-up enter the name of the field (e.g. headline) and confirm with the button Insert.
[2] – add a placeholder.
[3] – you can add a file to the template so later you can add a link to it in the form.
[4] – go to the HTML editor. If you have a ready form, paste its code in the HTML editor.
[5] – the preview of the form.
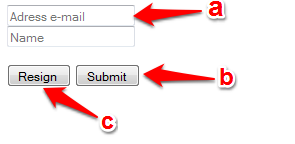
Email address– $email$ and $submit$ are mandatory fields; other fields that can be added to the form include:
-
- name – $name$
- telephone – $phone$
- company – $company$
- province – $province$
- street – $street:required$
- zip – $zip:required$
- city – $city$
- birthday – $birthdayDay$ $birthdayMonth$ $birthdayYear$
IMPORTANT: You can have a birthday date on the contact card when there are at least 2 placeholders (day and month). However, it is highly recommended to have all 3 placeholders here, that is: day, month and year.
- resignation – contact is unsubscribed from the database – $resign$
- non-standard fields (additional details) – $cst.detail_name$ . In this case you must remember to fill in the ‘Non-standard fields (separated by commas):’, below ‘+ Form layout’.
Form preview:
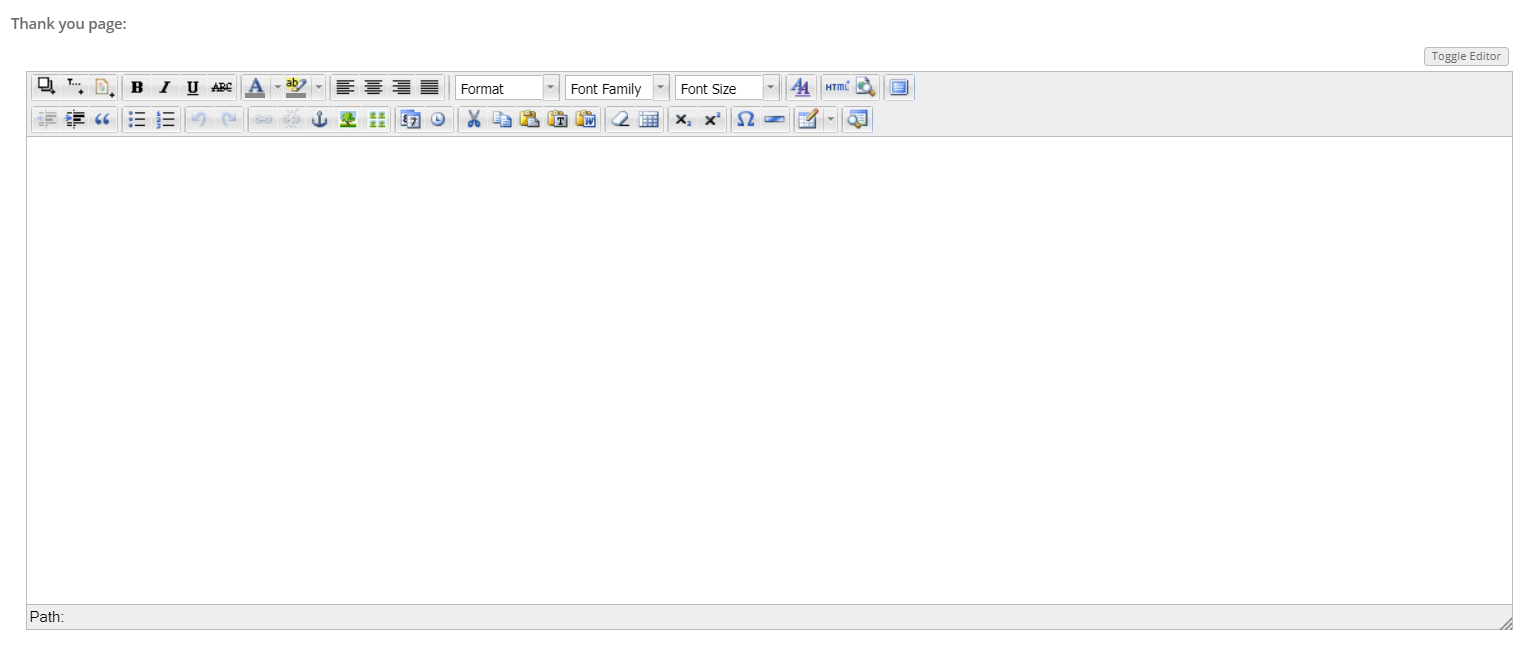
Creating Thank you page:
Once the user fills and sends the form, you can set the display of thank you page. You can create it in similar way.
Creating email confirming subscription:

[1] Email account – choose an email address from the dropdown list from which the email confirming subscription will be sent.
[2] Reply message subject – enter the subject of the email confirming subscription.
[3] Return email message – type in the text that will be included in the email.
[4] After opt-in link in email clicked – decide what will happen after the user clicks the confirmation link – a) redirect to URL, b) redirect to a landing page. If you choose b), you will be able to choose a landing page from the list.
[5] Redirect URL – enter the URL to which the user will be redirected after clicking the confirmation link.
[6] Opt in link description – enter the text that on the confirmation link, e.g. click here.
[7] Notify about form submission – tick the option if you want to be informed about every submitted form.
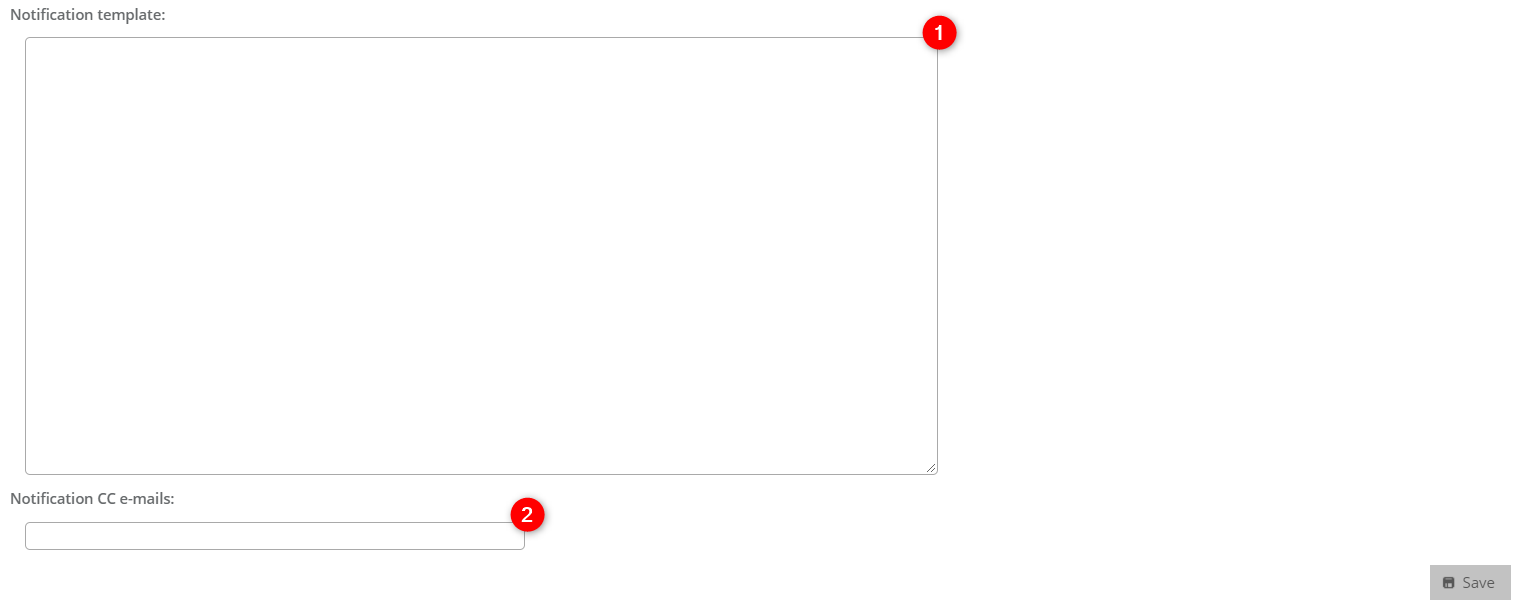
[1] Notification template – enter the template of the notification about submitted form.
[2] Notification CC emails – enter the email addresses that will be included in the carbon copy of notifications.
Option 2. Pasting the prepared form in HTML
You can also create a template by uploading a ready html form. To do this, skip the visual settings and go directly to the contents window, switch to HTML editing and copy the html code prepared earlier.
2. List of forms
You can find created forms in the section Menu → Web Tools → Lead Generation → Lead Generation forms → HTML Forms
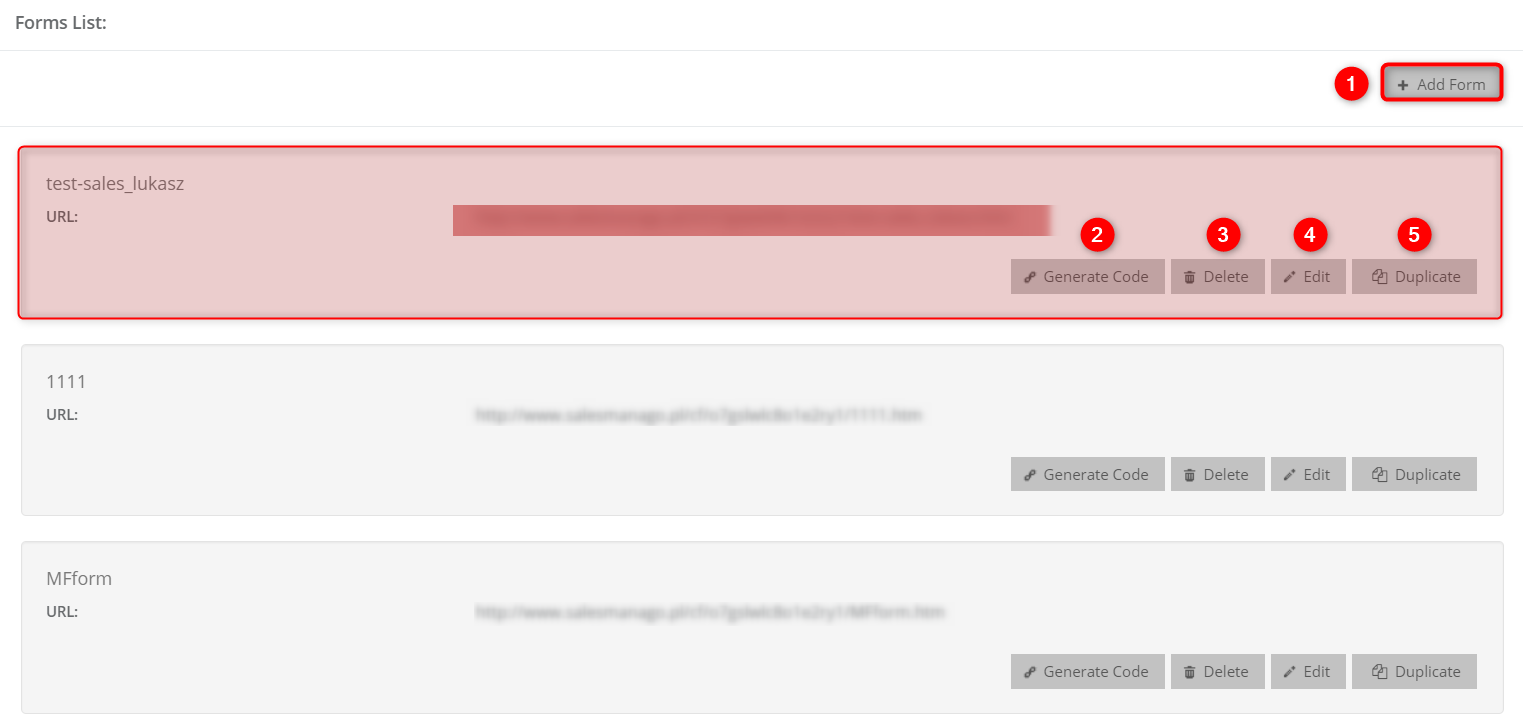
[1] Add form – choose it if you want to create a form from scratch.
[2] Generate code – click it if you want to generate a code of the form which you can paste to your website. You can also decide whether you want to display a form as an iframe, sidebar or pop-up. Besides, you can adjust the parameters such as width and height.

[3] Delete – the option of removing the form from the system.
[4] Edit – go to the editing mode of the form created in the system.
[5] Duplicate – the option of creating a copy of the form.
Submit your review | |