Useful links
Adform lets you maximize your digital advertising ROI with powerful, user-friendly software designed to help you streamline your campaigns across various digital channels and achieve measurable results.
Integrating Adform with your SALESmanago account allows you to use your customers’ behavioral, demographic, and transactional data, which is stored on their Contact Cards, to create and manage sophisticated Ads audiences that can be precisely targeted with your advertisements.
The integration enables you to automatically add or remove Contacts to/from Adform audiences using Automation Processes. This way, you can create a Workflow through which you can retarget Contacts who have been added to an Adform audience.
You can also select groups of Contacts (based on their properties) that will be added to/removed from an Adform audience.
Both monitored and non-monitored Contacts can be added to/removed from an Adform audience.
To access the Adform panel in SALESmanago, go to
Audiences → Social Media → Adform
Contents
- Integration process
- Adform—Main panel
- Managing Contacts in Adform audiences
- Marketing uses: Examples
1. Integration process
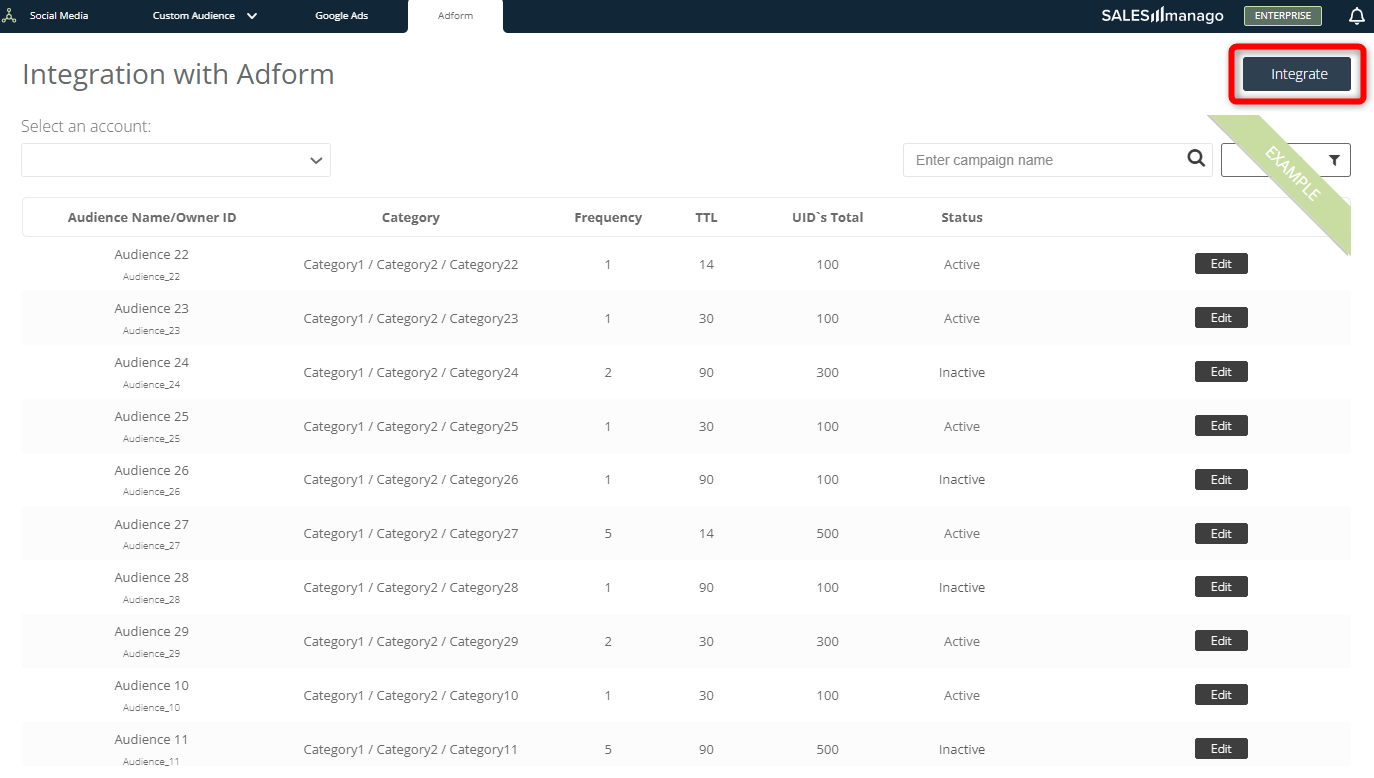
To integrate Adform with your SALESmanago account, go to Menu → Audiences → Social Media → Adform and click on Integrate.
A new window will appear. Enter the username and password that you use to log into Adform and click Log in.
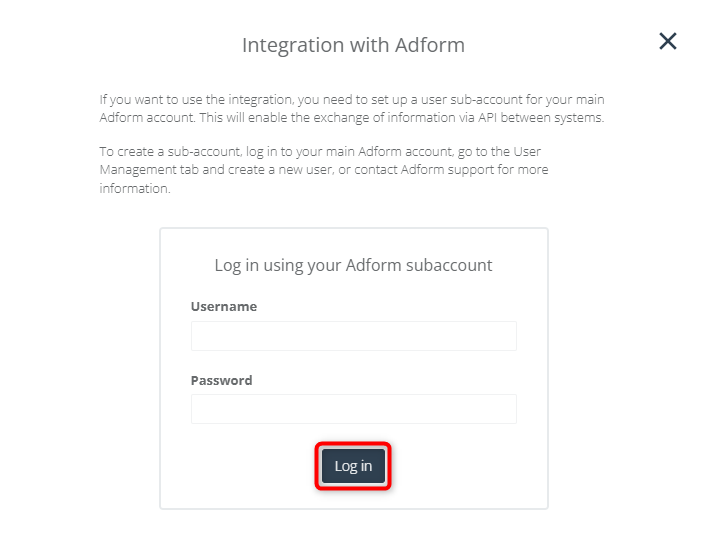
That’s it! You have successfully integrated your Adform account with SALESmanago.
2. Adform—Main panel
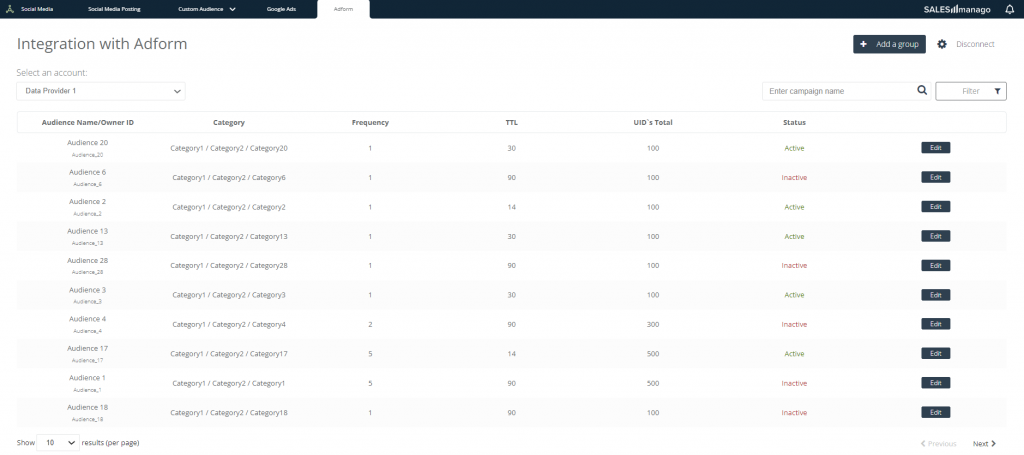
Following the integration of Adform with SALESmanago, you will see audience data from the Adform platform on the main integration panel:
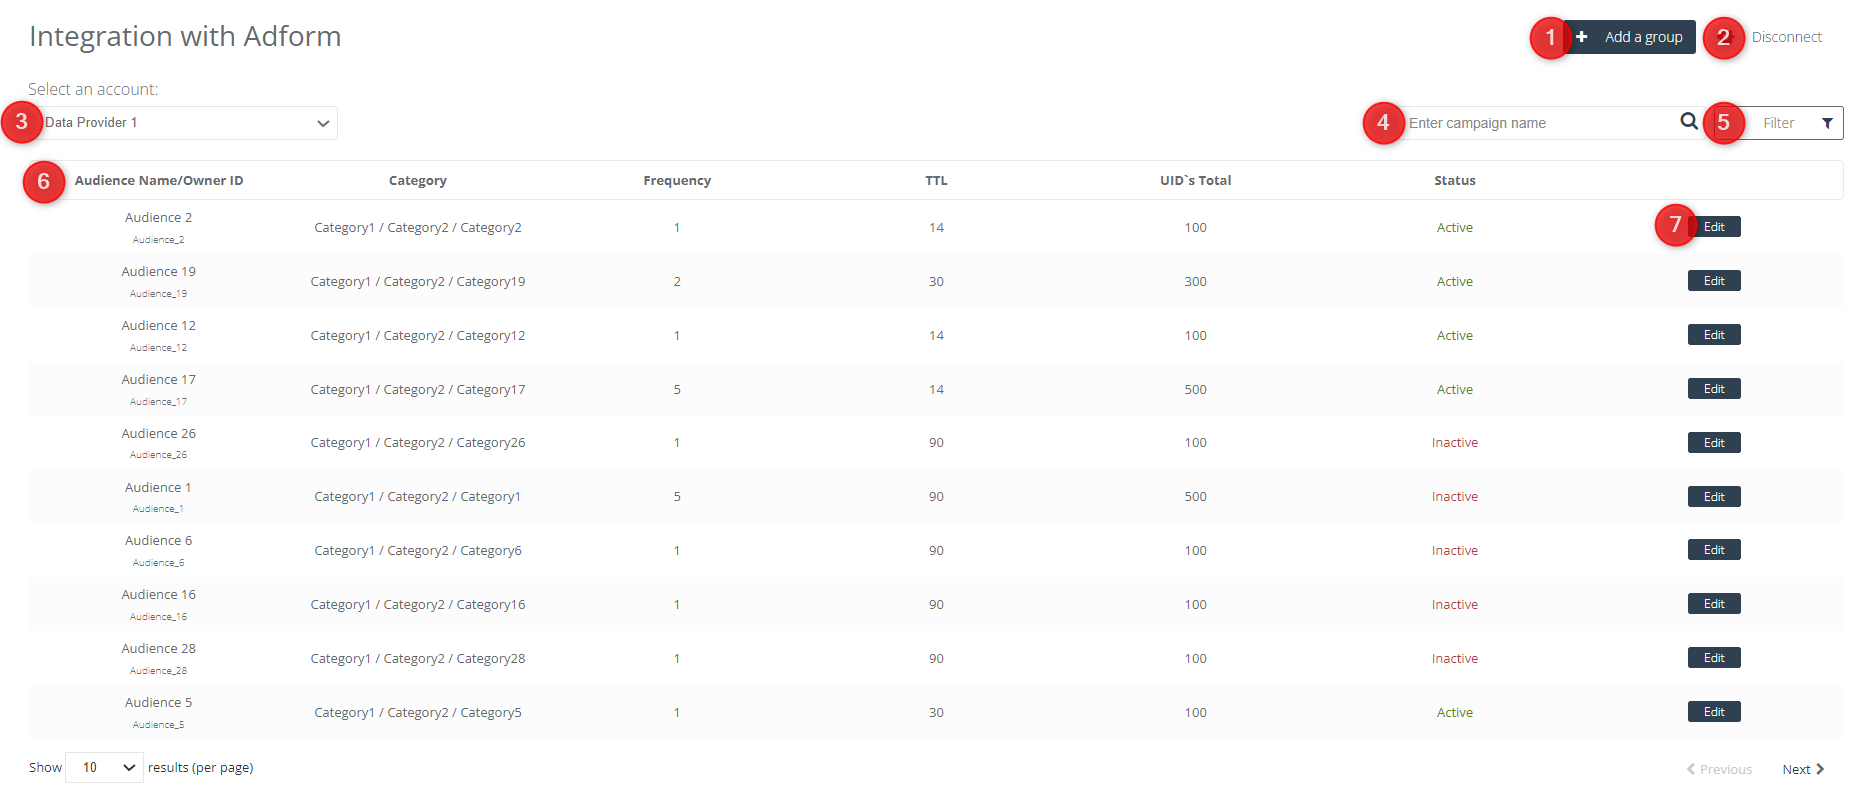
[1] Add a group—click here to create a new Adform audience to which you can add (or remove) Contacts through Automation Processes or Contact segmentation (see Section 3 for more details).
[2] Disconnect—click here to disconnect the integration. Remember that if you do this, all previously configured elements will become inactive.
[3] Select an account—choose the subaccount for which Adform data is to be displayed.
[4] Search—enter an audience name/Owner ID in the search box to quickly find an audience on the list.
[5] Filter—apply a filter to display only active or inactive audiences.
[6] Data from Adform—data transferred from Adform to SALESmanago. The list includes all audiences existing on your Adform account (not only those created in SALESmanago).
[7] Edit—click here to edit an existing audience (e.g., add or remove Contacts). Note that the account and the owner ID to which the audience is assigned cannot be modified.
3. Managing Contacts in Adform audiences
Following successful integration with Adform, you can create a Contact audience that can be targeted with highly personalized ads.
To create an audience, click Add a group:

The Managing Contacts in Adform wizard comprises two steps: Data and Contact management.
In the first step, define the basic details of your new audience.
In the second step, specify which Contacts should be added to (or removed from) your audience.
A. Data
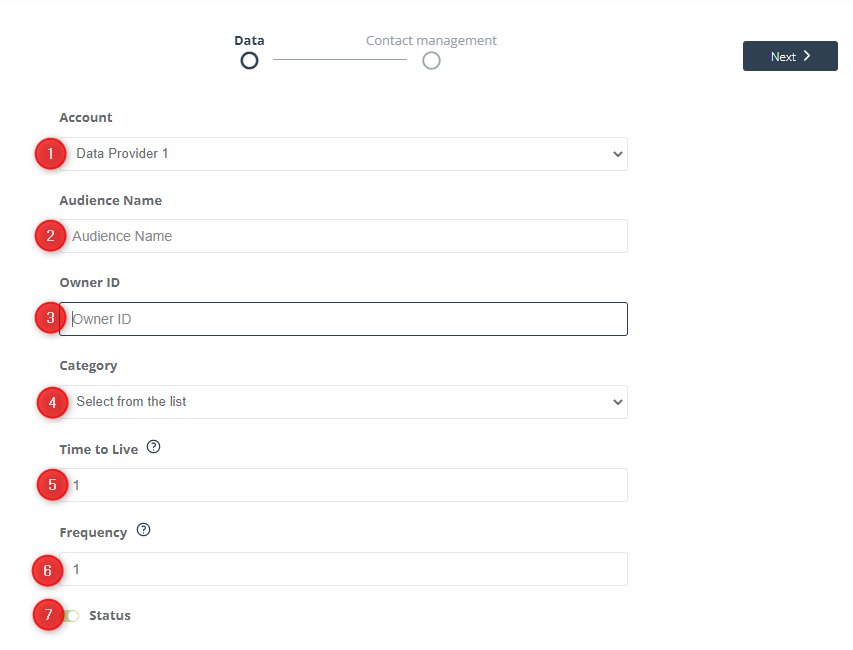
[1] Account—select the subaccount that will be the owner of the new Adform audience.
[2] Audience Name—enter a name for your new Adform audience that will allow you to easily identify it on the list.
[3] Owner ID—enter an owner identifier. Each audience must have a unique owner ID.
You may be required to provide or select the Owner ID when you want to use the new audience on the Adform platform.
[4] Category—Categories allow you to group (or classify) audiences on the Adform platform, to make audience management easier. Select a category path from the drop-down list.
[5] Time to Live—specify the number of days after which unique IDs (UIDs) will be removed from the audience, i.e., decide how long a Contact will remain a member of this audience.
The maximum period allowed is 120 days.
[6] Frequency—determine how many times a user must qualify for the audience to be actually included in the audience.
[7] Status—choose whether you want the new audience to be active immediately after its creation or whether you prefer to activate it at a later time.
Click Next to go to the second step: Contact management.
B. Contact management
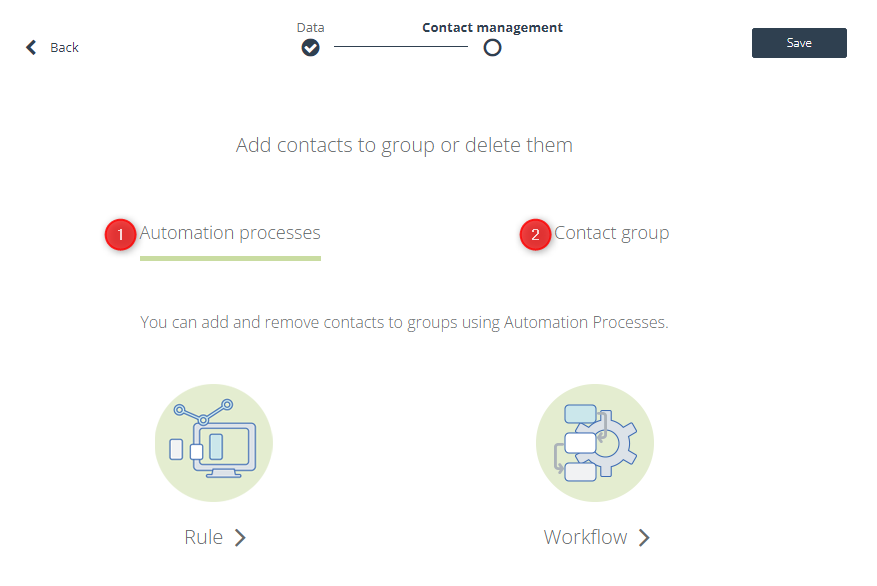
There are two ways to add or remove Contacts to/from an Adform audience:
[1] Automation Processes—use an Automation Rule or a Workflow to automatically add/remove Contacts to/from the new audience by using the Action: Add/remove a Contact to an Adform group.
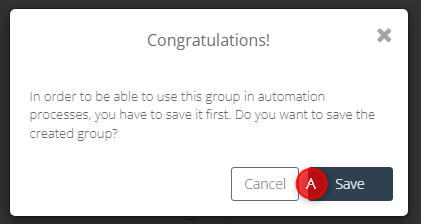
NOTE: If you select Rule or Workflow, you will be informed that in order to use the new group in an Automation Process, first you have to save it [A]. The new group will be immediately added to the list of Adform audiences (you can always edit it later).
If you create an Automation Process that includes the Action: Add/remove a Contact to an Adform group, then, following the occurrence of the triggering Event for a Contact (and provided that any specified Conditions are met), SALESmanago will automatically send a request to Adform for that Contact to be added to/removed from the selected audience.
See how the Action: Add/remove a Contact to an Adform group works in Automation Rules >>
See how the Action: Add/remove a Contact to an Adform group works in Workflow processes >>
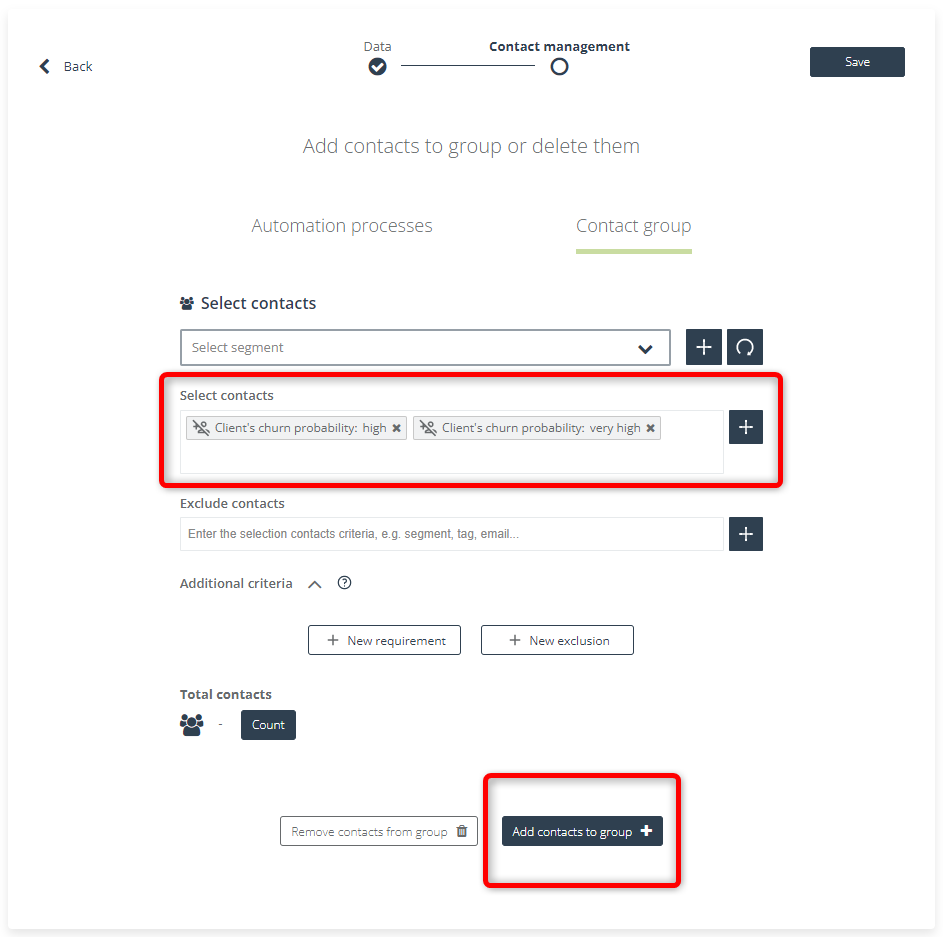
[2] Contact group—use Contact segments, selectors, and additional filters to precisely define the criteria based on which Contacts will be included in (or excluded from) the new audience.
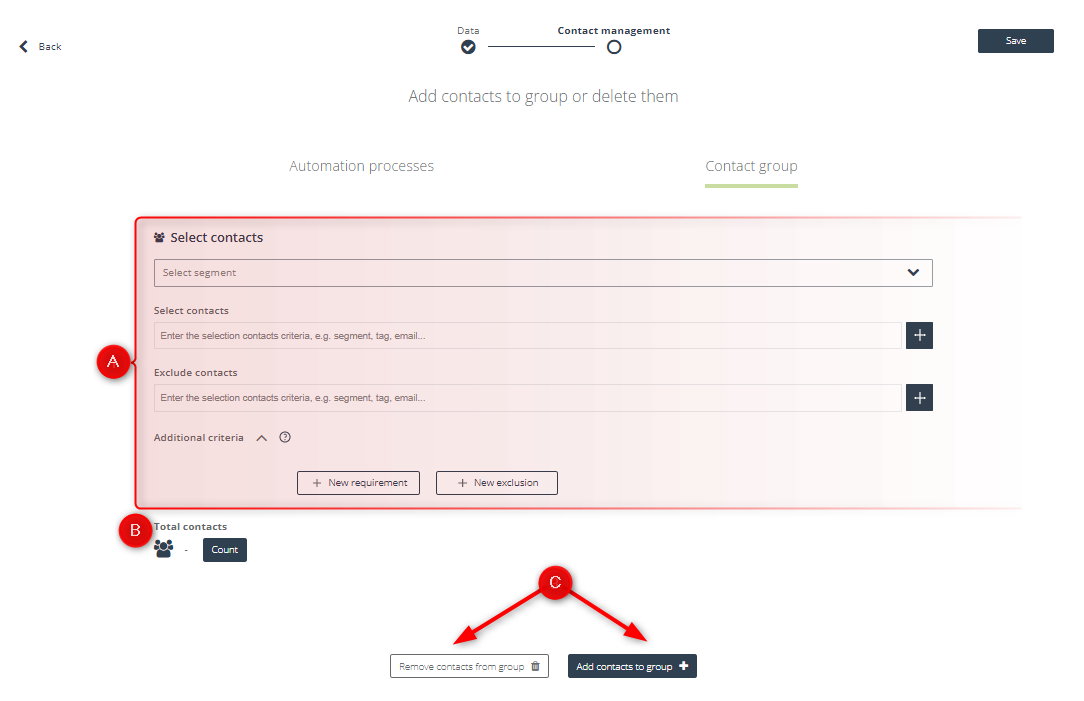
[A] Select Contacts—here you can provide detailed Contact selection criteria. These fields are the same as the ones you use when sending emails from SALESmanago.
Learn more about the Contact selection process >>
Learn more about predefined Contact segments and selectors >>
[B] Total Contacts—click here to calculate the number of selected Contacts, i.e., the number of Contacts that will be added to or removed from the new audience. It is recommended to click this button whenever a change has been made to the selection criteria.
Finally, choose whether you want to remove or add Contacts [C] to/from the audience based on the criteria specified above.
Click Save to complete the audience creation process.
4. Marketing uses: Examples
The SALESmanago integration with Adform allows you to create Adform audiences that can later be configured on the Adform platform for the purposes of displaying your advertisements on third-party websites.
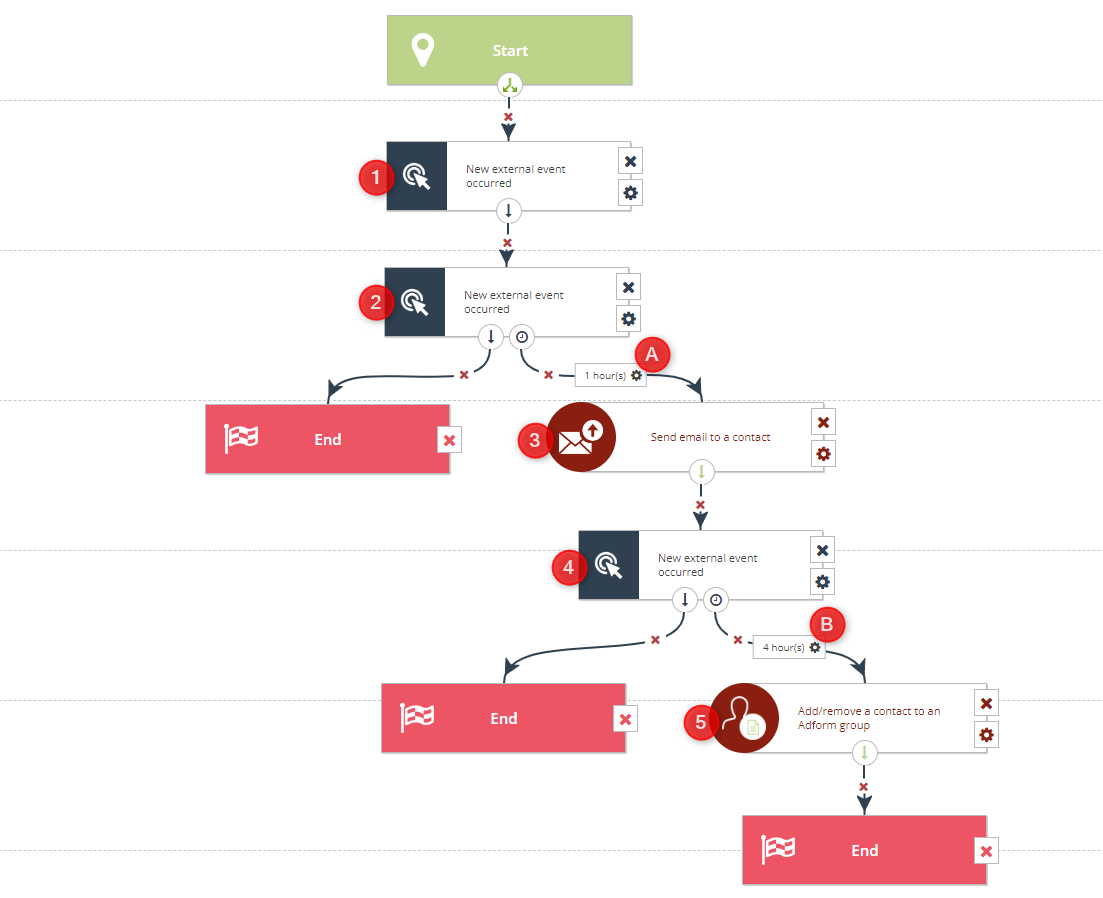
EXAMPLE 1. Create a Workflow through which you can add Contacts to an Adform audience for the purpose of retargeting them with your advertisements.
PROBLEM: A Contact adds products to their cart [1] but does not make a purchase [2].
RESOLUTION: Wait 1 hour [A] and send an email [3] aimed at recovering the abandoned cart. Using a free channel (email) for this purpose may help you reduce your costs.
Wait 4 hours [B] and check whether the cart recovery has been successful, i.e, whether the Contact has completed the purchase [4]. If the Contact has not completed the purchase, add the Contact to an Adform audience [5].
Next, configure your ad Creatives on the Adform platform to be displayed to the audience selected in the Workflow. Make sure that the advertisements are designed to regain the attention of Contacts who abandoned their carts.
Creating a Workflow of this or a similar structure maximizes your chances of cart recovery in a cost-effective manner.
EXAMPLE 2. Create an Adform audience containing Contacts that have a high or very high churn risk. Retarget them with ads for products that are now on sale.
Configure your advertisements on the Adform platform to be displayed to the new audience. Make sure that the ads are designed to draw inactive customers back in.