Useful links
This article explains how to send email messages from the SALESmanago platform, including: how to set the date and time of sending an email, how to define the group of recipients, and how to configure a coupon. You will also learn how to send a test email.
The SALESmanago platform allows you to reach your audience by email. By managing the sending process, you can specify which individual Contacts or Contact groups will receive your messages (based on a broad range of parameters, such as recent activity, tags assigned, etc.). You can also schedule the date and time at which messages are to be sent.
To send an email, go to
Channels → Email Marketing → Email List → Preview and send
or click on Save and finish in the wizard in which the email has been created or edited
Contents
1. Getting started
Create beautiful, elaborate emails or load ready email templates using our range of advanced, user-friendly email designers.
IMPORTANT: With the exception of a subscription confirmation email, which must contain an opt-in link, each email sent via the SALESmanago platform must contain an opt-out link allowing the recipient to unsubscribe from mailings. Make sure to include an opt-out link in your message.
Learn how to add an opt-out link >>
You can save your work as a draft at any time. If your message is completed, however, you can save it as a ready-to-send email, by clicking on Save and send… in the top right-hand corner. Your email will now appear on the Email List (Menu → Channels → Email Marketing → Email List), and you will see a new window:
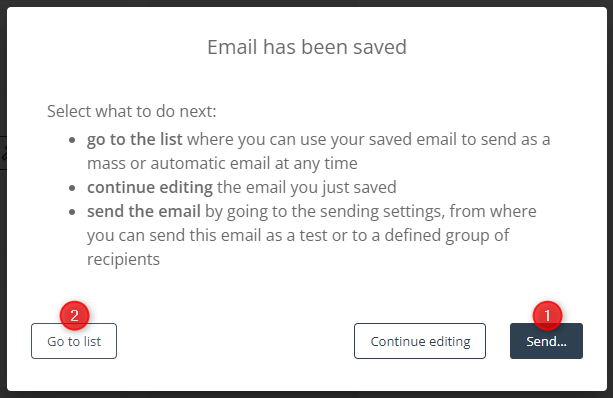
If you want to send or schedule the email immediately, click Send… [1]. You will be redirected to the sending screen, where you can specify the mailing’s settings (see section 3 below).
You can also go to the Email List [2] and send or schedule your email at a later time.
The Email List (Menu → Channels → Email Marketing → Email List ) is where you can see all your finished emails. If you want to send an email from the Email List, search for that email and click on Preview and send [1]:

A new window will appear where you can check some basic email details and see what the message looks like on various devices: desktop, tablet, and smartphone.
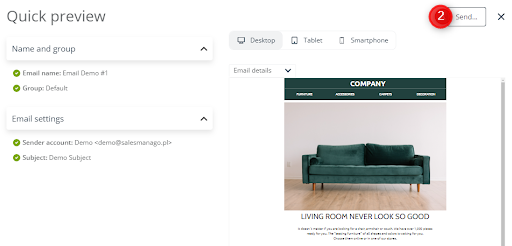
If you are certain that your message is ready, click Send… [2] in the top right-hand corner. You will be redirected to the sending screen, where you can specify the mailing’s settings (see section 3 below).
IMPORTANT: Only a finished email, visible on the Email List, can actually be sent. To send a message that is currently a draft, first save it as a finished email (by editing it and clicking Save and send… in the top right-hand corner).
2. Mailing settings
After clicking Send…, you will be redirected to another screen. The screen is divided into two parts.
On the left, you can define the mailing settings. These options are described in sections 2.A to 2.D below.
On the right, there is another preview of the email:

Here you can check the basic email settings [1] and see how the email will be displayed on different devices (desktop, tablet, smartphone) [2]. If you decide that the message still needs some improvement, you can click on Edit content >>[3] in the top right-hand corner of the preview section.
IMPORTANT: If you decide to edit the content, all selections made on the left side of the screen will be lost.
2.A. Send on
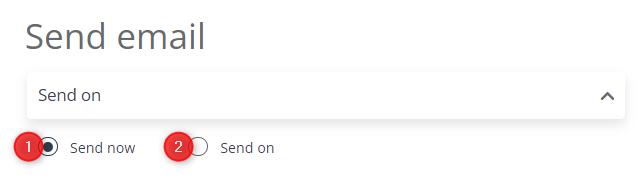
[1] Send now—select this option if you want the email to be sent immediately after you click the Send button in the top right-hand corner of the screen (see section 3. Sending a message).
[2] Send on—select this option to specify the exact date and time at which the email is to be sent.
If you select this option, you will be able to specify additional settings.
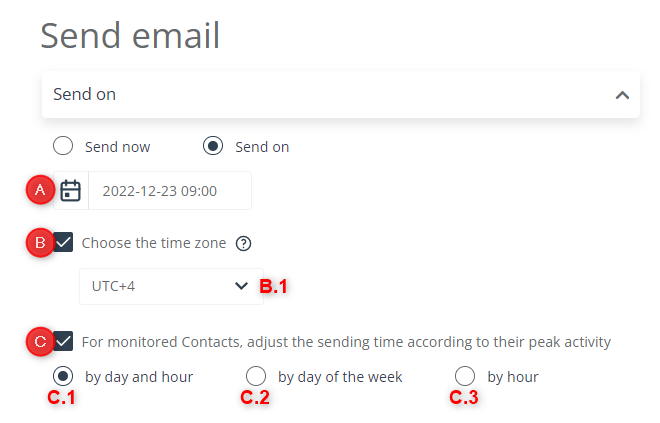
[A] Date and time—click on the calendar icon to select the date and time at which the email is to be sent.
[B] Choose the time zone—check this box if you want to specify the time zone according to which the selections made in point [A] above will be implemented. Open the drop-down list [B.1] to select the time zone.
NOTE: If you do not check this box, the email will be sent in accordance with the time zone settings of your SALESmanago account. To define your time zone, go to Menu → Settings → System settings → Application → Set your time zone.
NOTE: In some countries the time zone(s) may change depending on the time of the year.
[C] For monitored Contacts, adjust the sending time according to their peak activity—click here if you want the sending time to be adjusted for monitored Contacts based on their behavioral patterns. The SALESmanago system will determine the optimum sending time and date based on individual Contacts’ activity. Each Contact on the list of recipients will receive your email at a time when it is most likely that they will check their inbox.
After checking this box, you will see three options. Select one of them.
[C.1] by day and hour—if you select this option, both the day of the week and the hour will be adjusted automatically, depending on individual Contacts’ peak activity times.
[C.2] by day of the week—if you select this option, the day of the week will be adjusted automatically, depending on individual Contacts’ peak activity times.
[C.3] by hour—if you select this option, the hour will be adjusted automatically, depending on individual Contacts’ peak activity times.
IMPORTANT: The actual implementation of options [C.1] to [C.3] depends on whether you select option [1]: Send now or [2]: Send on.
- If you choose option [1]: Send now, the email will be sent to all Contacts within the next 7 days.
- If you choose option [2]: Send on and select any date later than today, the email will be sent to all Contacts within 7 days starting from the specified sending date.
2.B. Contact selection
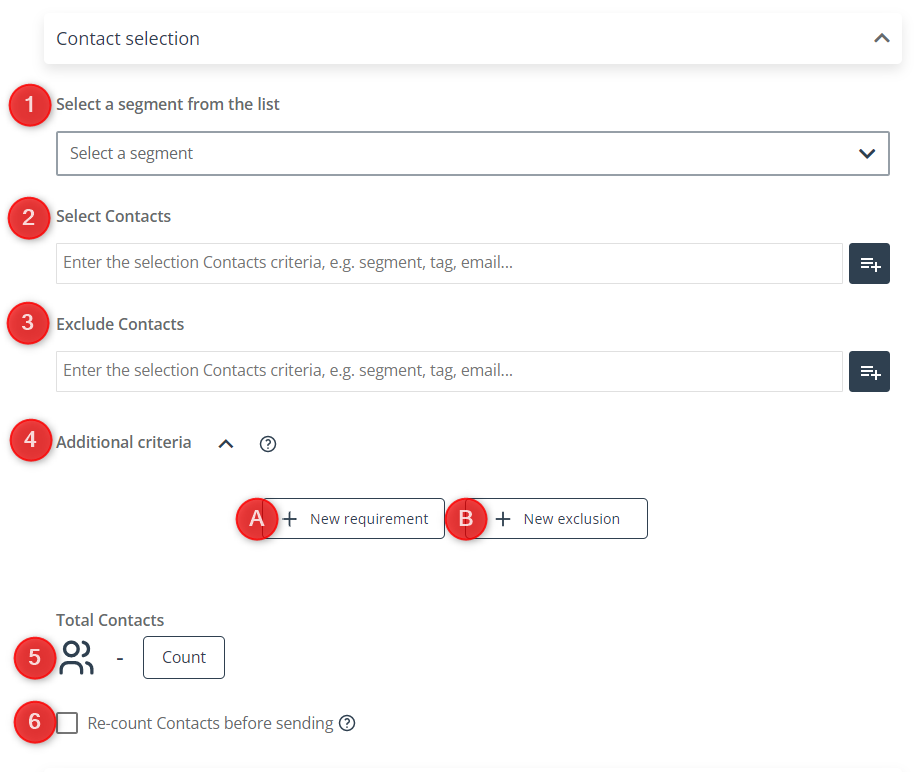
[1] Select a segment from the list—the drop-down list contains your ready-made Contact segments. You can select only one segment. Search the list or type in the segment name.
See how to create a segment in the Customer Segmentation Center >>
Read more about predefined Contact segments >>
If you select a segment, its defining selectors will appear in the sections below: Select Contacts and Exclude Contacts. Any additional criteria (requirements or exclusions) applied to this segment will also be listed.
All the defining items will be editable.
[2] Select Contacts—here you can select Contacts based on certain predefined selectors, such as tags, monitoring status, or preferred communication channel. Apply a predefined selector or search Contacts by entering the initial characters of their email address, name, or phone number (including the country code, where provided).
Read more about predefined Contact selectors >>
[3] Exclude Contacts—here you can specify which Contacts (that may have been included based on your selections above) are to be excluded from the group of recipients. Apply a predefined selector or enter the names, emails, or telephone numbers of individual Contacts.
Read more about predefined Contact selectors >>
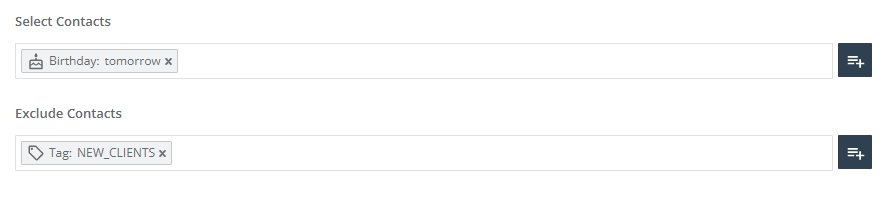
EXAMPLE: You want to send an email to all Contacts who have their birthdays tomorrow. However, the email is not intended for Contacts who have the tag NEW_CLIENTS assigned to them.
Define the group of recipients as shown below:
[4] Additional criteria—apply additional filters to further narrow down the list of recipients.
Add requirements [A] to specify further conditions that must be met by a Contact, in addition to the requirements specified above, for the Contact to be selected.
Add exclusions [B] to remove certain Contacts from the group defined above.
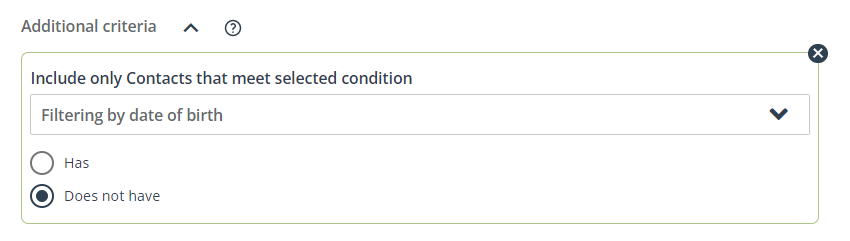
EXAMPLE 1: If you want to send an email only to Contacts who have not provided their date of birth, click on + New requirement and select Filtering by date of birth from the drop-down list. Then, select the option: Does not have.
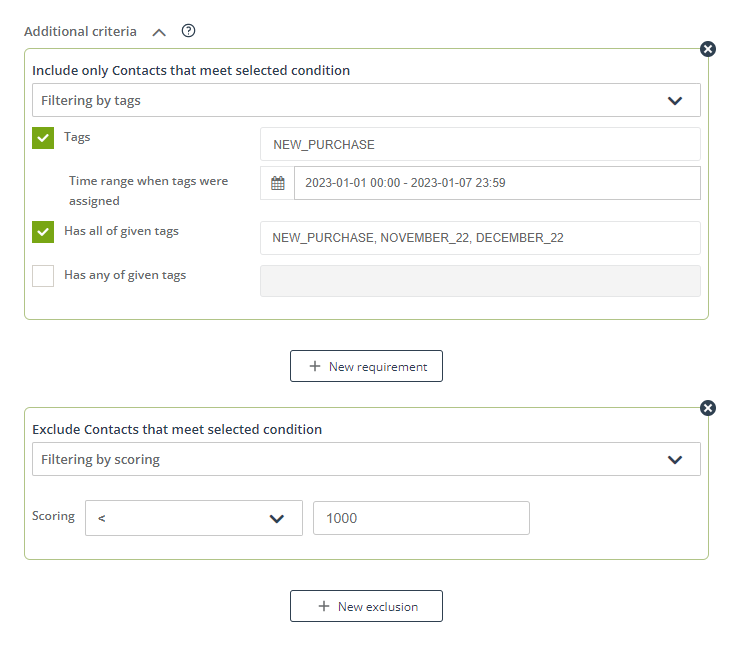
EXAMPLE 2: Today is January 8. You want to select Contacts that have the tag NEW_PURCHASE, but only if it was assigned to them over the last seven days. Additionally, the Contacts must have the following tags: NOVEMBER_22, DECEMBER_22. However, you want to exclude all Contacts with a scoring lower than 1000.
Apply the following additional criteria:
Read more about advanced email addressing options – filtering >>
[5] Total Contacts—click on the Count button to see how many Contacts will receive the email based on the selections you have made above.
[6] Re-count Contacts before sending—check this option to have the list of recipients recalculated one hour before the email is sent. By checking this option, you ensure that the message will only reach Contacts who meet the specified criteria at the time of sending the message.
EXAMPLE: You create an email on Monday and schedule it to be sent on Friday. If you check the option to re-count Contacts before sending, the group of recipients who meet all specified criteria at the time of scheduling (i.e., on Monday) will be recalculated (redetermined) on Friday. If you do not check this option, the group of recipients will be finally determined on Monday and will remain the same at the time of sending, irrespective of any changes occurring for individual Contacts.
NOTE: The list of recipients for emails other than mass mailings is determined by the system:
- in the case of A/B tests—when you click the final Send button to send or schedule the test mailings;
- in the case of periodic emails—20 minutes before sending;
- in the case of birthday emails—on the sending date.
2.C. Additional settings
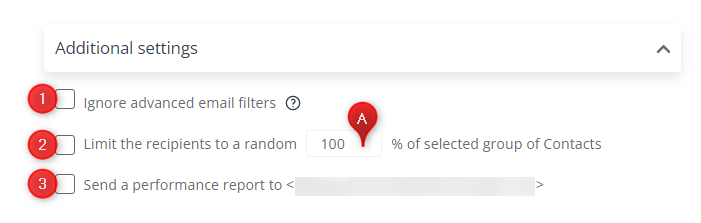
[1] Ignore advanced email filters—check this option if you want the email frequency filters set in Menu → Channels → Email Marketing → Settings → Sending settings to be ignored for this mailing.
[2] Limit the recipients to a random X % of selected group of contacts—check this option if you want to send the email only to a specified percentage of the Contacts selected above (see section 2.B. Contact selection). The recipients will be selected by the system on a random basis.
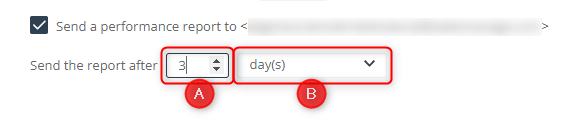
[3] Send a performance report to <…>—select this option if you want to receive a report describing the results achieved by your mailing (including the OR and CTR).
If you check this box, you will be able to specify when you want to receive the report. Use the arrows to select a number [A] and then use the drop-down list to select a time unit [B] (hours or days).
2.D. Email settings
Here you can look up the basic details of your email. You can also edit them by clicking on Edit settings >> [A].
IMPORTANT: If you decide to edit the email settings, all selections made on this screen will be discarded.
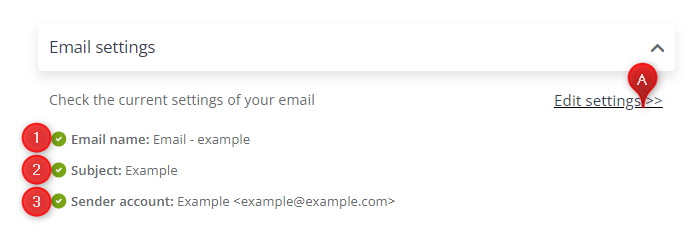
[1] Email name—the name of the message, allowing you to identify it in the SALESmanago system. The email’s recipients will not see this name.
[2] Subject—the subject of the email, visible in Contacts’ inboxes.
[3] Sender account—the account from which the email will be sent.
3. Configure a coupon
NOTE: This section will only be available if you include a coupon placeholder in your email.
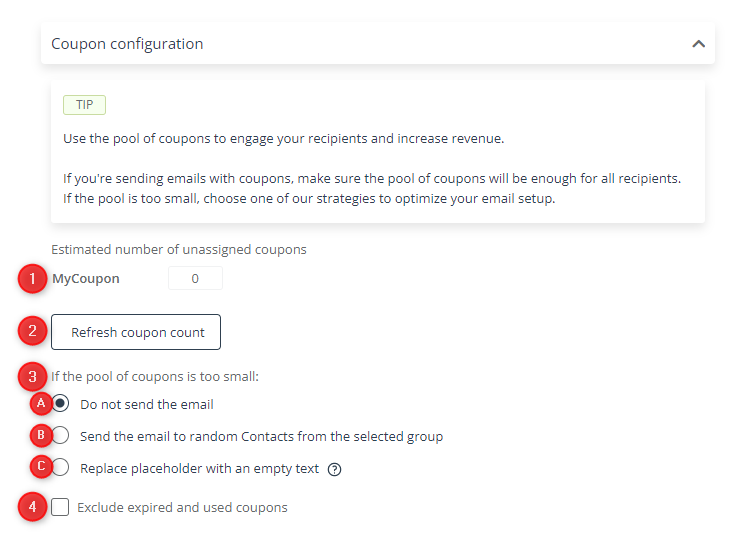
[1] Estimated number of unassigned coupons—if there are more coupons than intended recipients, here you can check how many coupons will remain unassigned.
[2] Refresh coupon count—if there have been any recent changes to the coupon used in the email, click on this button to see the current number of available coupons.
[3] If the pool of coupons is too small—decide on the course of action to be taken by the system if it turns out that there are more recipients than coupons:
[A] Do not send the email—if you select this option and it turns out that there are more recipients than coupons, no email from this mailing will be sent.
[B] Send the email to random Contacts from the selected group—if you select this option and it turns out that there are more recipients than coupons, only as many emails will be sent as there are coupons. The emails will be sent to randomly selected recipients.
[C] Replace placeholder with an empty text—if you select this option and it turns out that there are more recipients than coupons, some recipients will see a coupon in the email, while the remaining recipients – those for whom there were not enough coupons – will see a blank space (the coupon placeholder will not be replaced with any text).
NOTE: Good practice is to ensure that there are enough coupons for all recipients. Therefore, the last option is not recommended.
[4] Exclude expired and used coupons—if you check this option, coupons that have already been used or have expired will be excluded from the pool used in the mailing.
4. Send an email
Having defined all mailing parameters, proceed to send the email. In the top right-hand corner of the screen, you can see two sending options:
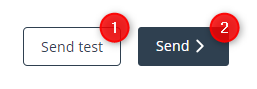
[1] Send test—click here to send a test email. This will allow you to verify if all message elements are displayed correctly. To use this option, you must select from 1 to 10 Contacts to whom you want to send the test email.
Test emails are first in the queue, before mass emails.
[2] Send—click here to send the email now or schedule its sending (depending on the option selected in the Send on section—see section 2.A above).
IMPORTANT: If the list of recipients is long (several thousand addresses) and you have applied complex filtering (many selectors and filters), the sending process may take from several to several dozen minutes. Please take this into account when planning your campaign—you may want to send such a mailing a little earlier so that it reaches your audience at the right time.
IMPORTANT: In the case of new or edited Email Marketing accounts, in order to send mailings addressed to more than 1,000 recipients, first you need to have your account verified and approved by a SALESmanago professional.
IMPORTANT: Under some circumstances, your emails may be subject to verification by a SALESmanago professional.
Read about the account moderation rules >>
When a mailing has been completed (or has started being processed), its analytics, including statistics, will appear in the Email Analytics tab (Menu → Channels → Email Marketing → Email Analytics).
To learn where to check the ORs, CTRs, and other statistics of your emails, read about Email Analytics >>
TIP: We recommend checking the OR and CTR a few days after an email is sent. Not all recipients will open it immediately after receipt.