The Email List contains all your emails saved as ready to send. Thanks to its transparent layout, you can easily check the essential information about particular emails and take various actions, including editing and sending.
Emails are divided into a number of categories, depending on the manner of use (A/B tests, Periodic, Birthday, and Subscription confirmation). You can also create groups to which you can assign emails according to your own criteria.
The List allows you to effectively manage your email messages and thus run your email campaigns efficiently.
To view the Email List, go to
Channels → Email Marketing → Email List
Contents
- Information available on the Email List
- Actions you can take on the Email List
- Division into categories: the A/B tests, Periodic, Birthday, and Subscription confirmation tabs
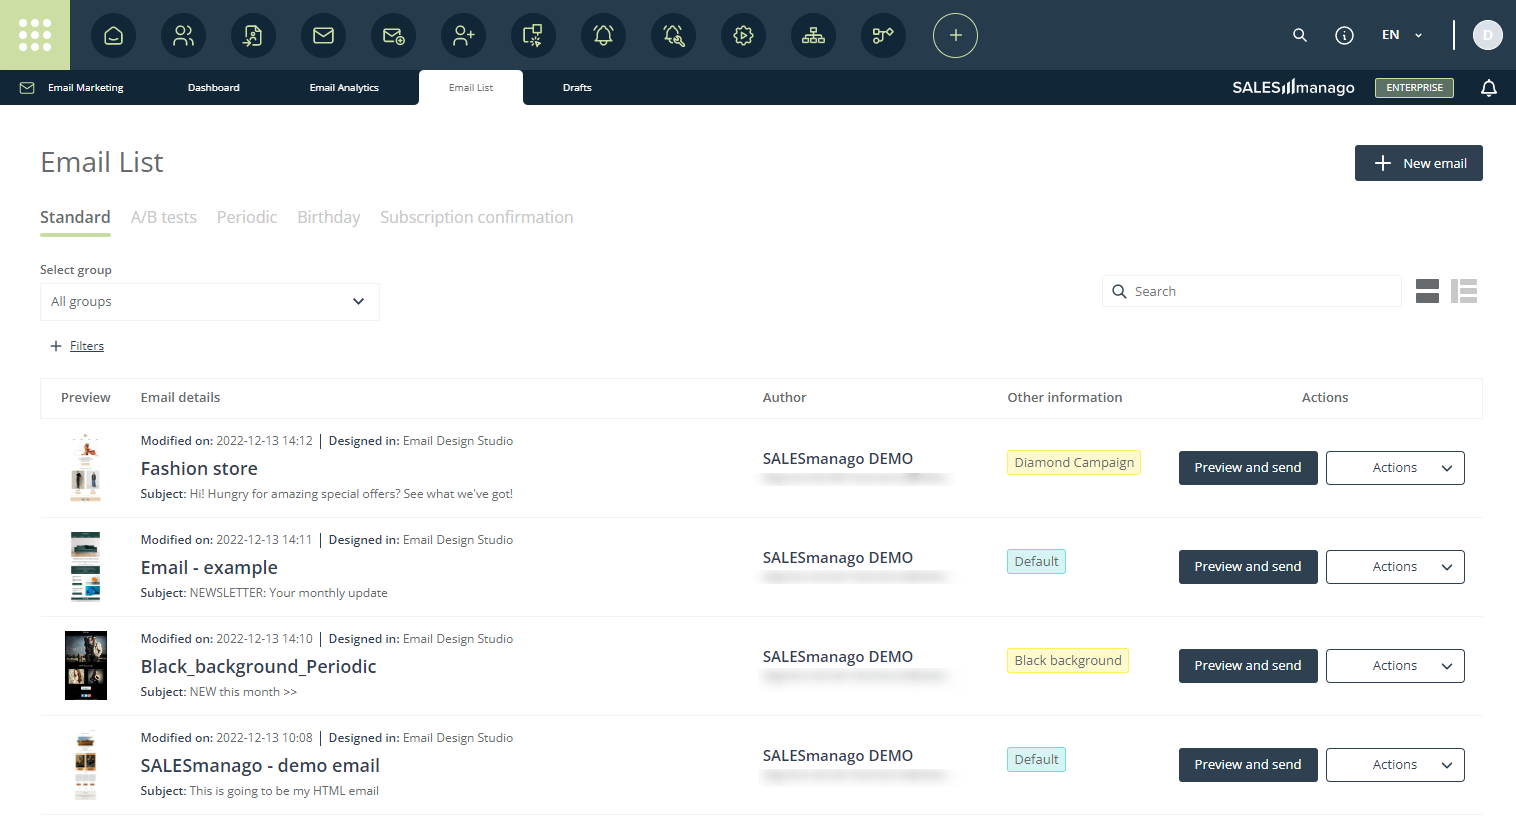
1. Information available on the Email List
The Email List contains the most important information about each completed email. By default, all existing emails (except for subscription confirmation emails) are displayed on this list, in descending order of the modification date. You can narrow the list down by clicking on a tab corresponding to a particular email category, selecting a previously defined email group from the drop-down menu, or entering the email name or subject in the search box. You can also apply a filter.

[1] Email categories—Completed emails are conveniently categorized according to how they are used. Select one of the five tabs to see the list of all existing emails (Standard) or only those emails which are used for a specific purpose (A/B tests, Periodic, Birthday, or Subscription Confirmation emails). The tabs for individual categories are described in detail in section 3.
[2] Select group—open the menu to select an existing group or create a new one. Groups allow you to freely segregate your emails (and A/B tests) based on your own criteria.
Learn more about email and A/B test groups >>
[3] Filters—click here to apply filters that allow you to narrow the List to the emails of interest. For instance, you can easily identify emails for which an RSS download failed, or that contain an attachment.
If you click + Filters, the following menu will open:
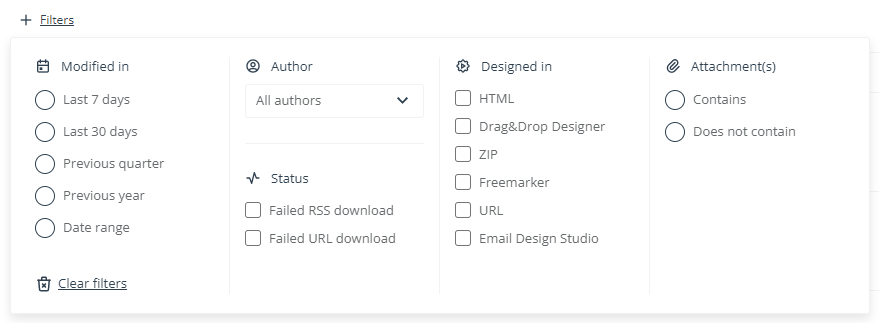
You can select one or more filters. Only the emails that meet all the selected criteria will be displayed on the list.
To remove all the applied filters, click Clear filters (see the screenshot above). To delete a single filter, click its closing icon (X):
[4] Search—start typing the name or subject of an email to quickly find it in the list.
[5] List view—click here to switch between the two available views of the Email List. Decide if you want to see miniature previews and in how many columns your email details are to be presented.
[6] Email List—the Email List proper, containing all the completed emails on your account (except for subscription confirmation emails; also, note points [1] to [3]). Here you can check essential information about individual emails:

[A] Preview—a miniature preview of the email.
[B] Email details—here you can look up the following data:
- last modification date (or creation date, for emails not edited after their creation);
- the wizard in which the email was created;
- the email name in the SALESmanago system;
- the email subject, visible to the recipients.
[C] Author—the SALESmanago account user who created the email.
[D] Other information—indicates the group the email belongs to.
[E] Actions—actions you can take for the email (see section 2).
2. Actions you can take on the Email List
A. Create a new email
To create a new email, click on + New email in the top right-hand corner:

You will be redirected to another screen, where you can select the wizard you want to use to create your email.
Learn more about creating emails on the SALESmanago platform >>
B. Create a new email group
To create a new email group, go to the Select group section and open the drop-down menu. At the top of the list, you will see the option + New group:

If you click this option, a new window will open. Enter a name for the new group and click Save. The group will immediately appear on the group list.
Learn more about email and A/B test groups, including how to add an item to a group >>
C. Actions
The last column on the Email List is Actions. The buttons here enable certain actions in relation to a selected email.
The actions available may differ depending on the manner in which the email is used (i.e., depending on the tab you are currently on—see point [1] in section 1 above).
i. Preview and send

Click the Preview and send button to open a new screen with a preview of the selected email and its basic information. From there, you can proceed to the sending screen.
Learn how to send an email from SALESmanago >>
ii. Actions

Click Actions to open a menu of the available actions. In the Standard tab, the menu looks as follows:
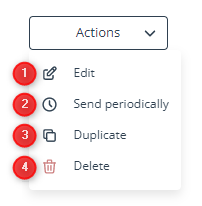
[1] Edit—click here to go to the wizard in which the email was created, to make any necessary modifications.
[2] Send periodically—select this option to configure the email to be sent periodically. You will be redirected to another screen, where you can define all the necessary settings for your periodic email.
Learn more about configuring periodic emails >>
[3] Duplicate—click here to create an exact copy of the selected email. The duplicate will appear at the top of the Email List.
[4] Delete—select this option to permanently delete the email. Following your confirmation (by clicking Delete in the new window that has opened), this operation is irreversible.
3. Division into categories: the A/B tests, Periodic, Birthday, and Subscription confirmation tabs
The tabs above the Email List contain particular email categories, i.e., emails used for specific purposes. The lists available under these tabs can differ in the number of columns, the scope of information presented, and the actions available.
A. A/B tests
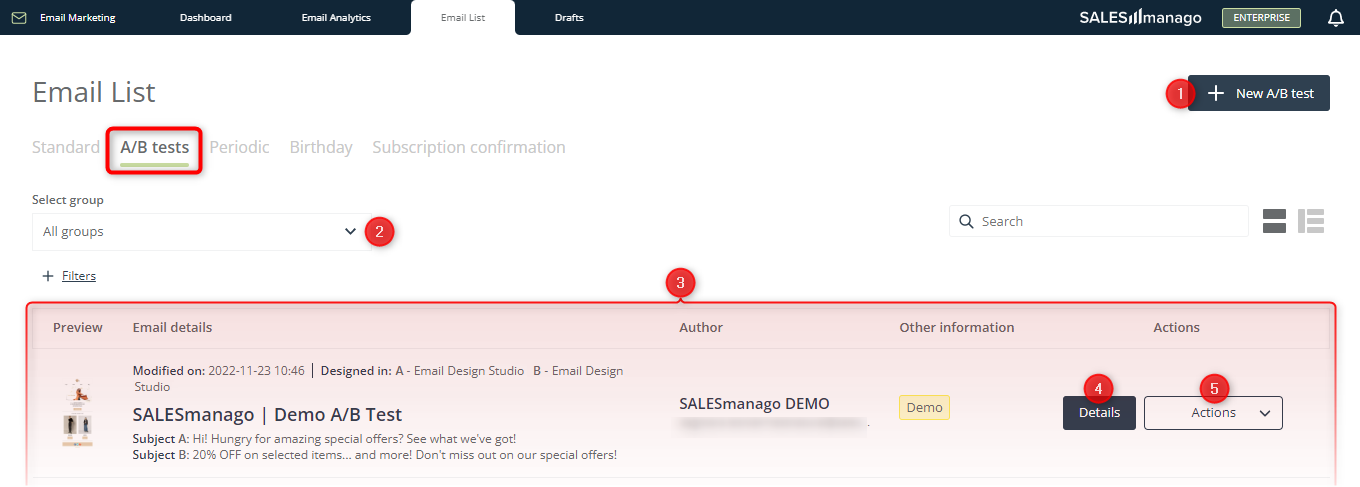
[1] + New A/B test—click here to go to the A/B test configuration screen, where you can create a new test using previously prepared emails.
Learn how to create and configure an email A/B test >>
[2] Select group—select an existing A/B test group to display only the tests belonging to that group in the list below. You can add an A/B test to a group when creating or editing the test.
Learn more about email and A/B test groups >>
[3] A/B test list—here you can check the basic information on completed and scheduled tests:
- the date and time of the last test modification,
- the wizard(s) the emails used in the test were created in,
- the test name,
- the subjects of the tested emails,
- the test author,
- the A/B test group the test belongs to, and
- the available actions.
[4] Details—here you can see detailed information on the selected A/B test, including the statistics for unique opens and clicks.
[5] Actions—click to view the available actions. In the case of A/B tests, only one action is available: Delete.

Click [A] to permanently delete the test and cancel sending the tested emails.
B. Periodic

[1] + New periodic email—click to configure a new periodic email using a previously prepared email.
Learn how to configure a periodic email >>
[2] Select group—select an existing periodic email group to display only the emails belonging to that group in the list below. You can add a periodic email to a group when creating or editing the periodic email.
Learn more about email and A/B test groups >>
[3] Periodic email list—here you can check basic information on individual periodic emails:
- the date and time of the last modification,
- the wizard the periodic email was created in,
- the periodic email name,
- the periodic email subject,
- the periodic email author,
- the group the periodic email belongs to,
- the status (active/inactive)—whether the sending of the periodic email to Contacts is active, and
- the available actions.
[4] Actions—click to view the actions you can perform on the periodic email.
[A] Deactivate—click to deactivate the periodic email, i.e., stop it being sent to Contacts until it is re-activated.
[B] Edit—click to edit the settings for the periodic mailing.
[C] Delete—click to permanently delete the periodic email.
C. Birthday
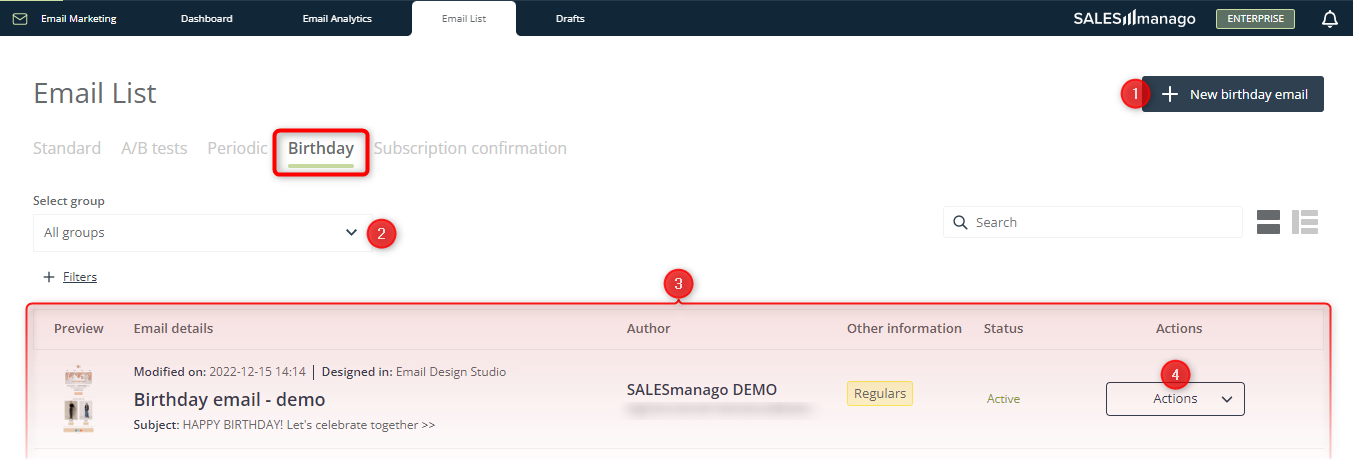
[1] + New birthday email—click to configure a new birthday email using a previously prepared email.
Learn how to configure a birthday email >>
[2] Select group—select an existing birthday email group to display only the emails belonging to that group in the list below. You can add a birthday email to a group when creating or editing the birthday email.
Learn more about email and A/B test groups >>
[3] Birthday email list—here you can check basic information on individual birthday emails:
- the date and time of the last modification,
- the wizard the birthday email was created in,
- the birthday email name,
- the birthday email subject,
- the birthday email author,
- the group the birthday email belongs to,
- the status (active/inactive)—whether the sending of the birthday email to Contacts is active, and
- the available actions.
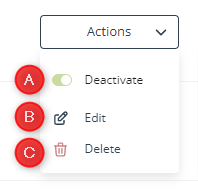
[4] Actions—click to see the actions you can perform on the birthday email.
[A] Deactivate—click to deactivate the birthday email, i.e., stop it being sent to Contacts until it is re-activated.
[B] Edit—click to edit the settings for the birthday email.
[C] Delete—click here to permanently delete the birthday email.
D. Subscription confirmation
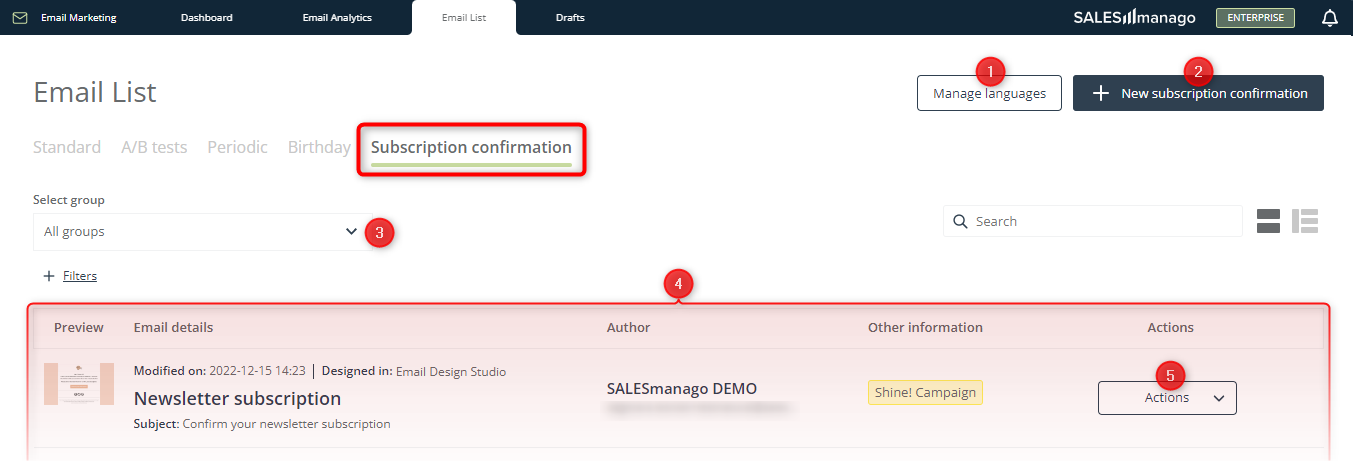
[1] Manage languages—click to be redirected to the location in the system (Menu → Channels → Email Marketing → Settings → Subscription confirmation languages where you can define the subscription confirmation settings for individual languages (the Manage languages section visible after checking the Use subscription confirmation for Contacts added via API option).
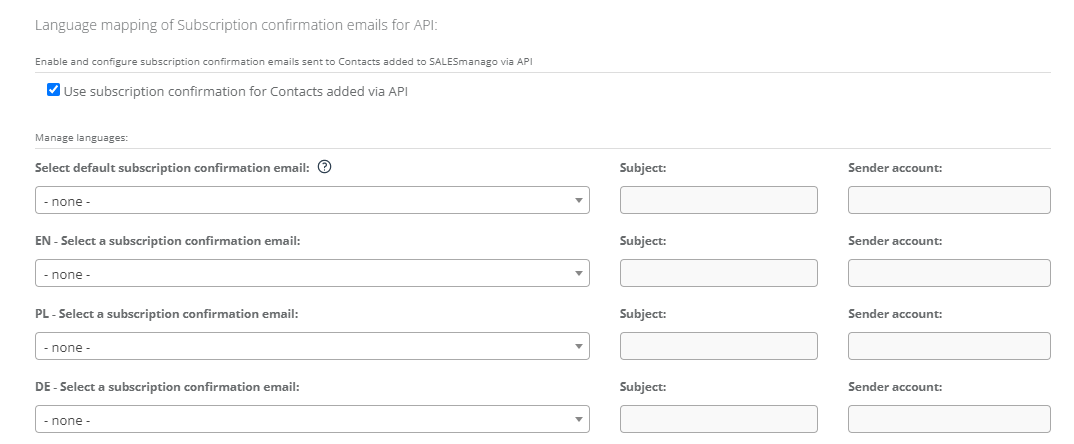
Learn more about configuring a subscription confirmation email (Double opt-in) >>
[2] + New subscription confirmation—click to go to a new screen where you can select the wizard in which you will create a new subscription confirmation email.
[3] Select group—select an existing subscription confirmation email group to display only the emails belonging to that group in the list below. You can add a subscription confirmation email to a group when creating or editing the email.
Learn more about email and A/B test groups >>
[4] Subscription confirmation email list—here you can check the basic information on individual subscription confirmation emails:
- the date and time of the last modification,
- the wizard the birthday email was created in,
- the email name,
- the email subject,
- the email author,
- the group the email belongs to,
- the status (active/inactive)—whether the sending of the subscription confirmation email to Contacts is active, and
- the available actions.
[4] Actions—click to see what actions you can perform on the selected subscription confirmation email.
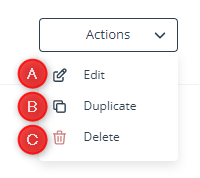
[A] Edit—click to edit the settings for the subscription confirmation mailing.
[B] Duplicate—click to create an exact copy of the email. You will be redirected to the wizard in which the original email was created, where you can make any necessary changes and then save the duplicate as a finished email or a draft.
[C] Delete—click here to permanently delete the subscription confirmation email.