Gravity Forms allows you to create advanced forms and simple sales of goods and services.
To download the plugin, click HERE
If you need help
- Plugin installation, basic configuration and technical description >>
- Contact Form 7 integration settings >>
- WooCommerce integration settings >>
Contents
- Basic information
- configuration
- Technical description
1. Basic information
The plugin uploads the data of contacts who fill out Gravity Forms for SALESmanago. The only mandatory field is the contact’s email, which must be on the form for the data to be uploaded to SALESmanago.
2. Configuration
When choosing forms:

After going to the Gravity Forms tab, you can select the forms you want to synchronize with SALESmanago from the list [1]. If the selected form is configured and then deleted, save the changes to make it appear again in the list of forms available for configuration.
The names of the fields to be configured:
For individual fields (such as first name, last name, email, phone) to be mapped correctly, they must be named in a specific way.
- Name → sm-firstname
- Last name → sm-lastname
- Email address → sm-email
- Company → sm-company
- Telephone number → sm-phone
- Street name → sm-address1
- Apartment number → sm-address2
- Post code → sm-postcode
- City → sm-city
- Country → sm-country
- Fax → sm-fax
- Subscribe to newsletter → sm-optin
- Birthday date → sm-birthday
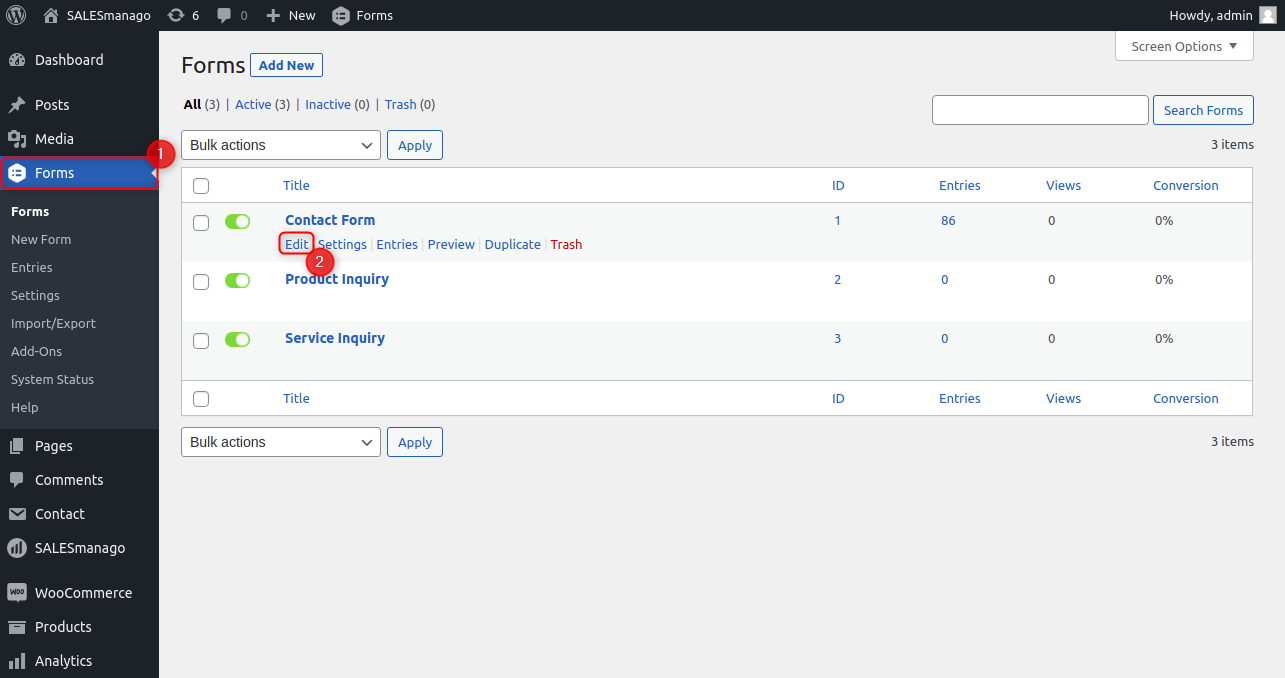
To name fields as described, go to the list of forms Menu -> Forms [1] in the WordPress admin panel and select Edit [2] next to the selected form. In some cases, the name in the menu may display as “Forms” or “Gravity Forms”.
This section explains how to name the fields that enable you to submit contact information to SALESmanago. To learn more about creating Gravity Forms, please visit the developer’s help page.

The individual fields are named in the Advanced tab [1] in the Admin Field Label [2] All fields that are going to be sent to SALESmanago as contact details should be assigned a name according to the list above.
Furthermore, it is possible to upload other fields as additional details, which is described in the section “Additional Details.”
Additional details
To transfer additional fields that are not listed in the “Field Names” section, add them in the “Custom Details” section. In the individual fields, enter the field names defined during the Gravity Forms configuration.
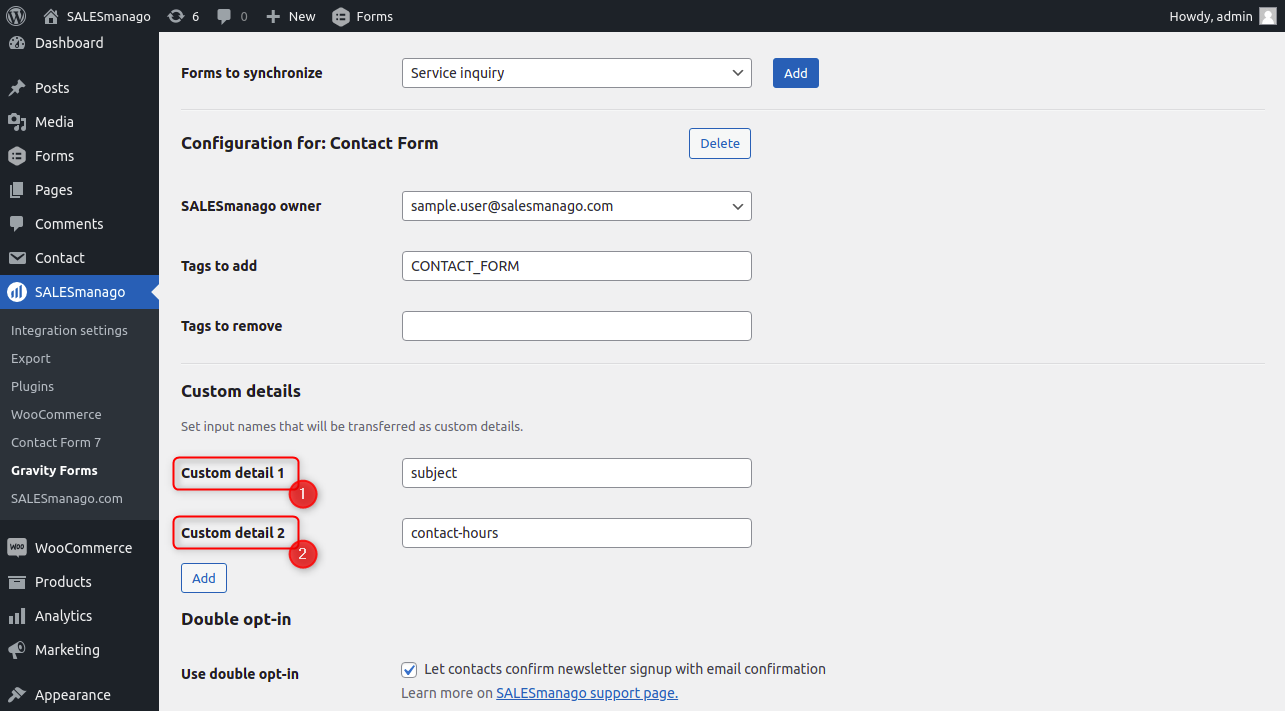
For example, to send the message subject (“subject”) and contact-hours field values, add your own details [1] [2]:
- subject
- contact-hours
The details that you provide are sent to SALESmanago as custom details with the same names.
3. Technical description
The plugin uses the gform_after_submission hook. The list of available forms is pulled by the static method RGFormsModel::get_forms(). The forms are identified by their ID.