Read more about the new Mobile Push channel >>
Mobile Push notifications are short messages displayed within or outside your mobile application integrated with SALESmanago Mobile. These notifications can appear as short text messages (referred to as notifications) or as URL/deep links that direct users to specific websites or designated in-app locations.
You can schedule a Push notification to be sent at a specified date and time, or create an Automation Rule that will send a Push notification to a user following the occurrence of a specific event.
To create a Push notification, in SALESmanago Mobile, go to
Communication → Push notifications
Contents
- Managing Push notifications
- Creating Push notifications
- Testing Push notifications
- Sending Push notifications
- Personalizing Push notifications
1. Managing Push notifications
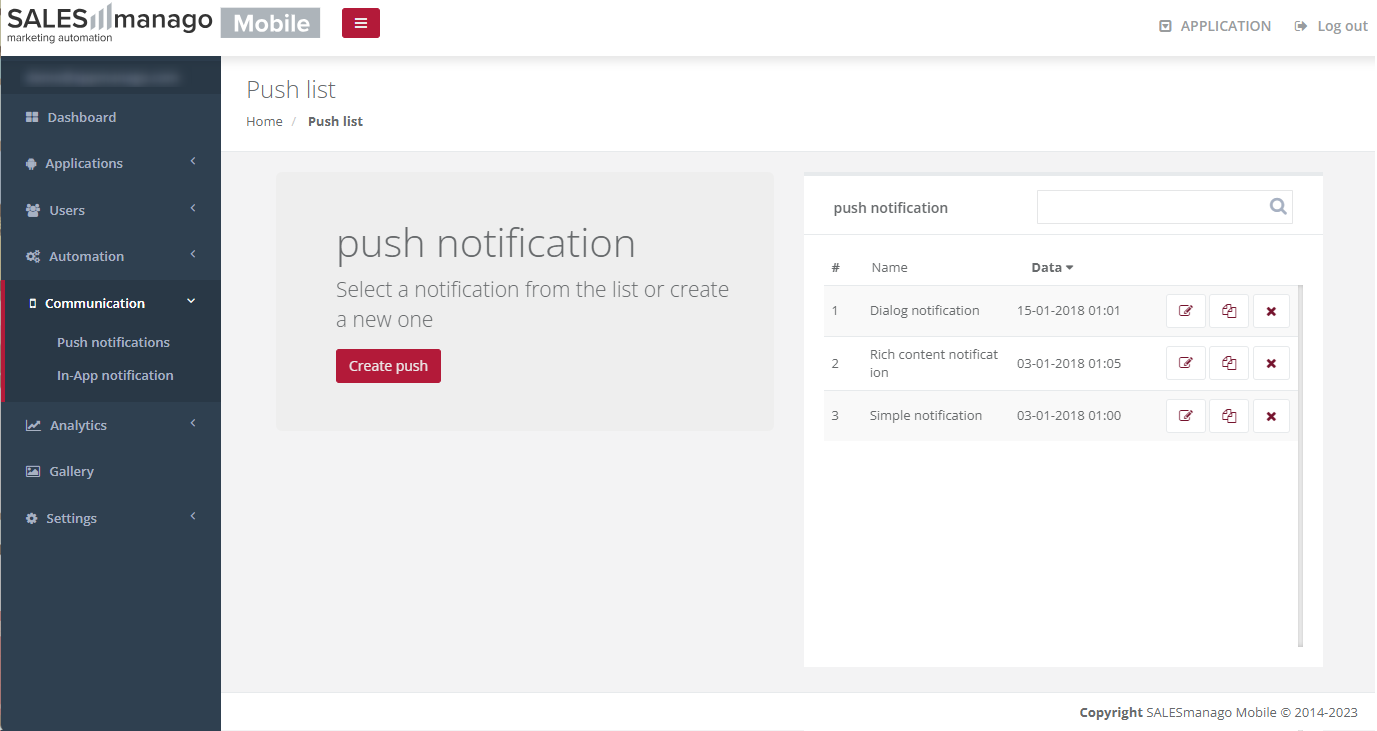
To create and manage push notifications, go to Menu → Communication → Push notifications. You will see the following screen:
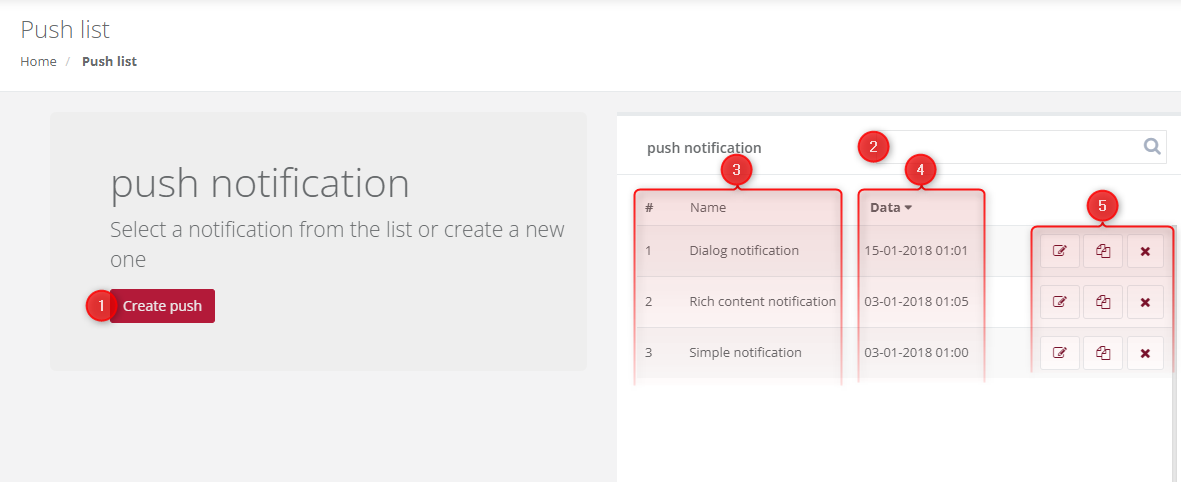
[1] Create push—Click here to open the push notification creator (See section 2 below).
[2] Push notification search bar—Search for push notifications by starting to type in their names.
[3] Push notification list—Here, you see the list of all created push notifications.
[4] Date—Here, you can check the notification creation date.
[5] Management options—Here, you can edit, duplicate, or delete push notifications.
2. Creating Push notifications
Push notifications can take the form of short text messages (notifications) or a URL/deep link that directs users to a specific website or a designated location within the app.
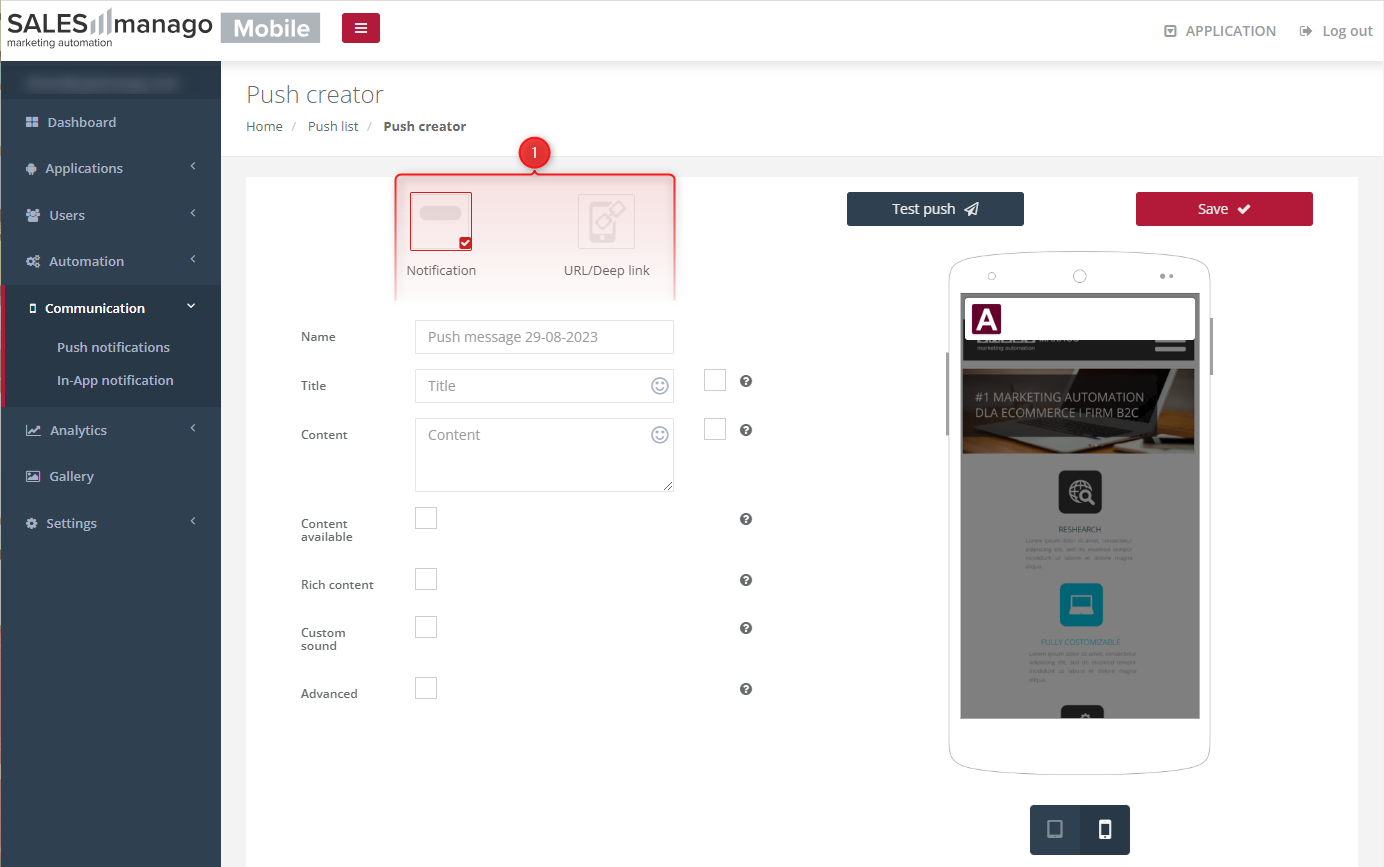
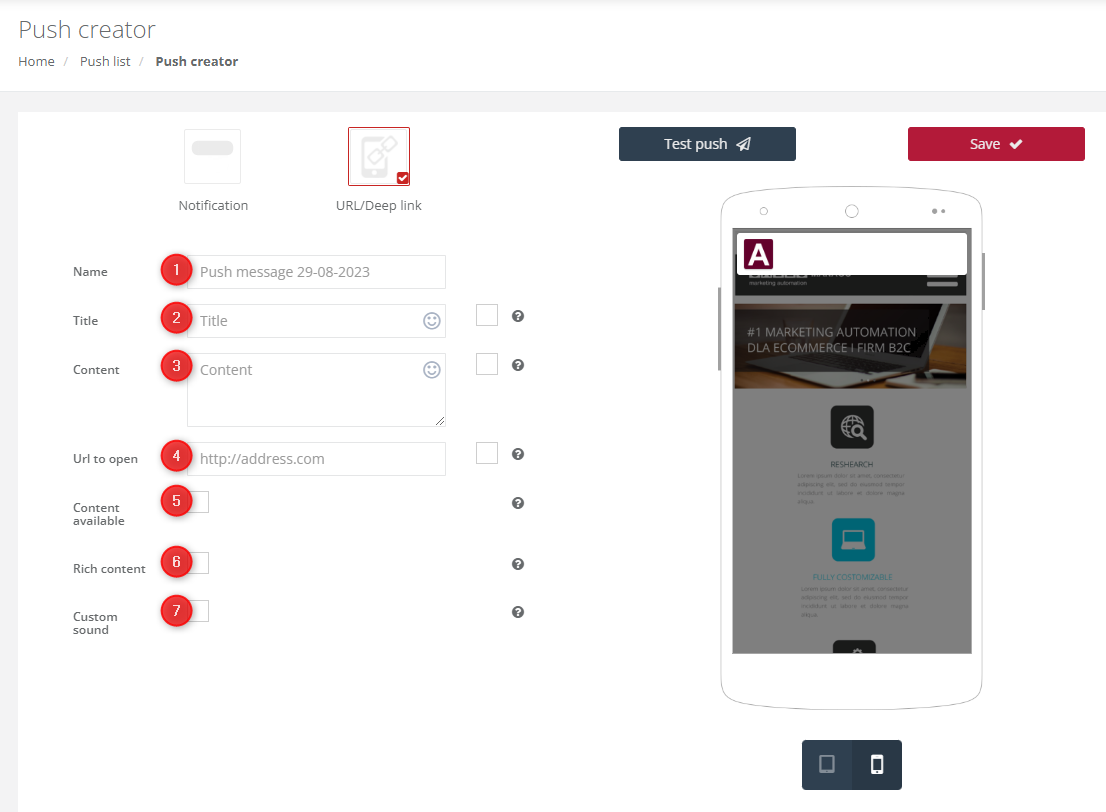
To create a push notification, go to Menu → Communication → Push notifications, and click on Create push and then choose the type of a notification you want to create [1].
A. Notification
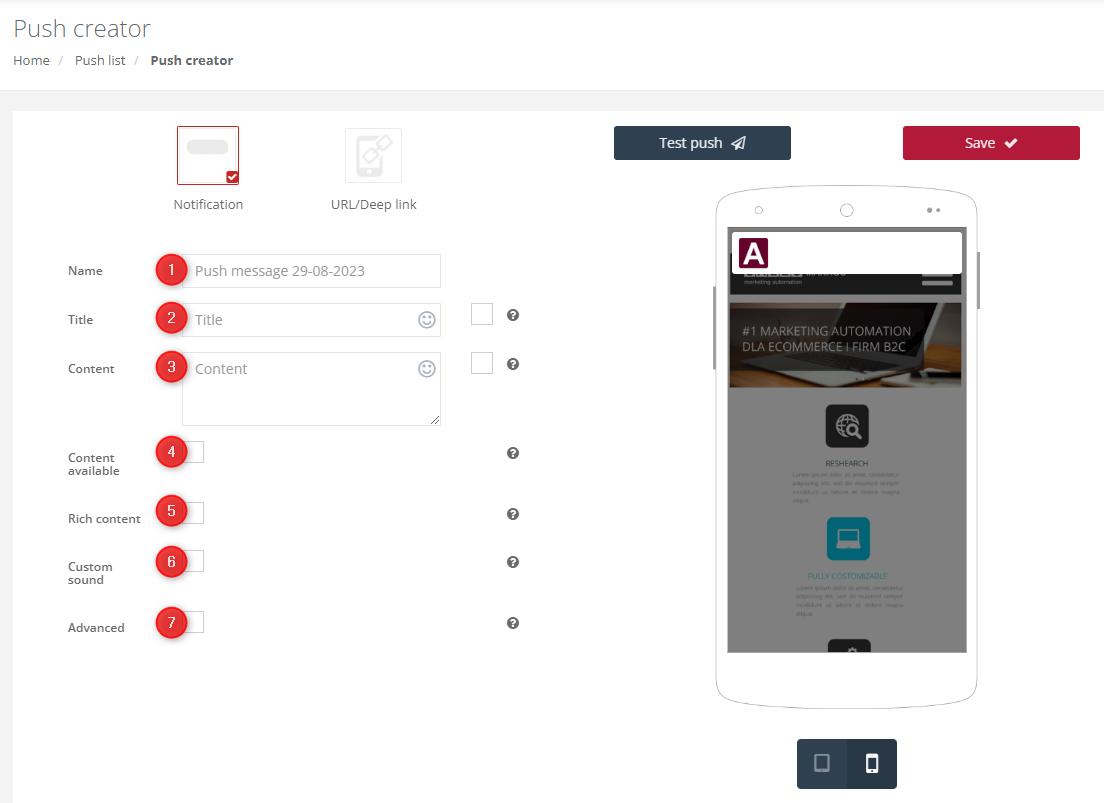
[1] Name—Enter a name for your new notification. This name is for internal purposes only—your Contacts will not see it.
[2] Title—Enter the text that will appear in the notification’s headline.
[3] Content—Enter the main text of the notification.
[4] Content available—This option is available for iOS only. Check this box to enable downloading the notification payload while the application is working in the background.
[5] Rich content—Check this box to add an image to your notification. Then, select the image from the gallery or paste the URL address of the image.
IMPORTANT: The rich content function requires additional configuration in the iOS system.
Visit Apple’s website to read more about customizing the appearance of notifications in iOS >>
[6] Custom sound—Click here to change the default notification sound.
[7] Advanced—Check this box to include additional data in the form of a payload in your notification. Payload data can be added using a simple or an advanced editor.
B. URL/Deep link
[1] Name—Enter a name for your new notification. This name is for internal purposes only—your Contacts will not see it.
[2] Title—Enter the text that will appear in the notification’s headline.
[3] Content—Enter the main text of the notification.
[4] URL to open—Enter a URL or a deep link leading to a specific screen in your application. A deep link needs to be defined by your developers in your application before you create the Push notification in SALESmanago Mobile.
[5] Content available—This option is available for iOS only. Check this box to enable downloading the notification payload while the application is working in the background.
[6] Rich content—Check this box to add an image to your notification. Then, select the image from the gallery or paste the URL address of the image.
IMPORTANT: The rich content function requires additional configuration in the iOS system.
Visit Apple’s website to read more about customizing the appearance of notifications in iOS >>
[7] Custom sound—Click here to change the default notification sound.
3. Testing Push notifications
Make sure to test your Push notifications before sending them to a real audience. To test a notification, go to Menu → Communication → Push notifications, find the notification of interest on the list, edit it, and click Test push [1].
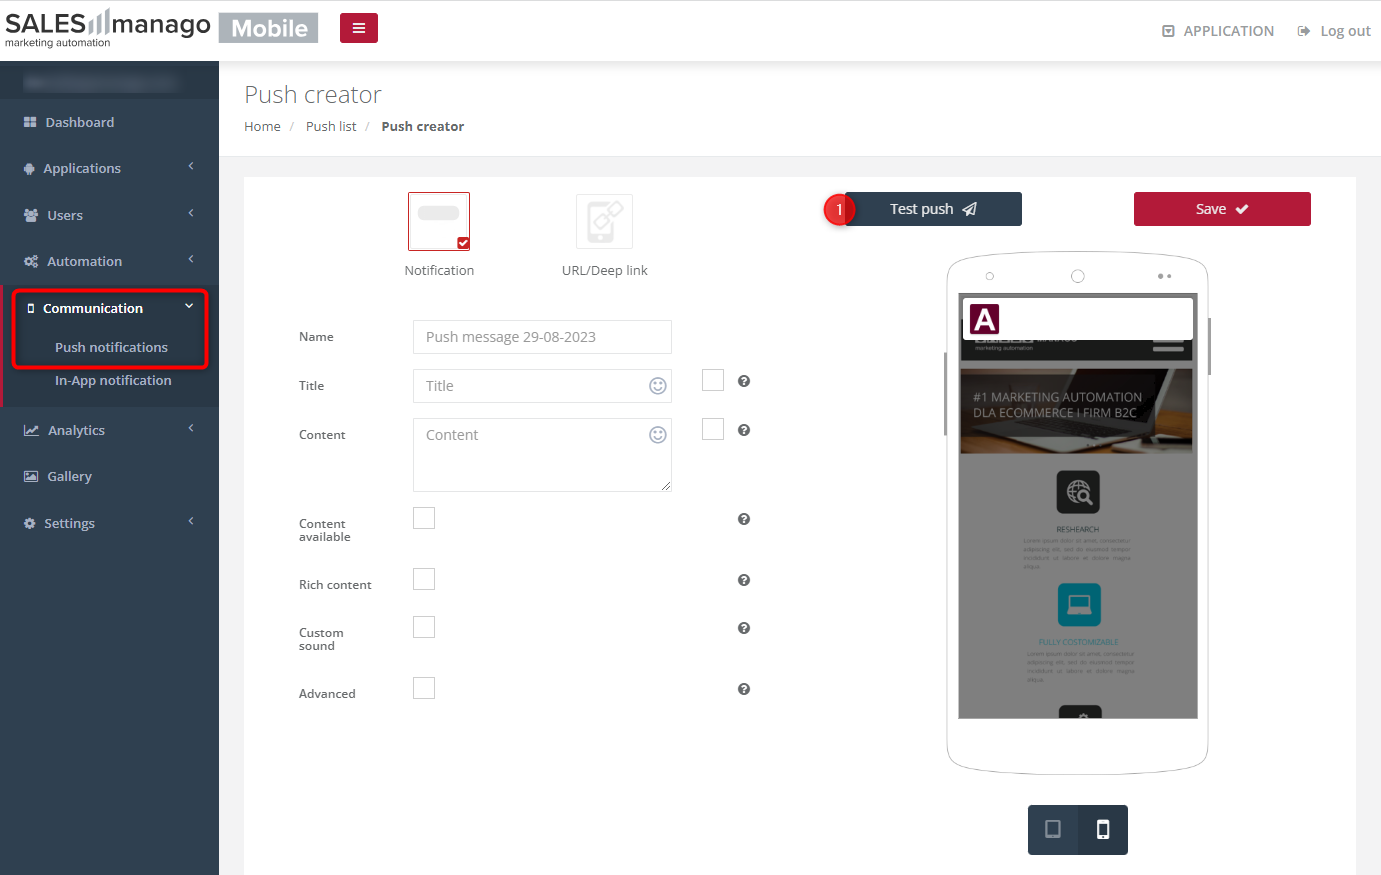
A new field will appear. Enter the UUIDs of Contacts to which you want to send the test notification [2]. You can find the Contact UUID on the Contact Card.

IMPORTANT: Test notifications are not included in the analytics.
4. Sending Push notifications
You can send Push notifications in four ways:
- Schedule a notification to be sent at a specific date and time.
To set a specific date and time at which you want to send a notification, go to Menu → Automation → Scheduled actions and click on Create scheduled action.
Read more about Scheduled actions in SALESmanago Mobile >>
- Configure an Automation Rule in SALESmanago Mobile.
To create an Automation Rule that will send a notification to a user in response to a certain event, go to Menu → Automation → Automation rules and click on Create automation rule. Create a rule that includes the action: Push notification.
Read more about Automation rules in SALESmanago Mobile >>
- Configure a Workflow process on the SALESmanago platform.
You can send Push notifications via the SALESmanago platform, by creating a Workflow that includes the Action: Send Mobile Push notification.
Read more about the Workflow Action: Send Mobile Push notification >>
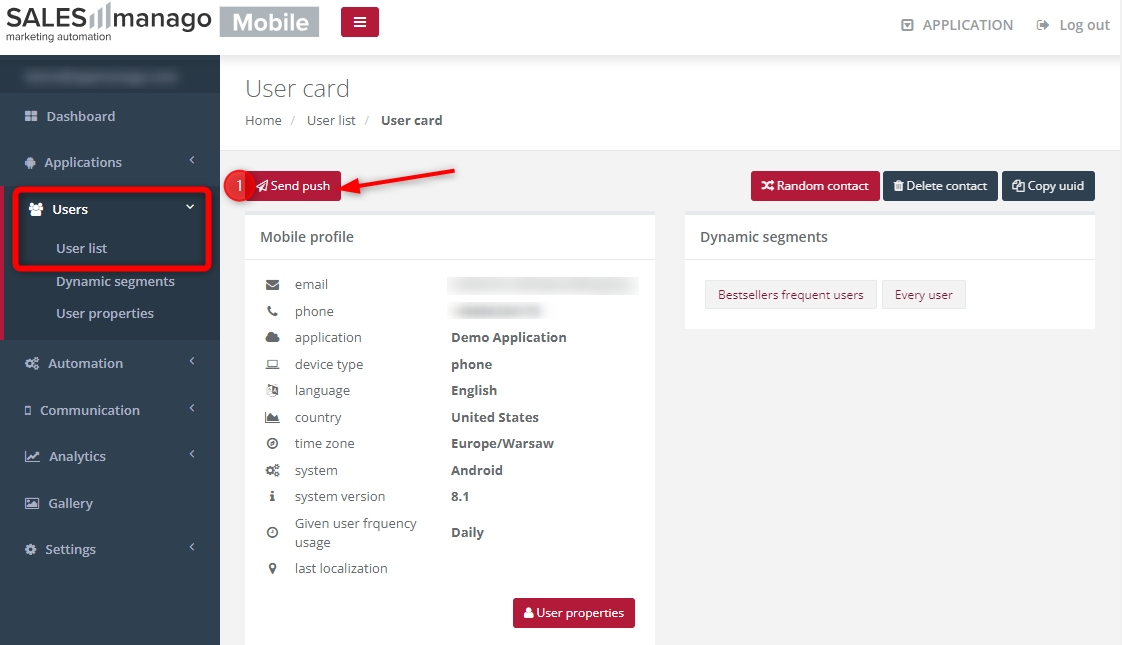
- Send notifications from individual User cards.
To send a Push notification to a single user directly from their User card, go to Menu → Users → User list, open the User card of interest, and click Send push [1].
5. Personalizing Push notifications
You can use placeholders in the notification title (subject) and content to personalize your communications. In SALESmanago Mobile, you can only use placeholders that correspond to your defined User properties.
IMPORTANT: In SALESmanago Mobile, as opposed to the SALESmanago platform, there are no default User properties, such as “name” or “city”. To use a placeholder for any user data type, first, you need to create a User property (Menu → Users → User properties).
The following placeholders that work on the SALESmanago platform will not work in SALESmanago Mobile:
- newsletter opt-out ($opt-out$),
- newsletter opt-in ($opt-in$),
- Contact ID ($contactID$),
- tag scoring ($scoring$),
- Contact’s external ID ($externalId$),
- Coupons ($cst.coupon_name.coupon$),
- all placeholders related to External Events (starting with $cst.ext.Event.EVENT_TYPE).
To be able to use placeholders, check the box(es) next to the notification title and/or content.

Placeholders must have the following format: ${property_name}. Make sure to use the name of an existing User property (created in Menu → Users → User properties).
EXAMPLES: ${name}, ${city}, ${pet}, ${pet_name}, ${holiday_destination}
If the specified information is missing from a user’s profile, a fallback value can be used instead. To set a fallback value, add it after a colon, for example: Hello ${name:Traveler}!
EXAMPLE: You enter the following notification title:
Hello, ${name:Traveler}! Ready for your next adventure?
A user identified as John Doe will see the following title:
Hello, John! Ready for your next adventure?
A user not identified by name will see the following title:
Hello, Traveler! Ready for your next adventure?
NOTE: If you do not define a fallback value, the placeholder will be replaced with empty space, e.g.: Hello, ! Ready for your next adventure?