Useful links
The Alert Wizard is a feature that allows you to send automatic email notifications to users, regarding recent contact activity on the monitored website. An alert is sent when a contact visits the specified page or subpage. If more than one site is selected, an alert will be sent after either site is visited. This feature is very useful for sales specialists as it allows them to immediately contact the customer faster and better prepared.
Benefits:
- a possibility of reacting to customer’s activity on the website at once
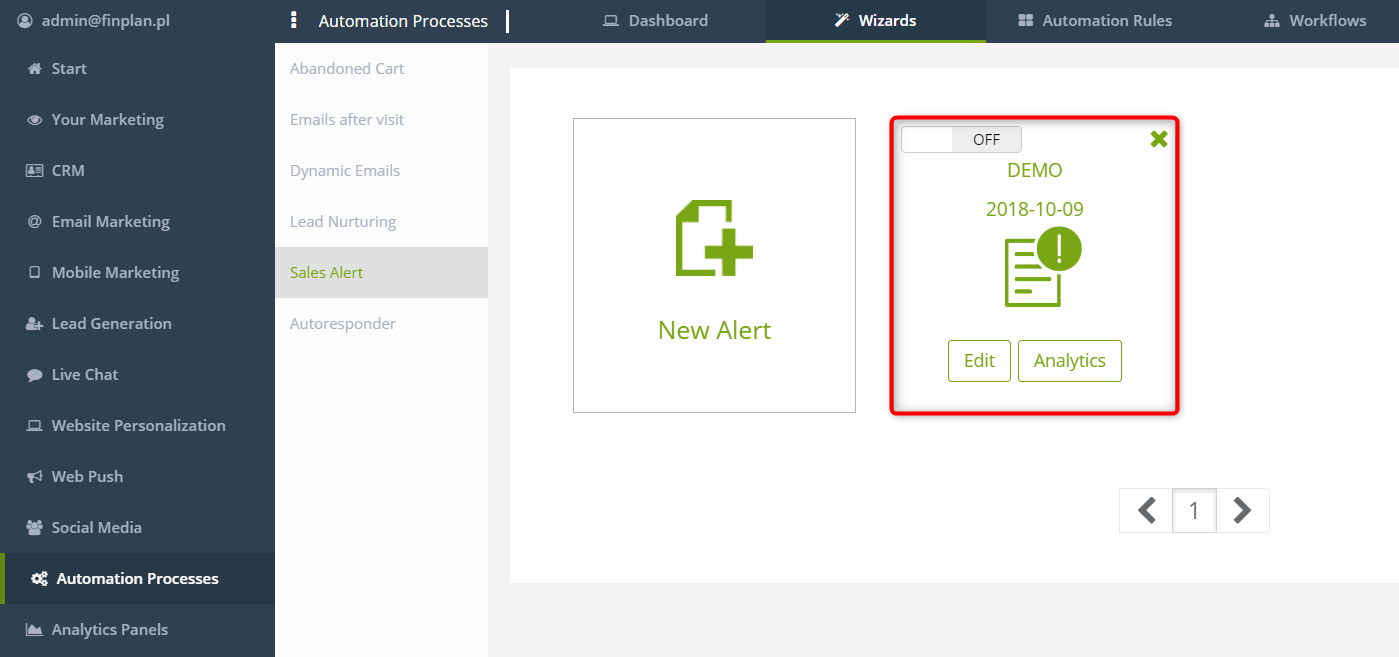
To create a customer activity alert, go to
AUTOMATION PROCESSES => WIZARDS => SALES ALERT
Contents
- Name
- Select page
- Frequency
- Details
- Summary
- Analytics
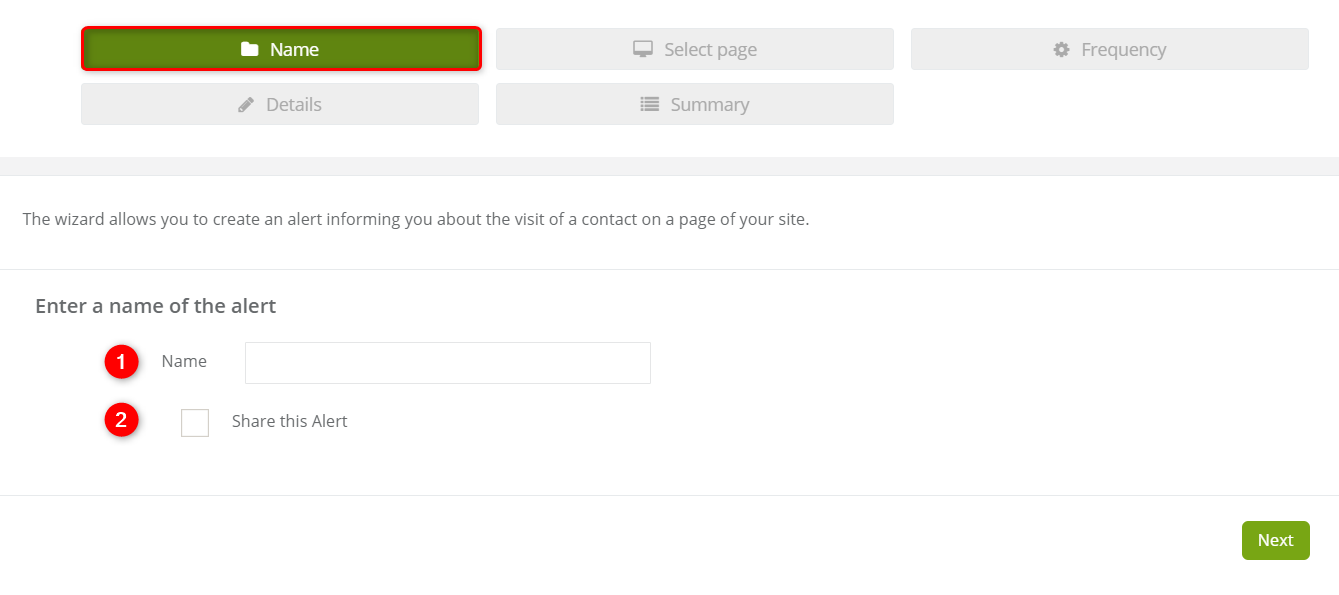
1. Name
[1] Name – enter a system name for the alert. Later you will find it in the system under this name.
[2] Share this alert – tick the option to make this alert available to other users in the system.
Click Next to proceed.
2. Select a page
[1] Visited pages (URL) – choose a destination website. If a contact visits this page, an alert will be sent.
[2] ** – If you want to receive an alert after contact visits any subpage, use the double asterisk sign (can be used in combination with a URL).
[3] For at least – specify the minimum duration of the visit needed to send an alert.
[4] – the “+” sign opens additional fields to select more websites.
Click Next to proceed.
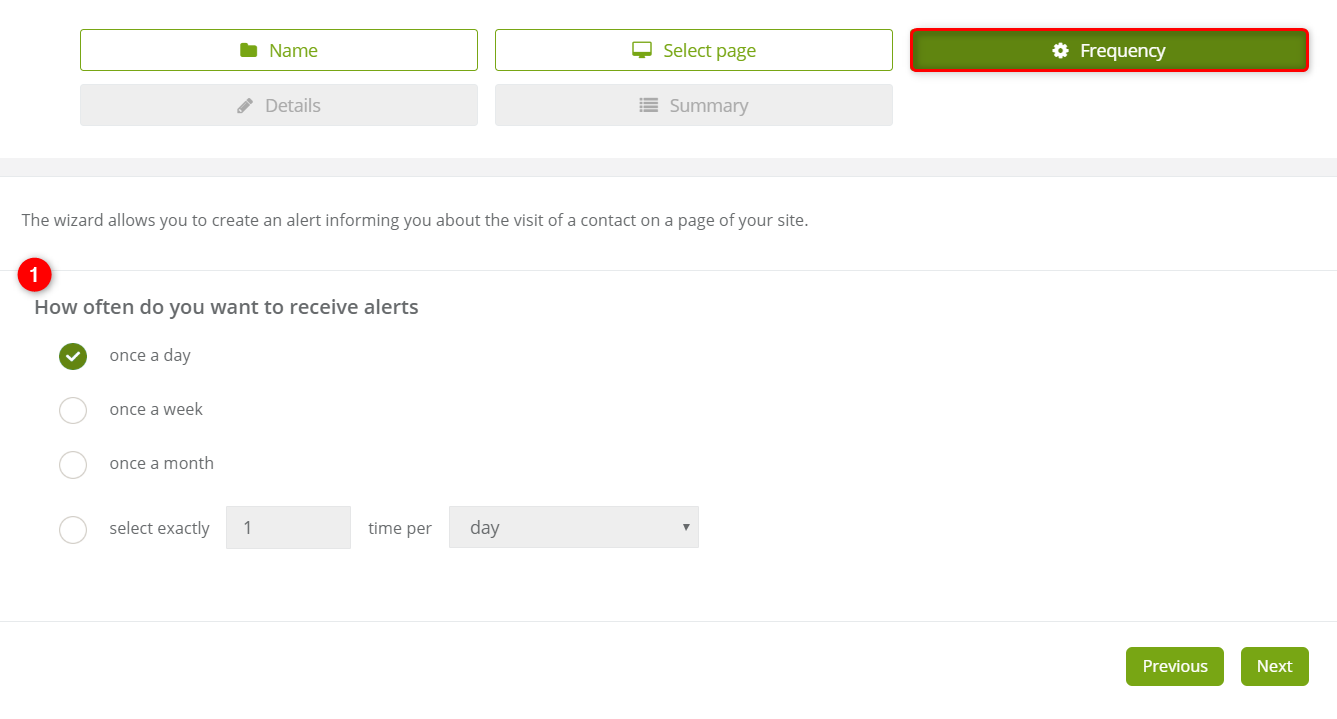
3. Frequency
[1] How often do you want to receive alerts – select how often you want to receive alerts. Their frequency can be set as follows:
- once a day,
- once a week,
- once a month,
- select exactly – customized settings, specify exactly up to how many times a day, a week or a month you would like to receive alerts.
IMPORTANT: The frequency settings concern one contact. It means that every time a new contact visits your website, you will receive an alert. It doesn’t include the case when one contact visits your website several times during the day. Then you will receive only one alert about its visit.
Click Next to proceed.
4. Details
[1] Recipients of alerts – choose a recipient.
- Sent the alert only to me – the alert will be delivered to the user currently logged into the system.
- Sent the alert only to the main owner of the contact – the alert will be sent to the person who is the main owner of the contact.
- add in CC – in addition to the other two options, it is possible to send carbon copies to specified email addresses (255 character limit).
IMPORTANT: In the CC field (carbon copy) do not type email addresses related to the SALESmanago domain. E.g. demo@salesmanago.com or demo@salesmanago.pl
[2] Alert description – you can enter an alert description, which will be included in the alert email.
[3] Add an attachment – you can also add an attachment.
Click Next to proceed.
5. Summary
Your alert summary – a summary of all actions taken to create the alert:
- Alert: the website that needs to be visited by a contact for an alert to be sent,
- Sent: how often an alert can be sent,
- Addressee: to what address the alert is sent,
- An attachment text: information about an attachment.
[1] Activate the alert – OFF this toggle must be switched to ON to activate this alert.
Click Save to save the alert in the system.
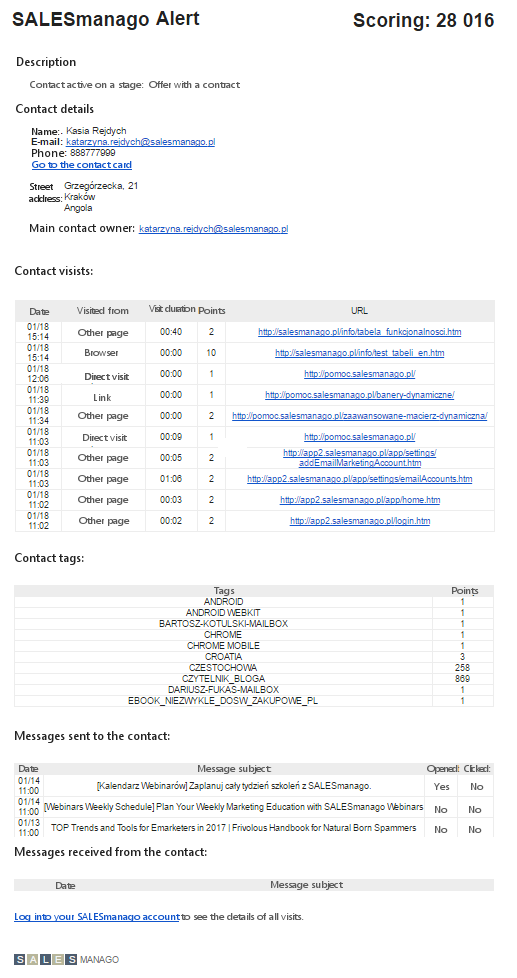
A finished alert should look similar to the following example:
6. Analytics
For more information click here
You can access Analytics from the Alert Wizard. You can view performance statistics for processes associated with this wizard Learn how to use the Rule Analytics dashboard


