Useful links
Facebook Ads is an easy-to-use advertising tool that allows you to create and run campaigns directed at the two billion people who use Facebook daily. You can run your Facebook ads not only on Facebook, but also on Messenger, Instagram, and Audience Network.
If you integrate your Facebook and SALESmanago accounts, you can create and manage Custom Audiences based on Contact data stored in SALESmanago, and then target those audiences with your Facebook Ads campaigns. You can also view your Custom Audience analytics in a dedicated dashboard on the SALESmanago platform.
To integrate your SALESmanago account with Facebook Ads, go to
Audiences → Social Media → Facebook
Contents
1. Integration process
To integrate Facebook Ads with your SALESmanago account, go to Menu → Audiences → Social Media → Facebook and click on Authorize.
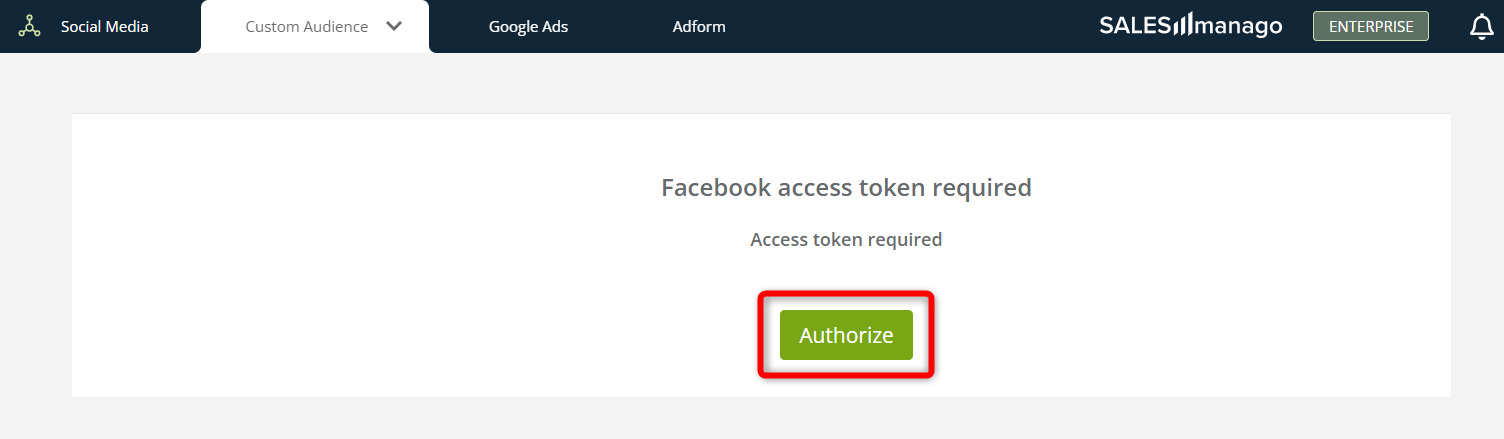
You will be redirected to the Facebook page, where you need to log in to continue the integration. Note that SALESmanago will request access to your personal account before requesting permission for your business account.
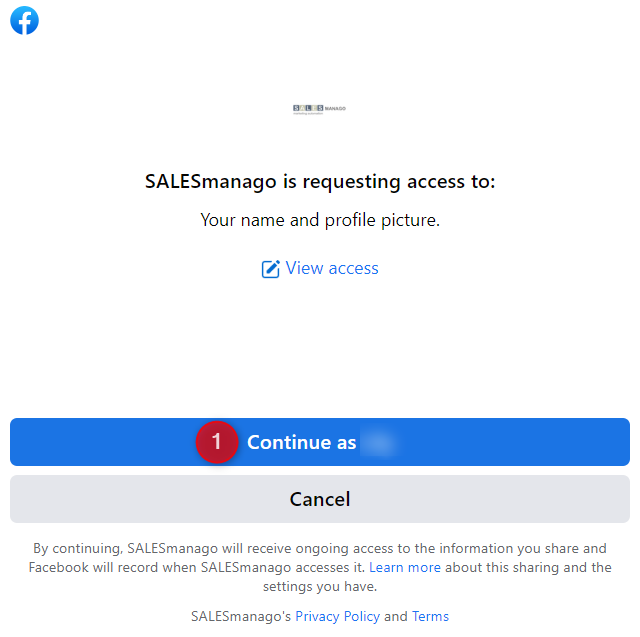
After logging in to your personal account, click Continue as… [1].
In the next step, define the permissions you give to Facebook by clicking Choose what you allow [2].
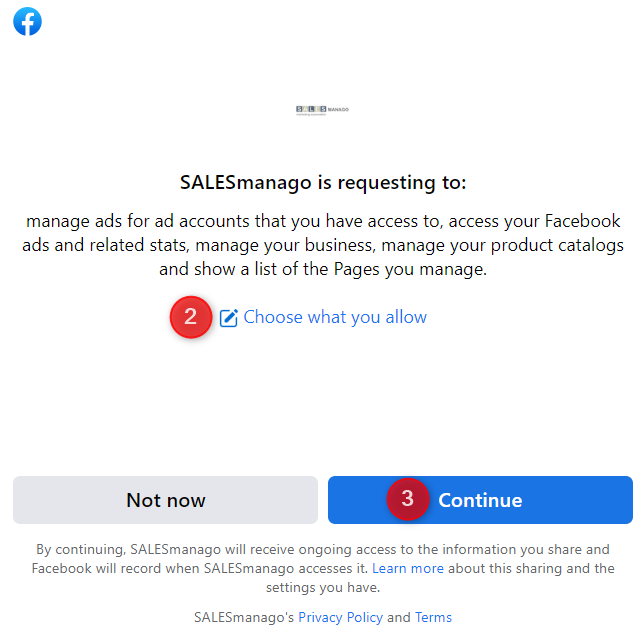
Finish the integration by clicking Continue [3]. You will be automatically redirected to the SALESmanago platform.
That’s it! You have successfully integrated your Facebook account with SALESmanago.
Now, if you go to Menu → Audiences → Social Media → Facebook, you will see the following screen:
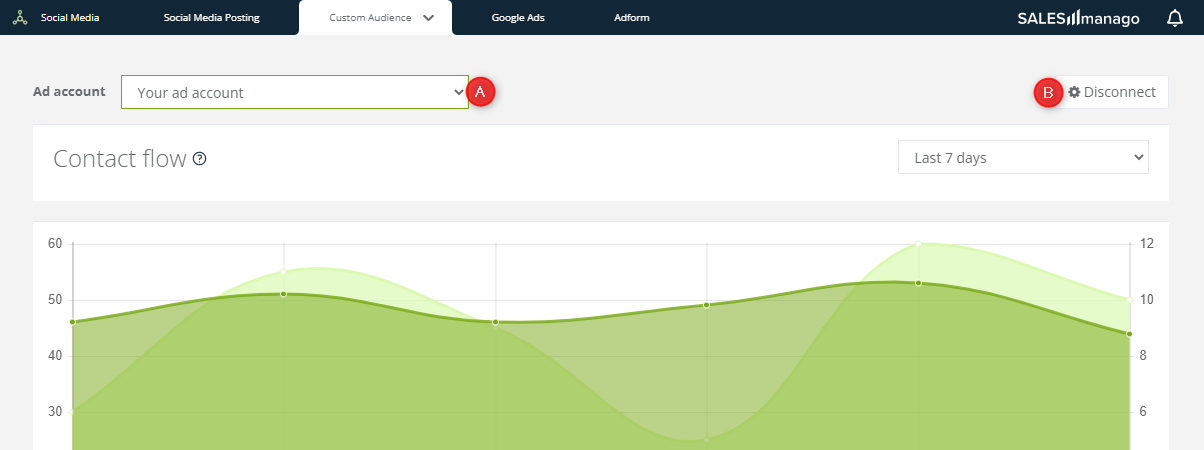
[A] Ad account—if you have more than one ad account connected to your Facebook account, you will see them listed here. Switch between the ad accounts to display their individual analytics below.
[B] Disconnect—click here if you want to deactivate the integration between your Facebook Ads and SALESmanago accounts.
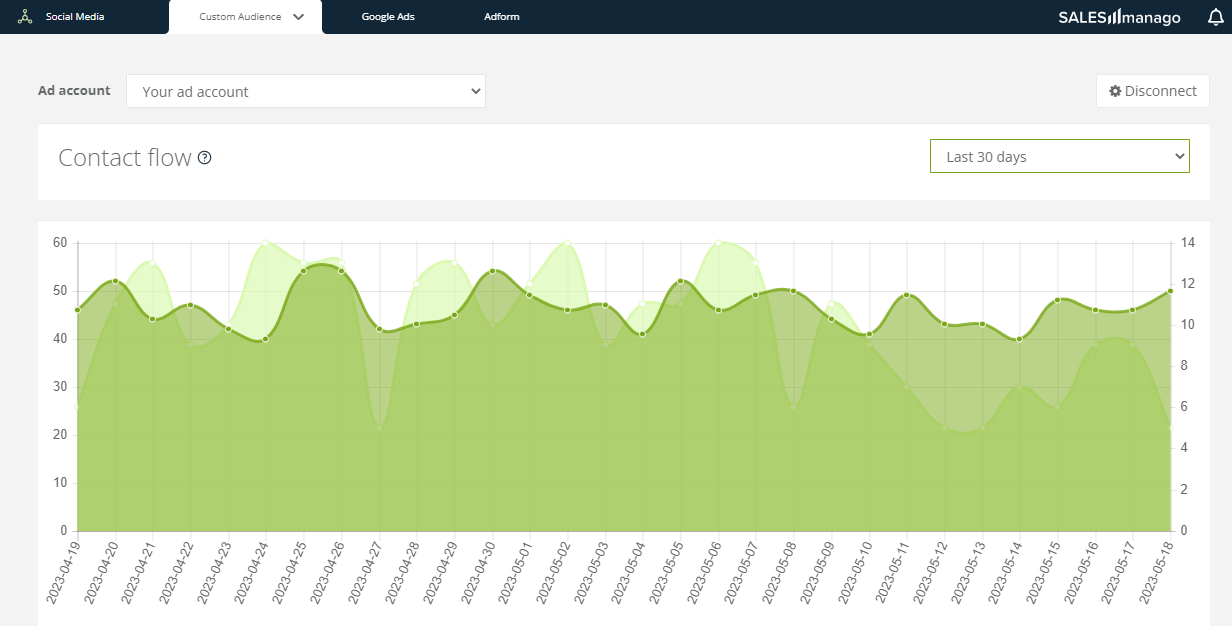
Below, you can find analytical data concerning your Facebook Ads Custom Audiences.
Read more about the Custom Audience Dashboard >>
If you scroll down to the bottom of the dashboard, you will see the Custom Audiences section.
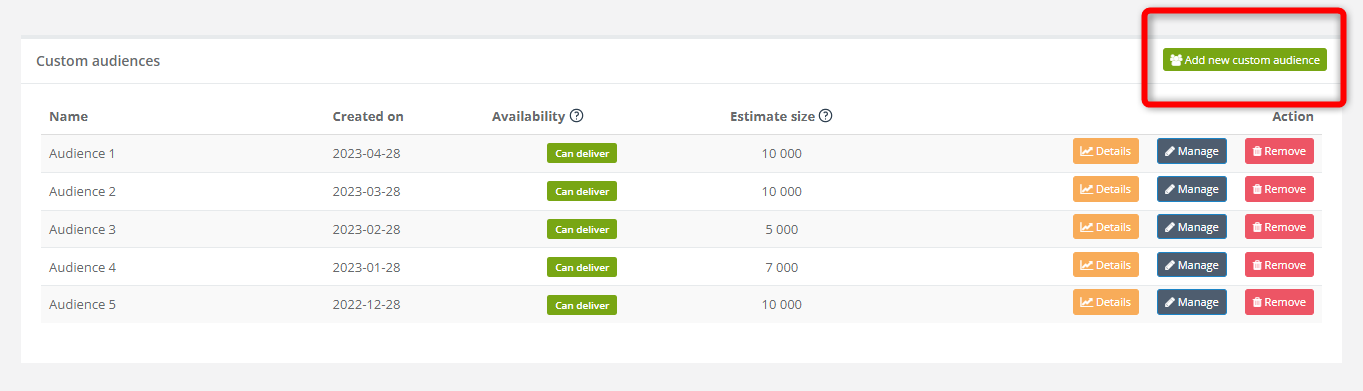
Here, you can click on Add new custom audience, to create a new custom audience based on Contact data stored on the SALESmanago platform.
Learn more about adding a Custom Audience >>
Then, you can target the audience with your Facebook Ads campaigns (see Section 2 below for examples).
2. Marketing uses: Examples
The SALESmanago integration with Facebook Ads allows you to create Custom Audiences that can later be targeted with your Facebook Ads campaigns.
Learn more about adding a Custom Audience >>
EXAMPLE 1: You send a birthday email to your Contacts. The birthday email contains a special discount code. You want to encourage your customers to use the discount code and make a purchase in your store.
Your customers are likely to visit their Facebook profiles on their birthdays to thank their friends for birthday wishes, so you decide to use Facebook Ads.
Create the following Workflow:
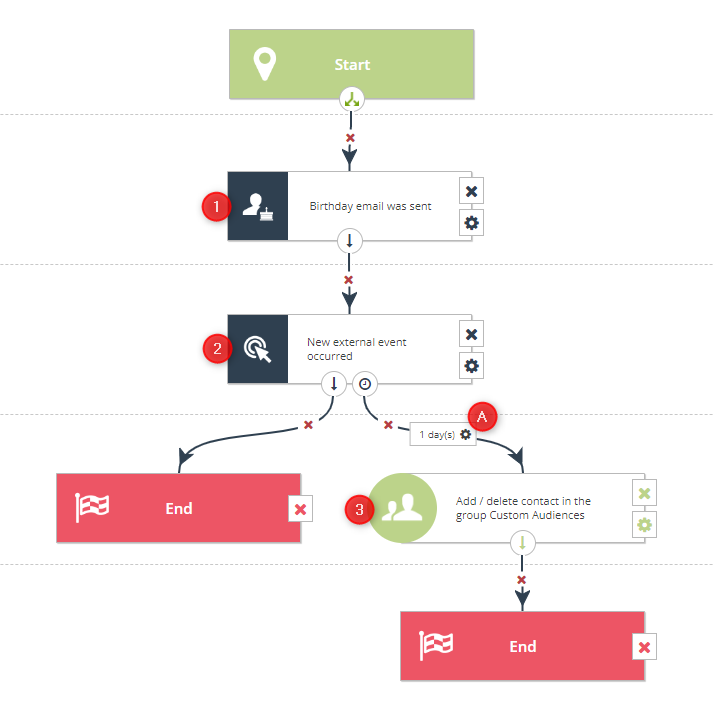
The Workflow starts when a Contact receives the birthday email [1]. If the Contact makes a purchase [2], the Workflow will end. If the Contact does not make a purchase, the system will wait 1 day [A]. If after 1 day the Contact still makes no purchase, they will be added to a Custom Audience of your choice [3].
Then, configure your Facebook advertisements to be displayed to the audience selected in the Workflow.
EXAMPLE 2: You are a travel agency that uses the Customer Preference Center >> to collect zero-party data about your Contacts, including their preferred travel destinations. You have just enriched your offer with interesting trips to different countries in Europe.
Create a Custom Audience with Contacts who have informed you that they are interested in visiting Europe. Use the selector: Key Information, choosing the item: Destinations, with the specific value: Europe.
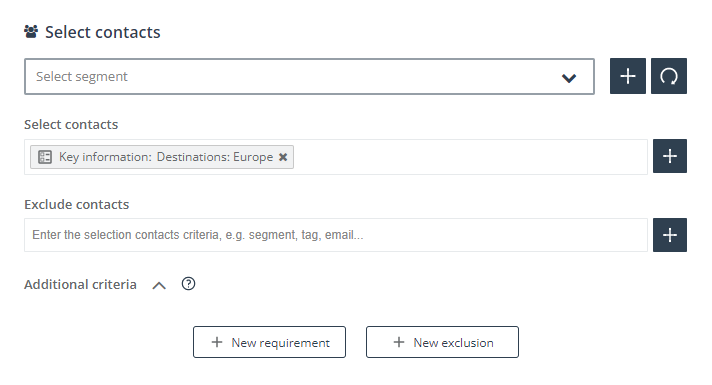
In Facebook Ads, configure your advertisements for trips around Europe to be displayed to this specific Custom Audience.