The Loyalty Program for your online store allows you to increase your customers’ LTV by using program data for segmentation, gamification, rewards and multi-channel communication using workflow.
To create a new Loyalty Program, go to the tab
Audiences → Loyalty Program → + New Loyalty Program
Contents
- Basic information
- Data
- Configuration of points
- Tier settings
- Add contacts
- Summary
1. Basic information
The SALESmanago Loyalty Program is a solution dedicated to the B2C sector. Thanks to the extensive personalization options of the advanced wizard, you can create any possible type of program. Decide if you want users to earn points that have a specified use-by date or if they can collect them indefinitely.
Create tiers in your Loyalty Program, allowing you to easily manage specific groups of contacts and analyze each tier’s data with the help of the analytical panel. You decide the parameters for each tier.
Create gamification programs and let your customers exchange points for special rewards and coupons.
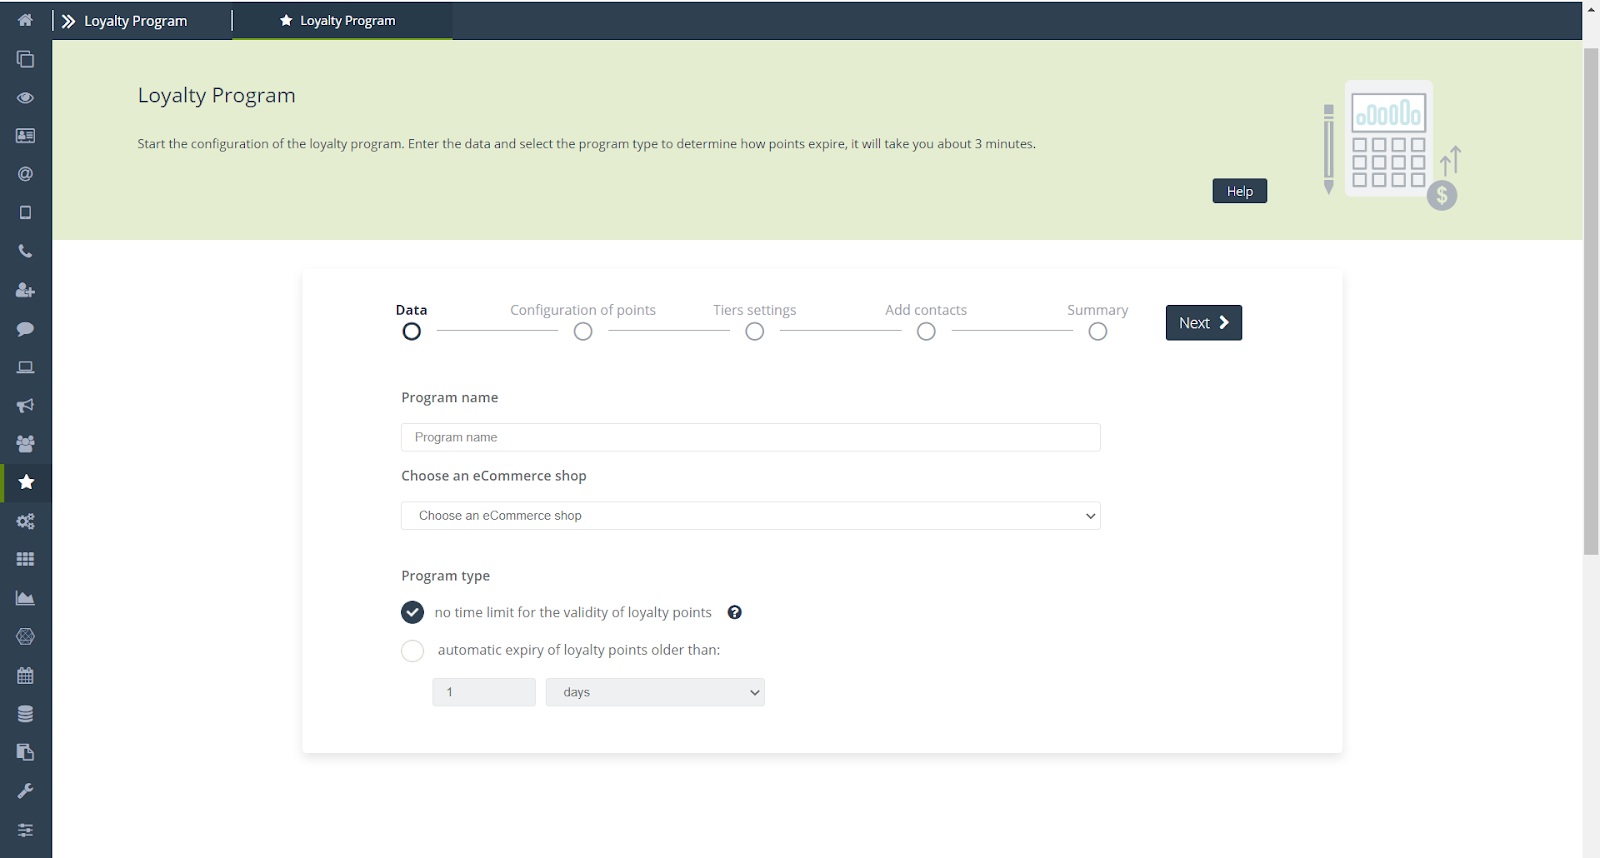
2. Data
The first step in creating a new Loyalty Program is entering basic data and selecting the program type to determine how points will expire.
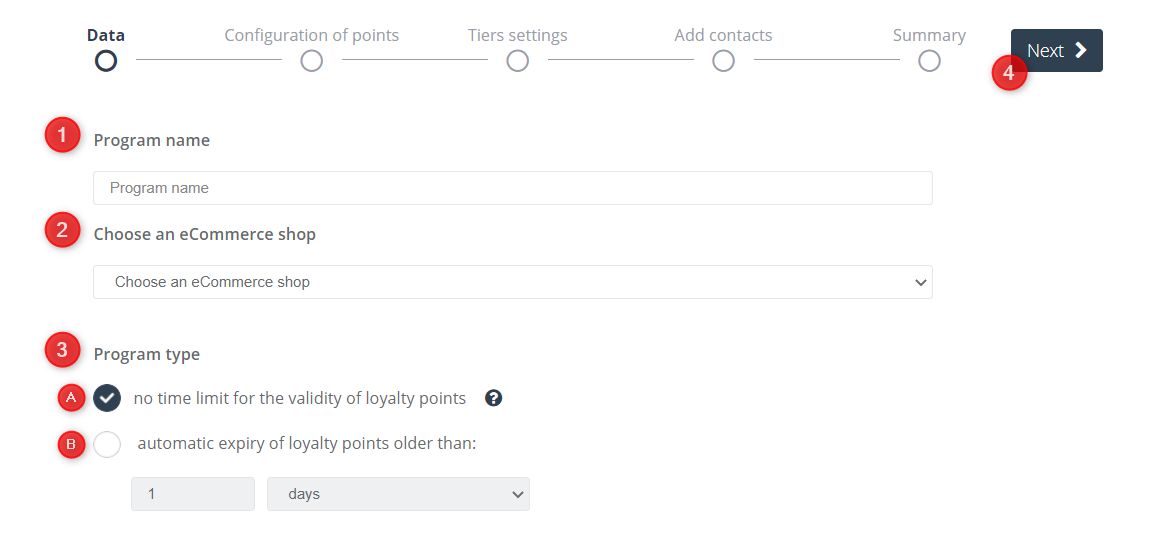
[1] Program name – Enter a unique name under which you will later find the analytics of your program. The maximum number of characters is 50.
See how the Loyalty Program Analyst in SALESmanago works >>
[2] Choose an eCommerce shop – use the drop-down list to select the e-shop (configured with your SALESmanago account) for which you want to create a new Loyalty Program. The Loyalty Program will operate based on transactions made in this e-shop.
IMPORTANT: For an External Event to be recorded (taken into account) in the Loyalty Program, the location field transferred in the External Event must be identical to the location field configured in the Product Catalog/the XML Product Feed.
[3] Program type – Define how your points will expire. You have two options:
[A] No time limit – Maximum time limit for points is 3 years. If you select this option, points collected by the users of the program will not expire before reaching the maximum storage time.
[B] Automatic points expiry – Specify the number of days, weeks or months after which the points in your Loyalty Program will expire by entering the number in the empty box.
[4] Next – Click the button to go to the next setup step.
3. Configuration of points
Configure points by selecting the ranges of spent amounts and the number of points awarded for each range. In addition to the basic amounts that you can fit in the ranges, you can give users additional points both from the point configuration panel and through the Automation and Workflow Rules.
See how to award extra points based on behavioral data using Automation Rules >>
See how to award extra points based on behavioral data using Workflow >>
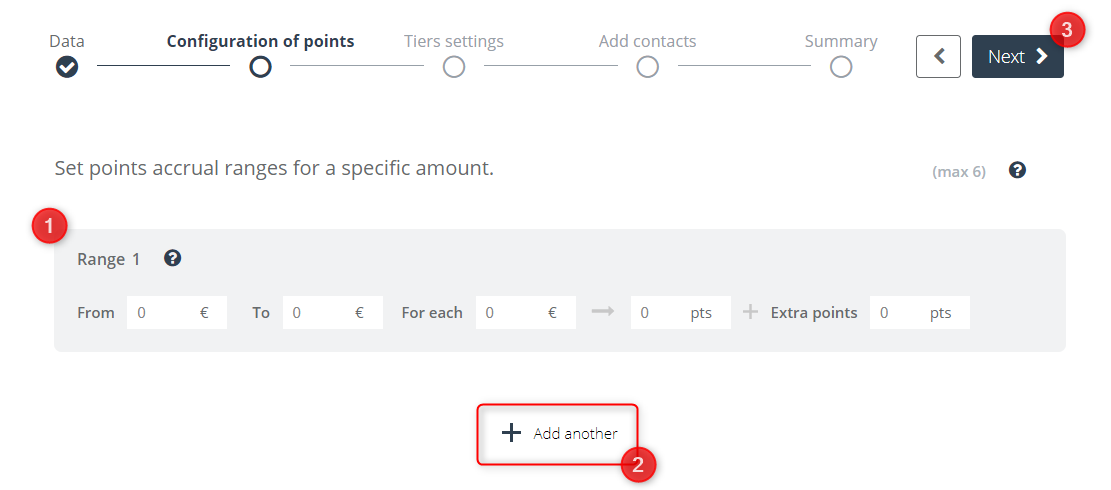
[1] Range – In the first two boxes, determine the minimum and maximum of the range of money spent for which the maximum number of points will be awarded, and then specify the point value for the selected spending range. You can also award extra points. In practice, this looks like:

In this case, if users purchase between €1,000 and €5,000, for every €50 spent, they will receive 10 program points and an additional 5 points. For example, suppose user X spent €2,500. For every €50 spent over the minimum of €1,000, he will receive 10 points. In this case, the user will receive 300 points + an additional 5 points, for a total of 305 points.
IMPORTANT: Currencies are automatically determined from the e-shop selected in the data entry step.
[2] Add another – You can add up to 6 different ranges; each subsequent range will automatically start with the amount that ended the previous range. You can delete a given range at any time by clicking the trash icon.
IMPORTANT: Transactions involving amounts not included in the ranges will not be taken into account. The ranges are left-closed intervals. That means, in the example above, €1,000 will be included in the range, but €5,000 will be included in range number 2.
[3] Next – Click the button to go to the next step of program configuration.
4. Tiers settings
In the third step, you will set the tiers of the Loyalty Program, which will make it possible to group participants based on the number of points earned and then use the tiers as an element of segmentation in Automation Processes in SALESmanago. Use tiers to build even more advanced campaigns in Rules and Workflow:
See how to use program tiers as a condition in Automation Rules >>
See how to use program tiers as a condition in Workflow >>

[1] Tiers – Enter the name of a given tier that will include all users whose number of awarded points falls within a specified range. Suppose we have created the following tiers in our program:
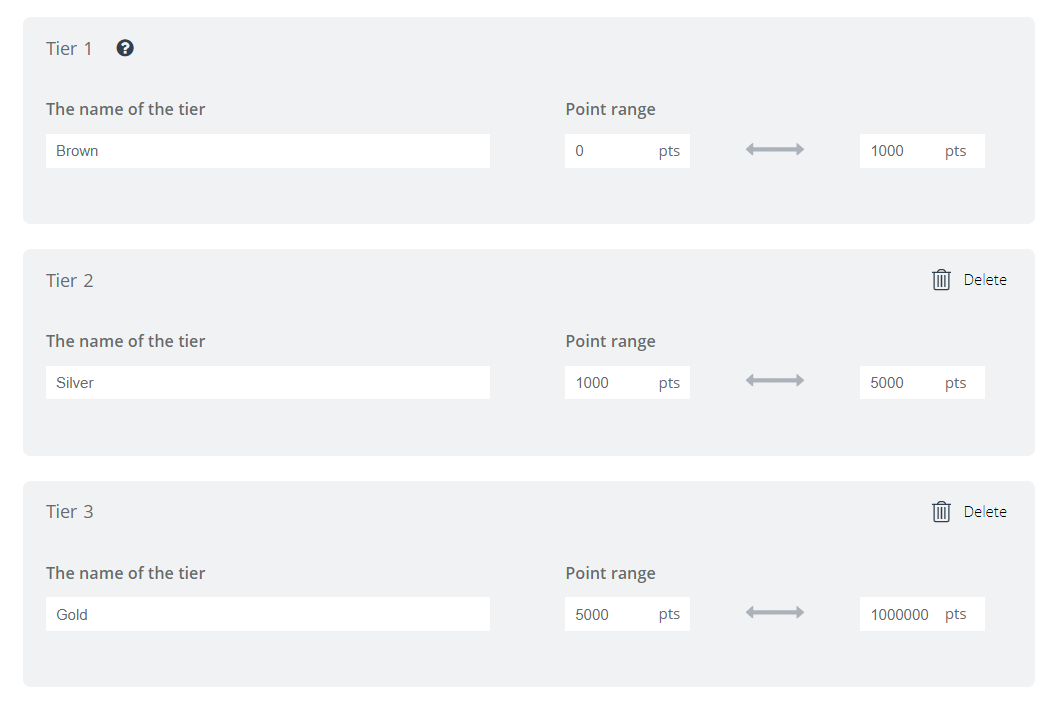
If a user has 4,500 points, that means she is in the Silver tier.
[2] Add another – You can add up to 6 different tiers; each subsequent range will automatically start with the number of points that ended the previous interval. You can delete a given tier at any time by clicking on the trash icon.
IMPORTANT: In this case, the intervals are also closed on the left side.
[3] Next – Click the button to go to the next step of configuring your program.
5. Add contacts
In this step, you will determine the method of adding contacts to the Loyalty Program.
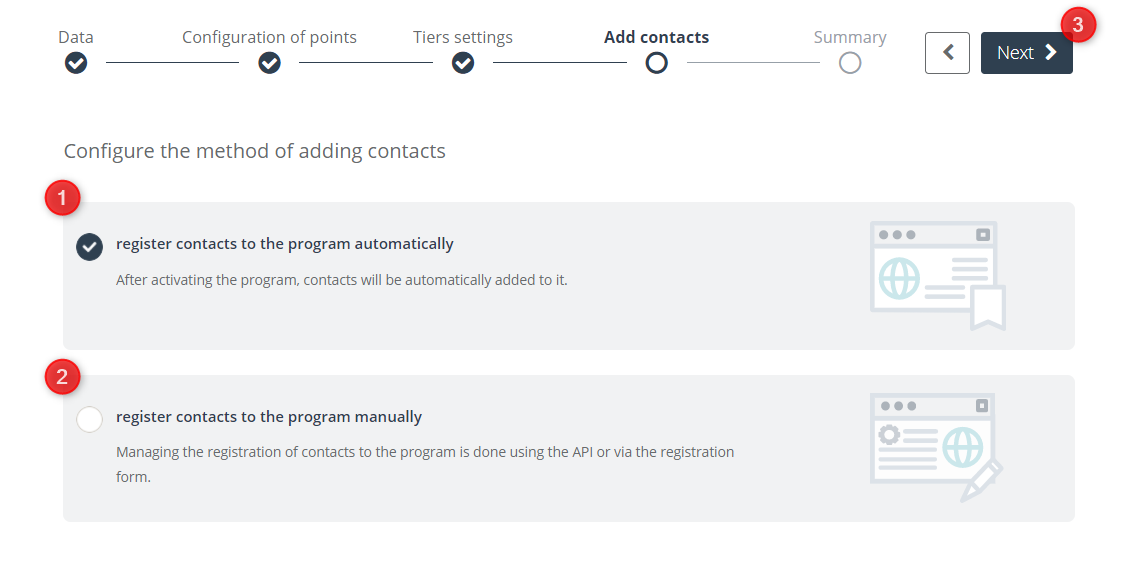
[1] Register contacts to the program automatically – By selecting this option, all contacts from your database will be added to the created program; their consent will not be required.
[2] Register contacts to the program manually – If this option is selected, contacts will not be automatically added to the program; they will be required to fill out a registration form (it is enough to add a checkbox to the form regarding the application form) or save using the API.
See how to add a checkbox with the registration form to the Loyalty Program >>
[3] Next – click the button to go to the last step of program configuration.
6. Summary
In the last step, you have the opportunity to review the entire program development process and either activate the program or save it as a draft.

Check if all settings are correct, and then:
[1] Save and activate – Click to immediately activate your Loyalty Program. You can also perform this action by clicking the [3] Save button.
[2] Save as a draft – Click to save your Loyalty Program but leave it inactive.