Useful links
You can use data collected through the Customer Preference Center to personalize your audience’s experience even better. One of the ways is to create a segment in the Customer Segmentation Center, which allows you to both manage the existing segments and create new ones. Adding a new segment is simple and intuitive. Thanks to predefined selectors, you can quickly and easily create relevant Contact groups. The system allows you to store up to 50 different segments.
To create a new segment based on Contact preferences, go to
Audiences → Segmentation → Segmentation Center → + Add a new segment
Contents
1. Basic information
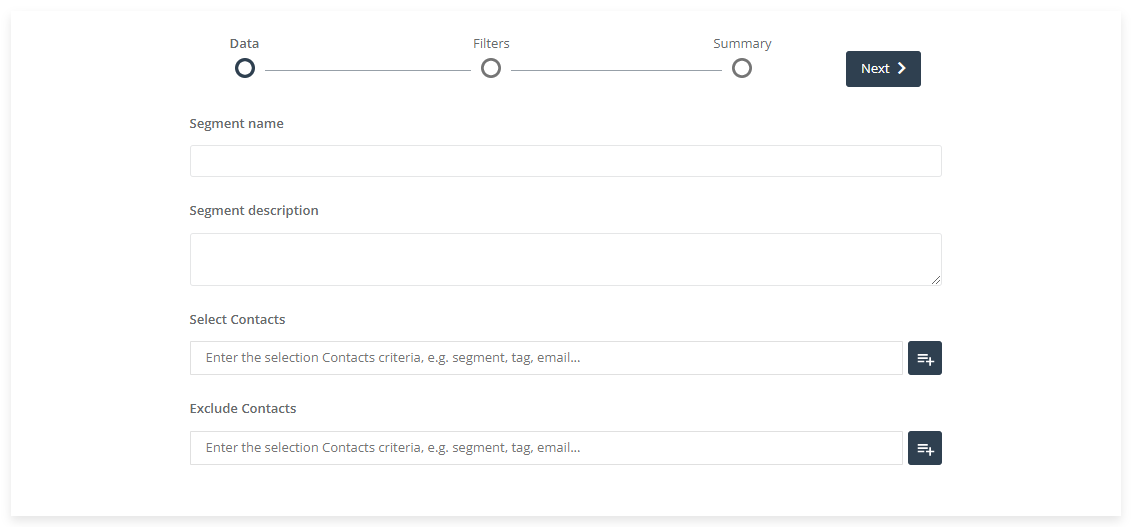
Build detailed segments based on customer preferences and address your messages to the right persons.
Create your new segment in the Customer Segmentation Center. Select (or exclude) the Contacts who have indicated appropriate preferences in the Customer Preference Center, as required. The segmentation wizard allows you to create detailed audience groups step by step using hyper segmentation, which considers consumers’ interests and behaviors to understand their individual preferences. Thanks to predefined Contact groups, you can engage all Contacts with a highly personalized approach. The wizard allows you to select predefined groups, such as “customers with high churn risk,” with a single click.
2. Creating a segment based on preferences
A. Data
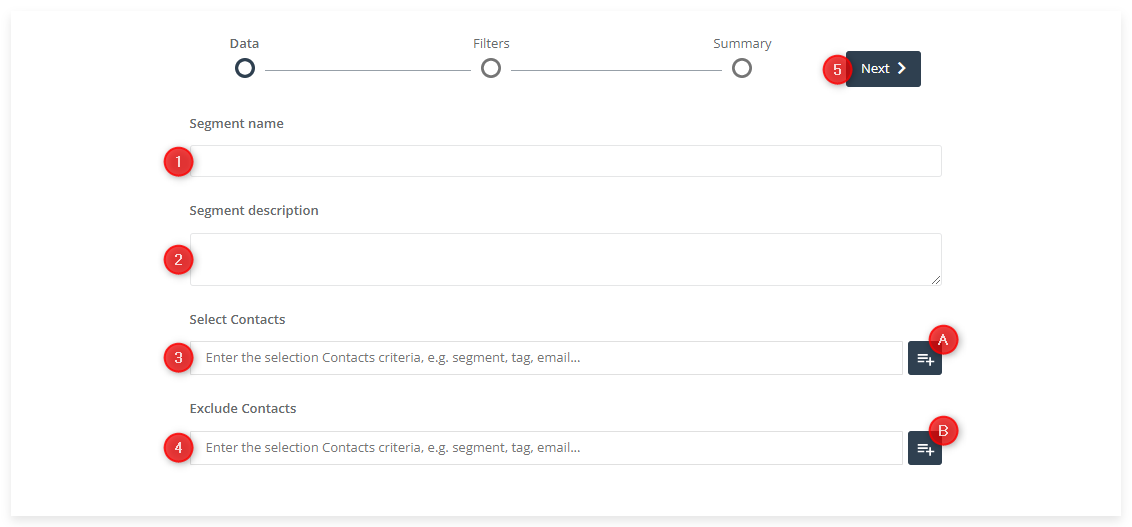
[1] Segment name – enter the name of the new segment that will later allow you to identify it in the system.
[2] Segment description (optional) – add a description that will provide additional explanation as to the types of Contacts included in this segment.
[3] Select Contacts – select Contacts or groups of Contacts that will comprise the segment. You can type the Contact selection criteria manually (e.g. segment name, tag, email address) and then select the desired element from the list of suggestions, or you can click on button [A] to use a list of predefined selectors.
After clicking on button [A], a new window will open.
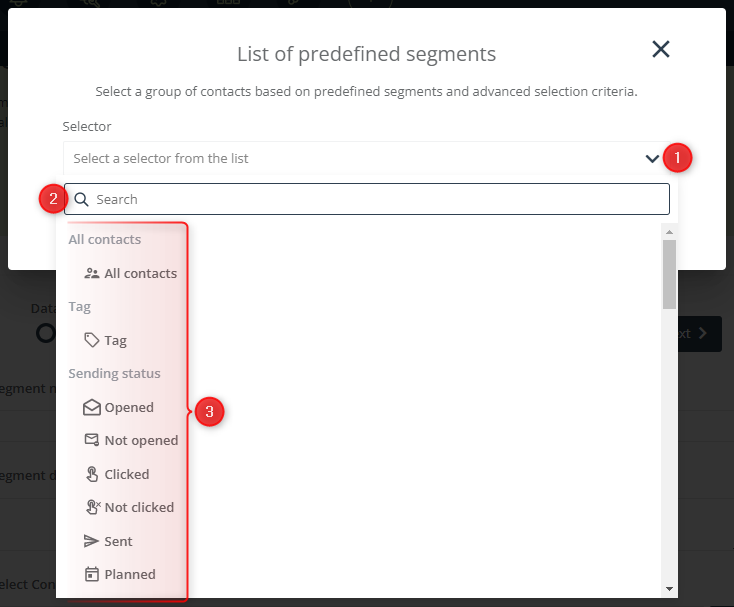
Start by expanding the selection menu [1]. Then enter the name of a selector in the search box [2] or search the selector list [3]. Add all Contact groups of interest and click Save.
[4] Exclude Contacts (optional) – where necessary, you can exclude from the new segment Contacts that should not be included despite meeting the conditions specified in the previous step (see step 3 above). You can type the Contact selection criteria manually (e.g. segment name, tag, email address) and then select the desired element from the list of suggestions, or you can click on button [B] to use a list of predefined selectors.
[5] Next – click to move on to the next segment creation step.
IMPORTANT: Selectors applied within a single segment are connected by the “or” operator. This means that for a Contact to be included in a segment, they need to meet at least one of the specified conditions.
A list of all selectors, including their descriptions, is available in this article:
Predefined Contact segments and selectors >>
i. Selectors related to the Customer Preference Center
To create a segment based on customer preferences, you need to choose the right selectors. The selectors that will allow you to build a segment using the data collected in the Customer Preference Center are: Preferred channel, Preferred frequency, and Key Information.
Preferred channel

This selector refers to the means of communication preferred by your Contacts (their favorite marketing channel). After clicking on this selector, you will see a list of channels with an indication of the Preference Center in which they were indicated. Check one or more boxes.
Preferred frequency
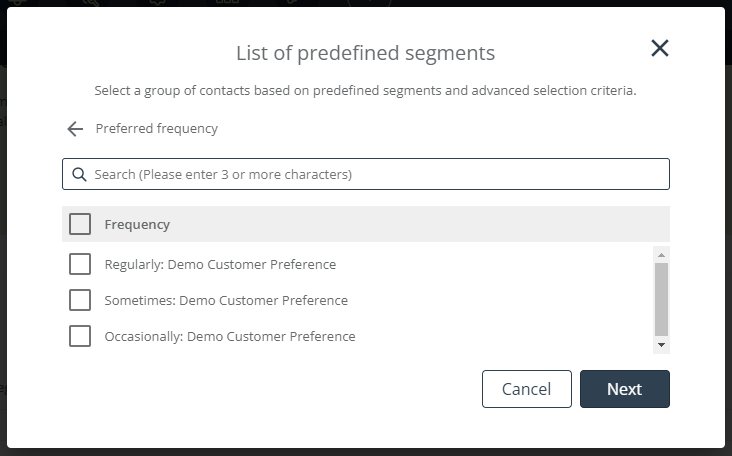
This selector refers to the communication frequency preferred by your Contacts. After clicking on this selector, you will see a list of frequency options (regularly, sometimes, occasionally) with an indication of the Preference Center in which they were indicated. Check one or more boxes.
Key Information
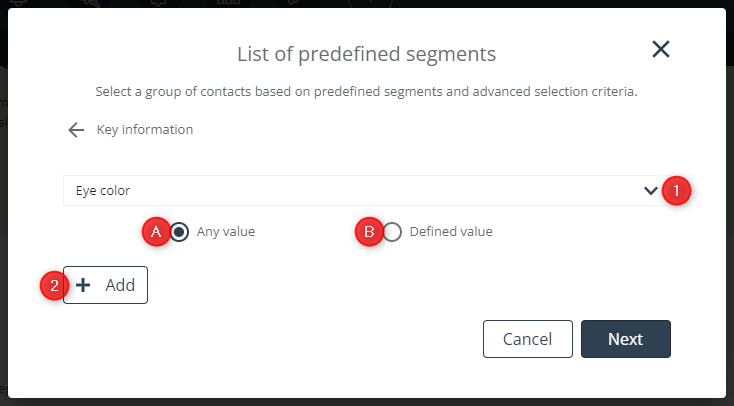
Key Information is a parameter that refers to a specific feature or preference of a Contact. It comprises two parts: attribute and value. The attribute is what the information concerns, whereas the value allows you to define the attribute specifically. To create a segment based on this data, use the drop-down list [1] to select the attribute that you want to use. Then decide whether the segment is to include Contacts who have provided Any value [A] or a Defined value [B] of the selected attribute. In the case of a Defined value [B], you will see a drop-down list. Use it to select the attribute value that you want to apply. You can use more than one attribute value in a single segment. Click + Add [2] to add further values.
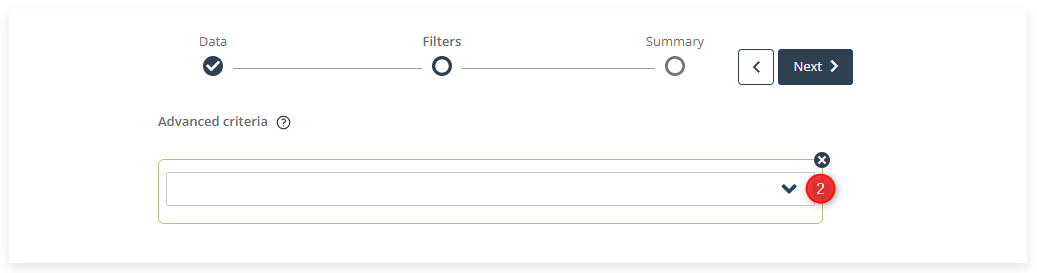
B. Filters
The filtering options allow you to define your new Contact group even more precisely. To add a filter, click on + Add filter [1].

Then use the drop-down list [2] to select a filter. Depending on your selection, you will see different settings. Specify the filtering criteria as required.
IMPORTANT: Filters are connected by the “and” operator. This means that for a Contact to be included in a segment, they need to meet all specified conditions.
You can find more detailed information on filtering in this article: Advanced email addressing options – Filtering >>
When your Contact group is ready, click Next to proceed to the Summary, where you can save your new segment by clicking on Save.