Useful links
The Email Design Studio is a state-of-the-art email designer that allows you to engage your customers and increase conversions while building true intimacy with your audience.
Learn more about the Email Design Studio >>
One of the prominent features available in the Email Design Studio is the Style Manager, which allows you to define the default appearance (including size, colors, fonts, positioning, etc.) of each widget available in the Email Design Studio. This way, when you create a new email, you don’t need to configure individual widgets from scratch.
You can create more than one style and easily switch between them.
If you have only one brand, you can use the Style Manager to create your default style and use it in a way similar to the Library >> – this way you will not need to search the Library each time you want to add a pre-configured widget to your email. The Style Manager can be even more useful if your company has more than one brand, each with its own branding style. You can also design special styles for certain special times of the year, such as Christmas time, spring/summer/fall/winter, Black Week, etc.
Contents
- Getting started
- Create a new style
- Apply a style to your email
- Edit or delete a style
- The Style Manager and the Library: Comparison
1. Getting started
The Style Manager is a feature available in the Email Design Studio—the only mobile-first email designer with conversion tools and zero-party data capabilities.
Make your first steps in the Email Design Studio >>
The Style Manager allows you to define the default appearance of each widget available in the Email Design Studio. This way, when you create a new email, you don’t need to configure individual widgets from scratch: when you drag and drop a widget into the email body, it already has all the properties defined in the Style Manager.
You can easily switch between different styles, even within the same email.
Why use the Style Manager?
- Save time and effort when creating new emails.
- Ensure consistent brand communication.
- If your company owns two or more brands, you can easily differentiate between their branding styles. Use the Style Manager to create a separate style for each brand and switch between the styles whenever you create a new email.
- If your emails are going to have a special design for a longer time (e.g., the two months during which you are going to promote your new product collection), you can define a new style specifically for this campaign and save yourself time and effort each time you create a new email.
Read on to learn how the Style Manager works and how it can be useful to you.
2. Create a new style
To access the Style Manager, go to the Email Design Studio and select the appropriate tab on the main menu:
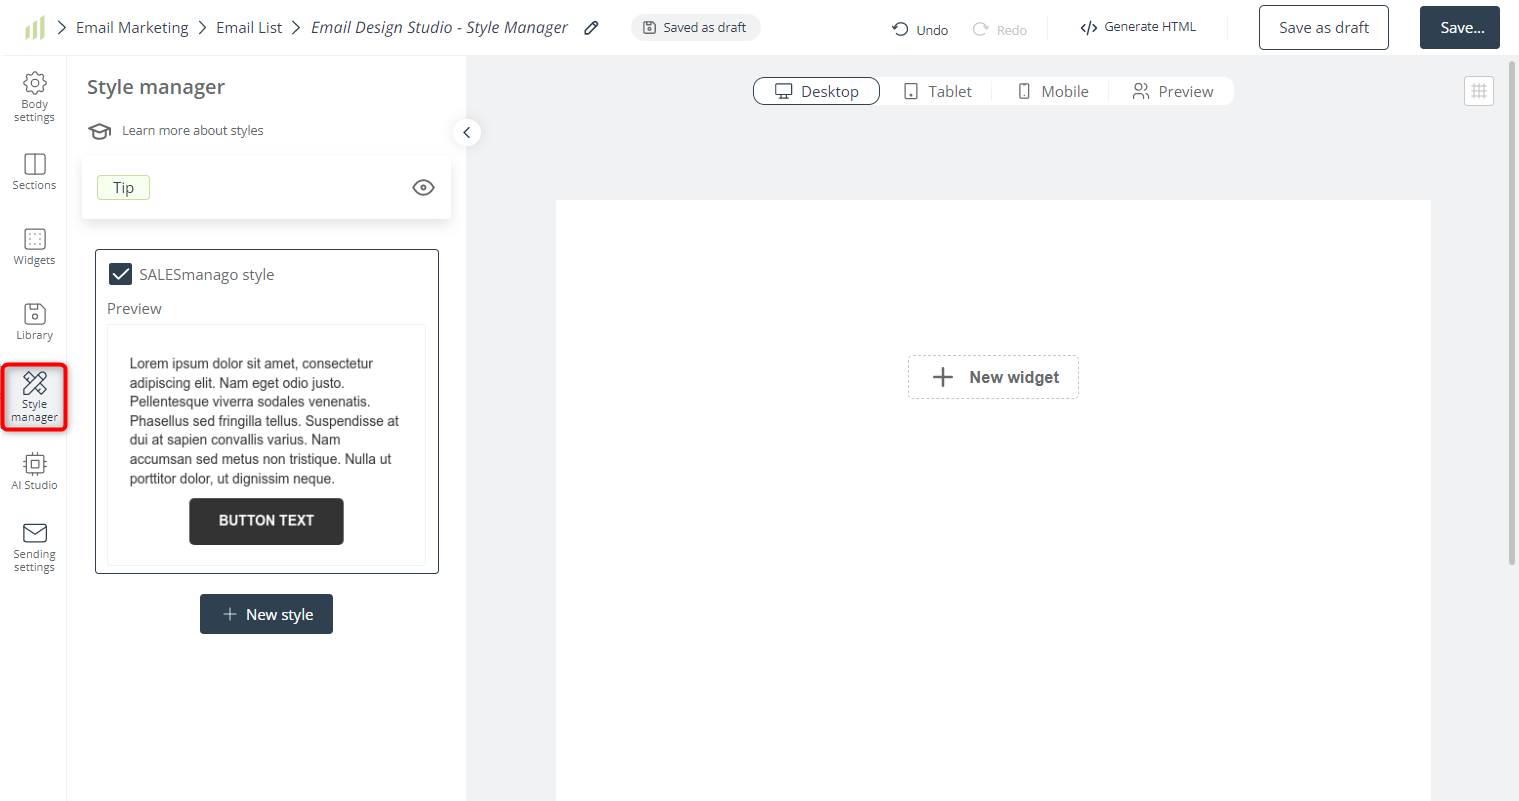
Note that the SALESmanago style (visible in the screenshot above) is present by default and cannot be deleted.
To create a new style, click on this button:
You will see the following panel:
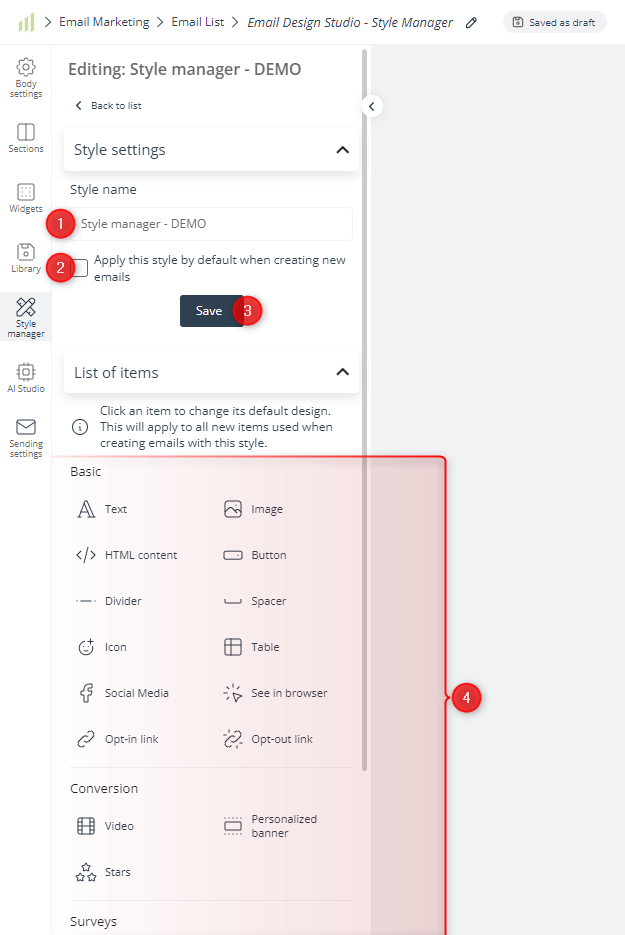
[1] Style name—enter a name for your new style that will allow you to easily identify it among other styles.
[2] Apply by default—you can check this box for the most standard or the most frequently used style. Whenever you create a new email, this style will be applied by default from the moment you start working with the Email Design Studio.
Only one style can be selected as default at a time. If no style is selected as default, the SALESmanago style will be the default one.
[3] Save—make sure to click this button if you want to save any changes applied in the Style settings section.
[4] List of items—a list of all widgets available in the Email Design Studio. Each widget can be freely designed and configured to match your branding style or your current needs.
A. Configure individual widgets
When you have created a new style and defined its basic settings, you can configure individual widgets to match your branding style or your current needs.
Widgets can be configured in terms of visual appearance, but also positioning (alignment and padding) and display settings.
To configure a widget, just click on it and it will appear in the email body. You can configure only one widget at a time.
After selecting the widget you want to configure, define its desired properties. The options and settings are exactly the same as those you can find in the Widgets section of the menu.
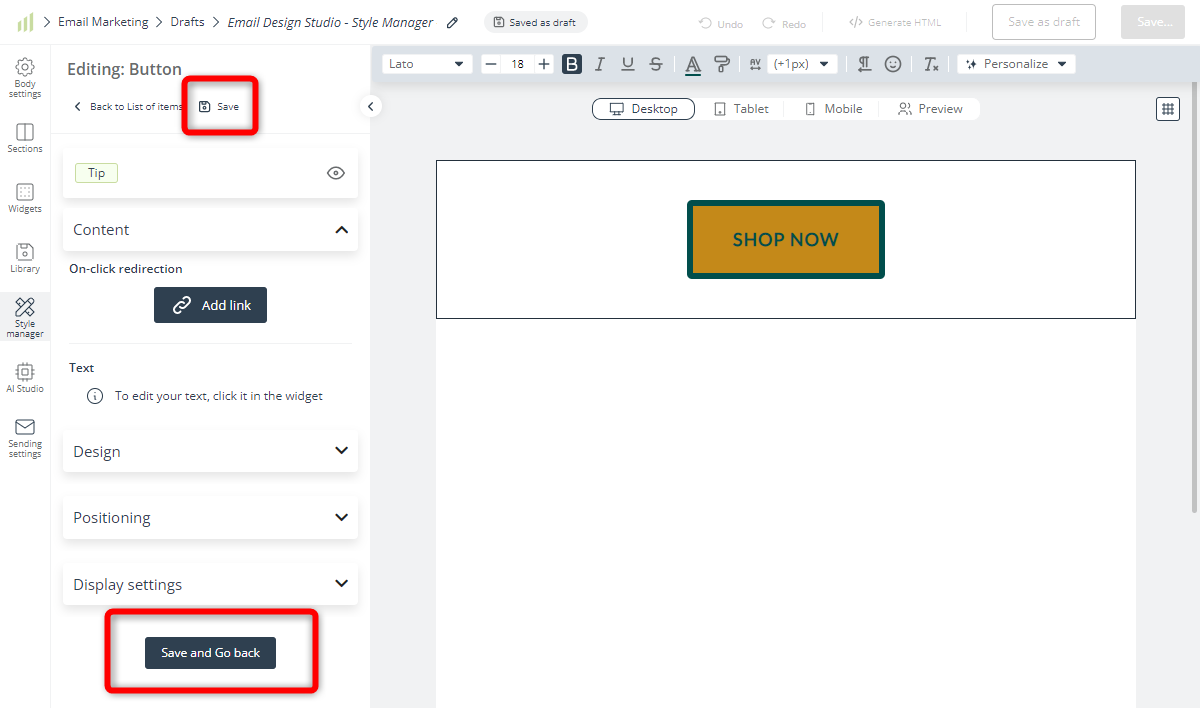
When you have configured the widget as required, for example:

go to the left-side panel and save the configuration by clicking one of the buttons shown below:

The configured widget has just become an element of your new style. Now you can proceed to configuring other widgets.
You can configure any number of widgets for each style, however, each individual widget can be configured only in one way.
After applying this style to an email, if you go to the Widget section of the menu and drag a widget into the email body, that widget will already have the appearance you designed for it in the Style Manager.
3. Apply a style to your email
To apply a style to an email, go to the Style Manager section of the menu and find the style on the list. Select it by checking the box next to its name.
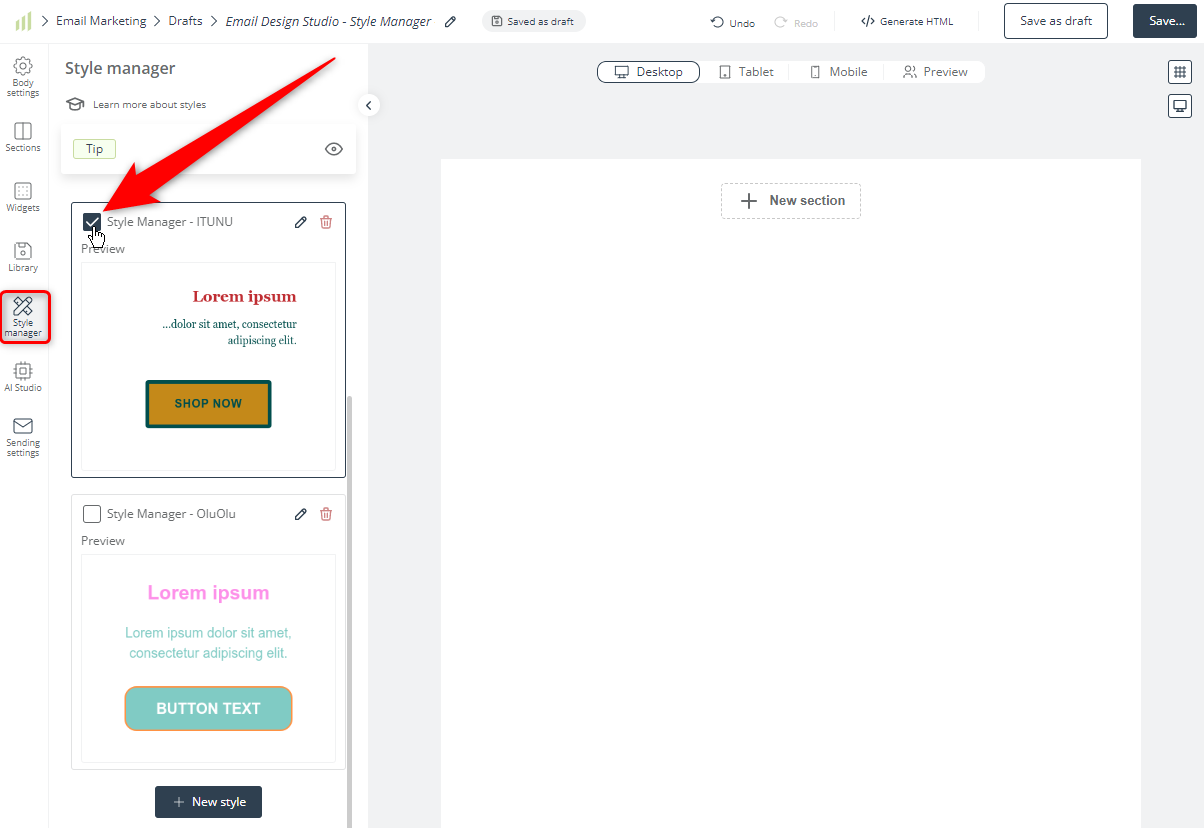
From now on, each time you drag a new widget into the email body, that widget will have the design and configuration specified in the Style Manager. However, after dragging a widget into the email body, you can still freely modify all its properties.
Note that if you don’t customize a widget in the Style Manager, that widget will continue to have the default appearance and properties.
If you want to stop using a style, go to the Style Manager and select another of your styles or the default SALESmanago style.
4. Edit or delete a style
You can edit a style by editing one or more widgets making up that style. To do this, go to the Style Manager, find the style of interest on the list, and click the pencil icon.

Click on the widget you want to edit (or configure for the first time). It will appear in the email body. Make any necessary modifications and save them by clicking one of the following buttons:
That’s it! If you go to the Widget section of the menu and drag the modified widget into the email body, it will already have the new appearance and properties.
To delete a style, click on the trash can icon:

Note that once you confirm that you want to delete the style, this action will be irreversible.
5. The Style Manager and the Library: Comparison
The Email Design Studio offers two powerful features that allow you to save time and ensure consistent brand communication: the Style Manager and the Library.
The Email Design Studio Library >> performs a similar function as the Style Manager, however, there are situations where you may prefer one over the other. For instance, if you manage Email Marketing activities for a number of brands and save various email elements for all of those brands, the Library may grow big over time and it may take some time to find the right element. Also, if you only use the Library, you need to search it each time you want to add a pre-configured widget. With the Style Manager, all you need to do is apply the right style and then just drag and drop subsequent widgets from the Widget section of the menu—they will already have the design you created for them in the Style Manager.
On the other hand, the Library allows you to store complete sections, not only widgets.
EXAMPLES:
| CASE | RECOMMENDED ACTION |
| You send a weekly newsletter to your Contacts, each time using a different banner at the top of the email. The image changes every week, but other properties (size, positioning, padding, etc.) remain the same. | Define the default appearance of the Image widget in the Style Manager. Each time you create a new email, all you need to do is drag the Image widget into the email body and select a new image from the gallery. |
| You send a weekly newsletter to your Contacts, always including the same banner at the top of the email. The Image widget containing the banner always has the same properties (same image, size, positioning, padding, etc.). | Add the Image widget to the Library. Each time you create a new email, all you need to do is drag the widget from the Library into the email body. At the same time, you can use the Style Manager to configure the default appearance of the Image widget so that it will fit a different purpose. (On the other hand, if you don’t need the Image widget for any other purpose, you might as well add the banner as an element of your default style). |
| Your emails always end with the same footer, which has the form of a section including the following widgets: Divider, Social Media, Text, and Opt-out Link. You don’t want to configure the footer from scratch (or duplicate a previous email and then change the necessary details) each time you create a new email. | Add the entire footer section to the Library and simply drag it into each new email. |
| Spring is coming! You are a gardening company and you want to give your emails a spring atmosphere throughout March and April. During these months, you are going to use a special banner, a different font, and special button and image designs. | Create a new style in the Style Manager and design emails quickly and conveniently throughout the spring season. It’s summer already? Don’t delete the new style, keep it for next year and save even more time! |