SALESmanago Live Chat is an Enterprise solution with advanced functionalities based on AI for large eCommerces. The intuitive wizard allows you to design a chat window perfectly suited to your website with extensive customization options. Personalize the welcome message in the chat and automate its display depending on the subpage viewed by the user. Measure customer satisfaction through ongoing analysis of conversation assessments, monitoring of reported problems and the way consultants solve them.
In order to create a new Live Chat in the creator, you need to go to
Web Tools→ Live Chat → Live Chat Panel
Contents
- Introduction
- Devices
- Appearance
- Request for contact details
- Inactive consultant
- Settings
1. Introduction
The Live Chat Creator in SALESmanago gives you unlimited possibilities to create visually personalized chats. Create your own gradient views, add a shadow, round your Live Chat, or even make it transparent. Select separate chat display options for smartphones and desktop devices.
2. Devices
In the first stage of creating a new LiveChat, select the devices on which it will run:
- Desktop – LiveChat will only be displayed on desktop devices.
- Smartphone – LiveChat will only be displayed on smartphones.
- Desktop and smartphone – LiveChat will be displayed on every device.

If you have selected the Desktop and smartphone option for each stage of creating a new Live Chat, you can adjust the independent design and display settings for both types of devices.

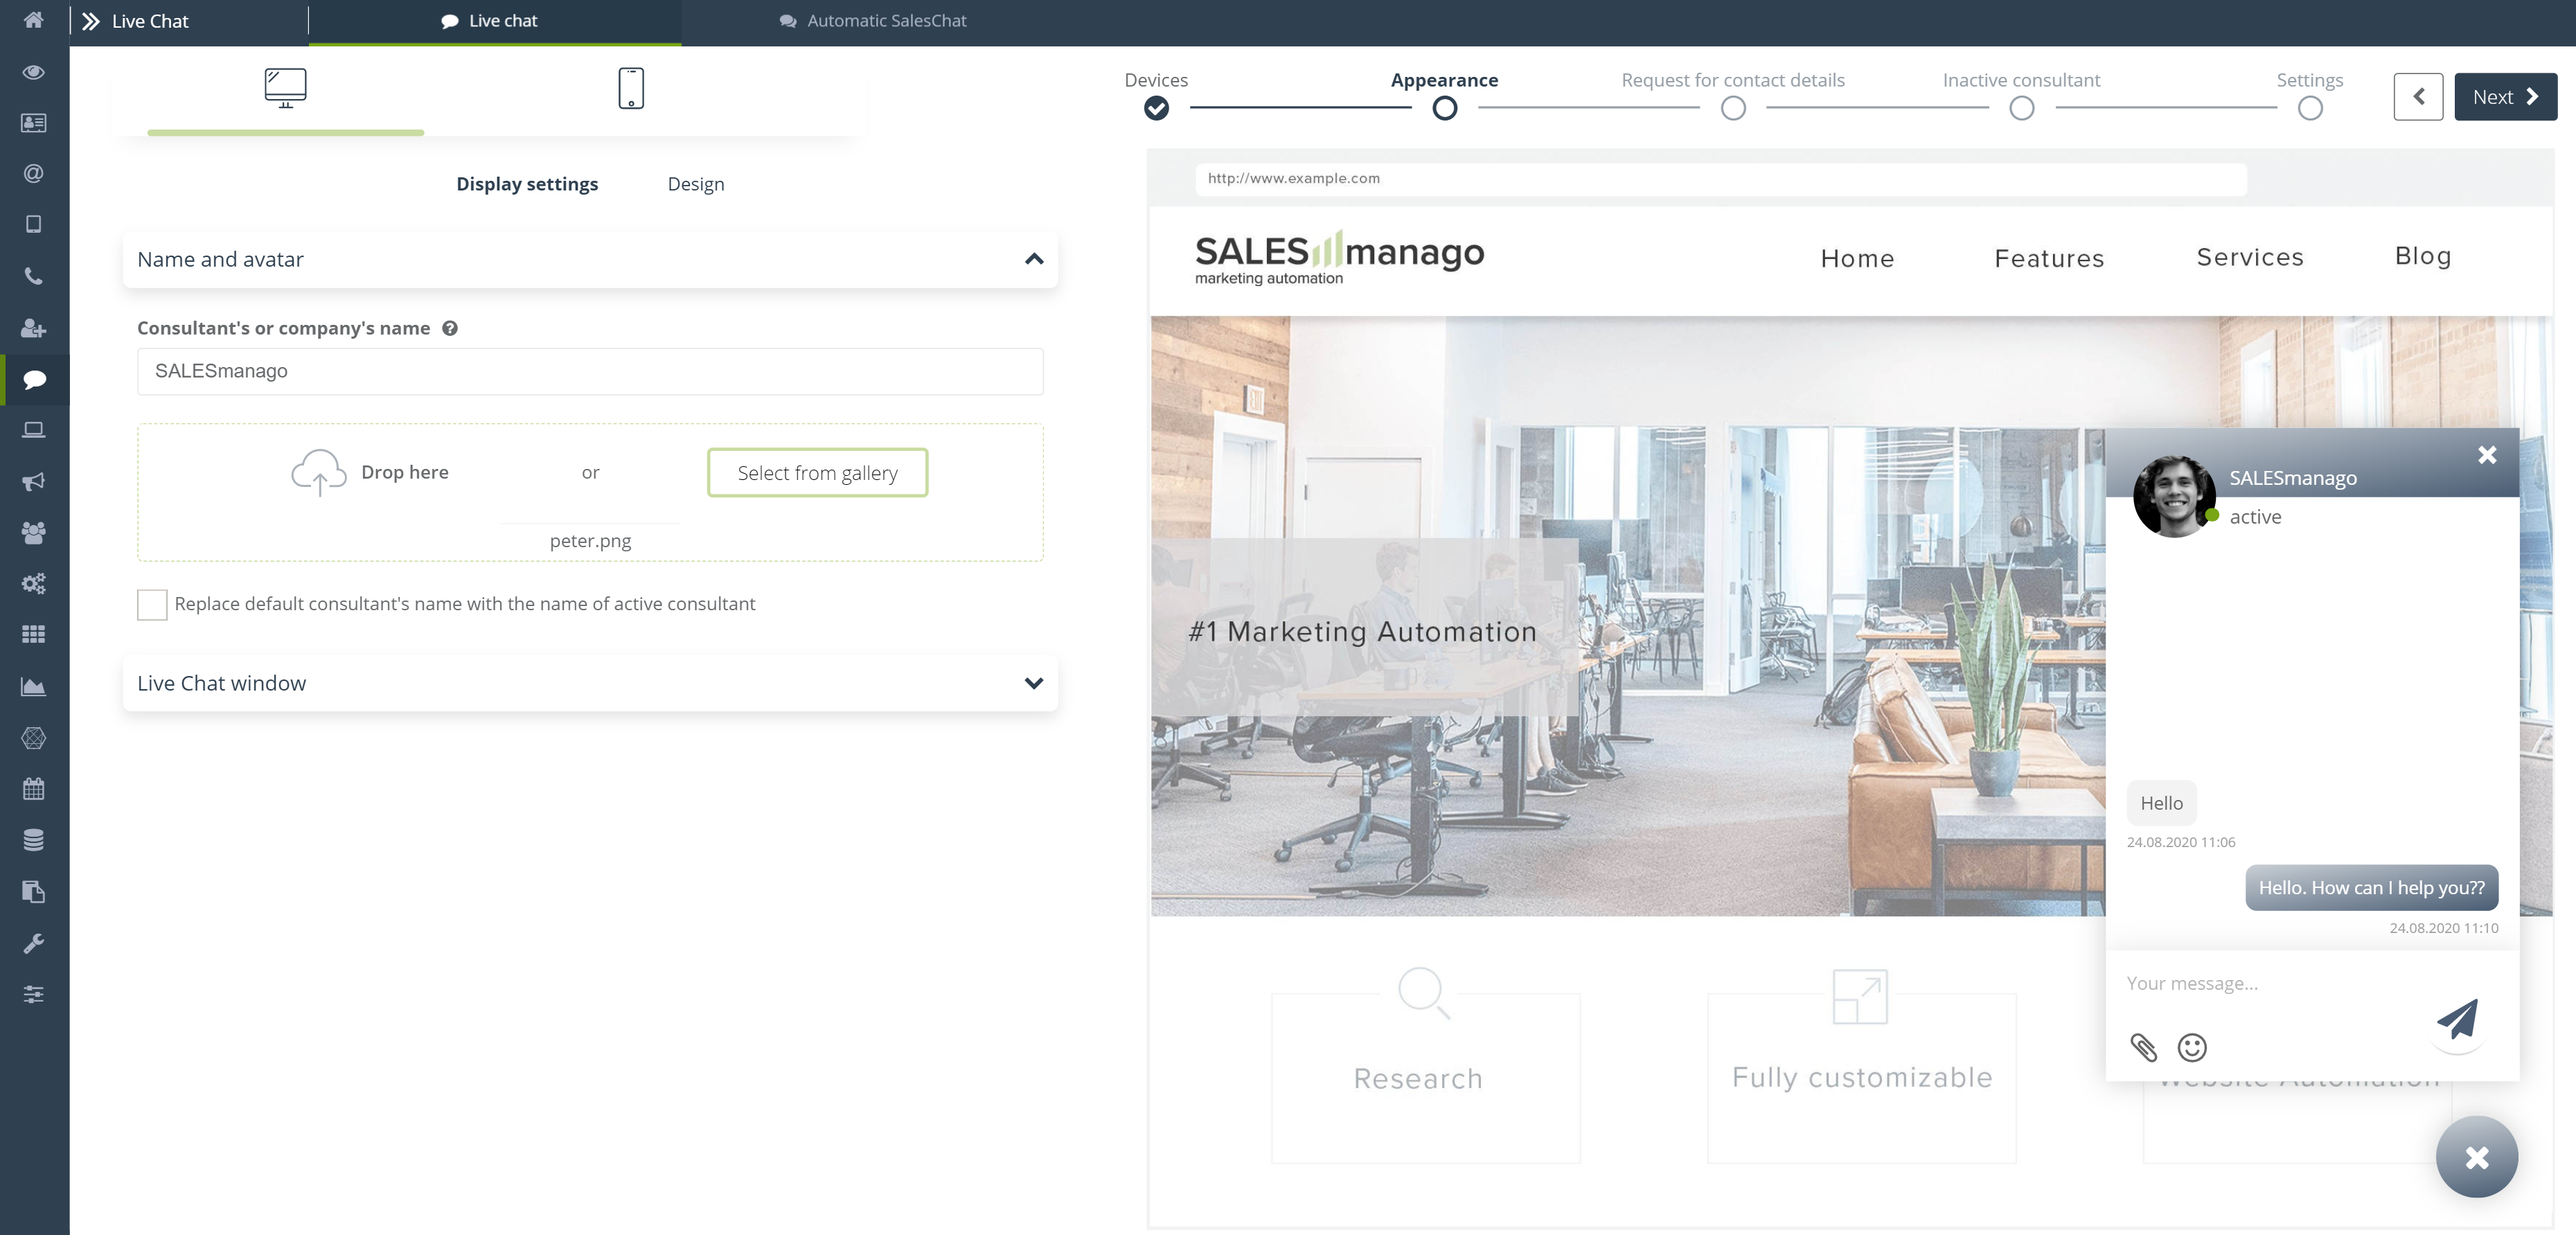
3. Appearance

[1] Display settings – specify how the Live Chat window will be displayed on your website:
[A] Consultant’s or company’s name – the given name and avatar will also be displayed for the bot. You can use up to 24 characters.

[B] Consultant’s avatar – choose a photo to display as your consultant’s avatar. You can choose a file from the gallery or add your own by dropping it to the designated place:

[C] Replace default consultant’s name with the name of active consultant – the avatar and name will be changed to the details of the consultant taking the conversation that were set in the process of creating a new consultant.
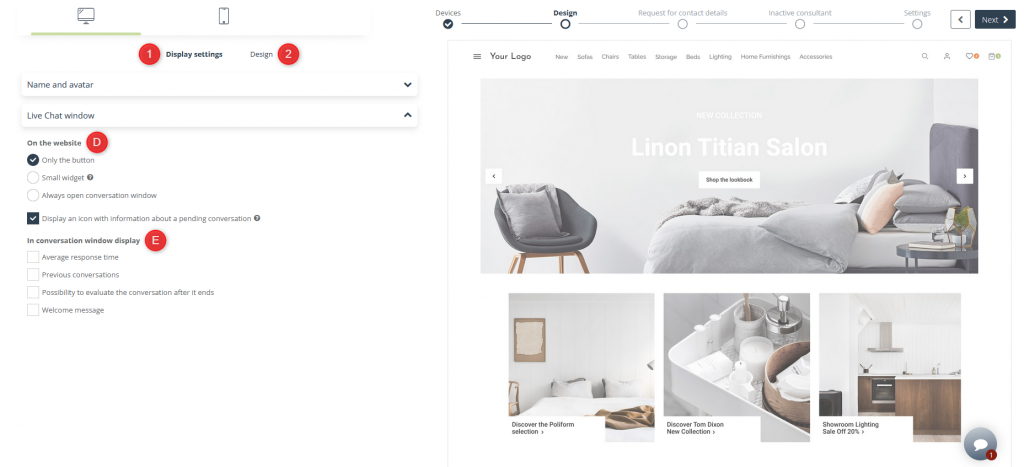
[D] The way in which Live Chat is displayed on the website – there are 3 ways you can display your chat on a website:
- Only the button – set a minimalistic button which, when pressed, will expand the Live Chat window:
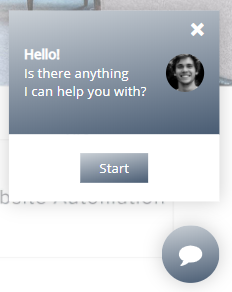
- Small widget – set the button together with a small widget. After pressing the “Start” button (which you can personalize in the next steps), or the button icon, the Live Chat window will open:
- Always open conversation window – position the button with the expanded conversation window. After pressing “x”, the conversation window will roll down to the button.

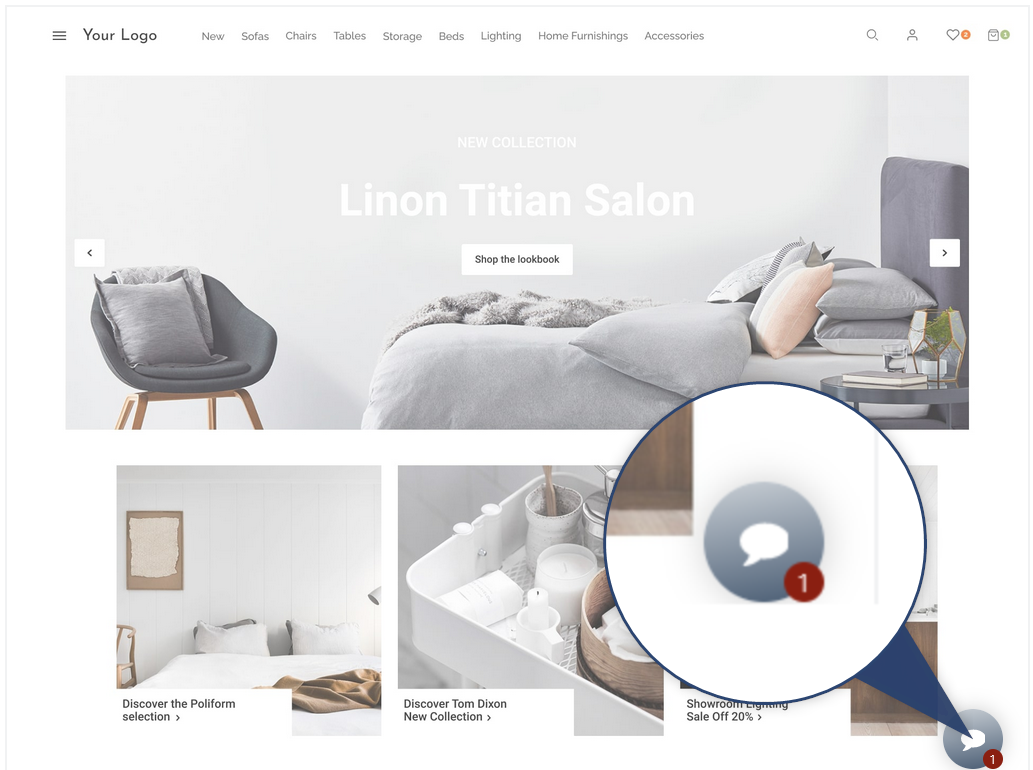
Display an icon with information about a pending conversation – check if you want the icon with information about the pending conversation will always be displayed when a contact makes a new visit to the site. The eye-catching mark will encourage the user to click on the chat icon.
[E] Additional display options in the conversation window – to make your Live Chat even more varied, SALESmanago gives you additional options to personalize your chat:
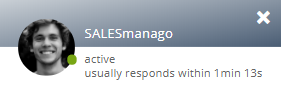
- Average response time – is calculated for a specific Live Chat, regardless of the consultant who takes the chat. It is calculated in the perspective of a month as the average time between responses from the beginning of the conversation with the user to its end.
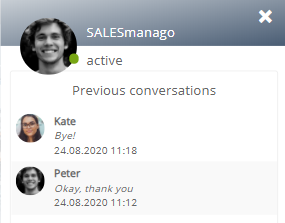
- Previous conversations – display a window with the possibility of previewing previous conversations conducted by the client in Live Chat. After selecting a specific conversation, it will be displayed in the Live Chat window.
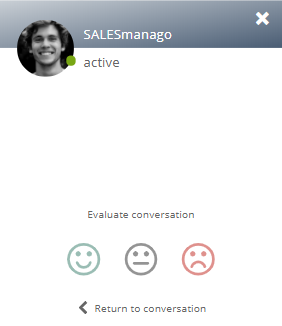
- Possibility to evaluate the conversation after it ends – add the option to evaluate the chat after its completion. The rating can be changed by the user within 12 hours after the end of the conversation with the “Return to conversation” function. The previous rating will be overwritten.
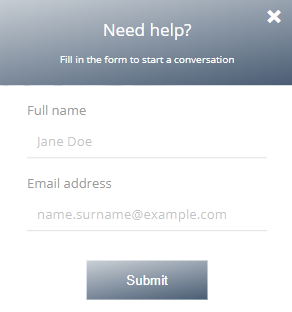
- Welcome message – set the opening message that will always be displayed when the user enters the Live Chat window to start a conversation.
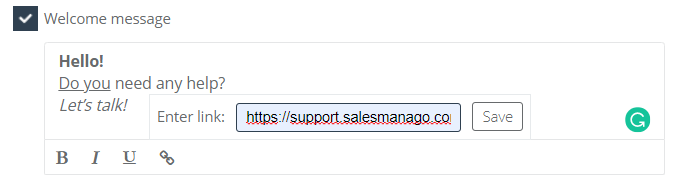
You can freely personalize your welcome message by linking the text. making it bold, italic or underlined. The maximum number of characters allowed in the content window is 255. This is how your welcome message will be displayed:

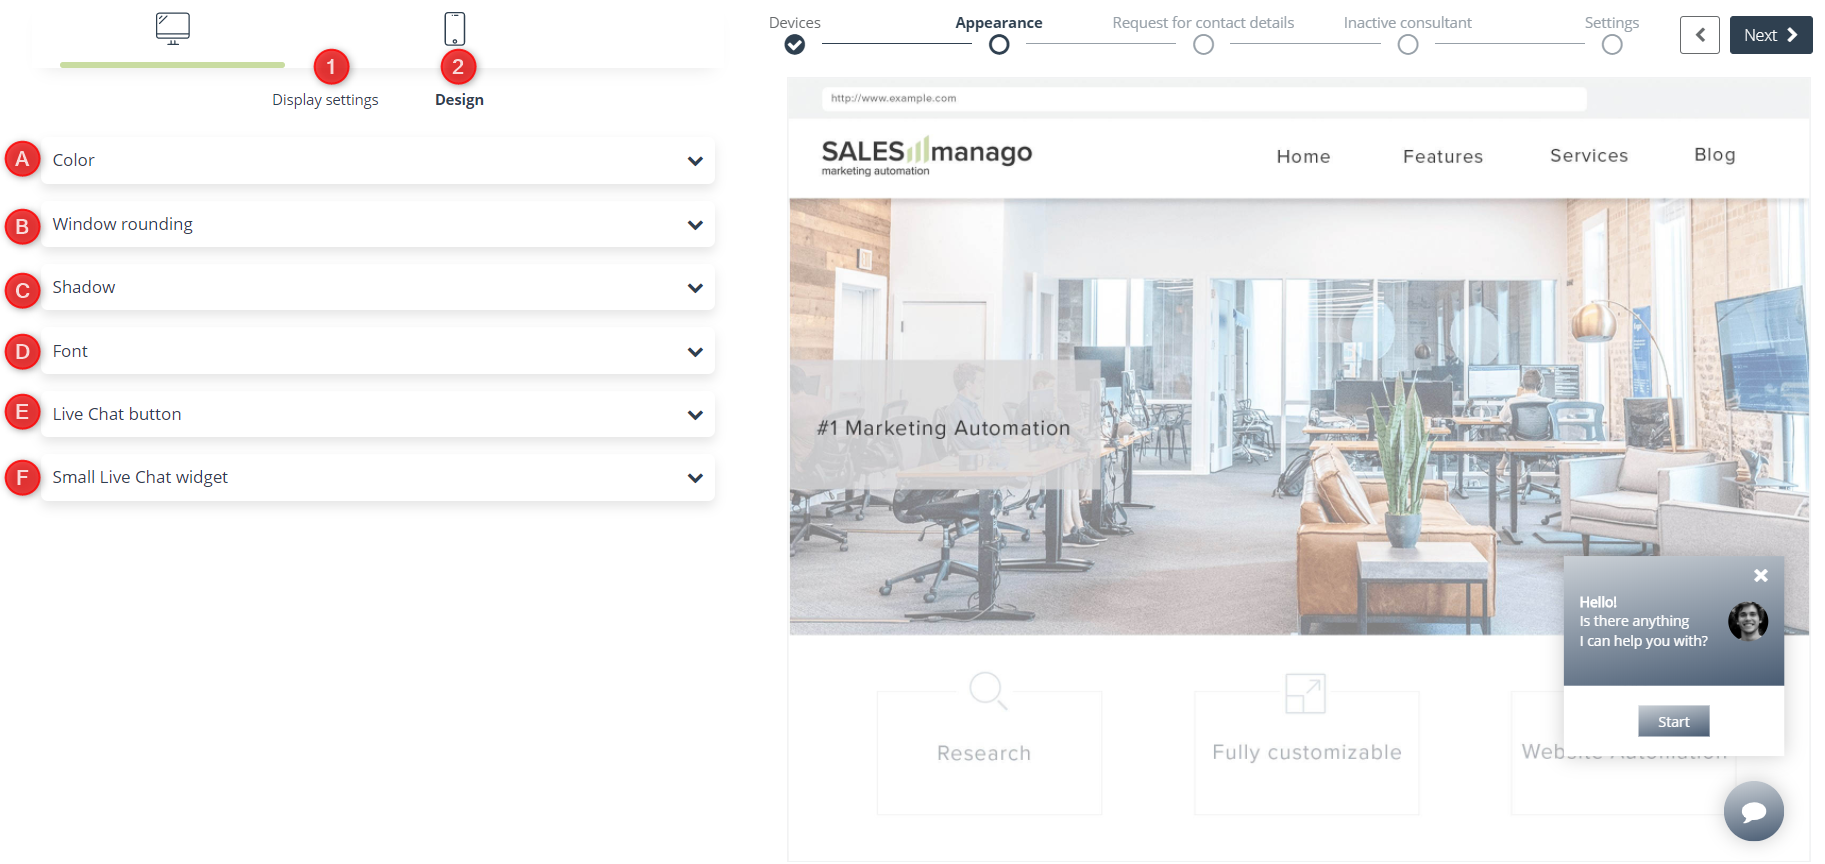
[1] Design – configure the appearance settings of the displayed Live Chat on your website:
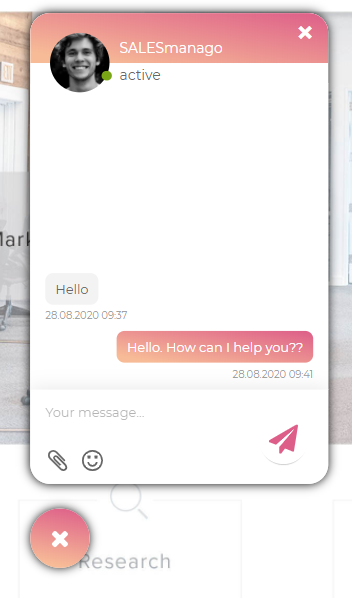
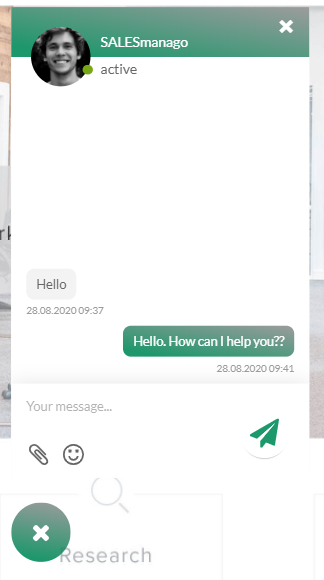
[A] Color – Choose a ready-made color theme for your Live Chat in gradient or flat color, or customize your own color settings:

Color distribution in Live Chat with full-opened conversation window:
Color distribution in Live Chat with a small widget:
[B] Window rounding – define the shape of your Live Chat window, you can choose to round it on a scale of 0-20:
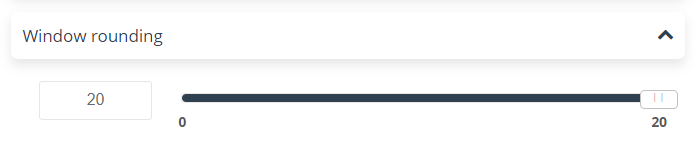
The rounding of the Live Chat window looks like the following examples, for:
- Full-opened conversation window
- Small widget
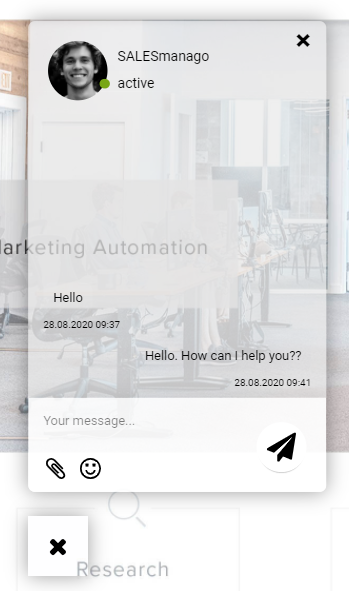
[C] Shadow – define the span of the shadow in Live Chat on a scale from 0-20px, you can also choose its color using the colour palette.
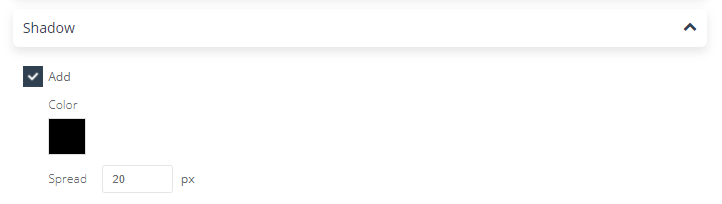
The Live Chat window shadow looks like the following examples, for:
- Full-opened chat conversation:
- Small widget
[D] Font – select the text font in Live Chat from the drop-down list:
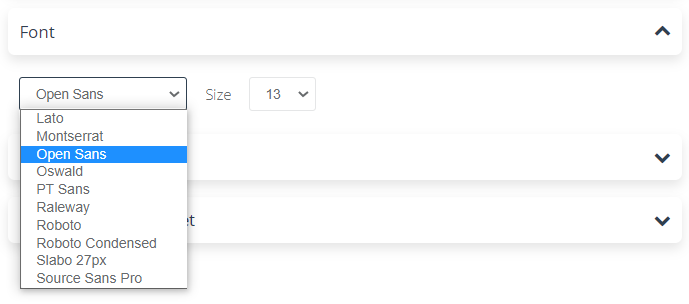
You can also determine its size on a scale of 10-20.
[E] Live Chat button – specify the exact appearance settings of the Live Chat icon:

- Icon – choose the appearance of your Live Chat icon, you can choose from the designs prepared by SALESmanago:
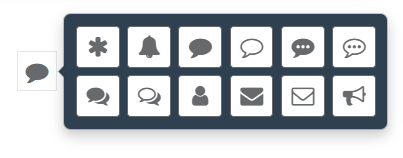
or upload your own image as a new button. The selected file will fit into its shape.
- Button shape – choose the shape of the displayed button from among the three available variants:

- Position on page – specify the location of your button on the website, you can use a simplified scheme by selecting only on which side the Live Chat will be displayed, or specify its exact location by changing its position vertically and horizontally by specifying the distance from the sides of the page in px.

[F] Small Live Chat widget – specify settings for the small Live Chat widget:
- Display message – enter the text you want to be displayed on a small widget encouraging the customer to start a conversation. You can personalize it freely by bolding, making italic or underlining its elements. Choose which side you want to align the text to, or whether you want to center it. The font is automatically adjusted to the one selected in [C]. Its size cannot be changed.
- Background image – instead of the usual background color, you can choose any image from the gallery, or add a file from your computer, which will automatically adjust to the size of a small widget. You can set opacity for it and blur (on a scale of 0-10px).

4. Request for contact details
The next step in creating a Live Chat is determining the visual and informational details of the contact form.
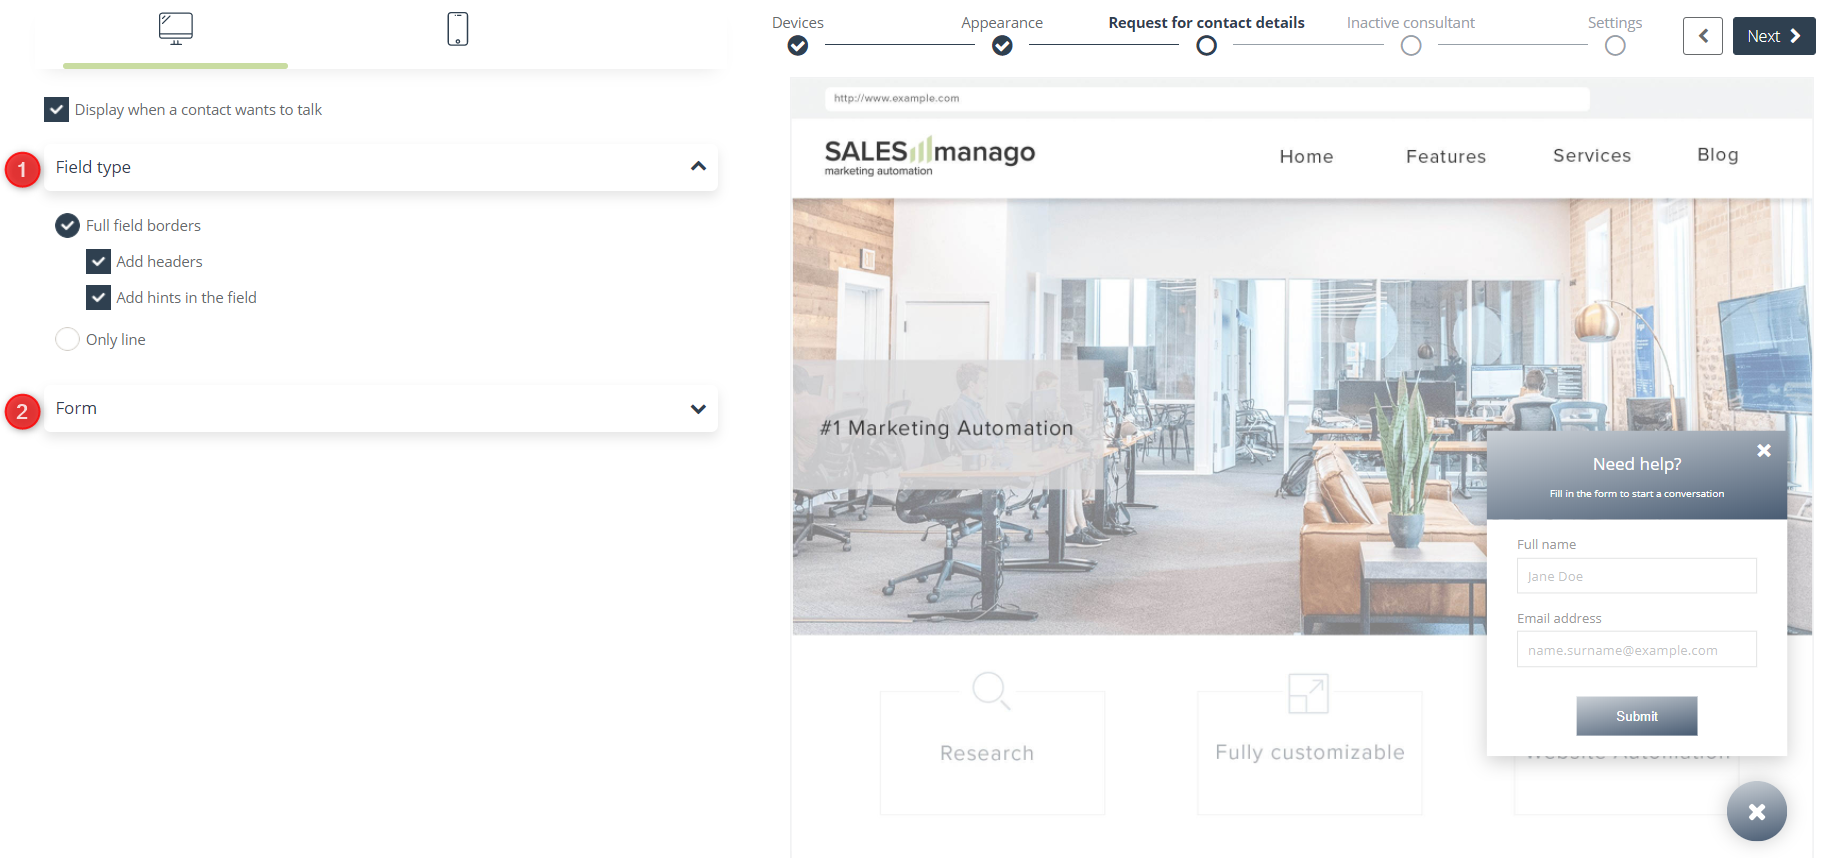
[1] Field type – define the pop-up settings and select what information you want to include in it:
- Add headers – decide if you want the names to be displayed above the text input windows, specifying what to type in the empty space:

- Add hints in the field – use the hints feature to display it in the text input field and suggest the input to users:

- Only line – instead of a framed field, you can display a text input field with only lines as follows:
[2] Form – set the specifications of the form:
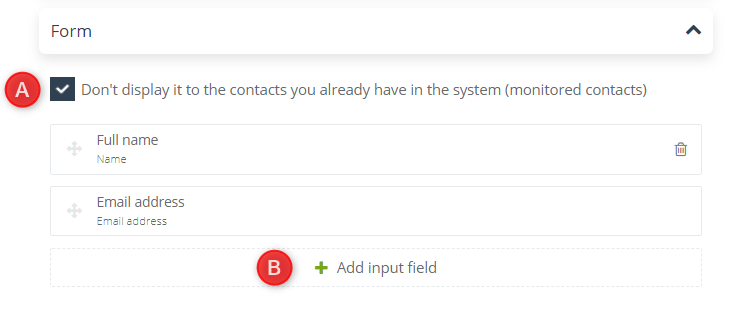
[A] Don’t display it to the contacts you already have in the system (monitored contacts) – the form will be displayed only to users who are not monitored in the system.
[B] Add input field – specify what data you want to collect in your form. You can choose the following items:
- Email address
- Name
- Phone number
- Date of birth
- Street address
- Region
- City
- Postal code
- Country
- Company
- Custom detail
- Consent from consents list
- Any text
- Selection options
- Selection list
- Message
IMPORTANT: The Email address field is required to create a new form and contact card for the customer.
5. Inactive consultant
The fourth stage of creating a new Live Chat is the specifications for the Inactive consultant. The “Field type” and “Form” lists look identical to those in the Request for contact details stage:
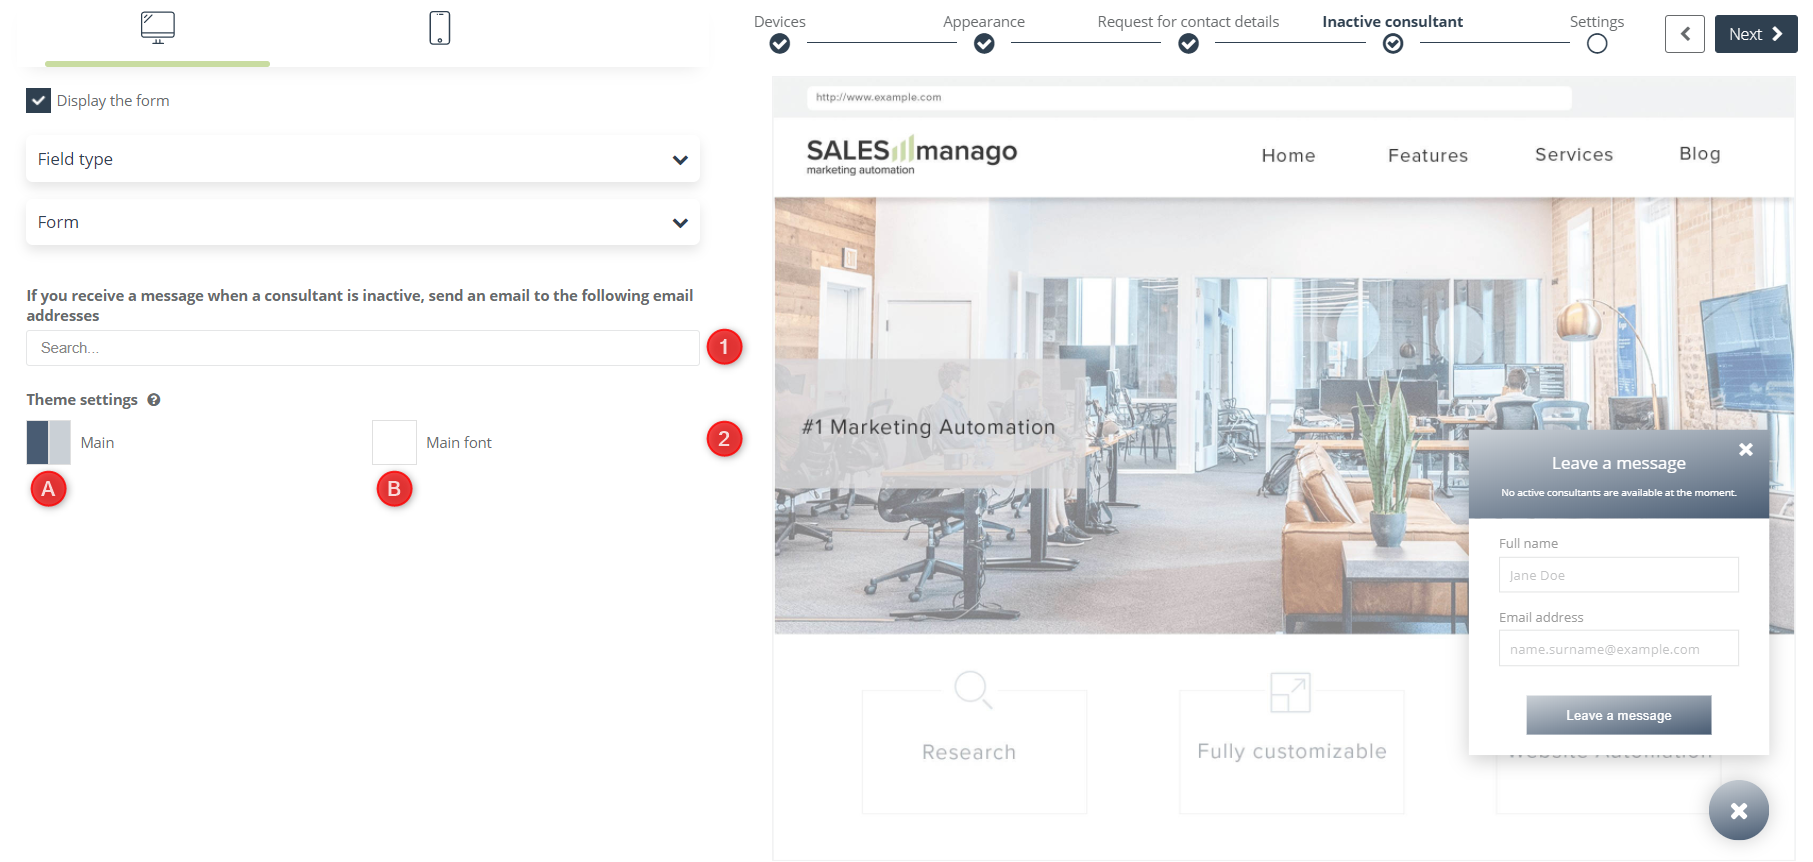
[1] Determine which email address you want the message to be sent to if the consultant is absent in the chat by selecting one of the available ones from the drop-down list.
[2] Theme settings – you can set different display colors for the inactive consultant window than for the entire Live Chat window:

6. Settings
The final stage of creating a new Live Chat is Settings:
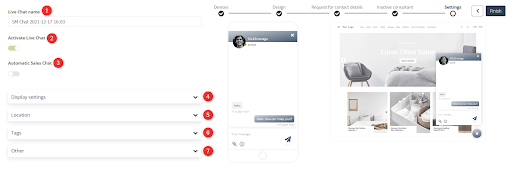
[1] Live Chat name – defines under what name you will find your created chat in its selection panel.
[2] Activate Live Chat – click to enable chat on your website immediately after creating it, or leave it inactive and turn it on later in the settings panel.
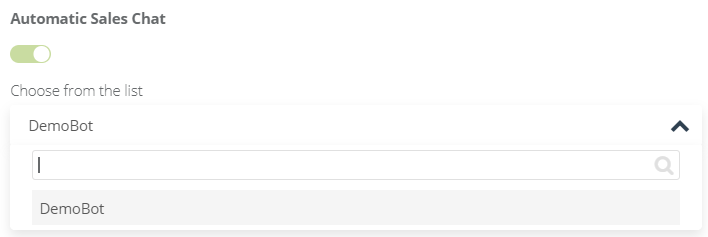
[3] Automatic Sales Chat – select a previously created chatbot from the drop-down list and run it on your website.
[4] Display setting – specify the time when Live Chat will be available on your website:
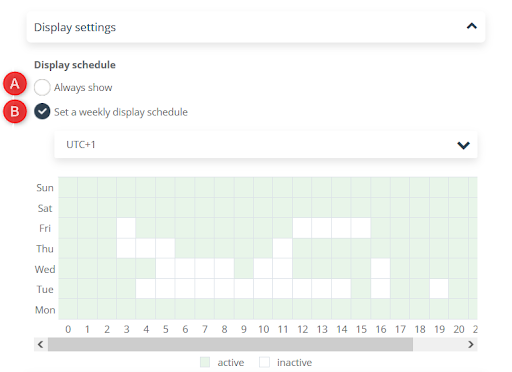
[A] Always show – Live Chat will be visible and available to customers around the clock.
[B] Set a weekly display schedule – you can set the availability of the chat depending on the given hour of the week.
IMPORTANT: From the drop-down list, select the time zone to which the selected data will relate. When the consultant is talking to the user, and the Live Chat is about to be turned off, the clients have 15 minutes to finish the conversation.
[5] Location – define where Live Chat will be displayed.
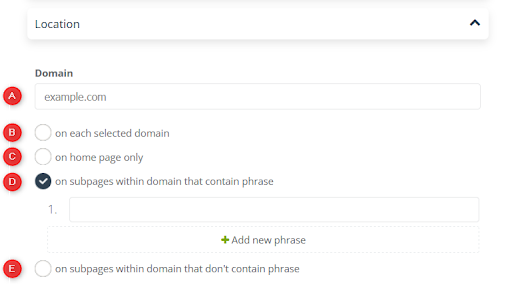
[A] Address – enter the address of the page on which Live Chat is going to be displayed.
[B] On each selected domain – Live Chat will be displayed on all pages for the web address selected in [A].
[C] On home page only – Live Chat will not be visible on any of the subpages.
[D] On subpages within domain that contain phrase – Live Chat will be displayed on all pages within the domain whose URL address contains the given phrase.
[E] On subpages within domain that don’t contain phrase – Live Chat will only be displayed on pages whose URL address does not contain the given phrase.
[6] Tags – assign a new tag to contacts who filled out the form.
[7] Other:
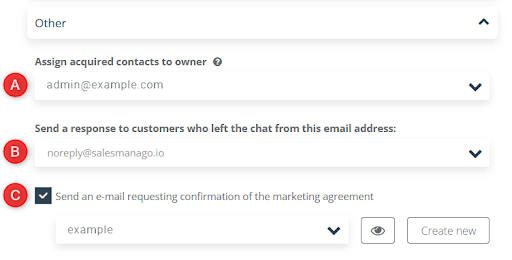
[A] Assign acquired contacts to owner – newly acquired contacts that filled in the form will be automatically assigned to the owner selected from the drop-down list.
[B] Send a response to customers who left the chat from this email address – if the customer leaves the conversation before the consultant responds to the question asked, they will receive a link with the option of returning to the conversation, and a fragment of the conversation to the email address provided earlier.
Specify from which email address you want to send the reply by selecting it from the drop-down list.
[C] Send an email requesting confirmation of the marketing agreement
In order for a new contact to be found after completing the form in the system with the opt-in status, they must confirm the marketing consent by clicking the link in the email.
IMPORTANT: If the contact does not confirm the consent of the marketing, their data will remain stored in the system, but they will have opt-out status.
Click “Create new” to design an email confirming your marketing consent in the HTML wizard. Remember that if you create a new consent template and want to use it, you must click the “Refresh” icon next to the button.