This article explains how to change the settings of a scheduled mailing (such as the sending date or group of recipients) or the content of the email (template) itself. It also describes how to edit A/B tests; birthday, periodic, and subscription confirmation emails; and emails sent as part of Automation Processes (Automation Rules and Workflows).
The SALESmanago platform allows you to schedule an email up to 10 years ahead. The content of a scheduled email (subject, images, text, links, widgets, etc.) can be freely modified until the email is sent. However, if it turns out that you need to enter different sending settings—follow the instructions provided in this article.
Contents
- Getting started
- Modify a scheduled or ongoing mailing
- Can I modify the content of an already-sent email?
1. Getting started
The SALESmanago platform allows you to schedule an email to be sent even months from now (up to 10 years ahead). Scheduled mailings are transferred to the sending server immediately. The server saves the sending settings defined by the user and adds the mailing to the queue. When the scheduled sending time comes, the server downloads the current version of the email from the SALESmanago account and sends it according to the memorized settings.
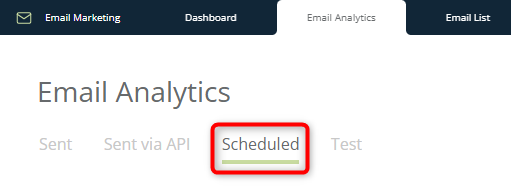
A list of scheduled mailings (including emails scheduled to be sent as part of A/B tests) is available under the Scheduled tab (Menu → Channels → Email Marketing → Email Analytics → Scheduled tab).
If you want to review the settings of a scheduled mailing, move your cursor over the selected item and click the Analytics button.

You will be redirected to a page containing information on that specific mailing, including its sending settings.
To view an email’s content, go to Menu → Channels → Email Marketing → Email List and locate the email of interest on the list.
What if something is wrong? It is possible that, after scheduling an email or an A/B test, you will find it necessary to modify that email’s content or the sending settings. You may also want to modify ongoing mailings sent automatically by the SALESmanago system, that is:
- birthday, periodic, and subscription confirmation emails,
- emails sent as part of Automation Rules and Workflows.
Read on to learn how to do this.
2. Modify a scheduled or ongoing mailing
A. Modify email content
If you have scheduled a standard email (i.e., a mass mailing) to be sent and now you want to modify the content of that email, for example:
- correct a typing error in the subject,
- add a preheader,
- change the sender account,
- insert another image,
- add a link,
- modify the conditions set in the conditional content,
- add or remove a widget,
- change the background color,
- use another font, etc.,
—all you need to do is edit the scheduled email. Right before the email is sent, the server loads the current version of the email from your account, so you can freely make any changes, even one minute before the scheduled sending time.
To edit the content of an email, navigate to Menu → Channels → Email Marketing → Email List → Standard tab, locate the email on the list, click the Actions button and select Edit. The scheduled email will be updated to the new version the moment you save it.
The same applies to emails configured to be sent as:
- birthday emails,
- periodic emails,
- subscription confirmation emails,
- part of an Automation Process,
- A/B tests (if the tested email is configured to be sent at a later date).
You can freely edit the content of such emails by locating them on the Email List (under the Standard tab—the only exception being subscription confirmation emails, which can be edited from the level of their dedicated tab), clicking the Actions button and selecting Edit. The SALESmanago system will start sending the new version the moment you save it.
IMPORTANT: If you edit an email that has been saved previously, when you click Save (or Save and finish) in the email wizard, the system asks if you want to update the queued mailing.
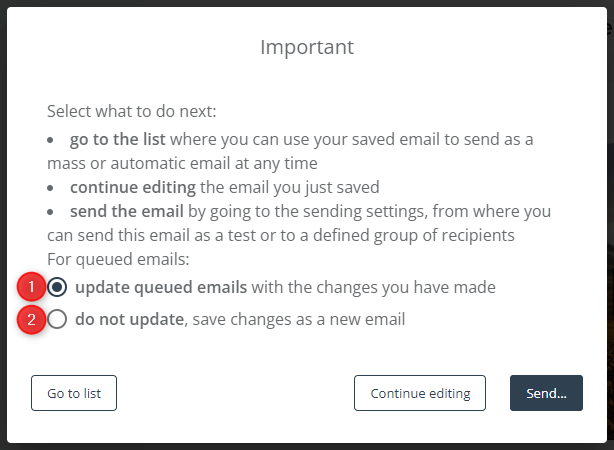
Before clicking Send, decide whether you want to:
[1] update any scheduled or ongoing mailings in which the edited email is used with its new version, or
[2] send (or keep sending) the old version of the email and save the changes as a new email.
If the email has been edited to correct an error or improve the email’s appearance, consider selecting option [1]. Option [2] is useful especially in the case of a planned modification to an email’s content (for example, if next month you want to send an email that looks more or less the same but contains different product recommendations).
B. Modify sending settings
i. Standard emails (mass mailings)
If you have scheduled an email to be sent and now you want to modify the sending settings, such as:
- the sending date and time,
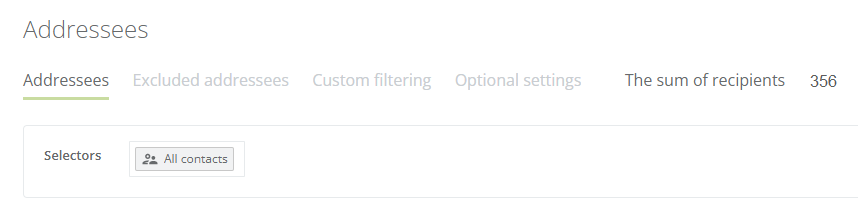
- the group of recipients (the segment selected, the selectors and filters applied),
- the option to ignore advanced email filters, or
- the coupon settings
—cancel (delete) the scheduled mailing and then schedule it again, entering the correct settings. This way you can verify all settings and avoid mistakes.
Start by going to Menu → Channels → Email Marketing → Email Analytics. Navigate to the Scheduled tab [1] and locate the email you want to cancel on the list of scheduled emails [2].
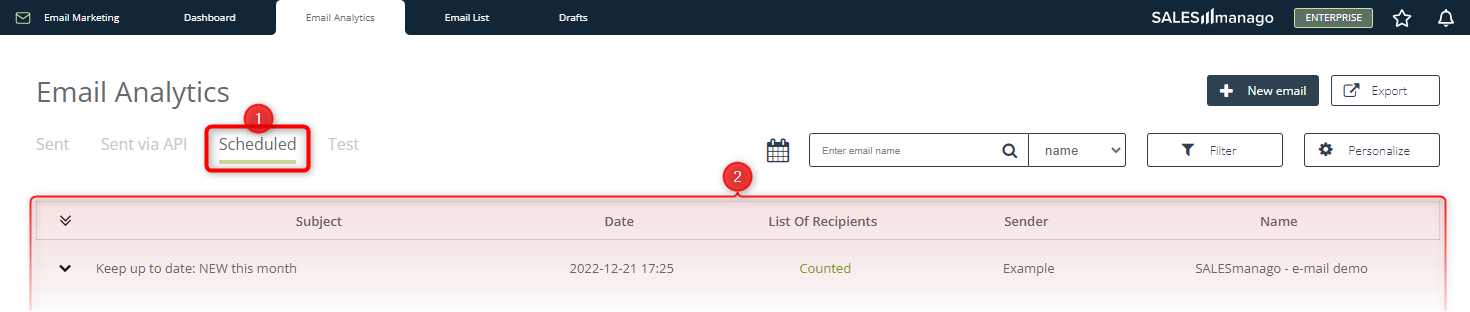
When you move your cursor over the item of interest, two buttons will appear in the rightmost column (Name). If you want to review the settings of the scheduled email, click Analytics. To cancel (delete) the mailing, click the trash can icon [3].

A new window will appear, asking you to confirm that you want to delete the scheduled mailing.
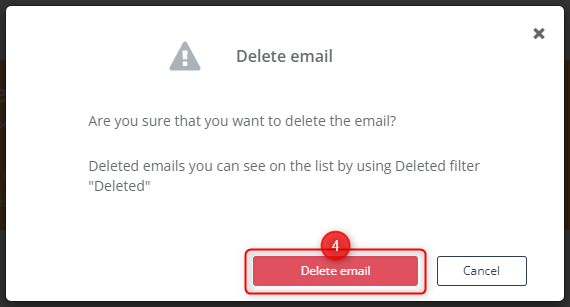
If you are certain that you want to cancel the mailing, click Delete email [4].
Then navigate to the Email List and select the email you want to send. Proceed to the sending screen and enter the correct settings. Finish by clicking Send.
Learn more about sending emails from SALESmanago >>
ii. Email A/B tests
If you have configured an email A/B test, you can freely modify the content of the tested emails until they have been sent. However, to modify the configuration (sending settings) of an A/B test, you need to delete it and configure a new test from scratch.
To delete (cancel) an A/B test, go to Menu → Channels → Email Marketing → Email List → A/B tests, locate the test on the list and click Actions in the rightmost column. On the list of actions, select Delete.
If you delete an A/B test when only one of the tested emails has been sent, the other email will not be sent. If you selected the option to send the winning email automatically, that email will not be sent, either.
If you select the option to send the winning email automatically and then delete the A/B test after both tested emails have been sent, the winning email will not be sent.
iii. Ongoing mailings: periodic, birthday, and subscription confirmation emails
Periodic emails
To modify the sending settings of a periodic email, go to Menu → Channels → Email Marketing → Email List → Periodic tab and locate the item on the list. Click Actions and select Edit. You will be redirected to the periodic email configuration screen, where you can enter new settings. The changes will be applied the moment you click Schedule.
Learn how to configure a periodic email >>
Birthday emails
To modify the sending settings of a birthday email, go to Menu → Channels → Email Marketing → Email List → Birthday tab and locate the item on the list. Click Actions and select Edit. You will be redirected to the birthday email configuration screen, where you can enter new settings. The changes will be applied the moment you click Save.
Learn how to configure a birthday email >>
Subscription confirmation emails
If the double opt-in mechanism is enabled, subscription confirmation emails are sent automatically by the system in response to actions performed by Contacts.
To configure the double opt-in mechanism for Lead Generation widgets, edit the settings of individual widgets in their respective wizards. To configure the double opt-in mechanism for API, navigate to Menu → Channels → Email Marketing → Settings → Subscription confirmation languages.
Learn how to configure subscription confirmation emails >>
iv. Automation Processes
Automation Rules
If you want to modify the sending settings of an email sent as part of an Automation Rule, go to Menu → Automations → Automation Processes → Automation Rules and edit the Rule in which the email is used. Find the Action tile: Send email to a Contact and click the settings icon. Enter new settings and confirm by clicking Save changes. Then, save the edited Automation Rule.
Workflows
If you want to modify the sending settings of an email sent as part of a Workflow, go to Menu → Automations → Automation Processes → Workflow and edit the Workflow in which the email is used. Find the Action tile: Send email to a Contact and click the settings icon. Enter new settings and confirm by clicking Save changes. Then, save the edited Workflow.
3. Can I modify the content of an already-sent email?
There is no option to modify the content of a sent email (i.e., an email that has already reached a recipient’s inbox). In this regard, an email is just like a traditional letter—after you drop it into a letter box, you can’t change the contents of the envelope.