In order to meet the expectations of our customers, we have enabled the sending of text messages from the most popular messengers. Integrate and use any number of gateways and communication channels without any restrictions. See how to integrate WhatsApp in the Accounts Integration panel and start using Mobile Marketing 2.0 today!
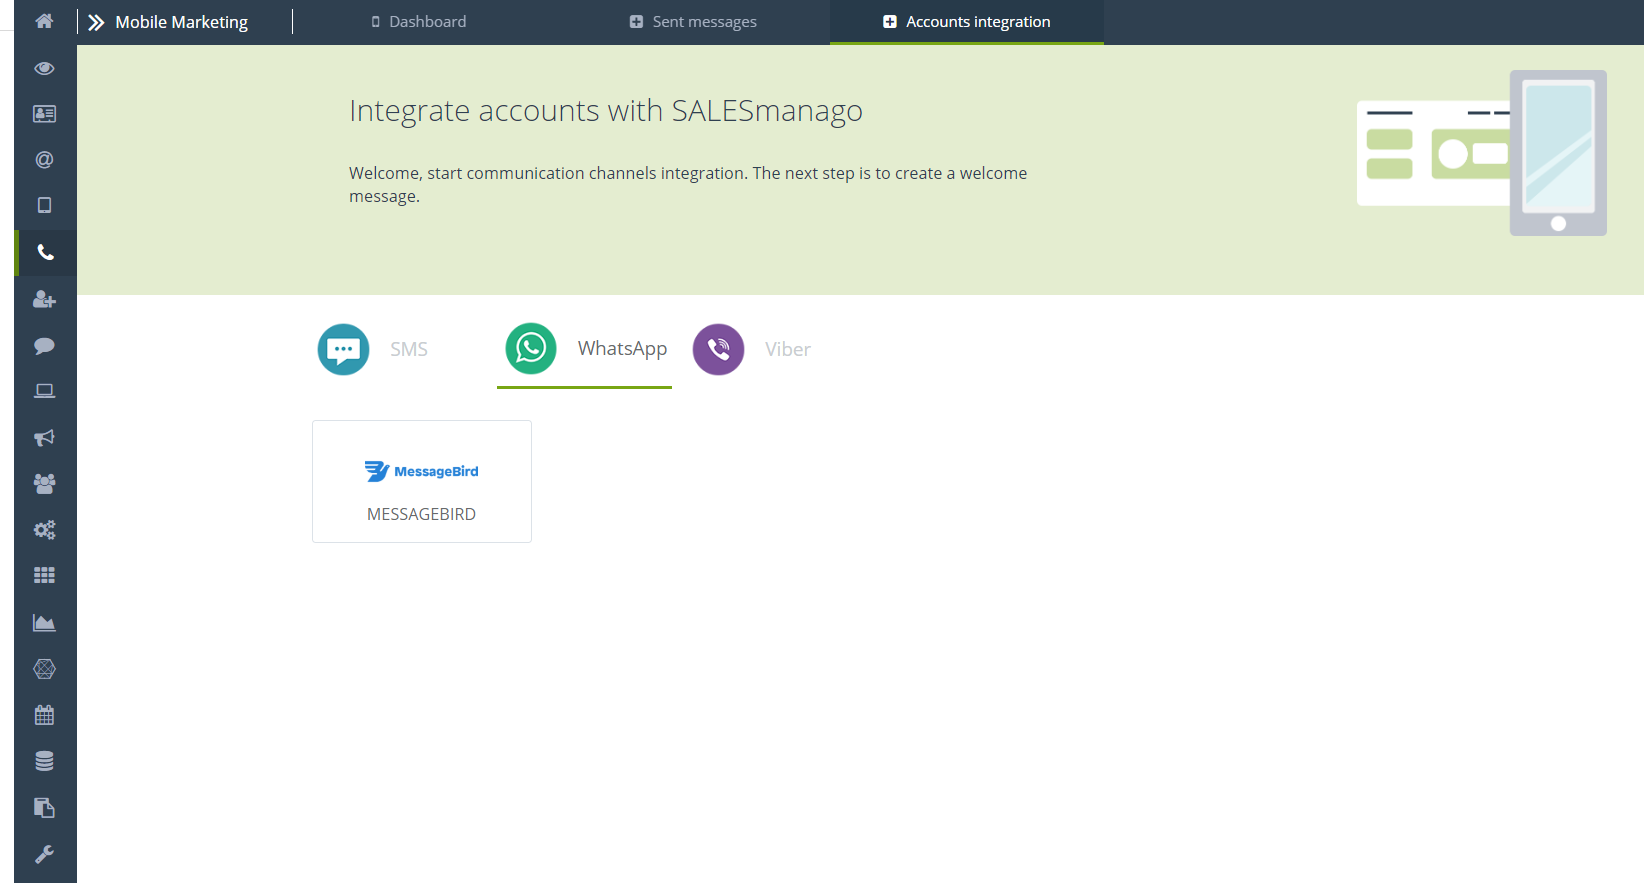
In order to integrate WhatsApp in Mobile Marketing module, go to
Channels → Mobile Marketing → Integrations → WhatsApp
Contents
- What is WhatsApp?
- WhatsApp integration
- Integration settings
- Templates import
- Invitations creator
1. What is WhatsApp?
WhatsApp is a mobile application for smartphones that works as an instant messenger. With this application, you can transfer messages and multimedia files between mobile phones connected to the Internet. The number of users of this platform has exceeded 2 billion globally. SALESmanago thanks to the integration with MessageBird allows you to send text messages directly from our system to WhatsApp. The integration allows you to send 1-to-1, mass, or birthday messages.
Integration entails certain requirements, such as the user’s consent to send messages. The invitation can be made in two different ways, and the consent to receive messages lasts 24 hours (top requirements for WhatsApp). More about this you can find in 5.
2. WhatsApp integration
If you want to integrate your SALESmanago account with WhatsApp, you need to have an account in the sending operator’s system. At SALESmanago, we use MessageBird services. You can have several MessageBird accounts integrated within one account.
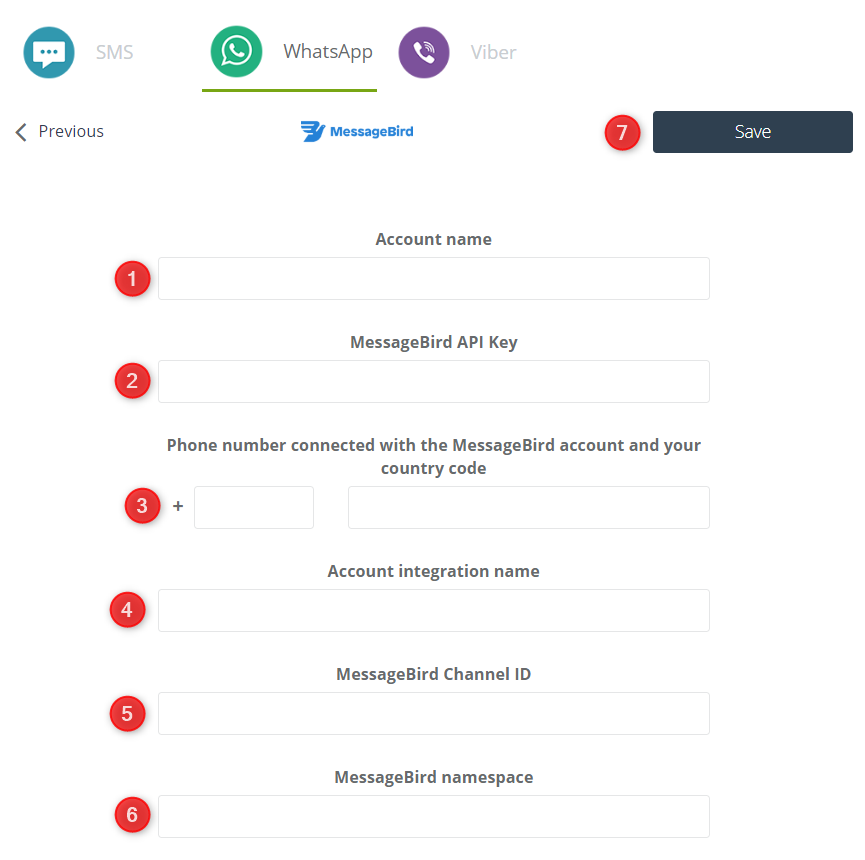
[1] Account name – the name that will be displayed as an element identifying the given integration. Under one name it is possible to connect an unlimited number of integrations with the system of a given operator.
[2] MessageBird API Key – a unique identifier used to authenticate the user, issued by the operator’s system, thanks to which it is possible to integrate with SALESmanago, and thus send messages from our system.
To find your unique MessageBird API Key, log in to your MessageBird account, go to the Developers tab, and then the API access subtab:
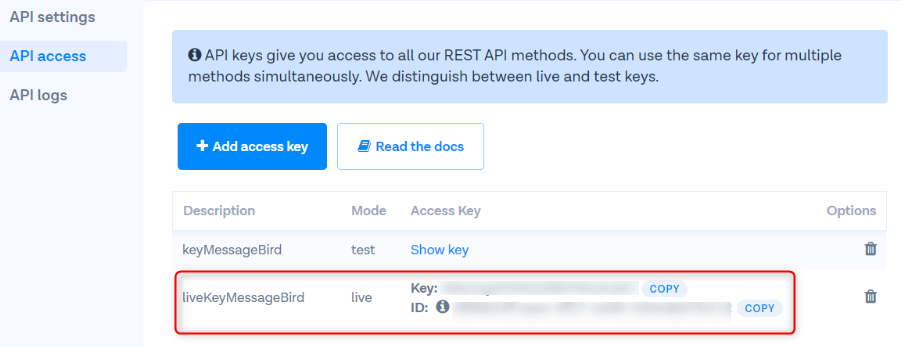
LiveKeyMessageBird is displayed in the window marked in the picture, copy, and paste it in point [2].
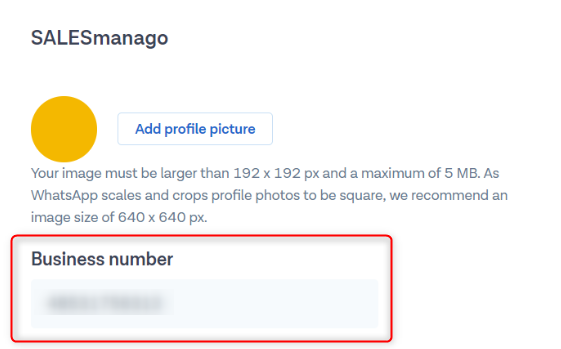
[3] Phone number connected with the MessageBird account and your country code – if you do not remember the phone number that you linked with the MessageBird, you can find it by logging into the MessageBird system. Go to the Channels tab, then the WhatsApp sub-tab and click the “Edit channel” button:
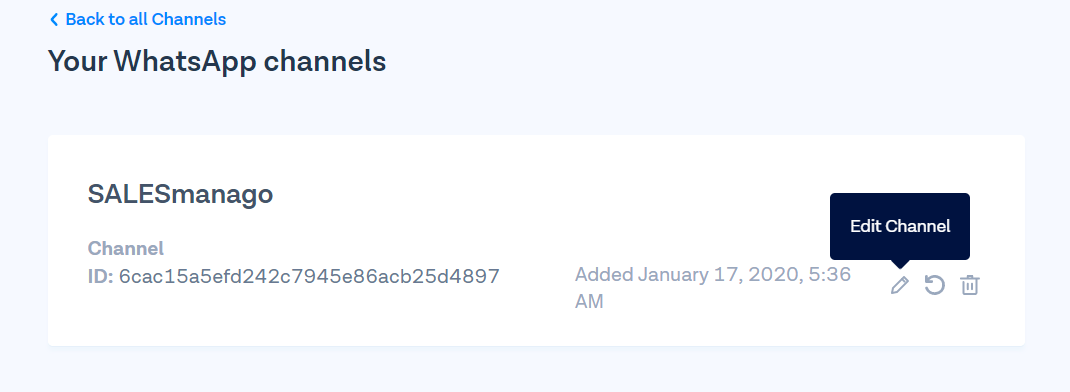
In the Business number window, you will see the phone number associated with the channel:
[4] Account integration name – choose a name for your account integration, which you can find and edit in the messenger integration details later.
[5] MessageBird Channel ID – a unique ID for the integrated channel in the MessageBird system.
To find your unique Channel ID, log in to your account in the MessageBird system, go to the Channels tab, and then – WhatsApp sub-tab:
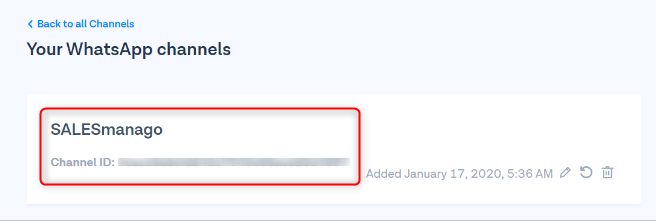
Copy the Channel ID from the marked tile and paste it in point [5].
[6] MessageBird namespace – by creating an account in the MessageBird system, you get your unique MessageBird namespace on your email address, regardless of SALESmanago. If you cannot find this value in your inbox, please contact the operator’s support.
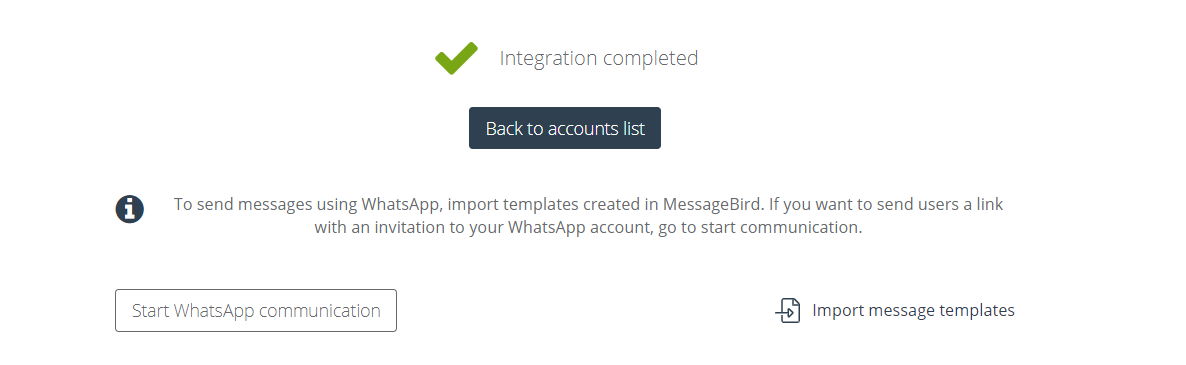
[7] Save – after entering all the data, click the “Save” button to confirm the integration. If the integration was successful, you will see the following message:
3. Integration settings
After integration in the panel, you can change the basic settings of your integration.
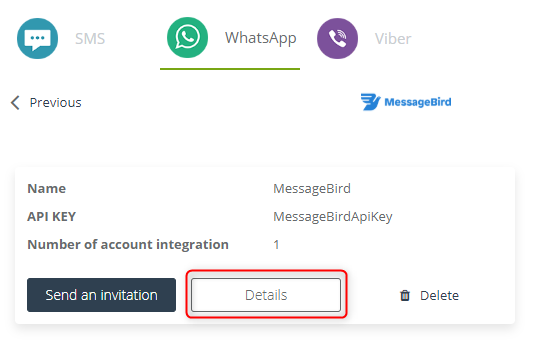
Click the “Details” button and the following window will show:
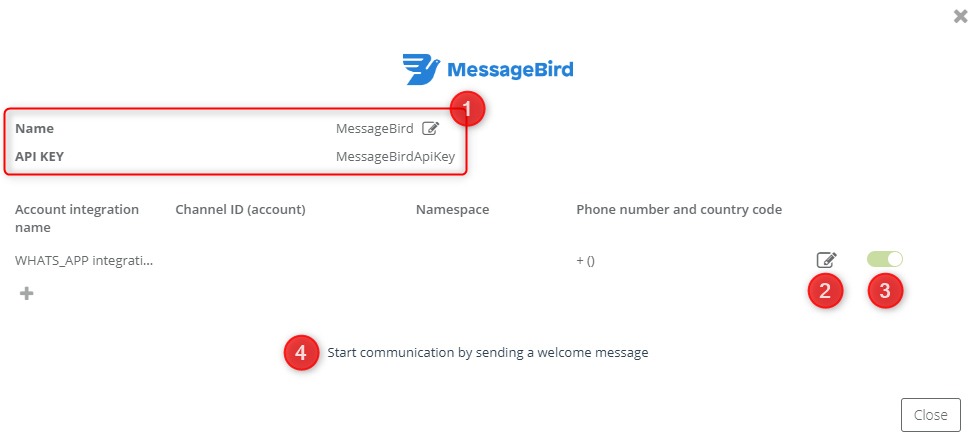
[1] Here you can find information such as the name of the integration you gave, which you can freely change, and your unique identifier used to authenticate the user causing the API – API KEY.
[2] Click the “Edit” button to modify the data.
[3] You can activate or deactivate your integration at any time. Remember that disabling the integration will prevent you from sending text messages via a deactivated channel.
[4] Start communication by sending a welcome message – if you want to send a message directly from WhatsApp, you must obtain the customer’s consent to receive messages from you.
4. Templates import
In our system, you can send a welcome message using a template imported from WhatsApp. To do this, download the WhatsApp-approved template created in your MessageBird account.
NOTE: This template must be prepared in the MessageBird account and approved by WhatsApp previously. If these 2 conditions are fulfilled, the template will be imported to the SALESmanago system successfully.
IMPORTANT: In order to update the consent status in the database for receiving text messages for 24 hours, the contact must respond to the welcome message. With each response to the message, the status is updated to 24 hours.
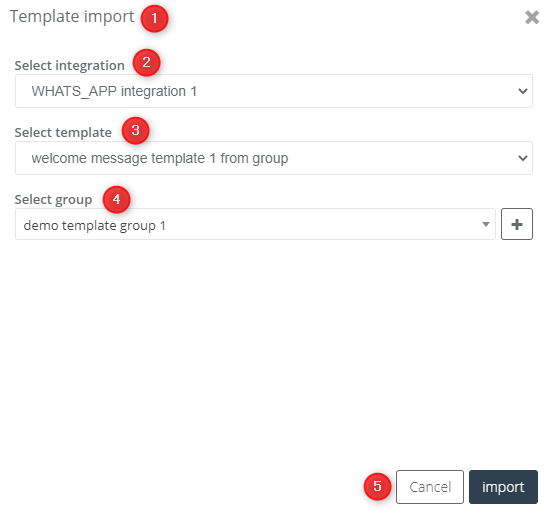
[1] Template import – import templates created in MessageBird. You can find your templates on the MessageBird website in the Template Manager tab.
[2] Select integration – select the integration for which you want to import templates.
[3] Select template – select a template to import. Names are taken from the MessageBird system and it is not possible to edit them in SALESmanago.
[4] Select group – select the group for which you want to import the template so it will be easier to use them later.
[5] Import – confirm all information and perform the import.
5. Invitations creator
To start communicating with contact via WhatsApp, the contact has to reply to the welcome message we sent:
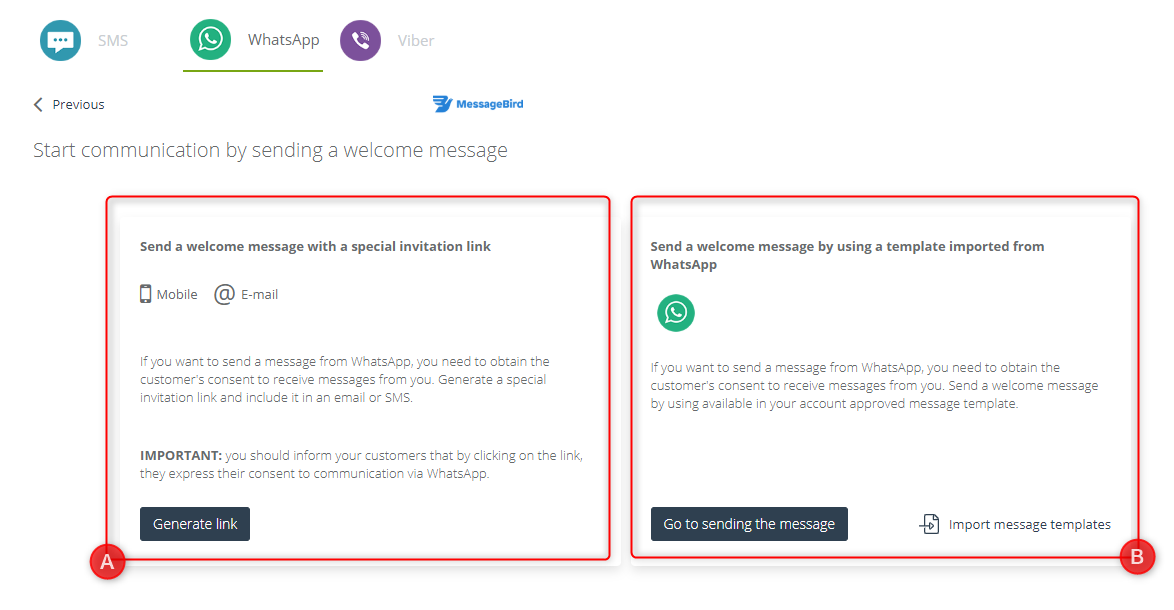
Start communication by sending a welcome message – if you want to send a message directly from WhatsApp, you must obtain the customer’s consent to receive messages from you.
[A] Generate a special invitation link and place it in an email or SMS message.
[B] Send a welcome message using previously created and approved templates available on your account.
A reply to a message confirms the consent to receive messages via this channel for a specific user for 24 hours. With each reply to the message, the status is updated to 24 hours.
If you have already imported message templates from MessageBird, you can select the target group of their sending and information about the message by going to the Menu → Channels → Mobile Marketing → Messages → Templates.
MessageBird allows you to create invitation templates with and without placeholders. After WhatsApp accepts them, you can personalize your templates in the wizard:
[A] Sending invitations without placeholders
If you want to send a message template, go to the text message wizard >>
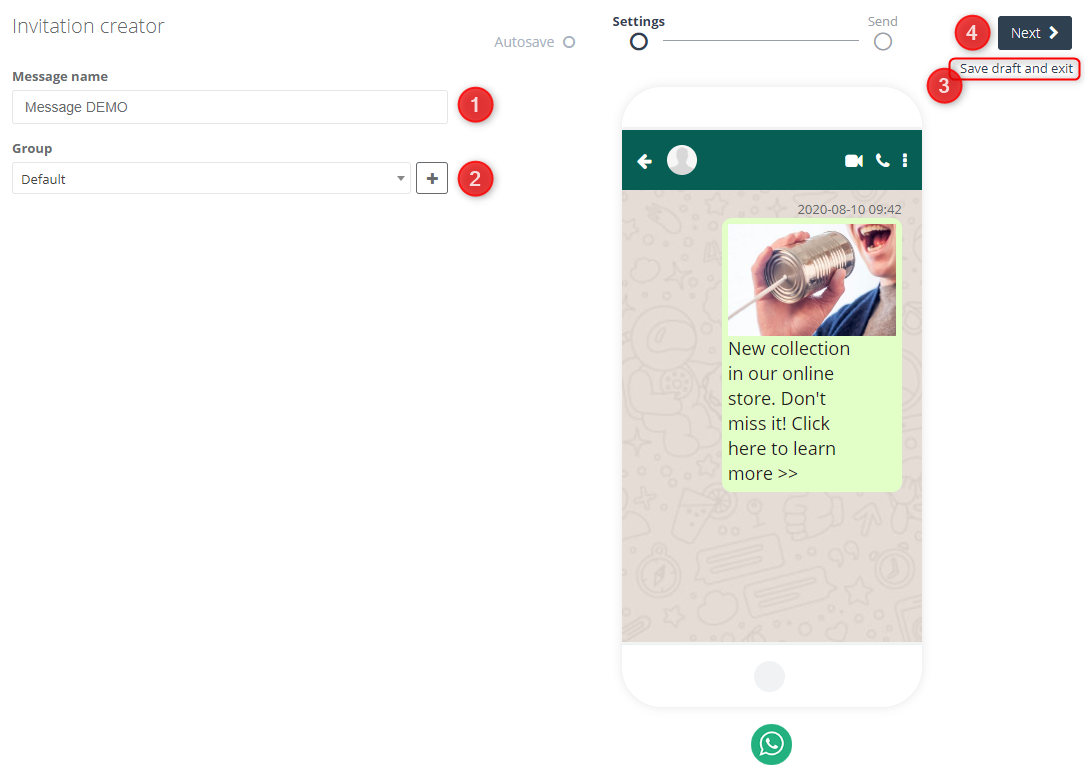
[1] Message name – give a unique name to the message that will be displayed on the List of sent messages.
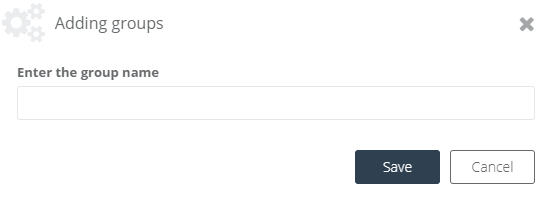
[2] Group – define the group to which the template should be added to make it easier to use later. You can also create a new group:
[3] Save draft and exit – save the message template as a draft and finish your project later.
[4] Next – go to the selecting message target group settings panel.
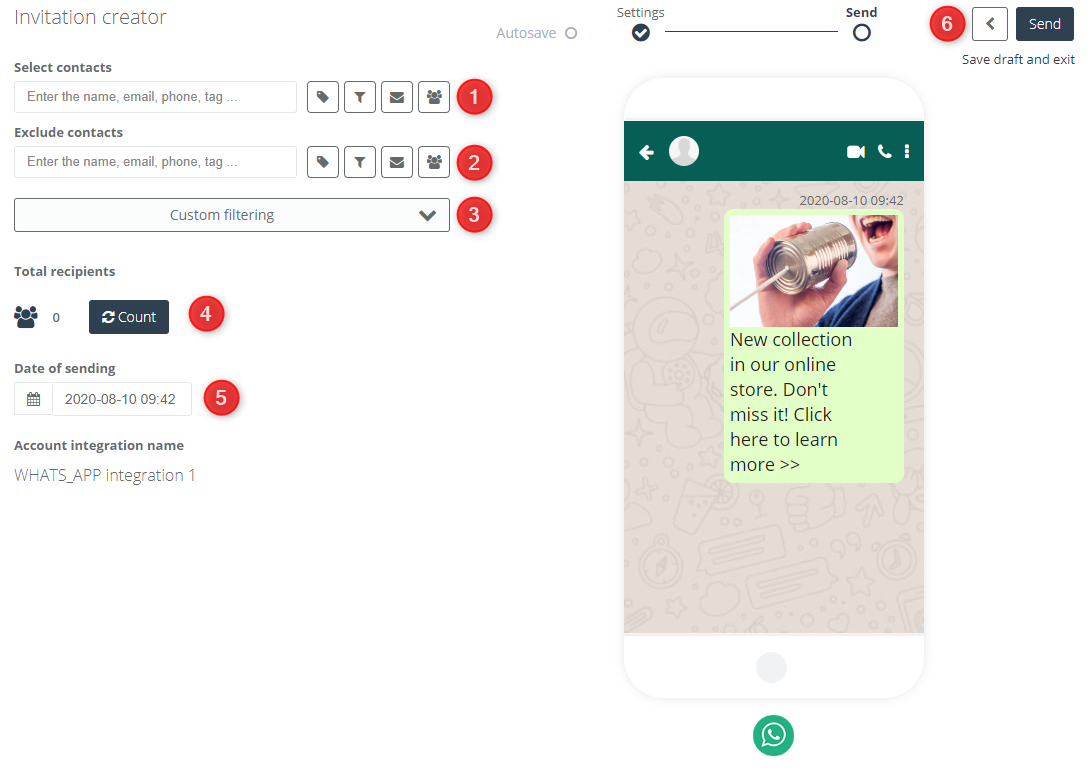
[1] Select contacts – specify the group of recipients to whom the text message is going to be sent. The choice of addressees is exactly the same as when sending mailings. More information about addressing selectors you can find here >>
IMPORTANT: Remember, that the message can only be sent to contacts for whom a phone number is provided on the contact card in place of the telephone. Therefore, it is important that only one telephone number is given in this field.
[2] Exclude contacts – select recipients excluded from sending the message in the same way as in point [1].
[3] Custom filtering – allows you to select additional filters from the list. More information about advanced addressing options based on filters you can find here >>
[4] Count – recalculates the estimated number of people who will receive the text message.
[5] Date of sending – set when a given text message will be sent to selected contacts.
[6] Send – enable message sending with the specified settings.
[B] Sending invitations with placeholders
The invitation creator with placeholders differs only in the second stage of creating a message.
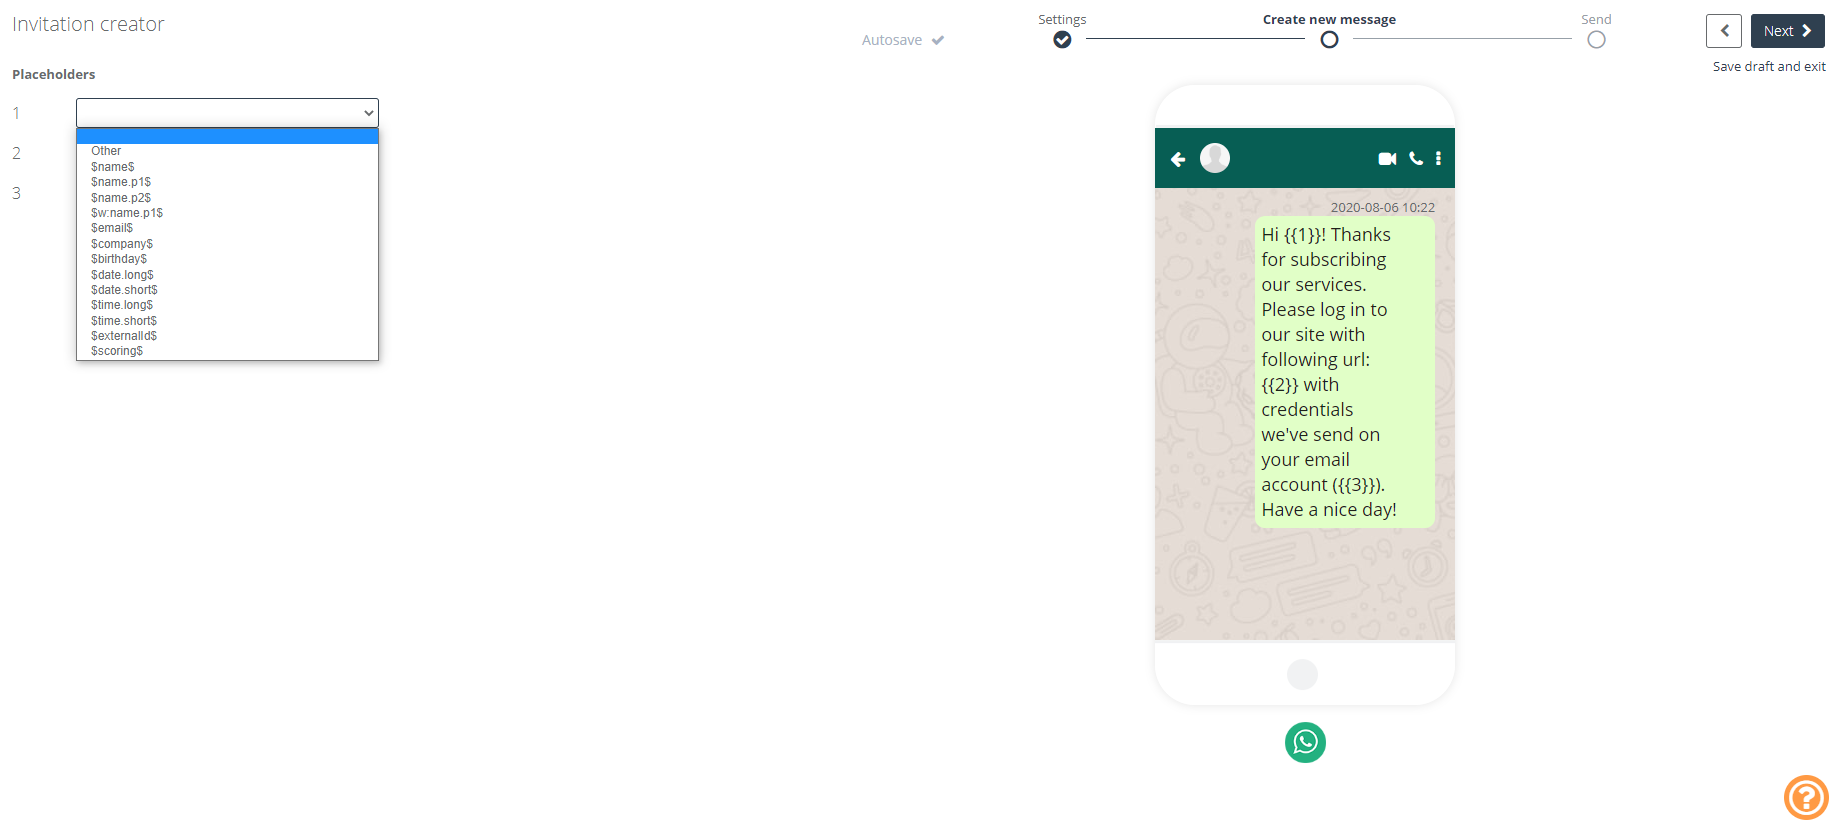
In the MessageBird system, you can create a message template with up to three placeholders. This is the text that is pulled from the user’s contact card and appears in the given field. E.g. $email$ is responsible for the email address of the contact.
All list of placeholders available in SALESmanago you can find right here >>
All other steps in creating and sending an invitation remain unchanged.