Useful links
This Action allows you to send a selected email to Contacts that have reached this stage of your Workflow.
IMPORTANT: If the option to send transactional emails is activated for your account, this Workflow element has additional options. Scroll to the bottom of this article for additional explanations.
After adding this Action to your Workflow, define the following settings:
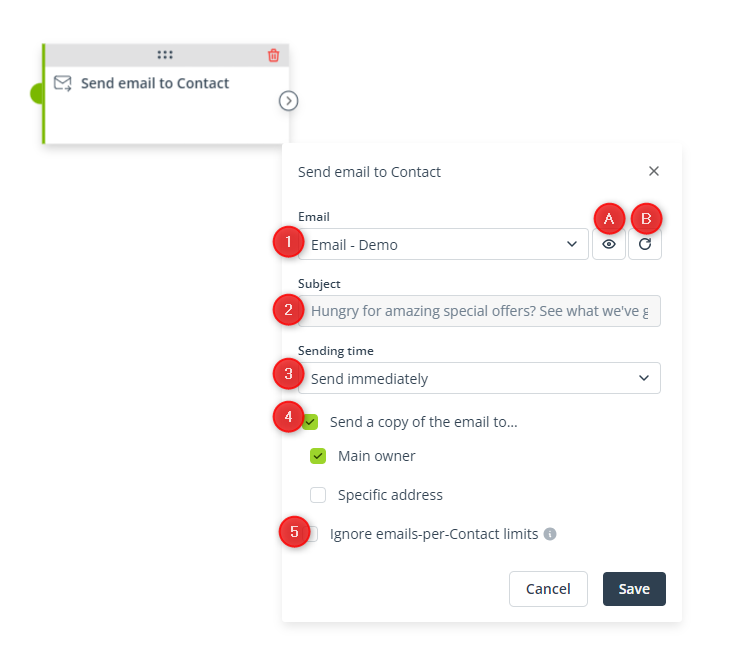
[1] Email—Select the email that you want to send to Contacts that have reached this stage of the Workflow. The list includes all your emails from the Standard tab on the Email List.
Click the eye icon [A] to see a preview of the selected email.
If you don’t see an email on the list (e.g., because it has just been created), click the refresh icon [B].
[2] Subject—Here, you can check the email subject that your recipients will see in their inboxes. If you want to change the subject, you need to edit the email in the wizard in which it was created.
[3] Sending time—Select when the email should be sent to Contacts. You have the following options:
- Send immediately—If you select this option, the email will be sent immediately after a Contact reaches this stage of the Workflow.
- Send after…—If you select this option, the email will be sent after the specified number of hours/days/weeks/months/years has passed from the moment a Contact reached this stage of the Workflow.
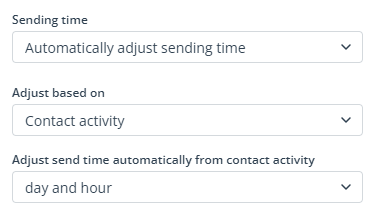
- Automatically adjust sending time—If you select this option, a new field will appear where you can select whether you want the system to determine the best time for sending the email based on Contacts’ activity or preferences (indicated in a Preference Center).
EXAMPLE: If you select the option Adjust based on: Contact activity and then day and hour:
The SALESmanago system will analyze a Contact’s interactions with your monitored website and determine on what day of the week and at what time the Contact is most active (and thus, most likely to notice and open your email). Note that if you select day or day and hour, the email can be sent even 7 days from the moment a Contact reaches this stage of the Workflow.

- Send at specific time of the day—If you select this option, the email will be sent at a specific time of the day within the next 24 hours.
[4] Send a copy of the email to…—Check this box if you want to receive a copy of the email each time it is sent to a Contact. After selecting this option, you can choose whether the copy should be sent to the main owner and/or to any other specified email address.
[5] Ignore emails-per-Contact limits—This option refers to the limits on the number of emails sent to a single Contact, which can be set in Menu → Channels → Email Marketing → Settings → Sending settings. Check this box if you do not want these limits to apply to this Action.
Click Save to continue configuring your Workflow.
IMPORTANT: The product recommendation strategy for an email containing a Dynamic Product Block/Frame (marked with a cart icon on list) must be selected in the wizard in which the email was created.
Transactional emails
Transactional emails are non-marketing emails that provide important updates. The ability to send transactional emails must be requested by individual SALESmanago clients. One of the ways to send transactional emails (in near-real time) is via Workflow processes.
Read more about transactional emails >>
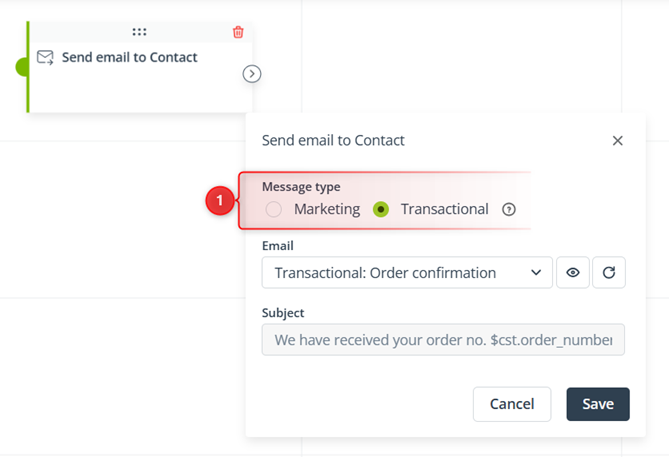
If the option to send transactional emails is activated for your account, the Workflow Action: Send email to Contact includes additional settings:
First, you need to select the message type [1]: Marketing or Transactional. After choosing Transactional, simply select an existing transactional email template and click Save.
IMPORTANT:
- Any limits set in the Email Marketing settings (such as excluded holidays or email-per-Contact limits) do not apply to transactional emails.
- Email templates containing static Product Blocks with products indicated via the API cannot be sent via Workflow. Such templates can only be sent via the API.

