Useful links
The Email Design Studio is a state-of-the-art email designer that allows you to engage your customers and increase conversions while building true intimacy with your audience.
Learn more about the Email Design Studio >>
One of the features available in the Email Design Studio is Custom Fonts, which allows you to upload your own, custom fonts and apply them to text in your emails.
Custom fonts can help you strengthen your brand identity and stand out from the crowd. Bear in mind, however, that custom fonts are not supported by most email clients (including Gmail). To help you avoid surprises, the Fonts feature allows you to select a fallback font that will be used in place of the custom font if the latter cannot be displayed.
Contents
1. Custom fonts and Web-Safe Fonts
The Email Design Studio offers a broad choice of widgets, many of which contain (or can contain) text.
Learn more about Email Design Studio Widgets >>
Text included in your emails created in the Email Design Studio can be formatted in a number of ways, including font selection. By default, you can choose from over 30 fonts, some of which are labeled as Web-Safe Fonts.
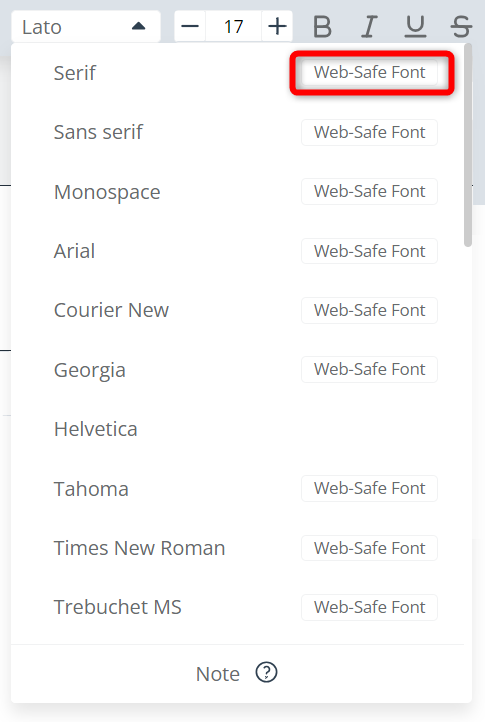
Web-Safe Fonts are most likely to be displayed correctly in all email clients (such as Gmail or Outlook) and on all devices.
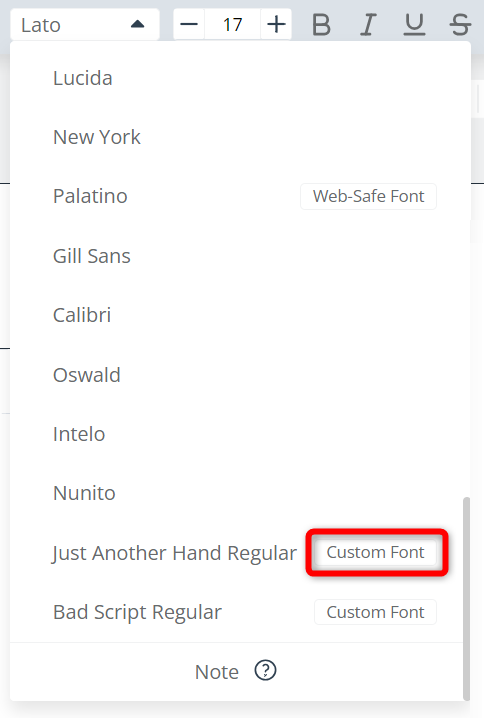
Additionally, the Email Design Studio offers the option to add your own, custom fonts by linking a TTF file. By using custom fonts in your emails, you can set your brand apart and ensure consistent brand communication.
The custom font will appear on your list of available fonts with an appropriate label:
2. Add a custom font
To add a custom font to your list of available fonts in the Email Design Studio, go to the Fonts section of the main menu and click on Add custom font [A].
You will see the following panel:
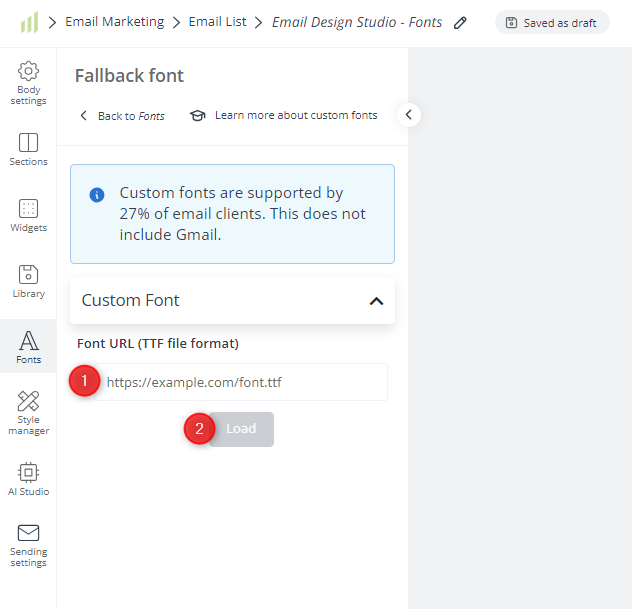
[1] Font URL (TTF file format)—Insert a URL for a TTF file containing your font. The font must be stored on your server to avoid privacy and copyright issues.
[2] Load—After providing a URL in field [1] above, click here to load your custom font into the system.
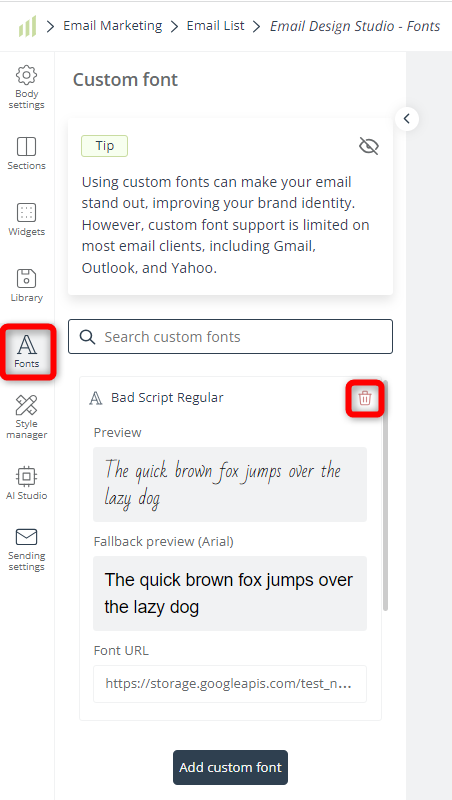
When the custom font file has been processed, you will see the following panel:
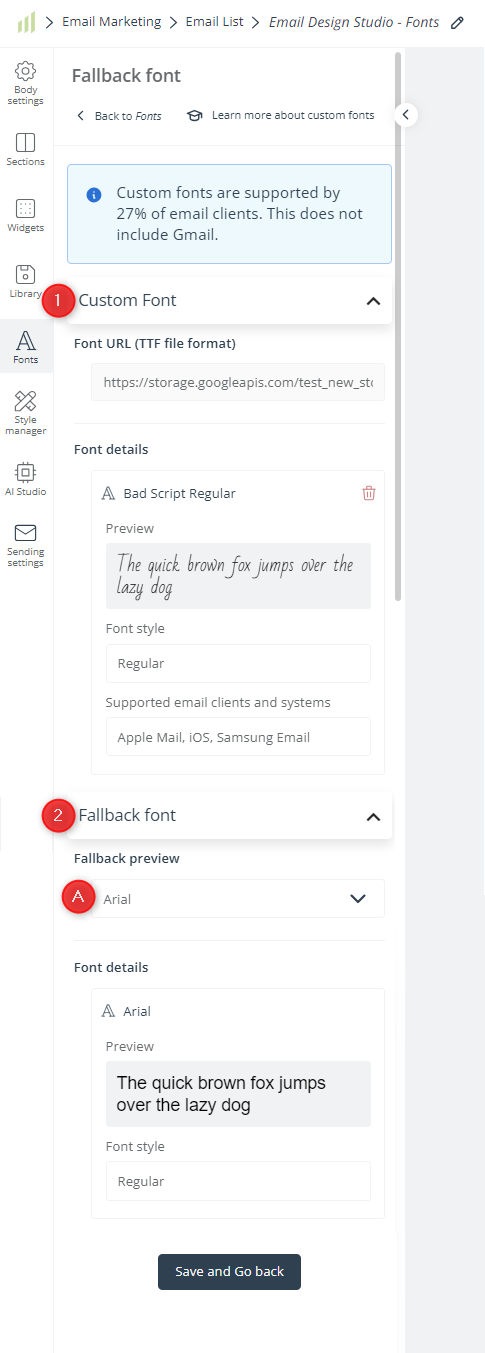
[1] Custom font—Here, you can see all the details of your linked custom font, including its name, preview, style, and supported email clients and systems.
[2] Fallback font—Here, you can select a fallback font that will be used when your custom font is not supported by a Contact’s device or email client.
Click [A] to select your fallback font from the list. The list includes only Web-Safe Fonts.
After selecting a font, you can see its details below.
Click Save and Go back to apply your selection.
3. Use a custom font
Custom fonts can be applied to text included in any Email Design Studio widget.
When you click on text, a toolbar will appear at the top of the screen. The toolbar contains a list of all your available fonts, including your custom fonts, which are appropriately labeled:
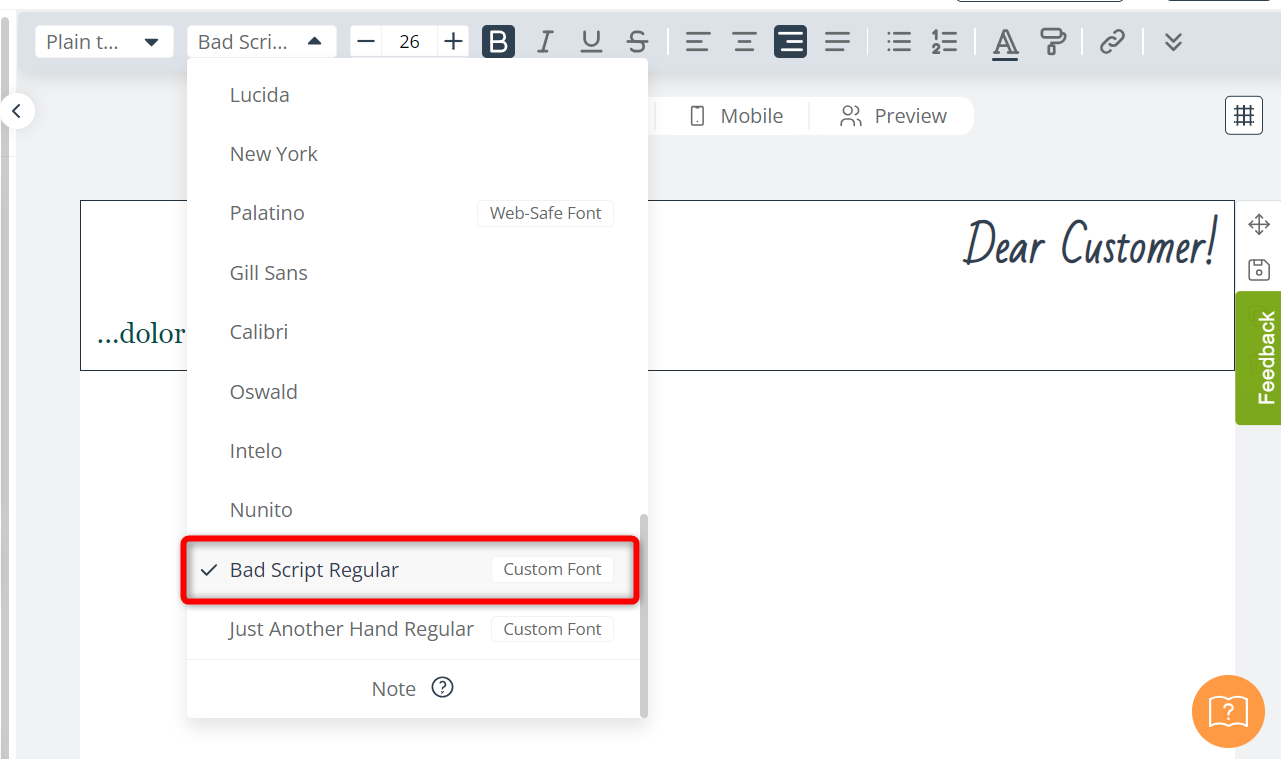
Select the font you want to apply to your text.
IMPORTANT: Remember that custom fonts are supported by 27% of email clients. This does not include Gmail.
TIP: You can use custom fonts in the Style Manager to create unique styles for your different brands or for special times of the year, such as Christmas time, Black Week, etc.
Learn more about the Style Manager >>
4. Remove a custom font
To remove a custom font from the Email Design Studio, go to the Fonts tab, find the custom font on the list, and click the trash bin icon:
IMPORTANT: When you remove a custom font from the system, all email content written in that font will be changed to the fallback font.
If you click on text to which the removed custom font was applied, the font selection value on the text toolbar will be empty.