Useful links
This Action allows you to trigger an existing Website Automation Rule for Contacts that have reached this stage of your Workflow.
The Website Automation Rule selected in the Action’s settings will be triggered for a Contact the next time the Contact visits the website (or page) for which the Automation Rule is configured.
Website Automation allows you to display personalized pop-ups, Web Push notifications, and Live Chat windows or icons to visitors on your website. You can also create a Website Automation Rule that will execute a custom JavaScript code.
Learn how to create a Website Automation Rule >>
After adding this Action to your Workflow, define the following settings:
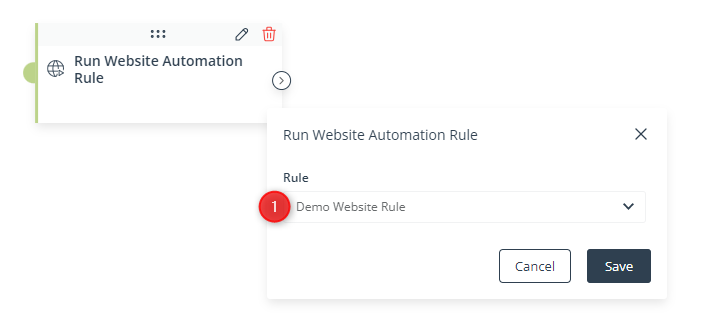
[1] Rule—Select the Website Automation Rule that will be run for Contacts that have reached this stage of your Workflow.
Click Save to continue configuring your Workflow.