This article describes how to configure a birthday email.
Sending birthday emails is a good way to strengthen your customer relationships. SALESmanago allows you to schedule and send birthday emails based on the birth dates provided by Contacts and stored on Contact Cards. In addition to well-wishes, a birthday email can contain a gift in the form of a coupon (discount code) that will make the customer feel special and encourage them to make a purchase.
To create a new birthday email, go to
Channels → Email Marketing → Email List → Birthday → + New birthday email
Contents
1. Getting started
Birthday emails are a good way to strengthen your customer relationships. Wish your customers a happy birthday to show that you care about them. A good practice is to personalize your email with the Contact’s name or birth date. Another good idea is to add a gift to your birthday email, such as a coupon or a discount code.
On the SALESmanago platform, you can configure a birthday email that will be sent automatically based on data stored on individual Contact Cards.
IMPORTANT: You can send birthday emails only to Contacts for whom you have collected birthday data. There are four ways to add a birthday date to a Contact Card:
- forms and pop-ups (Lead Generation),
- the Customer Preference Center,
- API and plugins, and
- Contact data imports.
Start by creating a beautiful email in your favorite SALESmanago wizard.
Read about creating emails on the SALESmanago platform >>
When the email is ready, go to Menu → Channels → Email Marketing → Email List and select the Birthday tab [1]:
Then click on + New birthday email in the top right-hand corner of the screen:
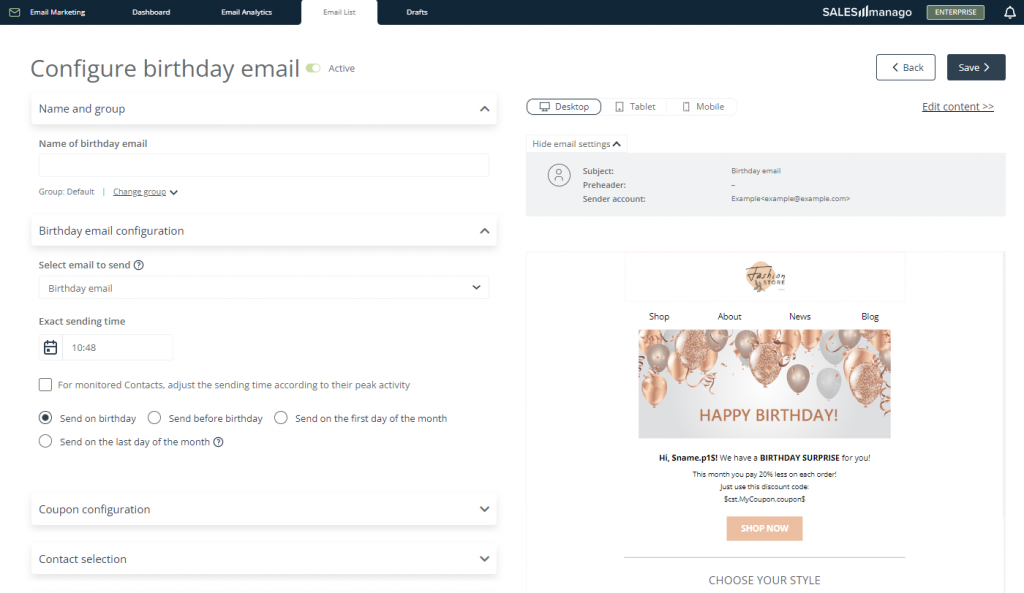
You will be redirected to the birthday email configuration screen, which is divided into two parts.
The left side of the screen is where you can configure your birthday email by defining all the necessary settings (described in section 2 below).
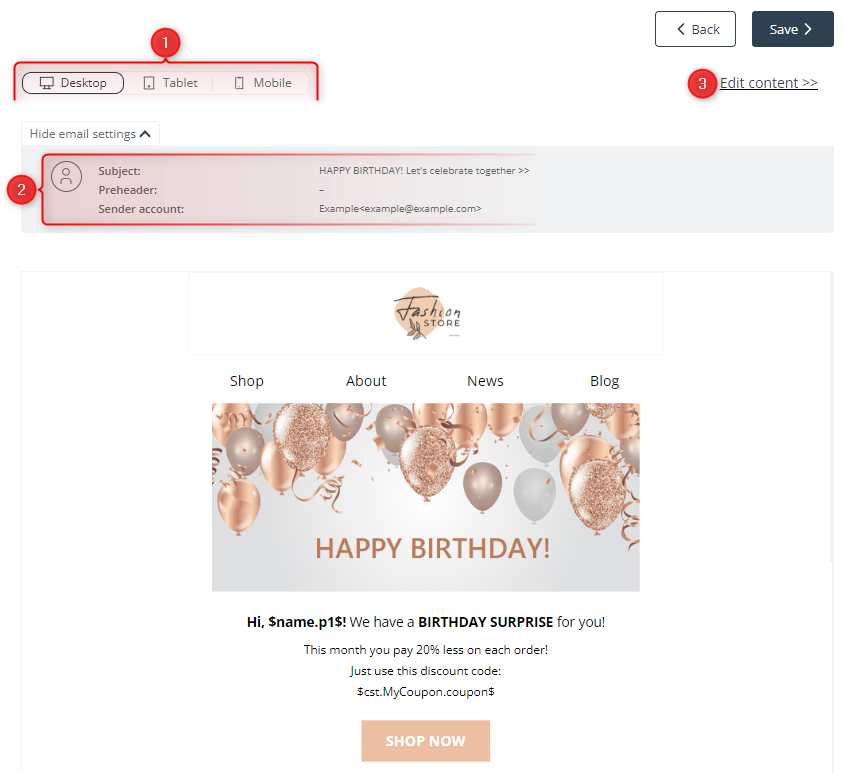
On the right, you will see a preview of your birthday email, along with some basic information:
[1] Devices—switch between these device icons at any time to see how the appearance of your birthday email will change depending on the device on which it is displayed.
[2] Email settings—here you can check the basic settings of the birthday email: subject, preheader, and sender account (as defined in the wizard used to create the email).
[3] Edit content—click here to modify the email’s content or edit its settings (subject, preheader and/or sender account). You will be redirected to the wizard in which the email was created, where you can introduce the necessary changes.
IMPORTANT: If you click on this button and confirm your choice, all changes introduced on the birthday email configuration screen will be lost.
When you finish configuring your birthday email, you can save it. As long as the email remains active, it will be sent to the individual Contacts included in the list of recipients on the appropriate dates, according to your settings.
2. Configure a birthday email
[1] Active/Inactive—use the toggle switch to specify if the birthday email is to be active or inactive after you save it. The default setting is active.
[2] Name of birthday email—enter a name that will allow you to identify the new birthday email in the system.
[3] Change group—unfold the list of birthday email groups to assign the new email to an existing group or create a new one. Groups allow you to organize your emails based on your own criteria.
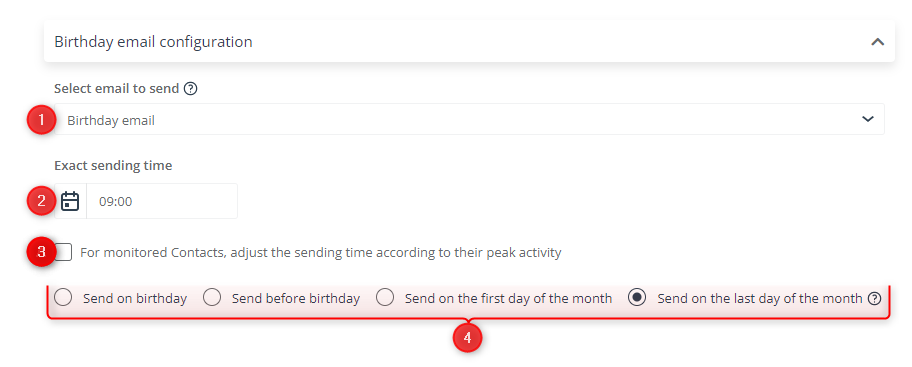
[1] Select email to send—use the drop-down list to select a completed email that will be sent as a birthday email. You can see a preview of the selected email on the right side of the screen.
[2] Exact sending time—specify the hour at which the birthday email is to be sent to Contacts (the date can be specified in point [4] below).
[3] For monitored Contacts, adjust the sending time according to their peak activity—click here if you want the SALESmanago system to determine the optimum sending time based on the behavioral patterns of individual Contacts. Each Contact in the list of recipients will receive your email during the hour when it is most likely that they will check their inbox.
[4] Sending date—select the rule for sending the birthday email to individual Contacts. You have four options:
- Send on birthday—if you select this option, the birthday email will be sent to individual Contacts exactly on their birthday and at the time selected in point [2] or [3] above.
- Send before birthday—if you select this option, you will see a drop-down list through which you can specify how many days before an individual Contact’s birthday the email will be sent.
- EXAMPLE: If you enter the below settings:
- the email will be sent to individual Contacts 3 days before their birthdays and at the time selected in point [2] or [3] above.
- Send on the first day of the month—if you select this option, the birthday email will be sent to individual Contacts on the first day of the month in which they have their birthdays and at the time specified in point [2] or [3] above.
- EXAMPLE: A Contact has their birthday on June 6. If you select the option: Send on the first day of the month, this Contact will receive the birthday email on June 1.
- Send on the last day of the month—if you select this option, the birthday email will be sent to individual Contacts on the last day of the month preceding the month in which they have their birthdays.
- EXAMPLE: A contact has their birthday on June 6. If you select the option: Send on the last day of the month, this Contact will receive the birthday email on May 31.

NOTE: You will see this section only if you have included a coupon placeholder in your email.
Read about how to configure a coupon >>
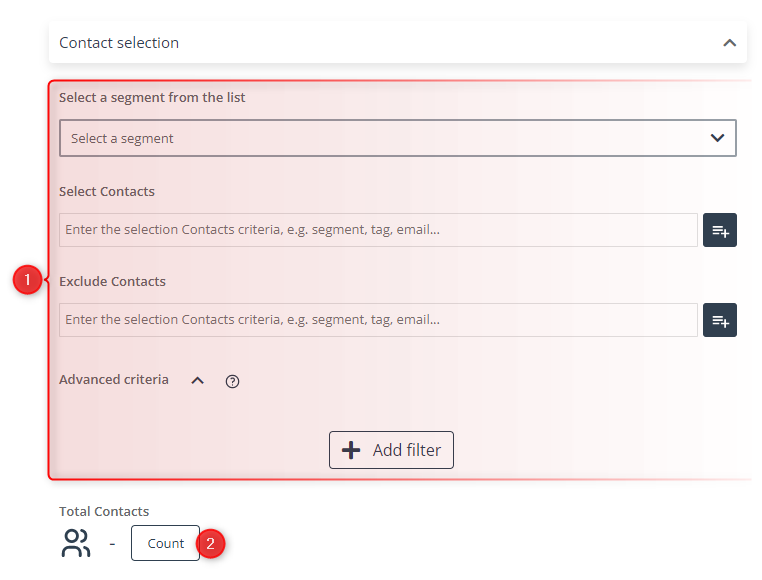
[1] Select Contacts—define the group of recipients for your birthday email. Select a pre-defined segment or use selectors to include or exclude groups of Contacts. If necessary, apply appropriate filters.
Learn more about selecting Contacts when sending emails >>
Read about predefined Contact segments and selectors >>
Read about Contact filtering >>
[2] Count—click on this button to see how many Contacts will be included in the list of recipients based on the selections you made above.
[1] Email settings—here, you can check the following settings of your birthday email: name, subject, sender account, and group.
[2] Edit settings—click here to be redirected to the wizard in which the email was created. There you can edit the settings or content of your birthday email.
IMPORTANT: If you click on this button and confirm your choice, all changes introduced on the birthday email configuration screen will be lost.
3. Save a birthday email
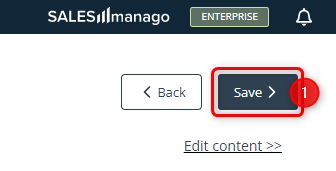
When you have defined all the necessary settings for your new birthday email, click the Save button [1] in the top right-hand corner of the screen:
Following your confirmation, the saved (and active) birthday email will be sent to the recipients specified in the Contact selection section, according to the date and time settings defined in the Birthday email configuration section.
You can edit its content by introducing any necessary modifications and then selecting the option to update queued emails (which is available in any email wizard when you save the edited version).
IMPORTANT: The email will continue to be sent until you delete or deactivate it. You can do this by going to Menu → Channels → Email Marketing → Email List → Birthday tab and clicking the Actions button.
Read more about the Email List >>
4. Birthday email analytics
To see the analytics of a birthday email, go to Menu → Channels → Email Marketing → Email Analytics → Sent tab and locate the birthday email of interest on the list.
NOTE: The birthday email analytics show data for all emails sent as part of a birthday mailing on a given day.
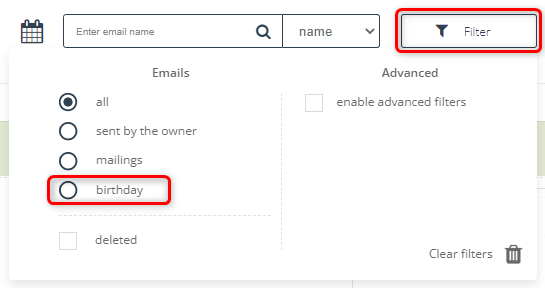
TIP: You can easily narrow down the list of sent emails to include only birthday emails by applying the birthday filter:
The following basic information is readily available on the list:
- subject,
- sending date,
- number of recipients (Sent),
- number of opens (Opened),
- number of clicks (Clicked),
- sender,
- open rate (OR),
- click-through rate (CTR).
Click the arrow icon to unfold the item on the list and see additional details:
Here, you can see the following information:
- sender’s email,
- message type,
- message name,
- user’s email address,
- scheduling date (when the email was scheduled by the sender or by the SALESmanago system),
- a miniature preview of the email.
If you move your cursor over a birthday email and go to the last column, you will see the Analytics button [1].
Click it to go to the detailed analytics of the selected birthday email.
Read more about Email Analytics >>
Submit your review | |
