Useful links
The Email Design Studio offers a wide range of widgets—elements that allow you to include different types of content in your email. This article explains how to configure the Countdown widget.
Learn more about Email Design Studio widgets >>
Contents
1. Getting started
Countdown timers serve multiple purposes. Firstly, they create anticipation and excitement, enticing customers to open and engage with your emails. With a visually striking timer ticking down, recipients are motivated to act promptly, fearing they might miss out on a limited-time opportunity. Secondly, countdown timers instill a sense of urgency, nudging hesitant buyers to make quicker decisions, resulting in increased conversion rates. The mere presence of a countdown timer can create a fear of missing out (FOMO), which drives customers to act immediately to secure the deal. Additionally, countdown timers can be effectively utilized for product launches and pre-orders. By setting a specific countdown leading up to the launch date, you can generate buzz and anticipation among your audience. This anticipation can lead to higher engagement, as customers eagerly await the moment they can finally purchase the product. It builds excitement and curiosity, positioning your brand as an industry leader.
2. Countdown types: Use cases
The Countdown widget allows you to include a timer in your email. The timer can work in one of the following ways:
- count down to a specific date and time (either fixed or dynamically loaded from a dictionary detail), or
- count down for a specific period of time.
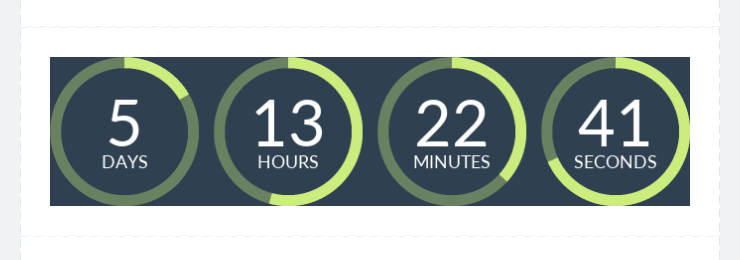
When a Contact opens your email, they will see a timer showing how much time remains until a specific point in the future. Depending on the style selected in the Design section, the flow of time can be illustrated by changing digits or by changing digits and progressing shapes and colors.
When configuring the Countdown widget, you can choose from three countdown types:
- Standard—In this option, you select a specific point in the future (date and time) to which time will be counted. The timer will always show the actual time left until that point in the future, i.e., will be updated accordingly each time a Contact opens the email.
This countdown type is especially useful if you want to show how much time remains until a promotion (seasonal sales, etc.) starts or ends, or in the case of scheduled events (e.g., if you want to highlight the start date of a festival, a trade fair, or a conference).
- Start-on-open—In this option, a specified period of time (e.g., 24 hours) will start to be counted down the moment a Contact opens your email. This means that the actual countdown start and end times will be different for each Contact (there is no single, specific date or time that would apply to all Contacts).
If you want, you can configure the timer to reset each time a Contact opens the email.
This countdown type is especially useful if you want to create a sense of urgency. For instance, you can inform your Contacts that the discount code included in the same email is valid only for 24 hours from the moment the email is opened. Note that for this information to be true, you need to synchronize the transfer of information between the SALESmanago system and your website. You can do this by creating an Automation Rule including the Action: Send information about executed rule >>. Through this Action, you can transfer the information that an email has been opened to your website. Then, configure the promotion/discount expiry dates to be set accordingly, with a small buffer to allow all data to be processed.
See IMPORTANT below.
- Dynamic—In this option, you select an existing dictionary detail of the date type. The timer will count down to the date (and time) contained in that dictionary detail, individually for each Contact.
This option is especially useful if you want to send an email from a Workflow process in which the Action: Send email to Contact >> is preceded by the Event: Date from dictionary detail is approaching/approached >> or by the Condition: Date from dictionary detail >>. This way, you can, e.g., remind a Contact that their subscription is about to expire, or configure a special anniversary discount that can be used within 30 days before the Contact’s anniversary (i.e., before the date from the dictionary detail).
The recommended way to use the Dynamic countdown type is to set the dates (e.g., promotion/discount/subscription expiry dates) on your website and transfer or import them to SALESmanago as a dictionary detail. Then, select this dictionary detail when configuring the Countdown widget, and only then activate the Workflow to start sending the email.
IMPORTANT:
- Some countries, especially the Member States of the European Union, are paying more and more attention to fake discounts and misleading consumer information. Bear this in mind when using the Countdown widget. When in doubt, consult your legal department.
- The timer can be configured to show how long a promotion, a discount code, a special offer, etc., will remain valid for individual Contacts. If the countdown is configured to start and end at different times for individual Contacts, remember that the remaining time indicated by the timer will only be true if you synchronize the transfer of data between SALESmanago and your website.
- You can use up to 4 Countdown widgets in a single email.
3. Configuring the Countdown widget
A. Time settings
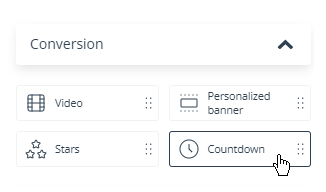
After dragging and dropping the Countdown widget into the email body, go to the widget’s settings and start the configuration by selecting the countdown type [1].
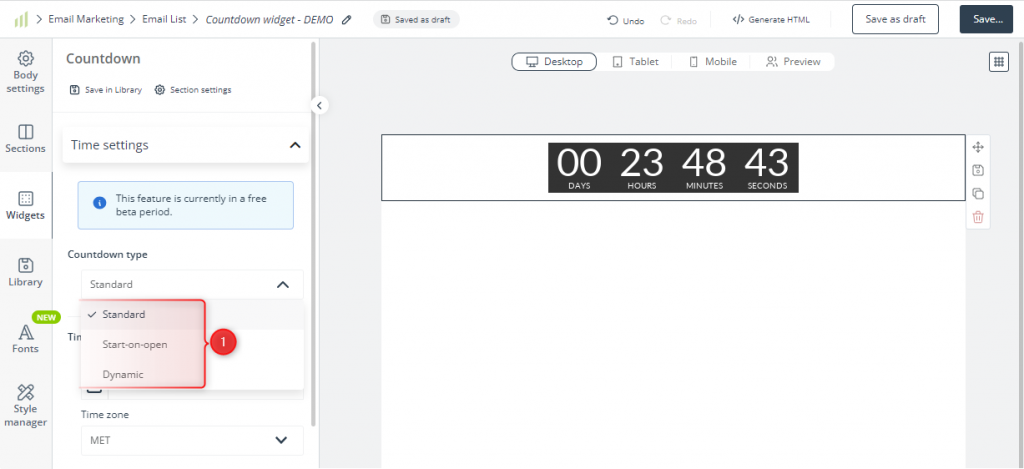
The differences between the three available options are explained in Section 2 above, where examples of use cases are also provided.
The time settings you can define below differ depending on the option selected.
- If you selected the Standard countdown type, you can enter the date and time to which the timer will count down [A]. Then, select the time zone [B] according to which the system will count time.
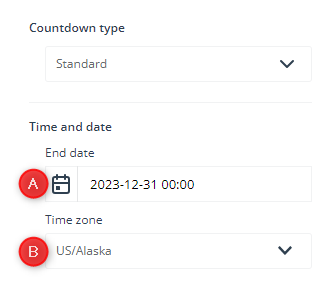
For instance, if you select 2023-12-31 00:00, whenever a Contact opens your email, they will see how much time remains until this date (December 31, 2023) and time (00:00).
- If you selected the Start-on-open countdown type, you can specify a period of time (e.g., 24 hours) for which the timer will count down from the moment a Contact opens your email.
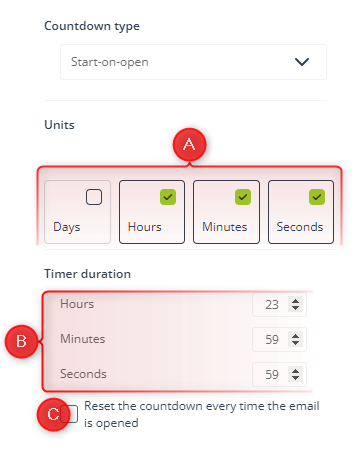
First, select the time units [A] that will be included in the timer. Then, specify the time period [B].
For instance, if you set the timer duration to 23:59:59, the countdown will start the moment a Contact opens your email and will last for 23 hours, 59 minutes, and 59 seconds. Whenever a Contact opens your email, they will see how much time remains until the end of this period.
If you want, you can configure the timer to reset each time the email is opened [C]. If you check this option, the countdown shown on the timer will start from the beginning each time a Contact opens your email.
Read IMPORTANT in Section 2 above.
- If you selected the Dynamic countdown type, you can select a dictionary detail [A] of the date type. The system will configure the timer individually for each Contact, depending on the value (date) contained in the selected dictionary detail.
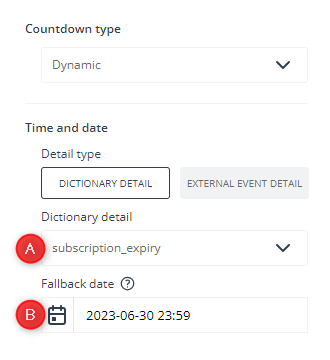
You can also set a fallback date [B] that will be applied by the system for Contacts that do not have the selected dictionary detail or for Contacts that have the selected dictionary detail with an invalid value.
For instance, if you select the dictionary detail: subscription_expiry and a Contact to which the email is sent has this dictionary detail with the following value: 31 January 2024, the timer will count down to 31 January 2024 for this specific Contact. If a Contact does not have this dictionary detail or if the dictionary detail contains an invalid value, the timer will count down to the fallback date (in the example above: 2023-06-30 23:59).
TIP: If you want to use the Dynamic countdown type, consider sending the email from a Workflow process in which the Action: Send email to Contact >> is preceded by the Event: Date from dictionary detail is approaching/approached >> or by the Condition: Date from dictionary detail >>. This way you can establish whether individual Contacts have the dictionary detail that you want to use in the timer.
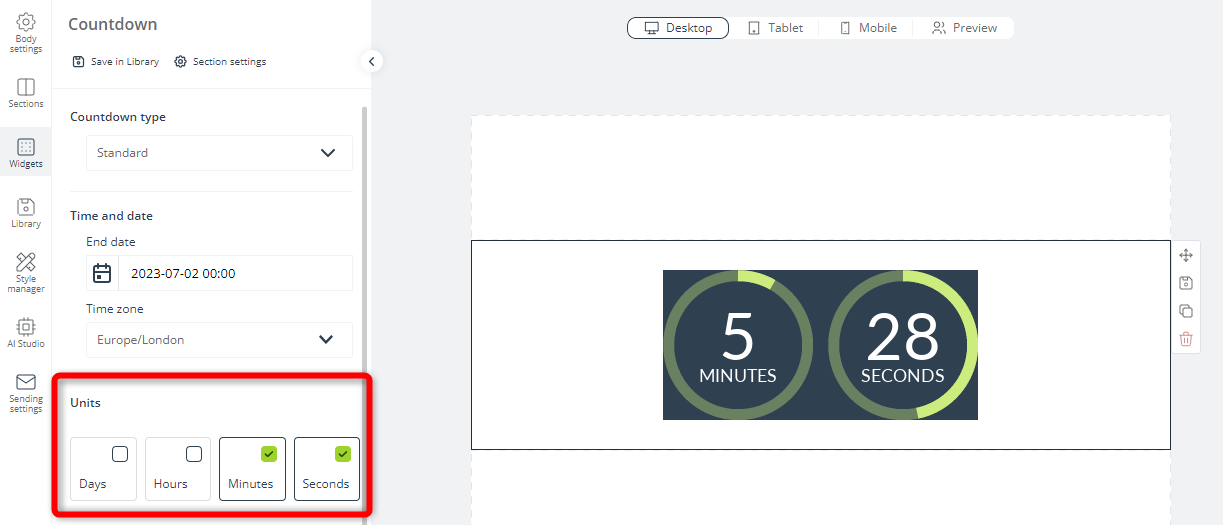
Irrespective of the countdown type selected, you can always choose which time units you want to include in your timer. For instance, with the following configuration, only minutes and seconds will be shown.
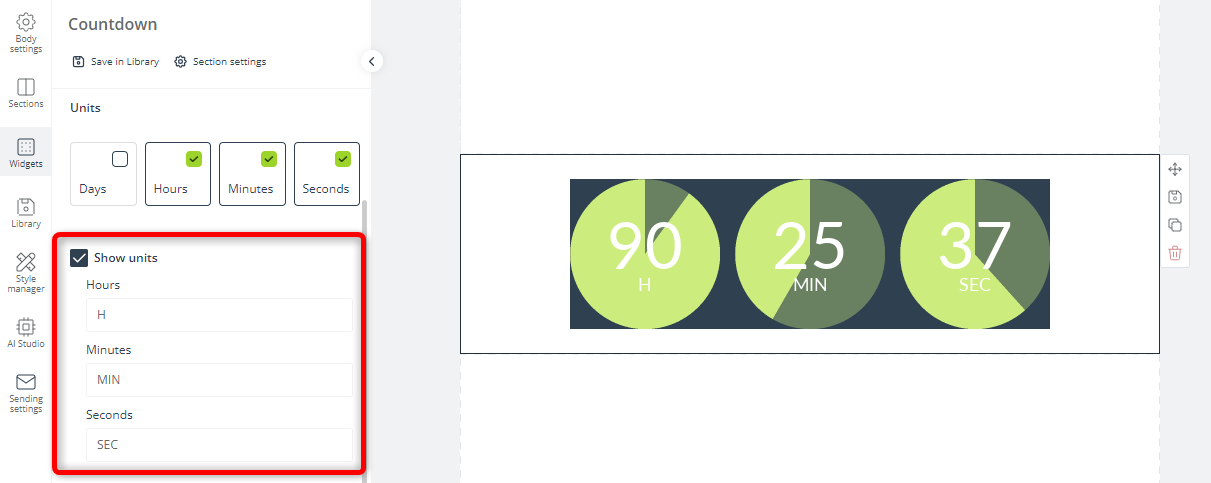
You can also choose if you want to display unit names below the digits. If you decide to show unit names, you can modify the default labels to your custom unit names, for example:
B. Appearance
After configuring the time settings, go to the Design section of the widget’s settings to define the desired appearance of your countdown timer. You can choose one of the five standard sizes (XS, S, M, L, XL) and pick one of the available styles. Then, you can choose colors and fonts.
The screenshot below shows four different styles used with the same color palette.
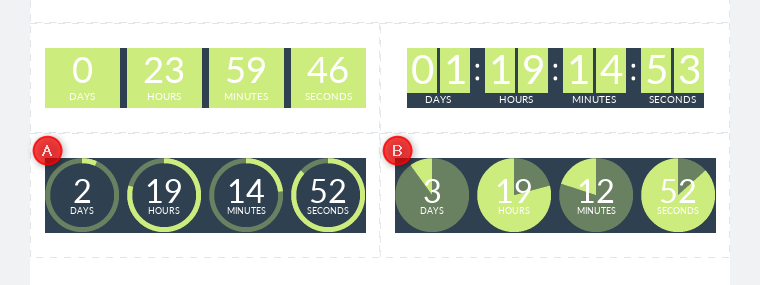
Note that in the case of circular timers, the shapes and colors illustrating the flow of time can move clockwise [A] or counterclockwise [B].
The darker accent color (olive green in the examples above) is selected automatically by the system to match the lighter color.
You can also adjust the positioning of the widget and its display settings.
Read about common widget settings (including positioning, links, and display settings) >>
Note that the display settings of this widget contain an additional option, which is selected by default: Show on unsupported devices.
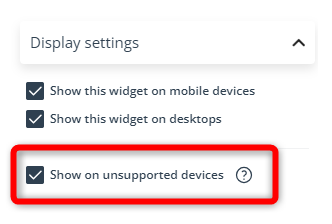
If this option is checked, this widget will also be displayed in Apple Mail and Outlook. These email clients represent 42% of the market share, but may not display the countdown timer correctly.