Useful links
The Customer Preference Center is an advanced Customer Preference Management tool that enables eCommerce businesses to collect data directly from customers (zero-party data) and to immediately put such data to action by running real-time omnichannel campaigns. The simple and intuitive wizard allows you to quickly develop a beautiful Preference Center, either from scratch or based on an existing template.
To open the Customer Preference Center wizard, go to
Audiences → Preference Center → Dashboard → + New Customer Preference Center
Contents
- Basic information
- Creating a new Preference Center from scratch
- Creating a new Preference Center based on a template
- Further actions
1. Basic information
The landing page is a special space containing your Preference Center, whose appearance can be freely personalized. It can include one or more of the following data category tabs:
- Product preferences,
- Personal data (Basic information and Personal preferences),
- Consents, and
- Channels and frequency.
Your Preference Center can have 1–4 tabs. You can also create more than one Preference Center and address various creations to various audiences, or use them for various purposes.
2. Creating a new Preference Center from scratch
On the main page of the wizard, you can choose how you want to create your new Customer Preference Center. To design a new Center from scratch, select the option: Create a new Center.
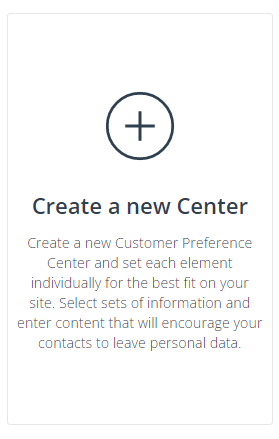
After clicking on this tile, you will be redirected to the Customer Preference Center wizard.
A. Data types
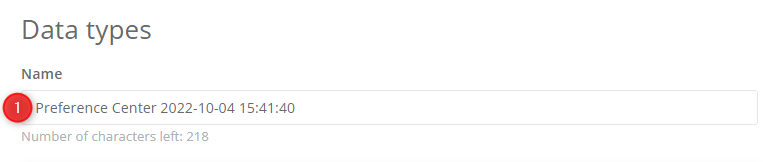
[1] Name – enter the name of your new Customer Preference Center by which you will be able to identify it in the system.
Next, select the data types that you want to collect in the Customer Preference Center. Select the appropriate checkbox to choose a specific data category. You can collect data from one or more categories. The more data you collect, the better you will be able to personalize your marketing communication. You can edit selected data categories at any time. Particular categories will be displayed in separate sections of the Customer Preference Center.
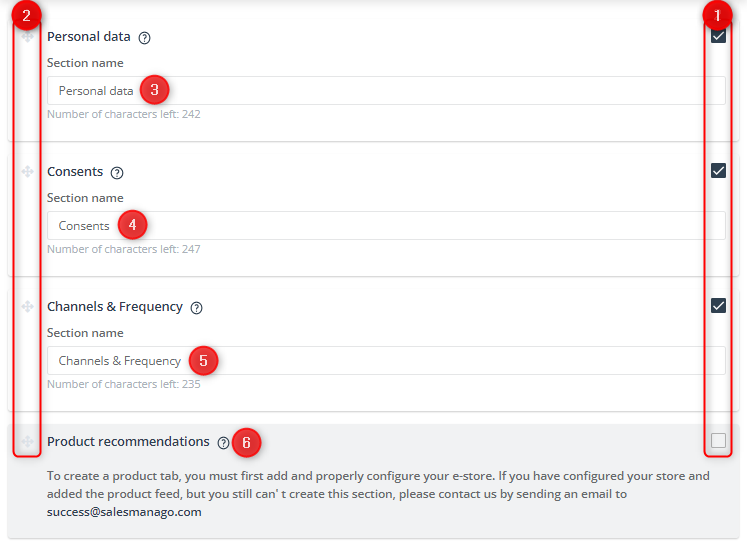
[1] Select data categories – use the checkboxes to select the types of zero-party data that you want to collect through the new Preference Center.
[2] Change the tab order – drag and drop a selected tab to change its order on the list and on the user menu.
[3] Personal data – information provided by Contacts in the form of answers to any questions asked in this section. Ask about various data relevant to your business, such as age, shoe size, favorite holiday destination, or pet’s name. You can name the tab under which such data will be collected however you want (Section name).
[4] Consents – any freely given, specific, informed, and unambiguous indication of the types of communications that a given person wishes to receive (by which they signify agreement to the processing of their personal data for this purpose). Select the consent types that you want to display to your Contacts so that they can manage them through the Customer Preference Center. You can name the tab under which such data will be collected however you want (Section name).
[5] Channels & Frequency – these parameters refer to how you Contacts want to receive marketing communications: by which channel, on which days, and at what times. Design a survey by means of which you will discover your Contacts’ preferences as to communication channels and frequency. You can name the tab under which such data will be collected however you want (Section name).
[6] Product recommendations – a set of filtering criteria to be selected by a Contact, based on which you can create well-matched product recommendations. Set product filters that can be used by Contacts to define their preferences. Add product suggestions to help them select the right criteria. You can name the tab under which such data will be collected however you want (Section name).
You can see a visualization of your new Center at the right side of the screen.
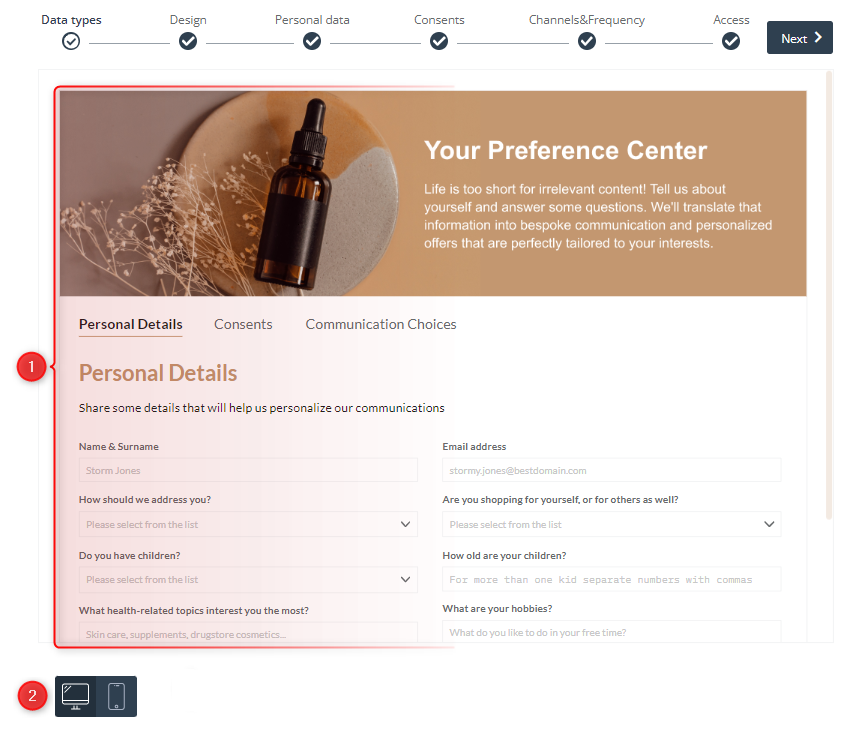
[1] Preview – here you can view in real time how the changes you make affect the appearance of your Customer Preference Center.
[2] Device – switch between these device icons at any time to see how the appearance of your Center will change depending on the device on which it is displayed.

The upper bar [1] indicates the part of your Preference Center which you are currently editing.
After defining all the settings of a given step, click Next[2].
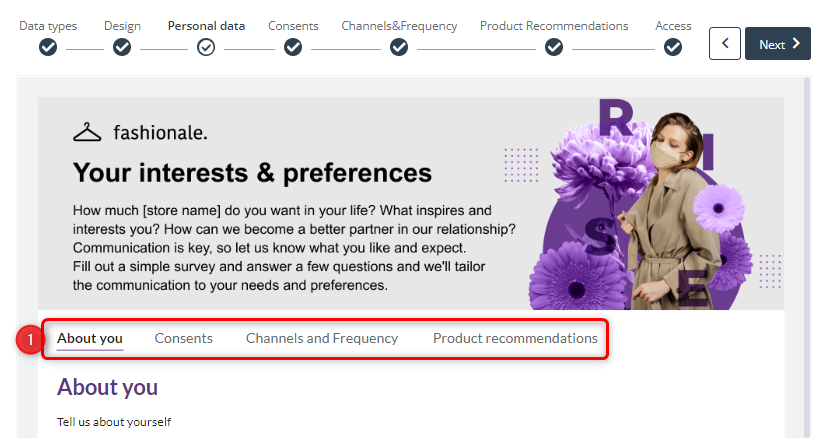
[1] Navigation between data types – on the preview, you can easily switch between the views of particular sections by clicking on the name of the section you want to see. Switching between the tabs on the preview does not change the active step of the wizard.
Read more about data types in the Customer Preference Center >>
B. Design
You can fully customize the appearance of your Customer Preference Center using advanced display editing options.

Click on Layout or Background to easily switch between the two sections.
I. Layout
Customize the color of particular elements, font style, and button shape.
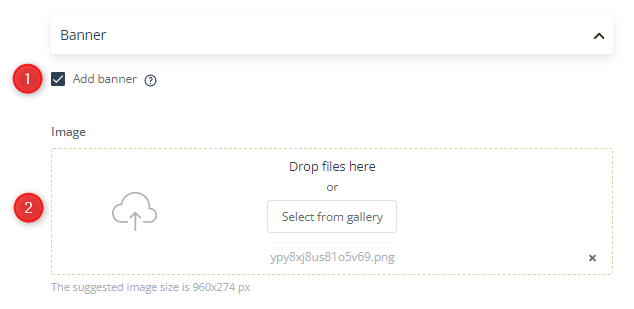
[1] Add banner – mark this checkbox to add a banner to your Preference Center.
[2] Drop files / Select from gallery – add graphics to your Center. You can either drag and drop a picture stored on a disc or select a previously uploaded file from the gallery. You can use the following file formats: JPG, PNG, WebP, ICO/CUR, and BMP (the GIF format is not supported by browsers). The suggested image size is 960 × 274 px.
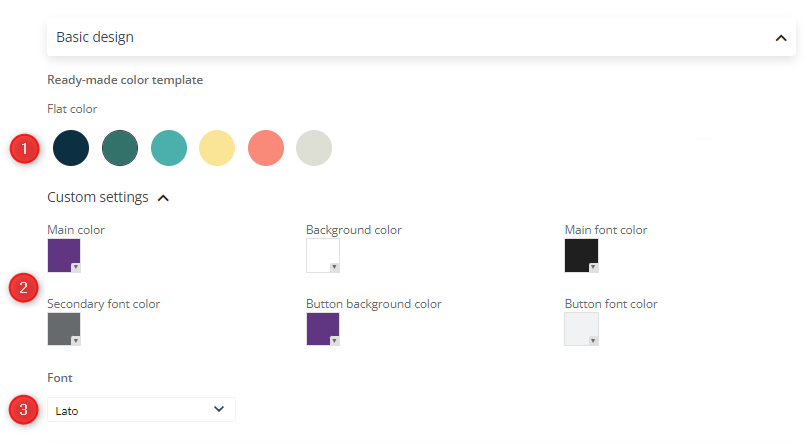
[1] Flat color – select a ready-made flat color motif for your Customer Preference Center. You can choose from the following:
- Dark Ocean
- Emerald
- Persian Green
- Lemon Tart
- Coral
- Silver Lining
NOTE: Changing the motif will affect the particular colors in the Custom settings and Advanced settings sections.
[2] Custom settings – select your own background, font, and button colors. To select a color, click on the appropriate field and enter the color parameters.
[3] Font – use the drop-down list to select a font that will be applied to all text in your Customer Preference Center.
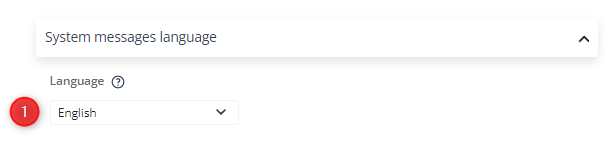
Certain automatic messages can be displayed to Contacts who use the Customer Preference Center (such as validations or error messages). Because the messages are non-editable, select the language in which you want them to be displayed.
[1] Language – select the language in which the automatic messages will be displayed in your Customer Preference Center.
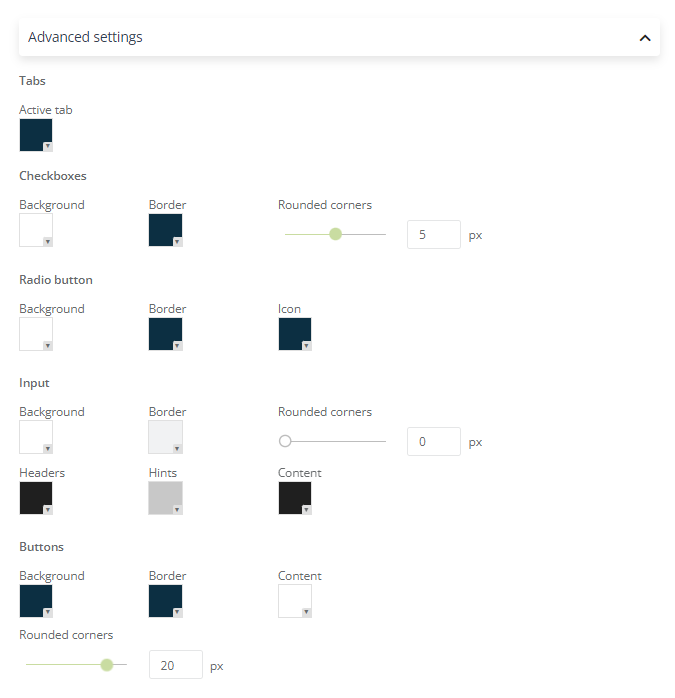
Customize the appearance of particular fields and buttons. Select the colors that best suit your entire creation. You can also adjust the shape of the corners of particular elements using a slider or by entering a specific value in the input field.
II. Background
Fully customize the look of the Customer Preference Center using advanced display editing options. Select the preferred background and borders.
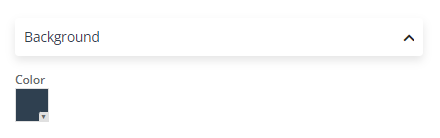
Background – select your own background color to be displayed behind the Customer Preference Center. To select a color, click on the field and enter the color parameters.
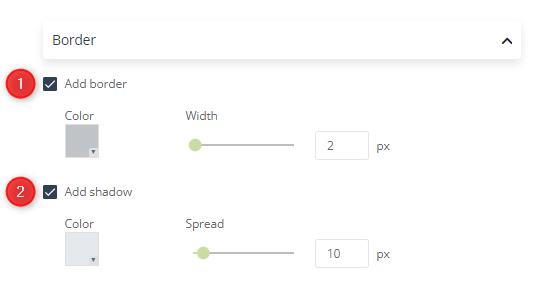
[1] Add border – check this box to add a border for the entire Center. Select your own border color: click on the field and enter the color parameters. Adjust the border size (width) using the slider or the value field.
[2] Add shadow – check this box to add shadow for the entire Center. Select your own color: click on the field and enter the color’s parameters. Adjust the shadow size (spread) using the slider or the value field.
C. Personal data
Define the form layout and decide what personal information you want to collect. Use Key Information to design a survey that will allow you to gather detailed information on your Contacts.

[1] Section description – enter a description that will help users complete this section.

To the right, on the preview, you can see what your section description looks like.
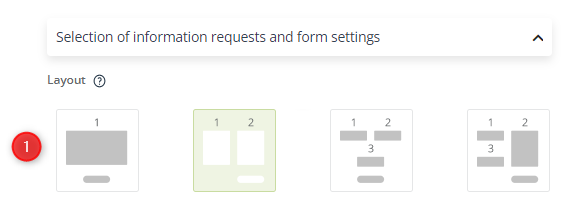
[1] Layout – select how you want your survey to be displayed in the Customer Preference Center. The selected layout should allow you to appropriately exhibit information and encourage your Contacts to share their data.
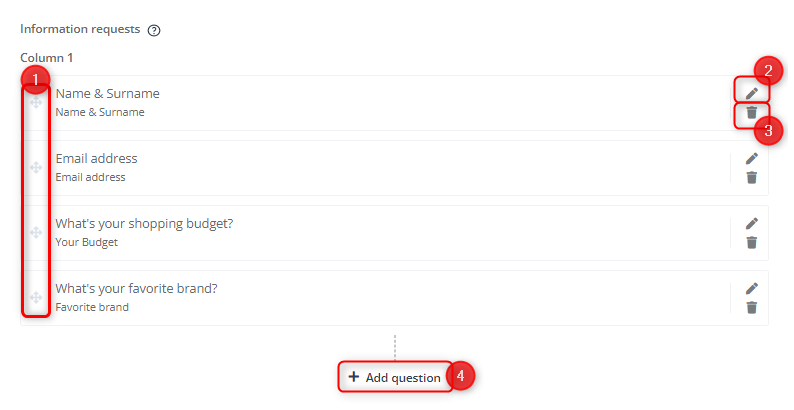
Select specific information requests to obtain new customer data. Select the Key Information items that are of interest to you; then edit the fields so that the questions and placeholders (prompts) will encourage users to provide the information.
[1] Change question order on the list – to change the order of questions, drag and drop an item in the desired position.
[2] Edit settings – here you can edit the settings for a given field.
After clicking on the indicated icon ([2]), a new window will open. Fill out fields [A] and [B] as appropriate.
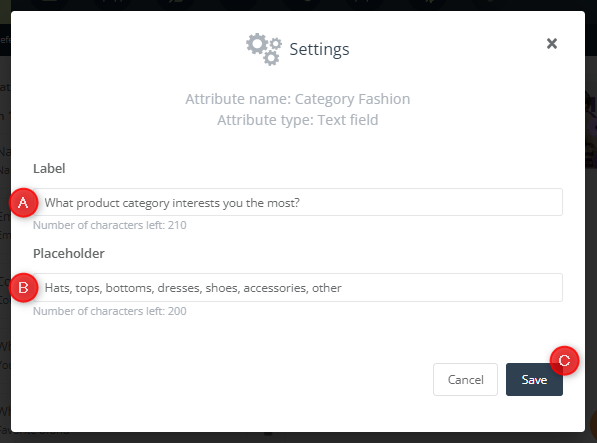
[A] Label – enter the name that will be displayed to Contacts in the Customer Preference Center.
[B] Placeholder – enter the initial text that will help your Contacts complete the field.
[C] Save – click here to save your new settings.
[3] Delete question – click on this icon to remove a given information request from the list.
[4] + Add question – click here to add another question. Then unfold the drop-down list and select a question or create a new Key Information item.
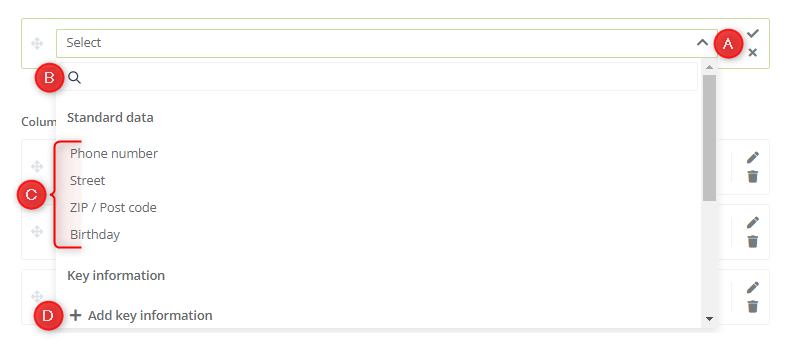
[A] Drop-down list – here you will find standard data and Key Information items that you can add to your Preference Center.
[B] Search box – enter a phrase to quickly find the item on the list.
[C] Question list – you can search this list to find the question that you want to add.
[D] + Add Key Information – click here to create a new Key Information item that you can immediately add to your survey.
If you select this option, a new window will open: Create Key Information.
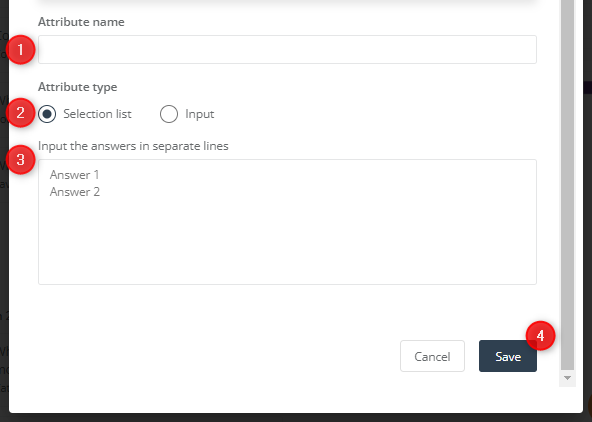
[1] Attribute name – enter the name of the new Key Information item; this name will allow you to identify the item in the system.
[2] Attribute type – select the attribute type (Selection list or Input).
[3] Answer section – define the answer section that will be visible to users.
Depending on the selected attribute type, you will see two different answer sections.
If you choose the option Selection list, you will be prompted to Input the answers in separate lines (see the screen above). Enter the answer options that will be visible to users. Each answer must be contained in a separate line. Key Information items created in this manner will be displayed on the list under the Key Information tab (Menu → Audiences → Preference Center → Key Information).
IMPORTANT: You can have up to 50 active Key Information items. If you have reached this limit and want to make space for a new item, deactivate non-used items. Deactivated items will be moved to the list of Deactivated Key Information and will not be included in the count. You can re-activate such items at any time and use them in the Preference Center as long as you are below the limit of 50 active items. Information collected so far by means of Deactivated Key Information will still be visible on the Contact Card and can be used in Automation Processes.
Read more about Event: Contact indicated a preference for Channels & Frequency >>
Read more about Condition: Contact has specified preferences for Channels & Frequency >>
Read more about Event: Contact has completed the Key Information >>
Read more about Condition: Key Information >>
If you choose the option Input, you will be asked to select the input value type [A]: Text or Number.
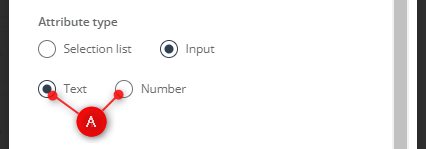
This option does not require entering any additional values. Key Information items created in this manner will not be displayed on the list under the Key Information tab (Menu → Audiences → Preference Center → Key Information).
After defining the settings for your new Key Information item, click Save [4] to save it and automatically add it to your survey as active (see the explanation below).

[1] Activate Key Information – for the newly selected question to appear on the list, click on the confirmation icon. Now you will be able to see the newly added question on the preview.
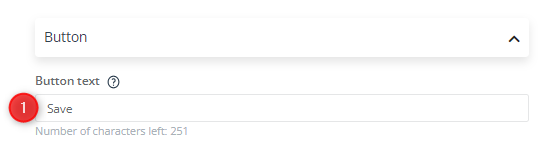
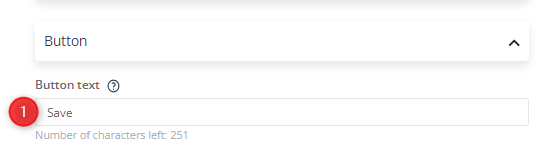
[1] Button text – enter a Call To Action that will be displayed on the button in this section. By clicking on this button, a Contact will save the information they have provided under this tab.
Read more about Key Information >>
Learn how you can use the data collected through the Customer Preference Center >>
D. Consents
Select what consent types you want to display in the Customer Preference Center. A marketing consent refers to any freely given, specific, informed, and unambiguous indication of the types of communications that a given person wishes to receive (by which they signify agreement to the processing of their personal data for this purpose). Any person may check and manage at any moment all marketing consents given to a company.
NOTE: Opt-in and marketing consents are not the same. To send a newsletter to a Contact, you need both these consent types. In the case of the double opt-in mechanism, you additionally need a subscription confirmation.
Learn how to create a subscription confirmation email >>
Learn how to configure a subscription confirmation email >>

[1] Section description – enter a description that will make it easier for users to complete this section.

[1] Change consent order on the list – to change the consent order on the list, drag and drop a consent into a selected position.
[2] Edit/Delete consent – click on these icons to modify or delete consents included in the list.
If you click on the Edit icon, a new window will appear:

[A] Consent label – enter a description of the consent that will help your users make a decision.
[B] Save – save the edited consent.
[3] + Add consent – click to add a consent by selecting it from the list. If you want to create a new consent, go to Menu → Audiences → Contacts → Custom consent list → + Add new consent.
After you click on + Add consent, a new item will appear on the list.

[A] Consent list – a drop-down list of the consents that you can add to your Customer Preference Center.
[B] Search box – enter the name of a consent to quickly locate it on the list.
[C] Full consent list – you can also search this list to find the consent that you want to add.

[1] Activate consent – for the consent to appear on the list, click on the confirmation icon. Now you will be able to see the newly added consent on the preview.
[1] Button text – enter a Call To Action that will be displayed on the button in this section. By clicking on this button, a Contact will save the information they have provided under this tab.
Read more about consents and their management in SALESmanago >>
E. Channels and frequency
Define the fields that you will use to ask about the users’ preferred marketing communication channels and frequencies. Select appropriate elements to collect more or less detailed preferences in this regard. You can edit the questions and descriptions so that they match your brand language.
Compose a list of marketing channels that can be indicated by your Contacts in the Customer Preference Center.
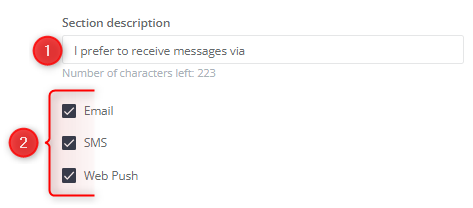
[1] Section description – enter a description that will make it easier for users to complete this section.
[2] List of channels – check appropriate boxes next to the channels that you want to display as selection options in the Preference Center. Select at least two channels from the list.
Next, select and specify the contents of the fields through which you will collect information on the preferred communication frequency of your audience.

[1] Section description – enter a description that will make it easier for users to complete this section.
Below you will see a list of frequency options. Select at least two items and edit them to match your brand language. Define what you mean by Regularly, Sometimes, and Occasionally in the context of the frequency with which you send messages, and describe it for users to ensure that they knowingly indicate their preferences in this regard. You can adopt various criteria, such as regular time intervals, monthly frequency, or message priority.

[1] Add a border to an element – check this box to add borders to the selection options in this section. You can see the borders on the preview.
[2] Add/Remove frequency – use the checkboxes to select the frequencies you want to display as selection options in your Customer Preference Center. Select at least two items from the list.
[3] Headers and Descriptions – edit these elements to match your brand language. Use the description fields to better explain to Contacts how you define a given frequency and how often they will receive messages if they select it.
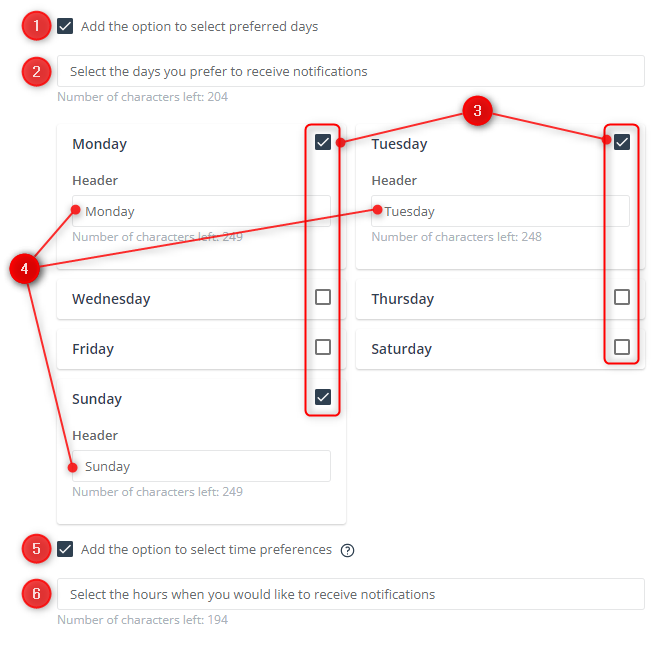
[1] Add the option to select preferred days – check this box to enable your Contacts to indicate the preferred days for receiving messages.
[2] Section description – enter a description that will make it easier for users to complete this section.
[3] Add days – use these checkboxes to select the days of the week that you want to display as selection options in your Customer Preference Center. Select at least two items from the list.
[4] Header – edit these elements to match your brand language.
[5] Add the option to select time preferences – check this box to enable your Contacts to indicate the preferred hours for receiving messages.
[6] Section description – enter a description that will make it easier for users to complete this section.

[1] Button text – enter a Call To Action that will be displayed on the button in this section. By clicking on this button, a Contact will save the information they have provided under this tab.
F. Product Recommendations and suggestions
Collect customer preferences regarding products so that you can display well-matched recommendations and better personalize customer experience.

By clicking on either Product Recommendations or Product suggestions, you can quickly switch between the two sections of the wizard.
I. Product Recommendations
Prepare a set of filters by means of which Contacts will specify their product preferences. Collect these data to better know your Contacts’ interests in your offer. Use the data to build product recommendations perfectly matched to your audience’s interests.

[1] Select e-shop – this field is required. Use the drop-down list to select a SALESmanago e-shop from which data will be loaded.
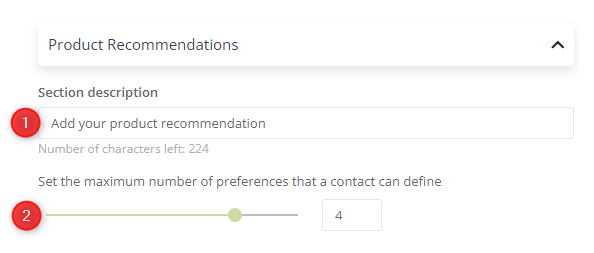
[1] Section description – enter a description that will make it easier for users to complete this section.
[2] Set the maximum number of preferences that a Contact can define – use the slider or the input field to set the maximum number of product preferences that a Contact can specify in your Customer Preference Center.
Criteria are directly linked to the information loaded from the Product Feed (XML). The structure of product preference filters is similar to that of search filters in an online store.
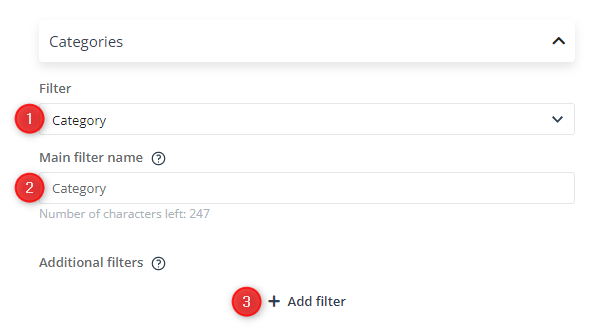
[1] Filter – use the drop-down list to select a main filter; this filter will be the basic criterion based on which Contacts will specify their preferences.
[2] Main filter name – enter the name of the main filter that will be displayed in the Customer Preference Center.
[3] + Add filter – add filters that will allow Contacts to narrow down and specify their preferences in detail. All parameters included in the Product Feed can be set as additional filters.
When a user selects a main filter, only those additional filters that can be used to specify information related to that particular main filter will be displayed as active.
EXAMPLE:In your shop, Jeans can be defined by the parameters: color, shape, and price, and Blouses can be defined by one additional parameter: material. Depending on the selected main category (Jeans or Blouses), the additional filters visible to a Contact will (in the case of Blouses) or will not (in the case of Jeans) include the “material” parameter.
After you click on + Add filter, two additional fields will appear.
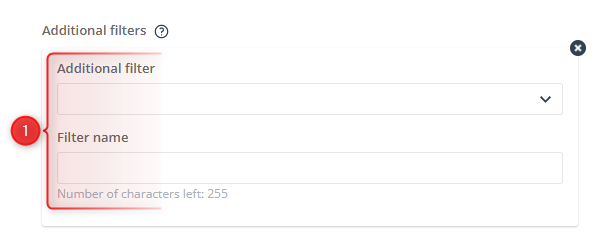
[1] Additional filter – select an additional filter from the list and enter its name, which will be displayed in the Customer Preference Center.

[1] Button text – enter a Call To Action that will be displayed on the button in this section. By clicking on this button, a Contact will save the information they have provided under this tab.
Learn how you can use data collected through the Customer Preference Center >>
Learn how to use data collected through the Preference Center to set recommendations on your website >>
Learn how to use data collected through the Preference Center to send email recommendations >>
II. Product suggestions
Help your Contacts complete the product preference section. Display product suggestions that match the Contact’s profile. The Preference Center also gives you the option to manually select products from the gallery.
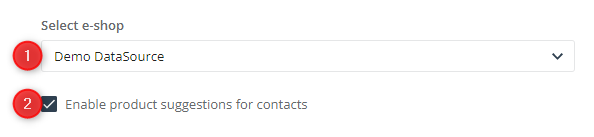
[1] Select e-shop – this field is required. Use the drop-down list to select a SALESmanago e-shop from which data will be loaded.
[2] Enable product suggestions for Contacts – check this box to add product suggestions that will be displayed in this section of your Customer Preference Center.

[1] Section description – enter a description that will make it easier for users to complete this section.
[2] Product suggestion scenario – use the drop-down list to select a scenario according to which the Preference Center is to select products to be displayed as suggestions for Contacts.
[3] Alternative product suggestion scenario – select an alternative product suggestion scenario. If the number of products recommended according to the main scenario is smaller than the number of fields in the product frame, the empty fields will be filled according to this alternative scenario.
[4] Additional settings to complete the product suggestion frame – check this box to add one of the two additional options for filling the suggestion frames.
[5] Select an option – decide whether, in the product suggestion frames, you want to use random products or products manually selected from the gallery.
If you select the option: Select products from the gallery, you will see a button that enables you to add products from the gallery.

[A] Product gallery – click on this button to open your product gallery. Select the products you want to display in the suggestion frame. On confirming your choices, you will see the products on the Product list.
[6] Layout – select the layout in which you want to display your products: as photographs accompanied by names or photographs alone.
[7] Number of displayed products – use the slider or the value field to set the number of product suggestions you want to display in your Preference Center.

[1] Button text – enter a Call To Action that will be displayed on the button in this section. By clicking on this button, a Contact will save the information they have provided under this tab.
G. Access
Prepare your Customer Preference Center for access by users. Set a verification page and a verification email and decide how Contacts will enter your Preference Center to manage their data.

Click on Verification Page, Verification Email or Access to quickly switch between these sections of the wizard.
I. Verification Page
Prepare a transparent Verification Page through which Contacts will be able to obtain access to your Preference Center. Define its appearance and the content to be displayed.
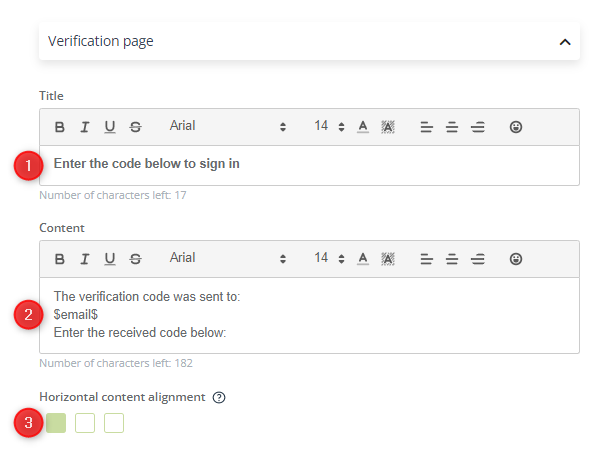
[1] Title – enter the title of the message that will be displayed on the Verification Page in the Preference Center.
[2] Content – enter the content of the message that will be displayed on the Verification Page in the Preference Center.
Read more about personalization by means of attributes (such as $email$) >>
[3] Horizontal content alignment – set the alignment of the displayed text. You can align it to left, center, or right.

[1] Button text – enter a Call To Action that will be displayed on the button in this section. By clicking on this button, a Contact will save the information they have provided under this tab.
II. Verification Email
Design an email message with a verification code by means of which Contacts will be able to obtain access to your Preference Center.
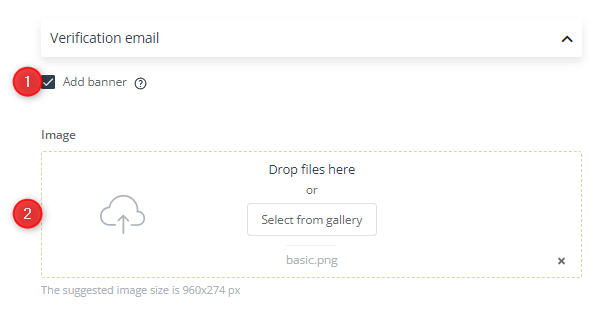
[1] Add banner – check this box to add a banner to your Verification Email. The image will be proportionally scaled.
[2] Drop files / Select from gallery – add graphics to your email. You can either drag and drop a picture stored on a disc or select a previously uploaded file from the gallery. You can use the following file formats: JPG, PNG, WebP, ICO/CUR, and BMP (the GIF format is not supported by browsers). The suggested image size is 960 × 274 px.
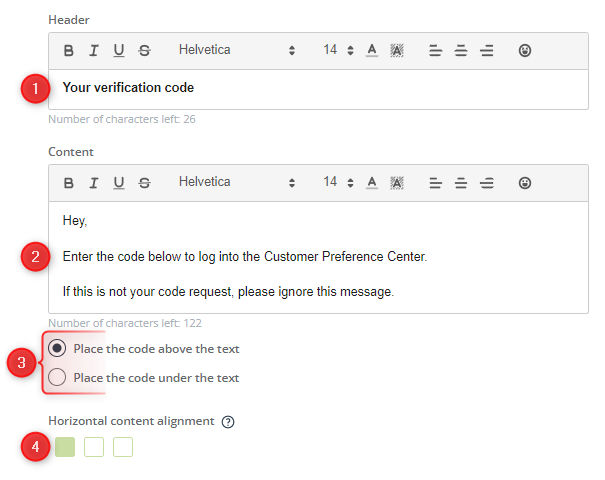
[1] Header – enter a title for the email with a verification code that will be sent to users of the Preference Center. The title will be displayed in the Contact’s mailbox.
[2] Content – enter the content of the email with a verification code that will be sent to users of the Preference Center.
[3] Code position – select whether you want to place the code below or above the content of the email.
[4] Horizontal content alignment – set the alignment of the displayed text. You can align it to left, center, or right.
NOTE: A new access code is generated and sent each time a user visits the Customer Preference Center.
III. Access
Decide how your Contacts will access the Customer Preference Center. Implement the Center on your website or send a link in a message.
You can implement the Customer Preference Center on your website by API. For this, you need your Center’s ID. To obtain it, first save and activate the Center; then copy the ID (see below).
Following the implementation by API, individual links enabling access to the Customer Preference Center will be generated for specific Contacts.
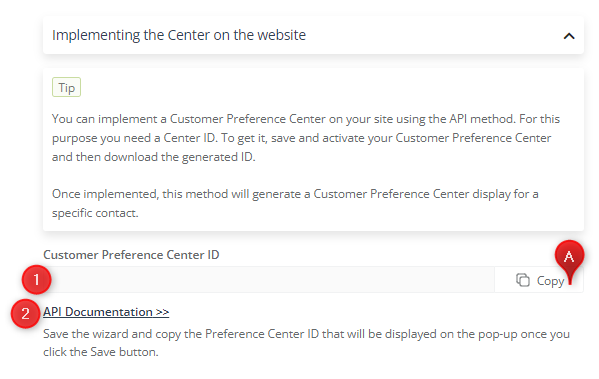
[1] Customer Preference CenterID – here you will find a unique identifier of your Center that can be used in your further activities. You can conveniently copy the ID by clicking [A] Copy.
[2] API Documentation – click here to be redirected to the detailed API documentation for your Preference Center.

You can send an access link to your Customer Preference Center to your Contacts by email, SMS, or WhatsApp. To obtain a link, first save and activate your Preference Center.
[1] Link – here you will find a unique link to your Preference Center that can be used in your further activities. You can conveniently copy the link by clicking [A] Copy.
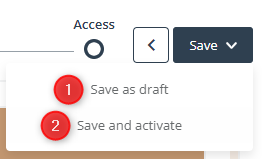
H. Saving

[1] Save as draft – save your Preference Center as a draft. The Center will not be available to Contacts yet. You can find it under the Drafts tab. You can edit, activate, or delete it at a later time.
[2] Save and activate – save and activate your Preference Center to immediately make it accessible to Contacts and start using it for your marketing purposes.
You will find your new, active Preference Center on the Dashboard, where you can preview, deactivate, edit, duplicate, or delete it. The Dashboard is also where you can find instructions for the next steps (Menu → Audiences → Preference Center → Dashboard → Actions → What’s next?; see also section 4 of this article – Further actions).
3. Creating a new Preference Center based on a template
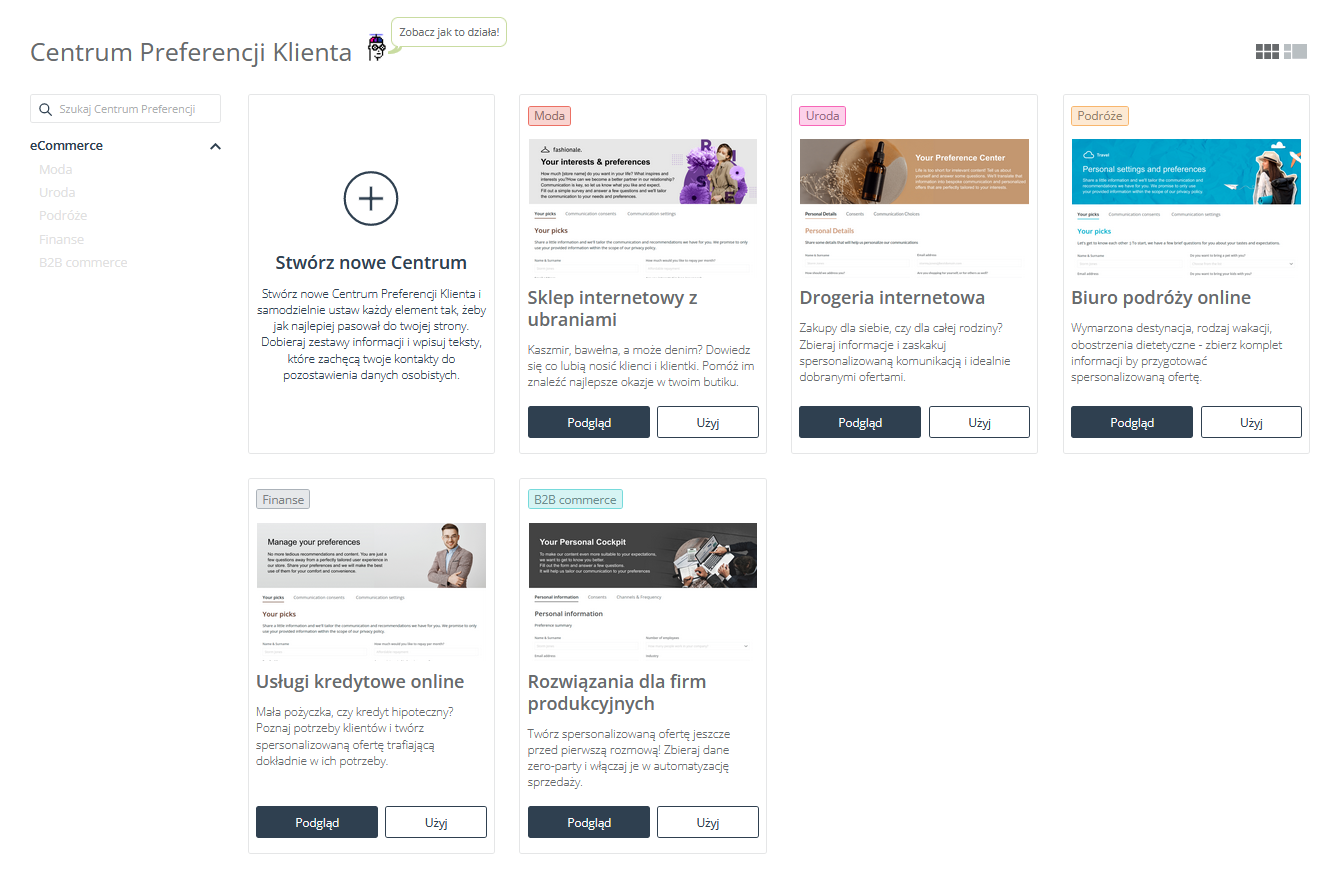
You can use the ready-made Customer Preference Center templates to quickly and easily prepare your own tool for collecting zero-party data.

A. Template library
Search the template library to find the template that best suits your needs.
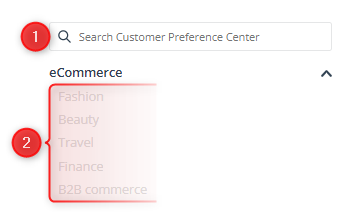
[1] Search box – start entering the template category name to narrow down the options.
[2] List of categories – click an item on the list to display only templates from the selected category.
When looking for a template, you can select your preferred view of the list:

Switch between tiles alone and tiles accompanied by a preview.
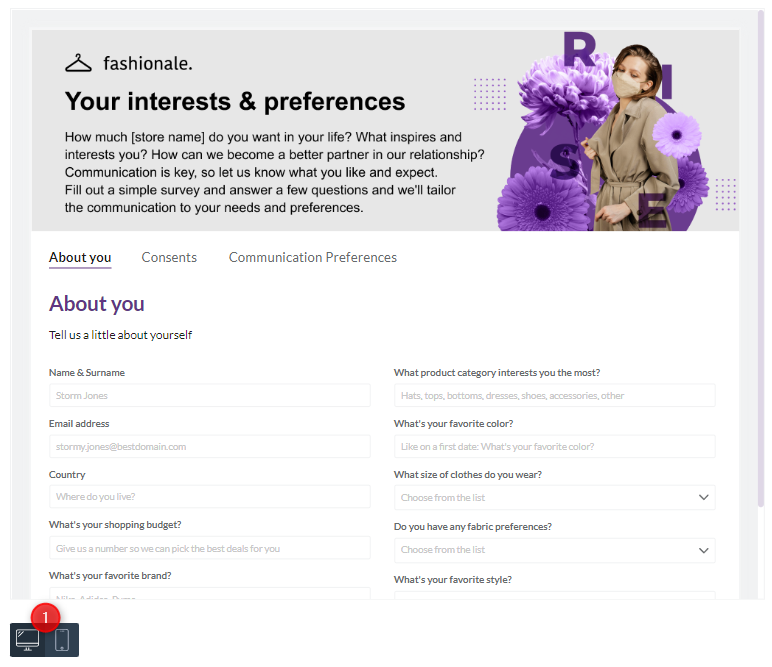
[1] Device preview – in the preview window, you can switch between the template views to see what the Center will look like on different devices.
When you have found an interesting template, you can take the following actions:
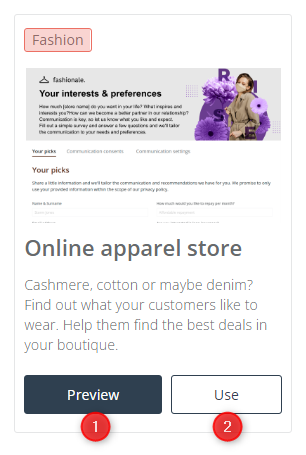
[1] Preview – click to display a preview of the selected Preference Center template.
[2] Use – click to edit the selected template and create a new Preference Center based on this template.
B. Editing a template
After selecting your template, you will be redirected to the wizard, where you can freely edit the template to suit your needs.
IMPORTANT: Each template contains a set of Key Information items. When you save and activate a Preference Center created based on a template, the Key Information items included in it are added to your account and can be seen under the Key Information tab. You can access them also when creating or modifying other Preference Centers. You can deactivate such Key Information items at any time if they become unnecessary.
C. Saving
Save your ready Customer Preference Center for use in your marketing activities.
[1] Save as draft – save your Preference Center as a draft. The Center will not be available to Contacts yet. You will be able to find it under the Drafts tab. You can edit, activate, or delete it at a later time.
[2] Save and activate – save and activate your Preference Center to immediately make it accessible to Contacts and start using it for your marketing purposes.
You will find your new, active Preference Center on the Dashboard, where you can preview, deactivate, edit, duplicate, or delete it. The Dashboard is also where you can find instructions as to the next steps (Menu → Audiences → Preference Center → Dashboard → Actions → What’s next?; see also section 4 of this article – Further actions).
4. Further actions
Now that you have created your Customer Preference Center, you can implement it on your website and combine it with other data collection tools. A good idea is to send emails encouraging Contacts to provide their data.
Learn how to implement the Preference Center on your website >>
Read more about data collection through the Preference Center >>
Read more about the use of zero-party data collected through the Preference Center >>